


Likes
Comments
Share

@Trichoma
Follow
@ 1.5-1.6 kPa
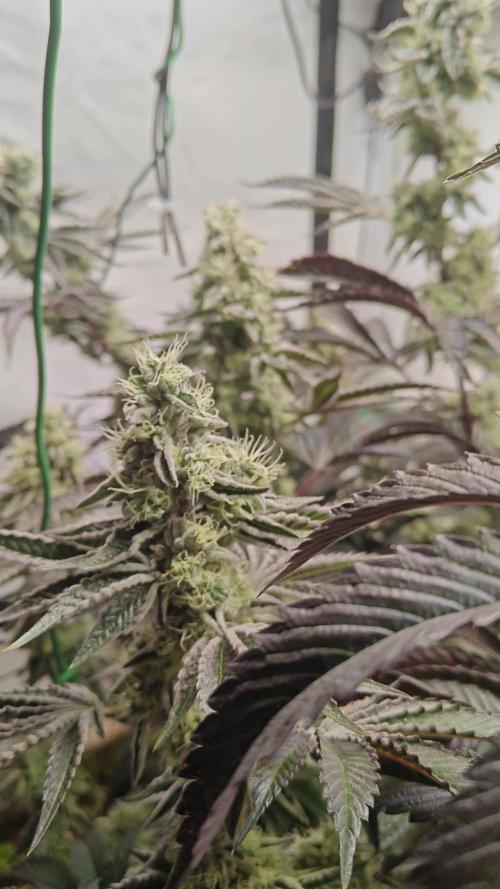
The plants have a strong, sweet skunk aroma, and when you smell the flowers directly, you also detect a zesty orange scent.
The buds are quite heavy for the plant, it would have benefited from a ScrOG net or additional support.

Likes
3
Share


@Kushizlez
Follow
Day 49-56 (June 18th - 25th)
(Day 51) Slurricanes and tuna are doing excellent despite their hail damaged leaves. I’m seeing good growth and decent dry downs. One of them looks like it’s been ravaged by pests but I still can’t find any evidence or signs of a pest. I’m suspecting caterpillars so I’m going to grab some BTK killer and also some all purpose insecticide sometime this week if I have time.
The clones are all really lagging so they won’t be flipped until July 15th at least. I’m still not seeing normal growth on any of them yet. It’s still quite gnarled and twisted.
(Day 52) The slurricane and tuna roots are starting to poke through the bottom of my pots. This is usually from underwatering, a thick soil or a hot root zone. I’m going to give everything except for the autos a good watering with some runoff. I am going to start incorporating 5mm sand into all of my soil mixes to help make the soil more loamy and give it some better drainage. I will also top dress every container and bed plant I have.
(Day 53) I was at a local department store today and I was shocked to see pallets of Destiny dark matter soil selling for 60% off! I bought 10 bags for a hundred bucks. At any hydro store that would have costed me 250 at least. I might go grab more because it looks like no one is buying it for 60% off even.
(Day 54) I’m going to be harvesting both of my indoor crops today and tomorrow or the next day I am going to be reusing the soil-coco blend for the slurricanes. I’m first going to till it, add a gallon of sea compost, a gallon of Destiny soil and a few cups of 5mm sand per container. I will use the excess for 5 gal pots.
I will be amending with:
5 tablespoons of nature’s pride bloom
4 tablespoons of kelp meal
2 tablespoons of Gaia green AP
2 tablespoons of glacial rock dust
2 tablespoons of oyster shell flour
2 tablespoons of alfalfa meal
1 tablespoon of rock dust blend
1/4 teaspoon of langbeinite
(Day 56) The autos are really making a comeback now. I was under the impression that I was working against the clock and they would start flowering after 3-5 weeks. I guess if they’re stunted from the cold they will delay flowering. I don’t see any pistils or signs of flowering yet so I don’t think they’ve officially started flowering yet
I didn’t get a chance to do my transplant this week or pest control. I will get to it ASAP because my photos are drinking almost a liter a day


Likes
17
Share


@Dunk_Junk
Follow
16cm vertical growth this week but she's fully entered flowering!!!!!!!!!!!
Look how bushy she got!

Likes
6
Share


@HomeGrowHeaven
Follow
The plant has recovered well from the last capping and defoliation🏻♀️
A few leaves have yellowed a little, but that's not so bad🏻♂️
It will get a compost tea🍵 in a few days when it is sent into flower and then everything will be fine again😊💪🏻🏻
The compost tea is brewed and was given to the Watermelon Runtz at day 49 of Veg🍉🏃♂️

Likes
31
Share


@JuicyFruit
Follow
happy with the growth of this plant. its the top performer in my tent in terms of vegetative growth :)ive noticed purple/brown tips on the leaves, and purple leaf edges and stems. if anyone can help and guide me through flowering feel free to give me a comment or private message :)
I feel more happy and alive now that ive been caring for these plants the last while. i love watching the progress day to day, listening to music with them and singing to them, they are quickly becoming a really big part of my life and health. over the moon that ive reached the flowering phase! roll on harvest and il update this when im home as my phone is gonna die! :)
Update - Day 37 - 29/10/19
Flushed the plant today, runoff ph was 5.95 and ppm was 837. i have to flush to obtain runoff in these pots and i think this is causing problems, especially because im not using RO water. the ppm of my water is 140, and thats what ive been using for my first grows. (il pick up some water from the store soon)
so im using 5 gallon pots with pure coco and autoflowers, the flushing to obtain runoff i think is just taking away from precious time in the plants life cycle. it would probably have been easier to grow photos in these pots and veg them out until they are monsters and then flip into flowering. oh well theres always next grow. and still for a first grow im happy with where im at :)
watered:
1.8L/4ml Canna A/4ml Canna B/3ml Rhizotonic/3ml Cannazym. ppm 380.
this should help with the purpling of the leaves and help flowering :) also needed that flush to get rid of salt buildup!
Day 39 - 31/10/19
Happy halloween folks!
Wow... Quick one is thriving now, i think ive learned enough to keep the plants in a near optimal setting :) tooks some photos and a video as usual, loving how the plants are developing! anyway this plant has grown about 6cm in 3-4 days, and its the buds getting taller instead of veg growth :) if actually looks like a plant off the 📺 more and more. i think im gonna get between 12-20 grams off this plant :) the flush worked a treat and i think the old nute and salt buildup was stopping it stretching!
following cannas feeding schedule slightly for the ratio of nute/water.
i learned that:(cocoforcannabis.com)
Coco is supposed to be mostly saturated at all times which in turn means less watering to get runoff. now that im in the flowering stage too im watering once every morning at lights on! maybe when i get the tehnique down i can increase to two waterings per day - once at lights on, and once 10 hours later.
To sum up this week ive had a lot of stretchy growth ,(flowering) a nice lavender like smell from the plant. a better fertigation schedule and i learned how to make dry ice hash from popcorn and trim :) i tried this in barcelona and it was amazing! super expensive so it will be nice to have my own stash :)
Dont forget to check out my videos and my other diaries :) all the best!


Likes
9
Share


@Cogollo_eu
Follow
**Encontrarás la traducción a español al final de la descripción**
From/Desde: 09/09/19 || To/Hasta: 15/09/19
From day/Desde día: 08 || To day/Hasta día: 14
Ocean Grown Cookies Diary / Diario de las Ocean Grown Cookies:
https://growdiaries.com/diaries/38831-oceangrown-cookies-blues-sisters
-----IMAGES & VIDEOS-----
V1 - Transplanting day. I'm using 10 l Aeropots as final recipient. I've used:
- Small layer of ATAMI HydroRokz (perlite) at the bottom of the pot, just for cover bottom holes and to retain a bit of humidity
- Over the perlite i placed 1l of mixture with BioBizz "All Mix" and Volcanic Soil
- Again over, 1l of mixture with BioBizz "Light Mix" + Volcanic Soil & Guano
- And filled the rest with BioBizz "Light Mix" + Volcanic Soil
It's the second time that i broke half of the roots of a plant doing a transplant, It happened to me just for not being careful enough to hold the soil by the lower part. While this is no good, no further signs of that mistake other than the recorded video ;).
V2 - Quick show up on how to correct the color of photos taken under red/ping/purple light.
First I merge the HDR image from 3 bracketed shots, then I apply my custom color adjustment in the HDR resulting image.
As i show in the video, to correct the red light, you have to enhance the blue and green curves, just play with a point in the curves until you find the best adjustment for each of both curves. Then you should go to tones, and play a bit with reds, pinks & purples... and.... Voilá, you can see the results, easy and effective..... but no more easy than using the right white spectrum.
P1 - Cookies Showdown before transplant
P7 - Volcanic soil and Guano
-----WEEK SUMMARY-----
This week was very easy, i didn't do anything to these babies apart from the transplant. This is the first time im mixing something with the soil, I hope not to overfeed the Cookies with the nutes, as i'm going to use the same nutrients i was using.
The first 10 days they were growing in my 60x60x40 tent (DP60), with a terrible chinese light that i always use the first week wen I plant.
PandaGrow 100W (50W draw) - http://www.pdgrow.com/index.php?m=Show&a=index&cid=12&id=53
So after transplanting when i place the plans under the Quantum Board or the Platinum LED, i've notice it on them immediately, they really don't like this kind of chinese lights.
Thus after the transplant the plants has started to grow and wide much more and much quickly.
-----WATERING CALENDAR-----
12/09/19 DAY 11 - 1,5 l after transplant with all week nutrients @ 0.8 EC & PH5.8
*****ESPAÑOL*****
-----IMÁGENES & VÍDEOS-----
V1 - Día de transplante. Transplantaré a AeroPots de 10 l. Para el transplante he usado:
- Una capa pequeña de ATAMI HydroRokz (perlita) en el fondo de los tiestos, sólo para cubrir los agujeros y retener un pelín de humedad.
- Encima de la perlita he puesto 1 l de mezcla de BioBizz "All-Mix" con tierra volcánica
- De nuevo encima he puesto otro litro de mezcla de BioBizz "Light-Mix" con guano y tierra volcánica
- El resto está relleno con una mezcla de BioBizz "Light-Mix" con tierra volcánica
Es la segunda vez que se me parter unas raíces por la mitad en un transplante, eso me pasa por no ser lo suficientemente cuidadoso como para agarrar el sustrato por su parte baja. Esto no es algo bueno, pero he de admitir que aparte del mal rato de que se te partan las raíces, a la planta no le sucede nada de nada, sigue creciendo al mismo ritmo que su hermana.
V2 - Un ejemplo rápido de como corregir la iluminación de una foto tomada bajo un espectro rosado o rojizo
En el vídeo primero compilo el HDR compuesto de 3 fotografías horquilladas y una vez compilado le aplico mi ajuste de color.
Como muestro en el vídeo, para corregir este tipo de luces hay que realzar las curvas de color azul y verde, simplemente con un punto por encima de la mitad de la línea media hasta encontrar los puntos más adecuados para tu luz. una vez encontrados, sólo hay que ir a los tonos y ajustar un poquito el rojo, rosa y morado.
P1 - Muestra de las Cookies antes del transplante
P7 - Tierra volcánica y Guano
-----SUMARIO SEMANAL-----
Esta semana ha sido muy sencilla, no les he hecho absolutamente nada a las pequeñas a parte del transplante. Esta es la primera vez que mezclo algo con el sustrato y espero no sobrealimentar las cookies ya que voy a seguir usando los mismos nutrientes que he usado con anterioridad y de la misma manera.
Los primeros 10 días han crecido en mi tienda de 60x60x40 (DP60), con una luz china terrible:
PandaGrow 100W (50W draw) - http://www.pdgrow.com/index.php?m=Show&a=index&cid=12&id=53
Siempre uso esa luz los primeros días de cada cultivo, por lo que al cambiarlas a la Quantum o al Platinum LED lo noto al toque, realmente no les gusta nada la luz china esa, inmediatamente se ponen a crecer y ensanchar mucho mas.
-----CALENDARIO DE RIEGO-----
12/09/19 DÍA 11 - 1,5 l después del transplante con todos los nutrientes semanales @ 0.8 EC & PH5.8

Likes
42
Share

@Dunk_Junk
Follow
Wow look at that bush!!!
I've not seen that much bush since Debbie Does Dallas! 😂 😍
She's grown another 18cm this week vertically too.
Hope she enters flowering soon 😬 😎

Likes
5
Share

@AlpenZilla
Follow
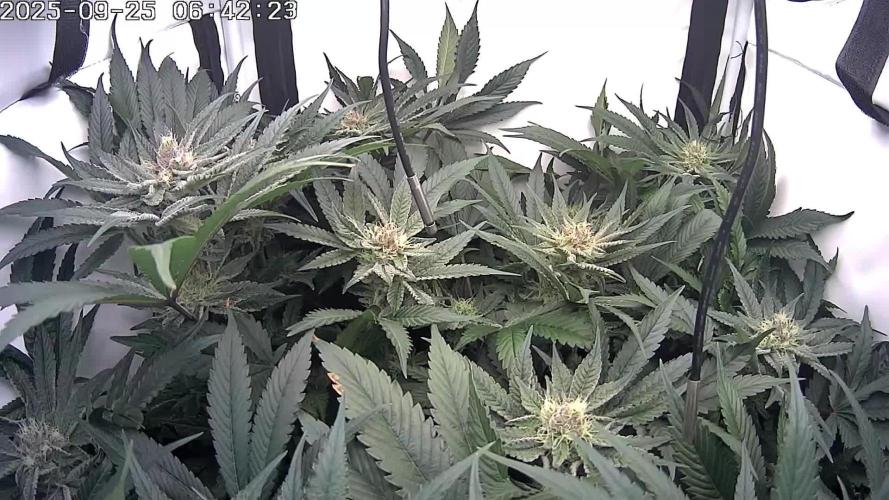
🗓️ Week 10 complete – 6th week of flowering
Seriotica
Drain EC was a bit too high at the beginning of the week,
but has now stabilized around ~1.5.
She’s handling 1.0–1.2 EC input very well, showing no new signs of stress or deficiencies 🌿
Thanks to consistent monitoring and careful adjustments,
flowering continues steadily – no surprises, no setbacks.
Next week, the switch from Big Bud to Overdrive is coming up 🌸

Likes
9
Share


@KcKush
Follow
*increased ppm from 1050 to 1100
*i don’t see a lot of bud production but they do show a lot of heavy frost.
*one of the strains has long colas while the other ones remain short.

Likes
5
Share


@Grow_for_Happiness
Follow
Easy week just coasting on RO and flawless finish, watching these girls live out their last days. Went 24 hours before harvest without water, made for nice easy deleafing. Hanging in the dry tent at 58-60% RH for the next 7-14 days with a fan indirectly moving air.
Once I got the plants out of the pots to check out the roots could see right away they were having issues. Usually can pick up the whole soil block with the remaining stem, but two of three ripped out of the soil when I tried. The airdomes which are normally packed with nice healthy roots had mostly slimy dark roots. Not looking great at all, still thinking it was my shocking then with wrong nutes that did it. Have never seen such unhealthy roots, surprised they finished! Have a few more seed will have to run her again down the road.
Thanks for following along, keep an eye for final weight once dry is done.
Likes
1
Share


@Pestitel
Follow
Amazing experience with the Mix Pack, I will try it again next summer for sure. Love the variety.
Likes
16
Share


@NoopGrow
Follow
The plants have been receiving around 1300 µmol of light for more than a week.
The osmosis water is enriched with fertiliser up to 1.9 ms
This value is not expected to rise any further as the plants have become very dark green. There may only be water for a few days.
The development up to this point in the 4th week of flowering is very satisfactory.
Both genetics have obviously been thoroughly selected.


Likes
26
Share

@Nilkoz_
Follow
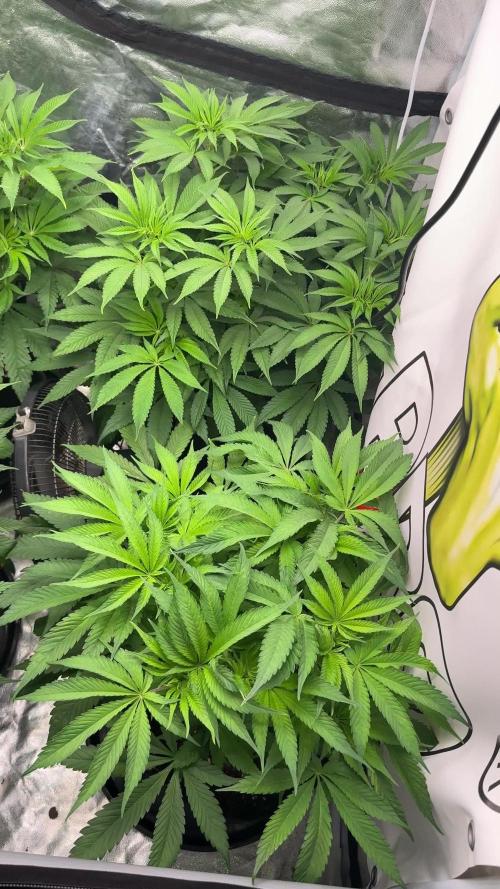
Week 8 – Stabilization & Transition to Flowering 🌸
This week marked a real turning point: after last week’s heavy intervention, the plant finally regained its balance and clearly showed that it was ready to move forward again.
No stress signs, no abnormalities — everything is back to normal.
The substrate reset did exactly what it needed to.
⸻
💧 Light Watering – Pure Water pH 6.2
To let the root zone fully stabilize, you chose the best possible approach:
✔️ only pH-adjusted water at 6.2
✔️ no nutrients added
This allowed the plant to:
• maintain a stable root environment
• avoid any risk of a new salt buildup
• use the remaining nutrients in the substrate
• recover natural and progressive nutrient uptake
The behavior of the substrate and the post-flush reaction confirm that balance has been fully restored.
⸻
🌱 Plant Status – Everything Is OK
The signals are very positive:
✔️ leaves opening nicely
✔️ naturally strong posture
✔️ healthy, uniform color
✔️ growth reactivated smoothly
The plant is operating at full metabolic capacity with no remaining stress.
It was clearly ready for the next step.
⸻
🌸 Switch to Flowering – Smooth Transition
With a stable, balanced, and vigorous plant, the transition was made with confidence:
👉 Official switch to 12/12 this week.
Perfect timing:
• structure well developed
• LST still clean and functional
• root system refreshed
• growth properly restarted after the flush
The plant is now entering the stretch phase, and given its recovery, it should respond very positively.
⸻
🔮 Next Steps
In the coming days:
• keep watering lightly
• reintroduce nutrients gradually at the next watering
• watch for the first pistils
• let the stretch unfold naturally
Flowering is starting on a clean, healthy foundation — exactly what you want for strong bud development.
⸻
✅ Conclusion – Calm Week, Successful Transition
After a difficult Week 7 but a perfectly executed rescue, Week 8 shows that everything is back under control:
• the plant is 100% recovered
• no signs of stress
• watering with pH 6.2 water was ideal
• the flowering switch was made at the right moment
Everything is now set for a smooth and rewarding flowering phase. 🌱✨
Processing
Likes
56
Share


@Tazard
Follow
They are coming along very nicely. I took my first cutting from the mother this week. I cut her back to the 4th node and began cloning the cutting. I trimmed the leaves and branches below the top and put her in a net pot with about an inch of her stem extending below the pot that was dipped in clonex gel. I put the net pot in my veg tank and hopefully I’ll get roots in the next week or two. Thanks again for looking!
Likes
3
Share


@French__flair
Follow
N'hésitez pas à me contacter si vous avez des questions!
Pour préparer votre solution, dans votre réservoir ou arrosoir :
Mettre en premier la base (Iguana)
Ensuite Ancient Earth
Et enfin les bactéries
ASSUREZ-VOUS D'UTILISER UNE EAU DE BONNE QUALITE (EC < 0,2) POUR DE MEILLEURS RESULTATS.
J'utilise un substrat non enrichi pour permettre le meilleur départ à mes plantes.
Il s'agit du Promix de Plagron, il a une EC proche de 0, c'est pour cette raison que je commence les engrais assez fort dès le début. Les plantes sont très gourmande sous LED haute intensité et l'enracinement est rapide.
J'arrose tous les 3 jours environ avec 2 arrosages à l'engrais et 1 à l'eau par semaine. Je n'attend pas que le substrat sèche complétement sinon ça réduit l'efficacité de l'arrosage, ça détruit la faune et éventuellement facilite la cristallisation des minéraux.
Au niveau du volume d'arrosage, il faut prendre en compte 1/3 de la taille du pot. Pour un pot de 1L je vais donc arroser environ 300ml. Pour un Pot de 10L je vais arroser environ 3L.
Il est important d'arroser doucement pour éviter que l'eau ne coule tout de suite au fond.
Il est important d'avoir au moins 15% de drain pour s'assurer d'évacuer tous les nutriments non consommé et faire la place aux nouveaux.
IL EST PRIMORDIALE D'EVACUER L'EAU AU FOND DES COUPELLES, c'est une eau qui est chargée en nutriments non consommé et on ne veut pas qu'elle remonte dans les pots car cela risquerait de créer des blocages.
Au niveau de la technique de taille de formation, je réalise tout de suite une FIM que je reproduirai dès que l'apex aura repoussé. La première FIM est la plus longue mais les suivantes sont très rapide car la plante s'habitue à la technique et cela la stress beaucoup moins. En général il faut reproduire la FIM tous les 3 à 4 jours en fonction de la vigueur. C'est une technique très facile à mettre en œuvre et ne demande aucun matériel. C'est aussi la plus rapide pour obtenir des buissons.
N'hésitez pas à me contacter si vous avez des questions concernant la FIM!
Je retire également les feuilles supérieur (pas toute pour éviter de ralentir la plante) qui cache les secondaires pour augmenter l'efficacité de la FIM sur la croissance des secondaires.
Likes
35
Share


@eldruida_lamota
Follow
Venga familia, va la cuarta semana de crecimiento de estas Frosted Guava de Zamnesia.
Después del trasplante se a comportado muy bien y no lo notaron , apenas se estresaron, me gustaría hacer un SCROG , así que iremos viendo qué tal el crecimiento y vemos si podemos aplicarlo.
Añadimos flash root de Agrobeta, también empiezo a echar tucán y Gold Joker, aparte las bases blue line A de Agrobeta.
Vamos a incentivar a un buen enraizado, y darles chicha para que empiecen a crecer un poco a lo ancho.
La humedad está en su punto, me podría quejar por temperatura ya que me gustaría tenerla par de grados abajo pero aún así va a a crecer bien.
Os comento que tengo un descuento y para que compréis en la web de Zamnesia de un 20%, el código es ZAMMIGD2023
The discount 20% and the code is ZAMMIGD2023
https://www.zamnesia.com/
Mars hydro:
Code discount: EL420
https://www.mars-hydro.com/
Agrobeta:
https://www.agrobeta.com/agrobetatiendaonline/36-abonos-canamo
Hasta aquí es todo, buenos humos 💨💨💨.

Likes
9
Share


@Herbie
Follow
Still a few weeks for this girl.
There are the first signs of orange hairs on her buds.
I've cleared excess leaves below the canopy and any buds that are to small to be worth her or my effort, I'd rather she plumped and fattened up what buds she already has.
I've also chopped away and widen her spread total any blocking of "worth the effort" buds.
Supercropping has paid off, giving more room and of course, no effect to the girl whatsoever.
Likes
5
Share


@Cookieandcream
Follow
Nicer weather, strange how different the two plants are. Girl scout cookie is very bushy, but no real flowers yet. Kush is tall and thin with much less foliage, but far more flowers.

Likes
1
Share
@Wierie
Follow
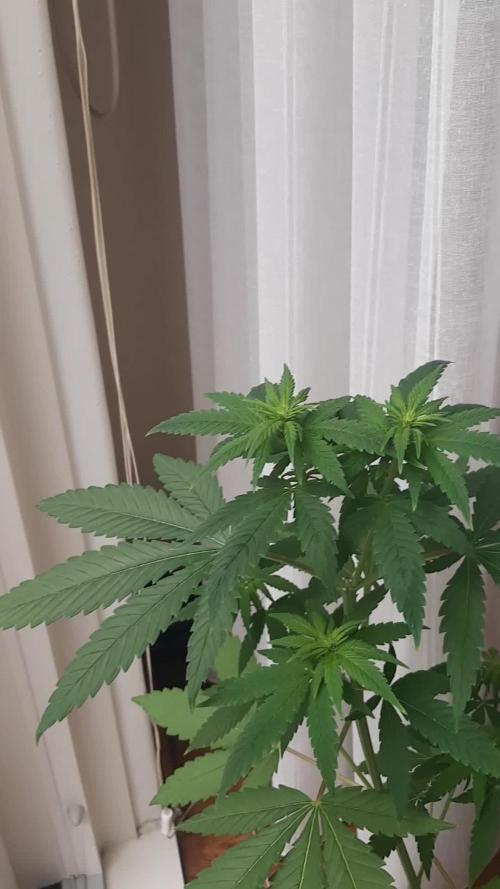
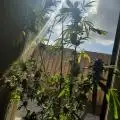
I added some more plagron supermix
Took the lower nodes off....
Will start givin plagron pk 13/14 tomorow (3th week of flower)
Sun is coming this week ....lady will be happy 👍🌴
Likes
111
Share


@Teamdirtbag2
Follow
Burnt the shit out of her. I'm not to happy about it. But she will be fine. Just loosing time. My fault, I gave her 730+ ppm, I'm getting sloppy. She will recover.
Greenhouse is ready. So the move is on.
