Likes
Comments
Share
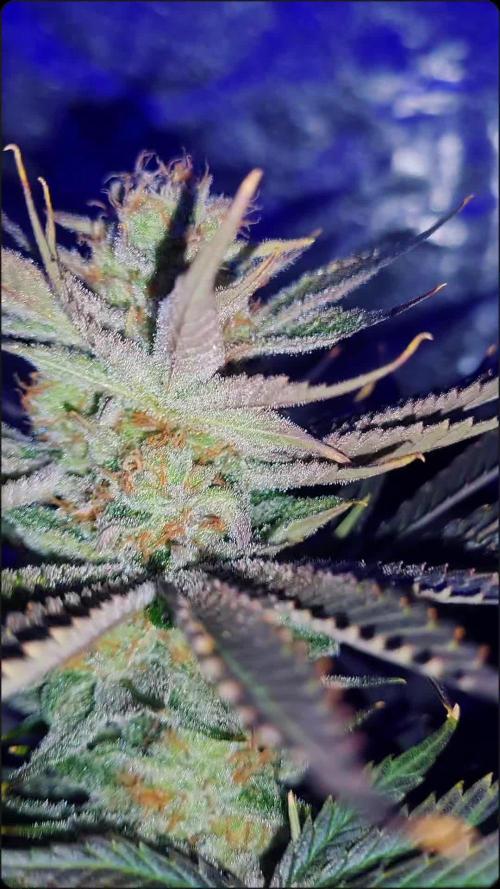
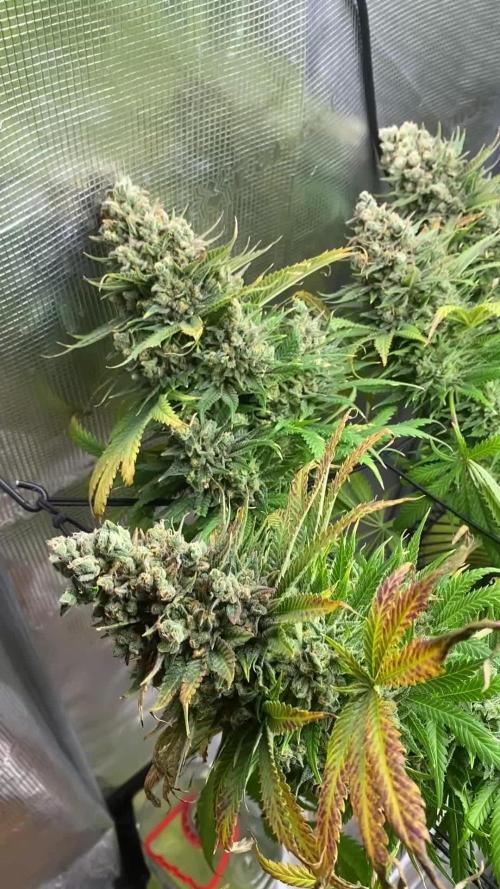
In week sixteen, the UV channel was turned off. The plants were flushed to remove residual nutrients and prepare for harvest. Trichome development was carefully monitored using a handy microscope, checking for milky and some amber-colored trichomes, indicating optimal ripeness. Environmental conditions remained stable, and the flush ensured the buds would taste clean and smooth after harvest.

Likes
7
Share
Subo estas fotos 5 días después de la última semana...crecieron un poco más los cogollos, las plantas están en buen estado.
Likes
11
Share
Likes
4
Share
Likes
2
Share
Hello everyone, The blueberry glue auto is doing okay she really needs to go under a trellisnet and needs also a good defiliation. Also i see a phosphorus deficiency on the leaves so i gonna start adding pk13/14 to the feed. Let's see how she looks next week. Thanks for stopping by and have a nice week. Growfather
Likes
50
Share
Eternity Grow Cup - Week 9 Veg Update We are stepping into Week 9 of vegetation, and things are getting exciting! The plants are thriving—compact, bushy, and growing beautifully. This week, we introduced a SCROG (Screen of Green) net, an essential tool for maximizing yield and optimizing plant structure. Let’s dive deep into the why and how of scrogging: Why Install a SCROG Net Now? Maximizes Light Exposure: The net allows even light distribution across all branches, ensuring every bud site gets the optimal amount of light. Controls Plant Height: By guiding the branches through the net, we keep the canopy even and prevent excessive vertical growth. Enhances Airflow & Reduces Mold Risks: Spreading the plant out increases air circulation, reducing humidity pockets and minimizing risks of mold and pests. Increases Yield: More bud sites exposed to light mean higher-quality flowers and greater overall production. For now, we’re still not using the under-canopy lights, though they will come into play soon. The ICL 300 is positioned strategically, and we will likely move them around as needed later. For now, the focus is on structuring the plants and ensuring they fill out the available space properly. Optimizing Airflow - The Vortex Effect Air circulation is crucial for plant health, and this week, we’ve optimized airflow by positioning the fans to create a vortex effect: Fan Positioning: Each fan is placed at the tent corners, pointing in different directions, ensuring dynamic airflow instead of direct wind hitting the plants. Benefits of a Vortex System: Reduces hot spots and evenly distributes CO₂. Strengthens stems by creating a natural resistance. Prevents stagnant air, reducing mold and pest risks. The extraction system is powered by an AeroFan, connected to the AeroFan Smart Remote FRC1, currently running at 60% speed. This setup efficiently manages humidity and temperature while maintaining optimal air exchange. Current Environmental Conditions & Feeding For now, we’re maintaining the same water schedule and nutrient regimen. The environmental conditions remain stable: Temperature: Holding steady at ideal growth levels. Relative Humidity: Balanced to encourage healthy transpiration. PPFD (Photosynthetic Photon Flux Density): Kept at optimal levels to support vigorous vegetative growth. CO₂ Levels: Elevated but within safe limits, promoting faster growth. The plants are filling the space beautifully, but we know that the flip to flower is approaching soon! The next phase will depend on how fast they continue to spread, and adjustments will be made accordingly. Closing Thoughts & What’s Next? This week was all about structural optimization—ensuring proper airflow, training the plants with the SCROG net, and keeping everything in balance before the transition to flower. The upcoming weeks will be crucial, as we fine-tune the environment, possibly introduce the under-canopy lighting, and prepare for the flowering stage. A huge thank you to our sponsors Aptus Holland, TrolMaster, CannaKan, Grove Bags, Ziggi Papers, and of course, Zamnesia, Plagron, and Grow Diaries for making the Eternity Cup possible. And to our incredible community—followers, supporters, and even the critics—we appreciate every single one of you! Stay tuned for next week’s update, and don’t forget to follow along on YouTube and Instagram for exclusive content and behind-the-scenes looks! See you soon, and happy growing! Let’s keep pushing forward, and best of luck to all the competitors—we’re all growing something incredible together. Until next time! Genetics - Runtz https://www.zamnesia.com/6000-zamnesia-seeds-runtz-feminized.html Nutrients - Plagron https://plagron.com/en/hobby - Aptus Holland https://aptus-holland.com/ Controls - Trol Master https://www.trolmaster.eu/ LED - https://www.futureofgrow.com/en LED - https://www.thinkgrowled.com Soil - https://www.promixgardening.com/en Germination - Cannakan https://cannakan.com/?srsltid=AfmBOopXr-inLXajXu3QFgKXCXXos4F1oEvScjMKIB5MR5dk8-GJ-F49 DOGDOCTOR 15% off Smoking Papers - https://ziggioriginal.com/ Terpene saver - https://grovebags.com/ As always thank you all for stopping by, for the love and for it all , this journey of mine wold just not be the same without you guys, the love and support is very much appreciloved and i fell honored with you all in my life With true love comes happiness Always believe in your self and always do things expecting nothing and with an open heart , be a giver and the universe will give back to you in ways you could not even imagine so As always, this is shared for educational purposes, aiming to spread understanding and appreciation for this plant. The journey with nature is one of discovery, creativity, and respect. Let’s celebrate it responsibly and continue to learn and grow together! Growers Love To you All 💚 #EternityGrowCup #RuntzHunt #GrowersLove #CannabisCommunity #AptusHolland #ProMixSoil #TrolMaster #Zamnesia #Plagron #ZiggiPapers #Grovebags
Likes
13
Share
Cette semaine s'est bien passée , changement de la game d'engrais je vais essayer la game APTUS changement de led aussi, je suis passer au Spider Farmer SF-1000.
Likes
23
Share
What a season so far. The three photoperiod girls are looking very impressive thus far. Their growth rate has slowed to about a half inch per day, and the signs of early flowering are appearing. 3/6 Sprayed with Mammoth CannControl 3/10 Light top dressing with Bu's Blend + Custom Amendment Mix
Likes
11
Share
Plant blew up, sorry no updates, i think currently it’s under watered not sure, and it’s been awhile and i see no pre flowers, i just started a Northern lights auto as well
Likes
67
Share
Welcome back everyone, As you can see are almost all seedlings growing. Some where still in the soil. Might happend when giving water(seedlings can turn or get deeper), checked it out and they are alive and well. All pictures are from day 4. The humidifier had been added, so I had to adjust the room. I spotted a corner of the room that gets dryer faster. I adjust the fan for now and see what happens. Corners are always hard to get perfect. Sometimes the light, air, watering doesn't come there properly. Seedlings don't need much nutrients, neighter do autoflowers. with normal soil I would recommend to only give water for 1-2 weeks, since it holds nutrients in it as well. But since I'm using Cocos for this grow, I might have to add some basic nutrients in the upcomming week. For this week I gave/give only water turns and Startbooster/rhyzotonic turns. Update day 5: - Lowerd the lights to avoid stretching, they are now at 75cm distance from lamp to pots. I want them at 40-50 cm, but I don't want to rush it. - Added another layer of cocos to avoid the soil from drying up therefore the roots from dying. This will happen because of lowering the lamps down, the soil will get exposed more to heat. As you can see, the humidifier is doing his thing haha. Pictures and videos where taken without the lights + fans on. because of that, it will look like this. Still fun thought. Arround 7 seeds didn't reach the surface yet, lets hope they make there way up soon. Enjoy!
Likes
4
Share
Anche queste albicocche crescono molto bene.....sempre complimenti a fast buds e a me🤣😂💪.sono robuste e anche lei con tanti punti dove fiorire....
Likes
14
Share
@AndrewC
Follow
So this is the Tear Down week. The timing of it makes it so i will need to the harvest flag in a few days when I can weight and test the plants. I have included the Cleaning, and Cutting and some Root Porn. I will make the harvest post in about 4-5 days, when I can trim these plants. There is a lot of Plant here. I got way more than I was expecting. I don't have a scale that measure this amount of plant, without taking like 10 measurements and then adding them together. So I will just be posting the dry weight. I will post the wet weight as dry weight * 1.65. Autopots: Wow, what a great product. I have been blown away by how well and how easy it was to work with them. They really did solve the watering issues. Excellent product. If you are a beginner, start with Autopots. -= Lessons Learnt =- - Overdrive the air to your Autopots. In my control plant, I used a small rectangle air stone (instead of a standard air dome). This lead to root rot and some other issues, it also put significantly less air into the water. The root rot, give the material for the Brown Algae to grow. Using a huge Air-disc-Air-Stone would be an excellent combo to mix in with the air dome itself. Something like this: https://www.amazon.ca/Pawfly-Diffuser-Suction-Hydroponics-Aquarium/dp/B01MY3AQ33 at the bottom and the air-dome on top of it, will be what I do with my next experiment. - Air stone in the reservoir. I had two instances where algae grew into the res. An air stone would have helped. It would have also helped my control plant get less root rot. Given the amount that the air-domes and air sources got engulfed, having the water have more o2 in it would have only been beneficial. - Don't grow 6 plants in a 4x4. Since my control plant was about 1/8th the size of the others, I think I could have grown 5 in the shape of a 5 (on a 6 sided dice)⚄ This placement would give a much more spaced canopy for airflow and more importantly light. The sides of some of the plants were lighter green and produced larf due to lack of light penetration. - This tent was on 19-5 schedule. This worked out very well for this strain. After every lights on, they were in the praying position, so this strain was able to recover in that 5hrs off. If I had more seeds, I would run these again, and try 20-4. I think this strain could handle it. All for all, I think I'm going to 19-5 as my default timing. This kept up a solid DLI. - Staring at .9EC (really .7 EC cause my water here is .2 EC) Then bumping up at .1 a week, until 1.6EC worked out VERY well. I experimented on this crop all the way up to 1.9EC, which burnt the tips of this plant. I think if I did this strain again, I would do 1.6EC until 3-4 weeks left then crank it to 1.9. It did plump them up when I went to 1.9, however it left them looking rough. Bulk was added though. - Sticking to 6.0PH for all of veg, and 2 weeks into flower worked great. The plant had solid and consistent color and leaf shape . The plant's did get hurt, due to some issues (as noted on the weeks). I switched to 6.5 PH in the last 3-4 weeks and it helped them recover, and plump up noticeably. -VPD. The #1 thing I focused on was VPD. I keep it .9kpa range, as best as humanly possible. It was honestly, HUGELY noticeable compared to my other grows. I know truly understand the value of properly dialed in VPD. This is the one lesson that will stick with me forever. - Super-cropping: On the plants I give the chiropractic treatment too, had much thicker stems as much larger channel internally. I did this treatment to 4 of the 6, and the 4 that had it done has larger buds and recovered from defoliation faster. TLDR; VPD is king. Super-cropping is worth the time. Keeping PH and EC dialed in were all wins. Autopots kick ass.
Likes
31
Share
Flower next week so upped the nutes with some bloom nutes. Topped all the tallest tops which was about 15, so all the lower branches have a chance of picking up to the taller ones. Day 61 // had to clean the girls up and strip them a bit, removed about 50g of Leaves and small branches and shoots i didn’t want
Likes
1
Share
@Cannerd
Follow
How ya doing mates?? Awesome week last week - all photos and logs have been added so be sure to check it out! This week is going great so far! I've switched to an early vegetative state nutrient system. As you'll see in the daily logs early this week, this bumps up the micro and grow nutes, and keeps the bloom at 0.6ml/gal. A quick note about last week - I'm unable to update the measurements, but please note that those nutrient amounts are measured in ml/gal, NOT ml/l. Anyhow, this week I'm just waiting to get my order of diatomaceous earth so that I can make up another batch of soil. I'm still debating between topping this week before repotting or letting them take root in the new pots first. Decisions decisions lol. I think at the very least I'll clean up some of the lower growth to make sure the energy is being spent at the right places. I've been switching back and forth between just LST and mainlining in the past - but I think I really like the ease and cleanliness of mainlining. The draw back is the recovery time they take in the process haha. UPDATE: The D.E. has come in, and I repotted the girls this week. I mixed in about 1.5-2 cups D.E. for the whole pot, as well as some Bat Guano and Kelp Meal for micro and macro nutrients to use on dry cycles. I've also included some photos of the mother plant to give an idea of what's to come! I've just started to flower it, which is the first time for this strain - so I'm pumped! Day 15: M.C. 01-21 After reviewing the last set of photos from last week, I figured I'd play it safe and dimmed the light back down to 25% strength. The mother plant is almost ready for flower, and I'm down some tents so she'll be taking this one over shortly. These photos were taken shortly after the lights went off, and they look quite happy! You can see some of the side branch developement in today's photo for MC-01. The pots are fairly dry now, and I've decided to move to the next stage in the nutrient regime. This kicks up the Micro and Grow nutes, while maintaining the Bloom amounts. M.C. 02-21 A nice top photo for MC-02, you can really see the lighter green in this photo. Not to worry though, as these will darken back to a vibrant green as long as I give her what she needs shortly! The pots are fairly dry now, and I've decided to move to the next stage in the nutrient regime. This kicks up the Micro and Grow nutes, while maintaining the Bloom amounts. M.C. 03-21 Look at that little leaf poking out from the 2nd node! Some slight yellowing you can see too, but again, not to worry. The new mix should rectify that. I've decided to move to the next stage in the nutrient regime. This kicks up the Micro and Grow nutes, while maintaining the Bloom amounts. Day 16: M.C. 01-21 Today is the day - for the mother! I've cleared out some space and moved plants around. So back out to the grow room these girls go! MC-01 seems much better today with the reduction in light. The 5th node is almost flattened out and the 6th coming through still. Most notably though, you can really see the work she's put into the side branches! The branches at nodes 2 and 3 are starting to produce more leaves - great sign! The new growth at the top is also a nice dark green. Added 500ml water to the tray. M.C. 02-21 MC-02 seems to have liked the adjustment of light as well. She's got nice dark green growth at the top, and the little branches at the 2nd node seem to have a full leaf! Added 500ml water to the tray. M.C. 03-21 The photo from today is cool, because you can see how close MC-01 & 03 are, even though there's almost a full node difference. MC-03 is stretch out a bit to compete with her sister for the light haha. She's also put some more effort into the side branches that you can see. Added 500 ml water to the tray. Day 17: M.C. 01-21 I figured a video would be the best way to illustrate the changes today! They've been back in the grow room under the Veg dedicated light for a day now and seem to be loving it! MC-01 has its' 5th node out, splitting the 6th node, and I can JUST see the 7th node coming in. I don't think they'll get too much more height, as you can see that the side branches are starting to stretch now! She's definitely going to be well tangled in the roots by the end of the week when I hope to repot her. M.C. 02-21 MC-02 is doing great despite the difference in height! You'll notice the side branches stretching out at nodes 2 & 3. The pots are also still fairly wet at their center, so I'll hold off on water most likely. At least this clone will have time to root more while we wait for the supplies! M.C. 03-21 MC-03 also has great side branching! If you take a look at the group photo from today, you'll see that both MC-01 & 03 are practically the same height, but MC-03 snuck in there by the stretch haha. Day 18: M.C. 01-21 My order of D.E. came in last night, perfect timing! As you can see, her roots have fully reached the bottom, and have started to migrate upwards with the water that's absorbed. The soil was a little dry for my liking, which made things a little difficult/dusty but still no mishaps! Watered around the root-zone before covering with more soil to keep the gnats down. M.C. 02-21 Not quite as much lateral root growth as MC-01, but still plenty enough for a repotting! Her soil was a little dry as well. Ideally I should have given them a light misting from the top of the soil and let is drip down to keep the dusty bits together haha. M.C. 03-21 Nice and thick root growth, no issues with repotting, and strong stalk. The extra spacing in the nodes may prove to be helpful during the training phase. Day 19: M.C. 01-21 Some nice top shots today as they slowly get acclimated to their new homes. Once I see them push out a new node, I'll probably top them. This is to make sure that they're taking to the new pot without causing any extra stress before they can take it. Today I watered them with an early veg nutrient. I like to stay cautious with nutrient boosts since they're in soil - not to mention the added nutrients from the repotting. M.C. 02-21 Top shots for the girls today. Not much change, but also no immediate signs of shock either, so I'll take it. M.C. 03-21 You can't really see it in this angled shot, but the small branch at the second node is coming along nicely! I think the girls are happy that they each have their own tray not haha. Day 20: M.C. 01-21 Definitely noticing some slow changes to the top nodes when comparing the pictures from the previous day. The leaves are slowly starting to separate, and I'm not noticing too much yellowing yet which is good. Watered with 500ml water to keep water migrating upwards to meet the roots. M.C. 02-21 Not noticing much change in this girl today, but that's okay. She's most likely focusing on the root developement instead which I can't complain about! Watered from the bottom. M.C. 03-21 Maybe seeing some separation in the top leaves, however more notably are the small branches at the 2nd node that you can see better here. Still a bit of stretching with them as they get longer. I might even keep them on for clones later on. Watered from the bottom. Day 21: M.C. 01-21 Looks like she gained some distance last night, as the top node is now above the fan leaves, unlike 2 days ago. I'm really getting eager to top them, as I don't want them to waste too much time and energy growing tissue that I'll just end up cutting off. I'll be bumping the nutrients up starting next week to keep the progress going, moving to a mid-veg stage shortly. I'm going to let things dry up tonight for a fresh boost of water tomorrow to give it a dry cycle as the pot is still a bit heavy. M.C. 02-21 MC-02 really worked hard last night it seems, as she almost completely flatted out her top leaves! I think she's ready for a topping, but I'll let her benefit from the headstart and let the other two catch up and root before. dry cycle for her tonight as well. M.C. 03-21 MC-03 was busy last night too and is now slowly flattening out the top node as well! Maybe tonight they'll have enough progress to go topless afterall haha. Dry cycle in prep for watering tomorrow.
Likes
2
Share
This week I have finally moved in to flower. I lollipoped the ladies on 4/20, after a day they seemed to be unstressed so I flipped them to 24 hr darkness and then 12/12 cycles.
Processing
Likes
3
Share
Ended week three with a flush. I haven't flushed her since purchase. Switched over from FF Open Sesame to FF Beastie Bloomz. Going to add molasses to the next feeding cycle. Any comments or suggestions ste always welcome. ✌️ Happy Holidaze and Happy Growing
Likes
1
Share
@gse314
Follow
Finally veg week before flowering
Likes
25
Share
@SybDarret
Follow
I'm kinda late on the update, week 11 finished on sunday 4, now is feb 9th. Last time i gave them nutrients was on sunday jan 28th and i'm flushing them since that date. My intention was to take them down this sunday (11) but I will not be at home that day, maybe I'll cut them on monday 12th. Maybe on monday i will add week 12 and then when the drying is done I'll update the harvest. So far it seems like taller plant needs more time, as far as you guys have told me, seems like smaller is ready, but because of time I think I will cut them together. Also my intention es to create a video to participate on 2F4B contest, i forgot to record the harvesting of LSD25 so this strain is my chance.😀