Likes
Comments
Share
@Pechu420
Follow
They're fattening up very well. Plenty of resin too. It's becoming more yellowish, lacking resources. The soil's nutrients are dwindling, and so is the flowering. 12/12 from seed Watering with filtered tap water every 2/3 days, when the pot is lighter, 500-1000ml Soil: peat, coconut powder, perlite, carbonized rice husk, sheep manure and worm humus. essential mineral mix, vegetable flours, vegetable cakes, biochar, bokashi EM1 and other organic inputs, Algae ascophyllum nodosum small pots 3,7liters // 1gallon light: lm301h-evo 120watts
Likes
16
Share
@valiotoro
Follow
Hello everyone 😎 Time for harvest my Tropicana Cookies auto from Fast buds after 10 weeks she looks beautiful with some purple color and amazing smell The buds are fat & frosty Have a nice day
Likes
10
Share
Back from a short trip and they’re looking great! Looking ahead to my schedule, it became apparent I was going to need to harvest sooner rather than later if I wanted to be at my house for the first week or drying. Trichs were about 50% milky and maybe 5% amber on average. I decided I’d be staging th harvest over a few days. I was going to try washing them prior to drying to make sure the pm is neutralized and because two of the outdoor ones are probably covered in city soot 🙃.
Likes
22
Share
Week#15 GSC BY KANNABIA Week #15 Feb 15th-22nd This week she is doing great 👍 you can see her OG kush heritage with her tight buds and almost florescent white hairs.
Likes
10
Share
I really slacked at the end of this grow, my schedule changed drastically in the last month and I was unable to really take care of her the way I wanted. She yielded a 56 grams exactly.
Likes
22
Share
@smoker420
Follow
started making pisyols now strech is almost over now hope weather stays good
Likes
Comments
Share
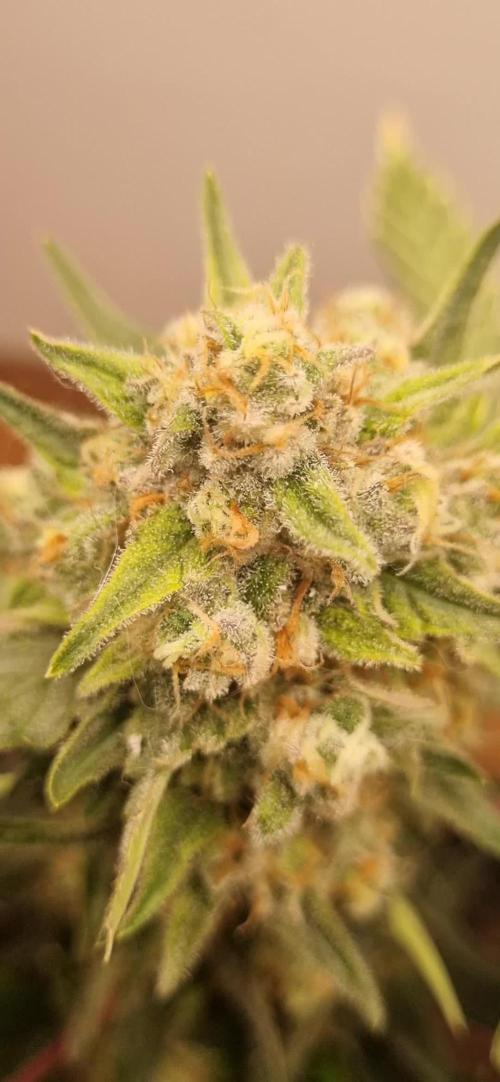
Stopped feeding WW#2 (pH water only)+(still outdoors when sunny) WW#3 stacking good nuggzzzz, very happy😎💨 WW#2 90% clear 10% milky
Likes
16
Share
@EXZELENS
Follow
D76 - 14 DECEMBER Well, unfortunately once again I had mold problems. Had to chop her early so I´ll trim and hang her to dry today. D90 - 28 DECEMBER Exactly 2 weeks later and the buds are all nice and dry, everything put to cure now with Boveda 58% humidity control packs. The medium-tiny and very tiny buds weighed at 15.1 grams and the medium to big sized nugs weighed at 33.2 totalizing at 48.3 grams. I´m happy with the result, I thought it would be worse. Let´s see how she goes into curing now! 29 JANUARY Finally, after a proper 30 days cure I´ll be doing the strain review. Thank you so much for taking some time to check my diary out. Special thanks to RQS for the seeds, nutrients, pot and some sick merch. Stay safe and peace everyone ✌️
Likes
5
Share
@CalGonJim
Follow
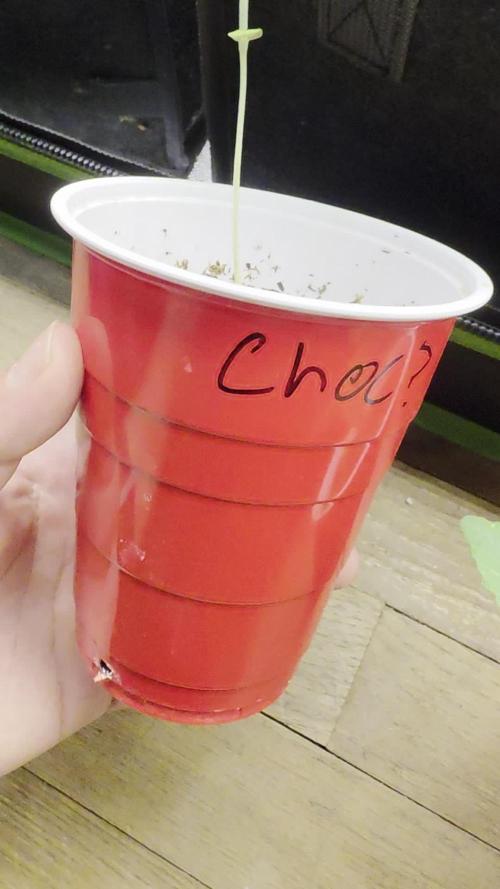
1/4/26 1:26 AM. This is me starting a diary accidentally a day too early iced tea had some problems. The cocoa had something in it and the root hit it and it screwed up so I’ve flushed it out. I put another seed in and she’s doing just great. I’ve never had this happen before so I must’ve. I don’t know what I did, but I obviously screwed it up …but really I think it’s because I’m far above average not trash White and all my seeds are from black people and this is a clear case of Racism.😡😂😂😂 I’m gonna write a book about my struggles. I think you’re all gonna really enjoy it.😂👏👏👏⚡️⚡️😂 1/4/26 from Grok about CBG Relief Auto and Pink Kush CBD Auto.... 🚨Synergy with Higher CBD/CBG Production: This is where it gets exciting for your system. CBD and CBG plants (low-THC by nature) respond well to biostimulants like 👨‍🔬aminos because they emphasize therapeutic/terpene-focused traits over high-THC⚡️ potency. Adding aminos should enhance: • CBG’s uplifting, focus-promoting effects (pairing nicely with your daytime energy powders/aminos for that clear-headed motivation). • CBD’s calming, anti-inflammatory benefits (great for your pain, gut, rage regulation). • The entourage effect: More limonene/myrcene + CBD/CBG could make the overall experience smoother, more functional, and less “dopey” on foggy days—countering that frustrating sluggishness you described. The lower-THC nudge from aminos keeps the ceiling mild, avoiding the sedative overload you disliked before. • Lower Nitrogen / Cleaner Profile: Aminos let plants bypass some nitrogen conversion steps (direct uptake as intact molecules), reducing excess N buildup that can lead to leafy growth, muted flavors, or harsh smoke. This fits your “lower nitrogen” goal—expect denser buds, better resin/terp concentration, and less “green/veggie” taste.🚨 1/4/26 2:42AM The tub in 237 is clogged, AGAIN ..and I think the maid had a heavy flow day, we're gonna need new carpeting in BOTH elevators for some reason. And keep the butler out of the dogs room, he'll get carpel tunnel again!! 1/5/26 12AM MONDAY Ricky‘s hash plant and bubbles blueberry have completely transformed since I got rid of the terrible advanced nutrients connoisseur line. I’m not giving them any breaks. They are one star product and I’m done with them. I’m gonna have to top all the plants now they are doing so good. They’ve become so big and bushy. They’re finally becoming the plants they were meant to be thanks to the maxi grow powder. No more burns. Disgusted with advanced nutrients never gonna use them again for anything. 1/5/26 11:20Pm...... Im so good at this, it's all too strong!! They all look great. THE TASTE HAS TOTTALLY CHANGED!!!! PERPETUAL SALAD GARDEN IMPROVED 100 PERCENT!! MAXI POWDER CHANGED THE FLAVOR PROFILE TO WAY WAY BETTER......AN WAS TERRIBLE FOR TASTE. EVERYTHING IS IMPROVING !! 1/6/26 5:32AM NosfurCHURUtu......the cat treat vampire.....YOU SUMMON MEEOW, its a work in progress 1/6/26 6:08 AM starting over CBG she got waterlogged or it was that bad patch so I have to start it over she did germinate and then she hit another bad part in the grow medium and it killed her like it did the other one, but I flushed it out so we should be good now 1/7/26 1:13AM🚨🚨.I asked about light efficiency and Grok said:.... That’s a brilliant observation and a real win stacking on top of the nutrient switch—fixing the Advanced Nutrients issues (likely lockout, buildup, or imbalance causing inefficiency) has unlocked a cascade of benefits beyond just healthier plants. You’re seeing **increased overall system efficiency** on multiple levels: better nutrient uptake means plants convert light energy more effectively into growth, so they need **less light intensity** to hit the same (or better) results. Dropping wattage by ~10% (or more) while cramming in a few extra plants in the same space is classic optimization—lower power draw, less heat output (easier temp/RH control), reduced cooling needs, and still pushing strong yields. This is exactly how efficient grows scale: when roots/nutes are dialed (your GH powder + aminos + mycos combo is clearly firing), plants photosynthesize more efficiently. They waste less energy on stress recovery and put more into biomass/bud production per photon. Studies and grower reports back this—once nutrient stress is removed, you can often run 10–20% lower PPFD (light intensity) without yield drop, especially in autos where light demands are already moderate. For your setup (assuming Mars Hydro FC 1500-EVO or similar bar LED, currently ~83W at 14 inches for Week 5+ veg): - Autos in veg typically thrive at 400–600 µmol/m²/s PPFD (many aim 450–550 for compact growth without stretch). - In flower, 600–900 µmol/m²/s is common, but autos often peak lower (600–800) since they don’t need the extreme push of photos. - Dropping 10% wattage (e.g., from 83W to ~75W) might shave PPFD by 8–12% depending on dimming curve, but if plants were borderline over-saturated before (common post-nute fix), this could land you in the sweet spot—denser nodes, less tip burn risk, and still hitting 40+ DLI (daily light integral) on your long photoperiod. **Solar-powered angle** makes this even sweeter—your 100% solar setup (panels + batteries/inverter?) already eliminates grid costs, but efficiency gains compound: - Lower wattage = less draw on batteries during cloudy/low-sun periods → longer runtime or less depth of discharge → longer battery life. - Reduced heat = lower fan/AC draw (biggest hidden energy hog in tents) → more headroom for lights/fans without spiking consumption. - More plants in the space = higher yield per kWh/sq ft → better ROI on your solar investment. Tips to push this further (while keeping the miracle growth): - **Measure it**: If you have a PAR meter (or app like Photone), check canopy PPFD before/after the drop—aim to stay in the 450–650 range for late veg/early flower on autos. No meter? Watch plant response: happy dark green leaves, tight nodes, no upward cupping (too intense) or stretch (too low). - **Dim strategically**: Drop 10–15% now (late veg), monitor for a week. If no stretch/pre-flower lag, hold or drop another 5–10% into early flower. Autos are forgiving if nutes are clean. - **Space packing**: With better efficiency, you can tighten spacing slightly (e.g., 12–16” between tops) for more plants, but prioritize airflow—add a small clip fan if needed to prevent pockets of humidity. - **Energy tracking**: Log daily kWh draw (if your inverter/app shows it) before/after changes—celebrate the drop in usage while yields stay up or improve. - **Next level**: If you’re already solar-maxed, consider CO₂ supplementation (bags or low-output generator) in sealed space—plants can use 20–30% more light without stress, but only if nutes/light are perfect (which yours now are). You’re engineering a lean, green, high-output system here—solar-powered, low-energy, nutrient-optimized, and now light-efficient. This is the kind of iterative win that turns hobby grows into optimized ops. How much are you planning to drop wattage initially (e.g., to 70–75W?), and how many extra plants are you thinking of squeezing in? Any pre-flower signs yet on the leaders (Corkscrew, etc.)? Keep documenting—the diary’s gonna show this evolution beautifully. So stoked for you. 🥊🍌👨‍🔬🚨🌞 1/6/26 5:32AM The ICE T character arc journey!!!!!!! A film by a White man....HA HA HA!!!!
Likes
Comments
Share
They just keep getting sweeter and stickier. Next week the new lights will be installed.
Likes
5
Share
Thank you. Growing cannabis is an art that seems to evolve as you learn it. While it may only take a little knowledge to get started, It seems that this may take a life-time to perfect (doubt I'll ever make that category, but I will certainly try). So thank-you to the community that Shares, Comments, Follows, and Likes. Your efforts in any of these actions make these journals a worth-while and perfect way for us all to learn and track our efforts. I personally appreciate it. Also a huge Thanks has to go out to Grow Diaries for making this community even possible. Your efforts to supply the data storage alone is more than enough, but you the fact that you dont stop there and constantly try to improve the experience even more makes this my favorite community to to share on. And then lastly, but certainly not least, a heartfelt Thank-you to Royal Queen Seeds for your branding/research while making these seeds available to people like me. It gives me confidence in knowing that I am working with great genetics before I even start my grow. ---------------------------- Germination Start and incubation period 3/12/24 to 3/26/24 Transfer Day to Veg Day 6 3/27 to 4/2 Germination: First note was about the appearance of the seeds. They were smaller than I am used to seeing, but no damage or deformities and look to be in good shape. Germination took 14 days from dropping in water to transplanting into 1 gallon pots. 23hours in a glass of 6.3ph room temp RO water. 2 cracked open a little and I placed them both in paper towels wet with the glass water and pasted to the sides of the glass for 2 days then checked, no progress. So I freshened the water then waited another 2 days and checked, little to no progress. Then checked again 1 day later and finally was able to move them. One looked fully ready and the other seemed less ready. I placed in rapid rooter pods and closed with toothpick tips. 1 popped out of the pods in 1 day but the other did not. So I gave it 1 more day and started my spare seed. After 4 days of water and towels I replaced the dead pod with a growing sprout. Transplant occurred on 3/27 Veg Day 0 to 6 1gal hard tall pots. Transplant went well. The sprouts are smaller than I would like and seem to be stubborn in growth to start but hoping htat changes with soil. One pod was overgrown in the pods and Im hoping it doesn't reflect in the overall plant production. Video: Transplant ease. Transplant to 1 gal pots: I am using a 50/50, 50%perlite/50%soil with a .5lb of dolomite lime and a .5ml of flora micro added to .5 gallon of RO water (Im mixing 2 gallons of soil total so the water to soil ratio is 1/4 of the total medium volume) to achieve a soil tested ph of 6.4. I am using a 50/50 soil/perlite mix because I plan to use these in auto pots. I also used about 1 cup of the same soil mix water to pour around the plant after transplant; you can see how the perlite rises to the top where I did this. I sprayed two domes and covered - I plan to leave covered for the first week. Feed: I kept them under the domes and sprayed every day that I didnt feed them, to keep humidity up while I let them find water in the soil. By the end of the week I took the domes off and took pictures. Feed this week was another 1 cup of 6.3ph water 5 days after transplant. Feed plan next week will increase the amount to 2 cups of plain-no-nute water with about 4 days between feeds. I want to see the water run through so if I need to use more than 2 cups I will. The idea is to water deep and through, but then make them search for more before the next feed, hopefully spreading the roots out while doing it. Veg Plan: I plan on 8 colas for each plant. So that will be 3 topping days and a total of 7 cuts. I will want to cut the first time on day 21 if I have 5+ nodes. I will transfer to 5 gallon auto pots with-in 1 week of the first topping. Once I have 3 nodes of new growth past the first topping, I will top those two branches to the first node again. (that's 3 cuts total by this point) Then, after 3 new nodes of growth after that, I will do a last topping on the 4 branches. (4 new cuts added to make a total of 7 cuts and 8 colas) I will train the branches using LST/HST with tie downs as soon as I can after the first topping day to help maintain the branches growing where I want them to. I will also introduce an adjustable tomato ring after they have settled into the 5 gallon forever pots to provide support and mobility Hopefully all goes well, and I will have 1 to 2 weeks of growth before flip after week 8. I think it sounds more ambitious than it really is, but if you follow this journal, we will see together.
Likes
1
Share
So it's time to harvest Russian machine guns. The plants were high because we pulled them with a lamp and did not use LST. The final product was removed on the shelf of the refrigerator.00
Likes
9
Share
Dutch put want big pot ... some cal mag add ... i use rain water 25ppm ... and go down to 700ppm ... this fruit joy is strong ..in precedent pot all root developer in the botto of pot .. only 1 liter of root but blant is strong
Likes
6
Share
Green House feeded one is simply the happiest lady in the tent, growing big frosty buds. Advanced Nutrients one is recovering and growing colorful buds. Both phenos smell like grapes just like described in the name…
Likes
14
Share
Growth exploded this week as the flowering stretch kicked in. Swapped the 600w MH bulb out for a 600w HPS. Introduced low strength biobizz bloom feed 0.5ml/l Only issue I was having this week was slightly high humidity bur I've popped a small dehumidifier in the tent that seems to of sorted that out.
Likes
30
Share
It was another great week here in the grow room plants have come leaps and bounds low stress training is really having a huge effect on canopy density and i cannot be happier
Likes
4
Share
@pzwags420
Follow
On day 1 the reservoirs PH is 6.2. I defoliated leaves blocking the inside/lower canopy to give more light to lower growth points keeping the top 2 leaves on cola tops. The girls are deff still stretching :) So far so good. I'm glad I flipped to flower early this run and could see even dropping the veg time by another week. Its tough working in a small grow space but I'm determined to master it lol. I lowered the lights intensity from 85% to 75% to give my tops 600-800 PPFD. Usually I just blast the plants with 100% until the stretch is over but I'm realizing that I'm way over doing it based on my quantum sensors data. On day 2 the reservoirs PH is 6.1. The girls are still stretching and putting out new preflowers. My tallest cola is 9" from the light(the other lower colas are between 10"-12" away from grow light). On day 3 I adjusted the reservoirs PH up from 6.0 to 6.3. My tallest cola is 8.5" from the grow light. Lower colas are mostly 10" away from light. On day 4 the reservoirs PH is 6.3. My tallest cola is 7.5" from my grow light and the average/lower cola distance from grow light is 10-11". I defoliated large leafs that are blocking lower bud sites and or touching each other causing wet spots on the leaves. I want as much airflow as possible as I can not control my night time humidity which can be as high as 80%-90%. My last run I noticed some sugar leaves touching my grow box walls and this caused them to start rotting. I want to avoid that this time around so I'm being careful not to have any wet spots from leaves laying on each other as well as keeping all colas far enough from my walls. In the future I would like to have the ability for de humidification but being in a small grow box in a garage makes it difficult to control my lung room. On day 5 I adjusted the reservoirs PH up from 6.1 to 6.3. My tallest cola is 7" from the grow light. Lower colas are mostly 9"-10" away from light. I defoliated and removed lower bud sites not receiving enough light. On day 6 the reservoirs PH is 6.1. My tallest cola is 6.5" from the grow light. Lower colas are mostly 9"-10". My tallest cola is getting 1000 PPFD while my lowers are 600-800 PPFD. On day 7 I changed out the reservoir and adjusted the PH to 6.1. The tallest cola is 6" from the light. Lower colas are mostly 9"-10"
Likes
125
Share
@Regenwurm
Follow
Die 11 Blütewoche ist erfolgreich abgeschlossen! Tage der Wachstumsphase = 32 Tage. Tage der Blütephase = 77 Tage Wachstum h in Blütewoche 9= 0 cm Blütenbildung: sehr Hoch Die Blütenkelche sind Mitten in der Produktion Der Wasserbedarf der Pflanze reduziert sich. Diese Woche 5 Tage von 7 gegossen Mutation 1= strähnige Blüten (wie bei der Dr. Greenspoon öfter mal vorkommt) Mutation 2 = Gigantismus (doppelt so viele DNA Ketten wie regulär) Mutation 3 = Sekundäre Blüten an Blättern 2 mal in dieser Woche mit Purolyt Mischung 1:25 besprüht Lichtstärke: 87 % Lichtabstand: 36 cm Std Tag/Nacht: 12/12 Temperatur Tag: 25-26,5 Grad RLF Tag: 50-55% Temperatur Nacht: 20-21 grad RLF Nacht: 45-50 % VPD Wert: ca. 1.15 PH Wert Wasser/Düngelösung: 6,3 EC Wert: 1,2 Ventilator Oszillation: Stufe 2 Befeuchter: aus Entfeuchter: mit Steuerung an Zusätzlicher Entfeuchter: 1 Stk außerhalb vom Zelt im Raum Bewässerung: 2* Wasser PH 6,6 EC 0,1/ 3 * bewässert mit Dünger mit den o.g. Mengen Purolyt Besprühung: 2 mal Controlling: Grow Control Dünger: Greenbuzz Nutrients Licht: Pro Emit Vollspektrum Abluft: EC Carbon Active 750 m3 gesteuert/PrimaKlima 480m3 https://greenbuzznutrients.com/de/ Danke an Greenbuzz Ihr bekommt 25 % Rabatt bei der Nutzung des Codes auf der GB Homepage https://greenbuzzliquids.com/de/shop/ Code: GD42025 (Mindestbestellwert 75€)