
Likes
Comments
Share


Likes
15
Share


@emeraldlabs
Follow
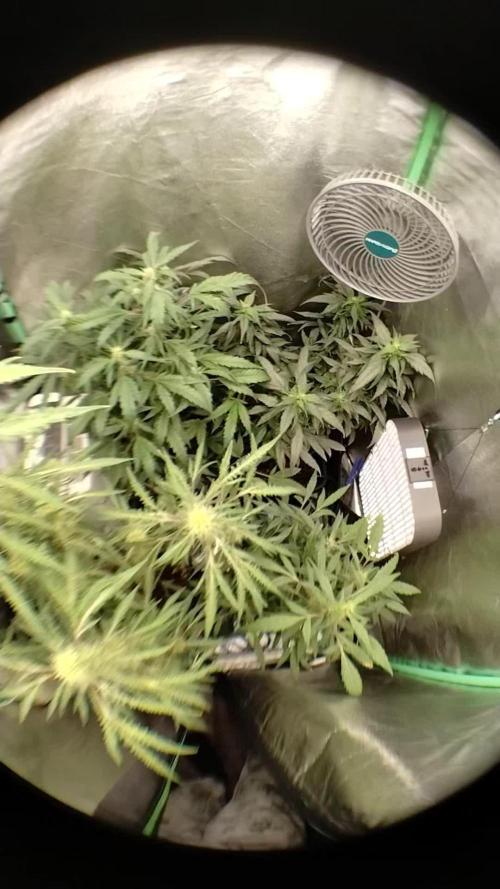
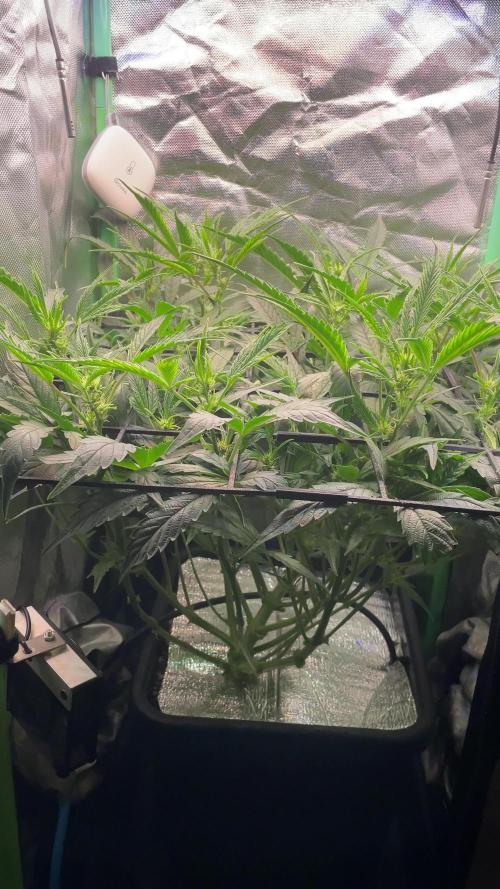
Continuously defoliating a bit at a time. Nitrogen issues seem to be resolving.
Photos/video taken 91 days after breaking soil, day 28 of flower.

Likes
2
Share

@TheBulldozerSicily
Follow
Le sfighe sempre a fine ciclo, riprendendo l'over fert ieri ho trovato 2 tubicini dell'irrigazione tappati, quindi non circolando l'acqua 2 piante sono seccate un po, adesso ho sistemato e l'acqua continua a circolare ma mi sa che sono ancora in blocco... attendo qualche altro giorno per vedere se ci sarà una ripartenza, altrimenti raccoglierò questo fine settimana o il prossimo.


Likes
116
Share


@DogDoctorOfficial
Follow
Harvesting the Bounty of Cherry Cola Auto
Dear fellow cultivators, we've reached the triumphant culmination of Cherry Cola's journey as we delve into Week 13 – Harvest Time! Join me in celebrating the fruition of our labor and the bountiful rewards awaiting us as we harvest the radiant buds of Cherry Cola Auto.
As the sun sets on Week 13, the air is filled with anticipation and excitement. Harvest season has dawned upon us, marking the culmination of Cherry Cola's remarkable journey from seed to harvest-ready beauty.
In the heart of the garden, Cherry Cola stands tall, her branches heavy with the weight of abundant buds. Each bud is a testament to her resilience, her vigor, and the care and dedication invested in her growth.
With meticulous care and precision, the time has come to harvest Cherry Cola's radiant buds. Each cut is made with reverence, ensuring that only the finest, most pristine flowers make their way into our stash.
As the buds are trimmed and cured, an aromatic symphony is unleashed, filling the air with the tantalizing scent of Cherry Cola's terpene-rich profile. It's a sensory experience like no other, a celebration of nature's bounty.
As we gather the fruits of our labor, let us take a moment to reflect on the journey that has brought us here. It's been a labor of love, a testament to patience, perseverance, and the boundless wonders of nature.
In conclusion, let us raise a toast to Cherry Cola Auto – a true champion of the garden, a symbol of resilience, and a source of boundless joy. May her harvest be plentiful, her flavors unforgettable, and her legacy enduring. Until next time, happy harvesting, fellow enthusiasts! #CherryColaHarvest #BountifulBuds #GrowersPride
Nutrition: @aptusholland @aptus_world @aptus_
Love, Care, and Attention: @dogdoctorofficial
As always, thank you all for joining me on this journey, for your love, and for it all. My horticultural odyssey would never be the same without you. Your love and support are cherished, and I feel both honored and blessed to have you in my life
Friendly reminder all you see here is pure research and for educational purposes only
Growers Love To you All 💚 💚 💚

Likes
14
Share


@MG2009
Follow
04/05/2023
First pic and video of tall grape Skunk,short, and middle (size,)
Lemon OG is kicking ass definitely going to get more of these seeds. Biscotti Skunk I forgot pictures. Fix that when I get home. Something is weird with grape skunk (short one)

Likes
9
Share


@BB_UK
Follow
She was the second to pop up (and purple punch earlier that day) I won’t be topping any autos this run! I will be only low stress training until scrog and then I’ll high stress train if necessary! I’ve given the first feed today of biobizz (doing fastbuds organic the other 3 synthetic) my aim is to keep the veg period vigorous! As a great veg equals great bloom! All other


Likes
7
Share


Likes
31
Share


@The_Doctor_Green
Follow
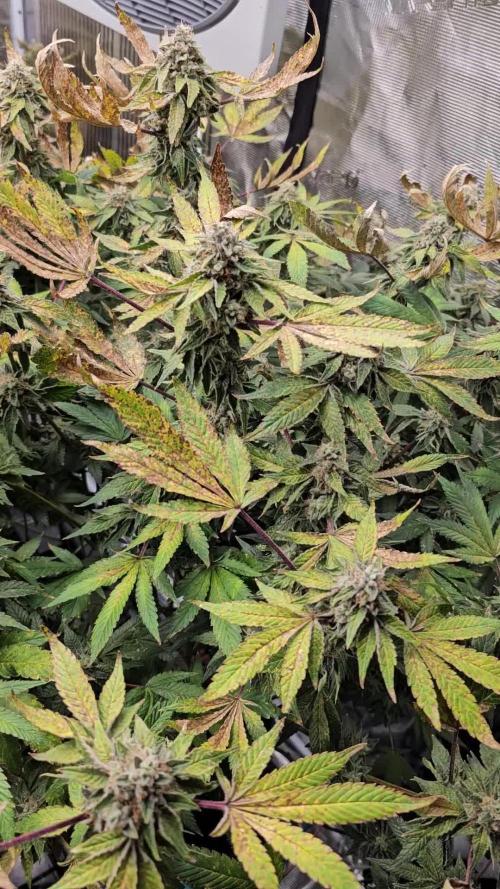
En esta semana 12 de floracion hemos bajado los niveles de ppm y de ph... no estan en los valores mas optimos pero han bajado considerablemente. A causa de los valores altos, he leido que muchas veces las hojas se quiebran con gran facilidad y lo pude comprobar, en las fotos se pueden ver algunas hojas asi.
Los nutrientes en los riegos han sido los valores minimos, esto fue un experimento ya que no quiero seguir sobrefertilizandola, quedan las ultimas semanas y no quiero hechar a perder todo el esfuerzo y tiempo que le dedico a ella.
Varias hojas se han ido poniendo amarillas al punto de caerse, los pistillos se han empezado a oxidar, todos sintomas de que estamos llegando a la parte final del ciclo.
(Esta semana por falta de tiempo quizas no he sido tan dedicado a la hora de tomar fotos,y tal vez el diario de esta semana se ve un poco desprolijo, espero sepan entender) :-)


Likes
3
Share


@Willy_Balls
Follow
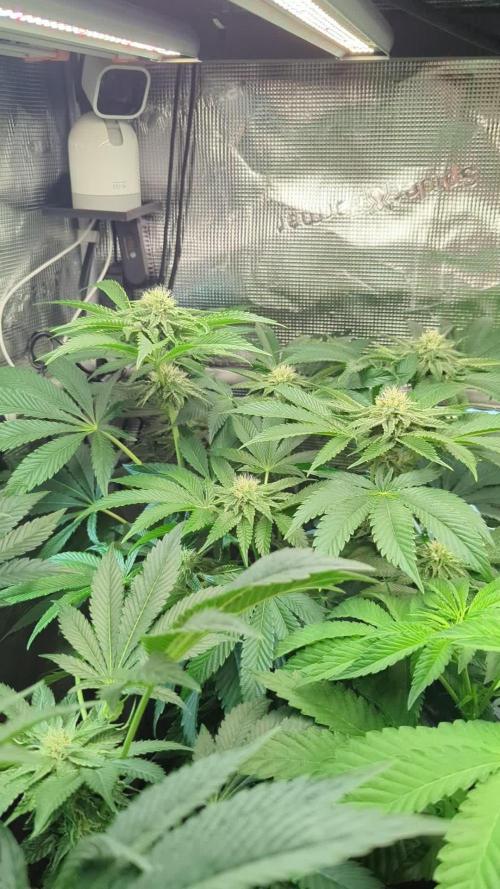
Getting chunky and frosty. Some very nice specimen in these. Lovely terps and I feel they are going to be a looker. Some colors are already poppin. And they still have a lot to go.
Likes
52
Share

@DogDoctorOfficial
Follow
Ah, the wondrous cosmos, a celestial playground of colors, stars, and infinite possibilities! Imagine diving into a cosmic swirl of vibrant hues, where nebulae paint the canvas of the universe with their kaleidoscopic brushstrokes. From the fiery reds of newborn stars to the serene blues of distant galaxies, the cosmos is a captivating masterpiece that fills our hearts with awe and wonder.
Among the countless stars that twinkle in the velvety night sky, there's a star for every dreamer, a star for every wish. They dance above us, like celestial fireflies, spreading their ethereal glow across the expanse. Gazing up at the starry tapestry, one can't help but feel a cosmic connection, as if the universe itself whispers secrets of eternity.
But wait, did you know that there's a CBD strain named Cosmos? Yes, that's right, the cosmos can now be experienced in a whole new way!
I can already imagine myself taking a puff and being transported on a cosmic journey, where galaxies swirl and planets giggle. I mean just look at this Beast and how amazingly beautiful she looks, at least to me she does, so its easy for me to dream big for this one <3
Let's revel in the sheer magnificence of the universe and let its vastness ignite our curiosity.
oh and i defoleate her , she the room was asking for it and so was she , and let me tell you guys she took it like a champion, i am simply loving the experience on growing my first ever CBD strain, Big Shout out to RQS she is the all package so far, dreaming big her hihihi
As always thank you all for stopping by and for supporting me on this journey, i am super passion about growing and fell blessed to have you all with me on this new journey <3 <3 <3
Genetics - RQS COSMOS F1
Ligth - LUMATEK ZEUS 465 COMPACT PRO
Food - APTUS HOLLAND
All info and full product details can be find in can find @
https://www.royalqueenseeds.com
https://aptus-holland.com/
https://autopot.co.uk/
https://lumatek-lighting.com/
With true love comes happiness <3<3<3 Always believe in your self and always do things expecting nothing and with an open heart , be a giver and the universe will give back to you in ways you could not even imagine so <3<3<3
<3 <3 <3 Growers love to you all <3 <3 <3
Cosmos F1: The World's First F1 CBD Cannabis Variety
Cosmos F1 is the largest autoflowering cultivar in RQS catalogue of F1 hybrids. With her tall, typical Christmas tree structure and bright green foliage, Cosmos F1 is a testament to the beauty and vigour of Cannabis sativa. Plus, thanks to her pure genetics, which descend from Oregon CBD, she boasts the highest CBD concentration in our entire F1 seed selection.
Aromas, Flavors, and Effects of Cosmos F1: A Vibrant CBD Super Variety
True to the pure lineage from which she descends, Cosmos F1 boasts a delicious aroma that combines the freshness of crisp pine with the full-bodied, almost creamy aroma of modern Cookies varieties, and an unmistakable peppery bite. Thanks to her high concentration of CBD and low levels of THC, Cosmos F1 offers a balanced effect without intoxication. Cosmos F1’s terpene profile is dominated by myrcene, farnesene, limonene, pinene, and caryophyllene. Combined with high concentrations of CBD, Cosmos F1 produces a clear, meditative effect that relaxes the body while leaving the mind functioning and focused. Her effects help unite the mind and body, creating a state of cosmic order.

Likes
2
Share
@PapaTerps
Follow
Wizard Fuel - Wizard Trees
Day 70 - Watered with 3L of RO tap water with nutrients, mixed individually, in order and then pH'd to 6.3! She has completed her stretch phase, has developed her bud sites and is now focusing on bulking her flower 🙏🏻I removed a couple of fans leaves to improve general airflow in the tent 💪🏻 She has developed a good amount of trichomes on her buds and her smell has also started to appear - very gas earthy 👌🏻

Likes
16
Share

@love_2_grow
Follow
This first week in flower was a bit more exciting than previous weeks.
I decided to put in a scrog net to help spread and even out the canopy. So naturally, I 3D-printed one. (Yes, I can be that nerdy.)
Besides, it was the quickest and easiest solution as I don't like the stretchy-net kind so need a frame. Much easier to download a file and press print :D
Installing it was a breeze and I also cleared away most branches and leaves below the screen. The stuff that won't make it above the screen and will just result in a bunch of larf.
I'm still seeing chlorosis (which I suspect has to do with her transitioning into flower and stretching), so I gave her a bit of Orgatrex and Bactrex. Next week, I'll start feeding her PK booster.
––––––––––––––––––––––––––––––––––––––––––––––––––––––––––––––––
This grow is generously sponsored by Bio Tabs
Bio Tabs is an organic growing system that uses slow-release tablets of beneficial microbes, mycorrhizal fungi, and nutrients to create living soil that feeds plants naturally throughout their growth cycle. It’s designed to simplify growing and promoting strong roots, healthy growth, and large yields.
Use code GDBT420 for 15% off at the BIOTABS Webshop https://biotabs.nl/en/shop/
––––––––––––––––––––––––––––––––––––––––––––––––––––––––––––––––


Likes
18
Share


@Ageddd
Follow
Another freezing cold week !!
Before having this plant, i thought that a plant would never survive with this temperatures... but this Afghan Kush proved im wrong, whats amazing because this plants strenght is remarkable, the buds i noticed, are not developing as fast as in September/October, basic grower logic but we are having between 8-14 ºC during the day and 2-5ºC at night..
Wider range of colours, i spot like Purple, Deep green, and even shades of Violet and blue, its incredible :D
Last feedings, finished like in the middle of this week and the buds developement degree is telling me, its flush time ...
Spotted a few white aphids, but only on the leaves, so not a problem.. Having in mind the temperatures they are not lasting so much hahaha its the good thing
Last weeks of life, and i suppose she will be yellowing more during the next week.
THe photos are progresive, so the first photos were taken at the beginning of the week and so ...
Have a Nice Week Guys :D
Likes
41
Share


@FrostyGardens
Follow
11/17/18
Beginning of week 4 of flower. Day 21-22 of flower. So far I am pretty happy with my results. O think I identified one sativa leaning phenotype, one indica, and also that grows slower then the rest. Although not entirely sure if its the environment that created these differences. As they further develop I may get some clues to this regard.
Black Magic soil seems to work great with no issues of burning or deficiencies whatsoever. Are far as smell its not very noticeable unless the plants are disturbed or pruned.
Decided to discontinue the Aerated teas. Im sure the ladies have plenty or microbes in the soil. The rest of this grow they will only be feed 3-12-12 bloom fert untill its time to start the flush.
Buds should really start to develop in the coming weeks so stay tuned. Also im already planning my next run which will be 10X different strains including this one. Another 5-6 weeks on this one. Shout out to ilovegrowingmarijuana.com for these beans.
11/24/18
End of week 4 and the buds are looking amazing. Nice and frosty already. Noticed slight yellowing on the tallest girl. I suspect my LED was a little too close. Increased distance.Other then that smooth sailing. The next 2 weeks they should really begin to develop and put on weight. Cant wait to see what these 4 beauties produce!