


Likes
Comments
Share


@I_roll_my_own_420
Follow
Week 3 started nice. Plants growing bushy and strong. Cant wait for fair seeds buds to show up.


Likes
40
Share


@MadeInGermany
Follow
Info:
Unfortunately, I had to find out that my account is used for fake pages in social media.
I am only active here on growdiaries.
I am not on facebook instagram twitter etc All accounts except this one are fake.
Flowering day 29
since time change
to 12/12 h.
Hi everyone :-) .
This week the growth was very strong :-).
The buds are developing well.
it was poured twice, everything was cleaned and filled up.
1 g GHSC Powder Feeding was added per l coco.
stay healthy 🙏🏻
You can buy this Strain at :
https://sweetseeds.es/de/cream-caramel/
Type:
Cream Caramel
☝️🏼
Genetics:
Blue Black
x
Maple Leaf Indica
x
White Rhino
👍
Vega lamp:
2 x Todogrow Led
Quantum Board 100 W
💡
Bloom Lamp :
2 x Todogrow Led
Cxb 3590 COB 3500 K 205W
💡💡☝️🏼
Soil :
Bio Bizz Coco
☝️🏼
Fertilizer:
Green House Powder Feeding
☝️🏼🌱
Water:
Osmosis water mixed with normal water (24 hours stale that the chlorine evaporates) to 0.2 EC. Add Cal / Mag to 0.4 Ec Ph with Organic Ph - to 5.8 .


Processing
Likes
6
Share


@MG2009
Follow
06/27/2019
First wave of pistils are withering away and waiting on next burst of pistils to start building up more flower, sorry about the grainy video but you can still see how she is looking.
Likes
3
Share

@leithsffs
Follow
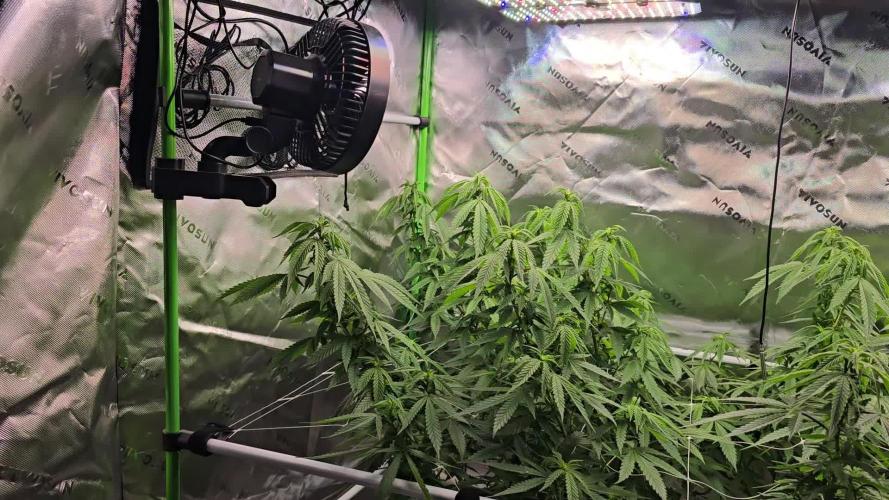
Not much for change this week. I think she is getting over the shock of the defoliation, lollipopping, and moving her back indoors all at the same time. As time is not of the essence, I'm only looking to get some good healthy buds from this plant. Also, she's my last grow for the year because it will be too cold to grow after this.
Likes
149
Share


@CBD_Sweden
Follow
Hi all the happy people here in GrowDiaries.
This is my second cultivation ever and it will be fun to try a bigger space than my closet grow.
First, I'm just going to say I'm done with the construction of my new growroom.
I put some pictures on the construction here in week one.
The room is 2.14 meters by 1.7 meters and has a ceiling height of 2 meters.
It provides a floor area of 3.6 square meters.
I use a 54 Watt Lightwawe T5 for germination and 2 Pcs 400 Watt HPS lamps.
I have a channel fan that replaces the room air about 40 times an hour to get a comfortable theme in the room, the air enters a fresh air intake from the outside.
The air is purified through a carbon filter to then leave the room to the rest of the basement.
Then I use that heat to heat the rest of the basement.
I will use 8 pcs 15 liter Autopots to grow with and a 100 liter water tank that supplies the pots of water and nutrition.
I will grow completely organically in soil and will watercure my buds to get the best possible medicine for me.
But there are no cultivation rooms to be displayed here, so I continue with what is most important.
Today I have put my seeds in my moisture dome and hope the seeds have germinated within a few days.
I am very excited to see how the new growroom will work and how this Blue cheese Auto from Royal queen seeds will turn out.
Blue Cheese automatic cannabis seeds are a cross of Blueberry Automatic and Cheese Automatic that has been perfected over five years of breeding and careful selection. The result is a feminized, autoflowering strain with superior yield, flavor, and effects to either of its distinguished parent strains.
THC: 16%
CBD: Low
Yield Indoor : 325 - 375 gr/m2
Yield Outdoor: 60 - 110 gr/plant
Height Indoor: 40 - 70 cm
Height Outdoor: 60 - 110 cm
Flowering: 7 - 8 weeks
Harvest month: 9-10 weeks after planting
Genetic Background: Blueberry x Cheese x Ruderalis
Type: Sa 35% In 40% Ru 25%
Effect: Cerebral and uplifting
Climate: Mild
..............................................................................................................................................................................................................................................................................................................................................
Update 2017-08-15. All 4 seeds have germinated and planted in small pots inside the humidity dome.
I'm so glad it worked so well and now it's just hoping they'll start growing and become 4 big healthy girls :)
...............................................................................................................................................................................................................................................................................................................................................
Update 2017-08-16. I have mixed my own soil today. Its 40% sieved peat harrow H2-H4 0-30 mm, 45% sieved peat harrow H4-H6 0-30 mm. 5% sand and 10% of compost soil. And i use 15% of perilite and mix it all together.
................................................................................................................................................................................................................................................................................................................................................
Update 2017-08.20. Nr1 and 2 grow and thrive.
Number 3 just got rid of the seedpod and is folding out the sheets.
Number 4 is a bit shy and can only be seen if you look carefully into the soil.
.........................................................................................................................................................................................................................................................................................................................................
Update 2017-08-21. Nr 1 and 2 is doing well. Nr3 is trying to catch up and Nr4 is still shy.
--------------------------------------------------------------------------------------------------------------------------------------------------------------------------------------------------------
2017-08-23. Transplanted 2 girls from humidity dome and the small germinating pots to 15 liter autopots. The other 2 girls have to wait a little more before transplant to the autopots.
................................................................................................................................................................................................................................................................................................................................................................................
2017-08-27. The girls have settled in to there new home of the 15 liters autopot after a little transplant chock. Now the real week 1 starts for me and the girls.
--------------------------------------------------------------------------------------------------------------------------------------------------------------------------------------------------------
2017-08-28. New pic and movies.
---------------------------------------------------------------------------------------------------------------------------------------------------------------------------------------
2017-08-28. Nr3 is transplanted in 15 liter autopot.
-------------------------------------------------------------------------------------------------------------------------------------------------------------------------------
2017-08-29. New movie of the girls. Its no water for 3 days now for Nr1 and 2 so the roots develop more and match the plant above the soil. The temp controlled fan is awesome, its easy to set what temp you like to have in the room. Right now its 28 celcius. And humidity is 56%.
------------------------------------------------------------------------------------------------------------------------------------------------------------------------------------------
2017-08-29.
Hello to you who read my diary, I just want to say that I am pleased that you have chosen to check in with me and in my diary.
I just want to say that I do this for myself and for a steady flow of my medicine.
Everything you read and see in my diary is 100% honest and I will never distort or beautify anything here.
I document my crops so that I can learn from my mistakes and also to look back at those different crops.
I try to update with pictures every day and with text if something special has happened in the garden.
This is my strainhunt for the best medicine and the beginning of my journey with cannabis and the cultivation of it.
-----------------------------------------------------------------------------------------------------------------------------------------------------------------------
2017-08-30. Cleaned the room this morning, just vacuuming and cleaning with chlorine solution. Im testing the fan to control temp and humidity, it works great.
Added some pics with measurements and movie. Everything is looking great right now.
---------------------------------------------------------------------------------------------------------------------------------------------------------------------------
2017-08-31. New pics and videos.
---------------------------------------------------------------------------------------------------------------------------------------------------------------------------------
2017-09-01. New pics and videos. Gave each of the girls with 2 ml Alg-A-Mic, 4ml Bio-Grow, 4ml Bio-Heaven and 10 ml Formulex mixed in 2 liters of water.
I hope they like it :)
-------------------------------------------------------------------------------------------------------------------------------------------------------------------------------------------------------------------------------------------
2017-09-02. New pics and the girls liked the water and nutrients yesterday.
-------------------------------------------------------------------------------------------------------------
2017-09-03. New videos of the girls this morning. Nr1 and 3 looks great and nr 2 is looking a little funny, maby a little stressed.
Kl. 16.00. Did some defoliation on the girls. Added video.
Kl.. 23.00. New videos, defoliation and leaftucking.
-----------------------------------------------------------------------------------------------------------------



Likes
50
Share


@DogDoctorOfficial
Follow
Week 6 Veg Report – Runtz We Meet Again!
Another week, another step forward in our Eternity Grow Cup 2025 journey, and oh boy, do we have a lot to unpack! These Runtz girls are showing their potential, and we’re dialing in every little detail to ensure they thrive. Let’s dive deep into everything that happened this week!
Cal-Mag Deficiency Adjustment – Pheno #5’s Special Needs
This week started with a close inspection of our phenos, and we noticed that Pheno #5 was showing early signs of a calcium/magnesium deficiency. Whether it was slightly off VPD levels or this particular plant being more demanding, we decided to correct it by increasing the dose of RO Water Conditioner. Now, while this isn’t a direct substitute for Cal-Mag, it does contain trace amounts that can help stabilize the situation.
🔬 Understanding Cal-Mag Deficiency:
Calcium and magnesium are essential secondary nutrients. Calcium strengthens cell walls, preventing issues like tip burn and weak stems, while magnesium plays a critical role in chlorophyll production, allowing plants to efficiently absorb light energy.
💡 Signs of Deficiency:
• Yellowing between veins (Magnesium)
• Rust spots on leaves (Calcium)
• Slow growth and weak stems
⚡ How We Address It:
• Slightly increasing RO Water Conditioner to see if trace minerals help
• Keeping an eye on overall nutrient uptake to ensure no lockout
• Monitoring VPD (Vapor Pressure Deficit) closely to optimize nutrient absorption
Let’s see how she reacts next week!
Branching Development – Pheno #2 Leading the Race
All five phenos are thriving, but Pheno #2 is showing the most aggressive branching, pushing outward faster than her sisters. However, overall, we’re seeing very uniform growth, which speaks volumes about the stability of these genetics.
🌱 What is Branching & Why It Matters?
Branching is the plant’s way of expanding its canopy, increasing surface area for photosynthesis, and maximizing potential bud sites. Well-structured branches allow better airflow, light penetration, and more even growth—key for a successful high-yield harvest.
⚖️ Topping vs. Leaf Bending – The Training Choice
Instead of topping, I’ve decided to go with leaf bending for now. This method allows for gentle manipulation of the plant’s growth without causing major stress. Once we introduce the SCROG (Screen of Green) net, this training will help maximize the canopy spread.
Moving to the TrolMaster Ecosystem – A Game Changer
Big move this week—our Runtz girls officially transitioned into the TrolMaster Ecosystem, and let me tell you, they are absolutely loving it! Under the ThinkGrow Model 1 LEDs, they’re thriving, leaves praying upward, soaking in that optimized spectrum.
💡 ThinkGrow Model 1 LEDs – Why They Work
• PPFD of ~400 µmol/m²/s at their level, running only on Channel One
• Full-spectrum lighting tailored for optimal vegetative growth
• Passive cooling design, keeping temps stable while saving energy
Environmental Conditions (Measured on the TrolMaster Tent-X and the AMP-3)
• Temp Max: 26.6°C | Min: 16.2°C
• RH Max: 77% | Min: 52%
• VPD Max: 1.65 kPa | Min: 0.43 kPa
• Solution pH: 5.8
• EC: 0.96
• Water Temp: 16.3°C
Why These Numbers Matter:
• Keeping VPD in check ensures efficient nutrient uptake
• pH and EC levels fine-tuned for maximum root absorption
• Water temp stable to avoid root shock and slow growth
Autopot System Prep – Getting Ready for the Next Phase
The week wraps up with us cleaning and preparing the Autopots for their next phase. These self-watering systems will allow the Runtz girls to access water and nutrients at their own pace, optimizing growth as we head into pre-flower soon!
A huge THANK YOU to Zamnesia, Plagron, and GrowDiaries for making this incredible Eternity Grow Cup 2025 possible! Also, a big shoutout to my main sponsors, thank you for keeping this journey running:
🔥 Aptus Holland – Precision nutrients for peak plant health
⚡ TrolMaster – Bringing automation and accuracy to the grow
🌱 Pro-Mix – The foundation of strong roots and healthy plants
💨 The CannaKan – Premium solutions for top-tier results
Grove Bags – Revolutionizing post-harvest storage & terpene preservation
📜 Ziggi Papers – The ultimate rolling experience
And of course, a massive thank you to the community—followers, supporters, lovers, and even the haters. You ALL fuel this journey, and I appreciate every single one of you!
🚀 Good luck to all fellow competitors—watching everyone’s grows is inspiring, and the competition is fierce!
📢 Join the journey on YouTube & Instagram for exclusive content, behind-the-scenes action, and more insights into this epic run!
👊 Let’s keep pushing, learning, and making history—see you all next week for another deep dive into the Runtz We Meet Again grow! 🌿🔥
💚 growers love to all 💚
Genetics - Runtz https://www.zamnesia.com/6000-zamnesia-seeds-runtz-feminized.html
Nutrients - Plagron https://plagron.com/en/hobby
- Aptus Holland https://aptus-holland.com/
Controls - Trol MAster https://www.trolmaster.eu/
LED - https://www.futureofgrow.com/en
LED - https://www.thinkgrowled.com
Soil - https://www.promixgardening.com/en
Germination - Cannakan https://cannakan.com/?srsltid=AfmBOopXr-inLXajXu3QFgKXCXXos4F1oEvScjMKIB5MR5dk8-GJ-F49
DOGDOCTOR 15% off
Smoking Papers - https://ziggioriginal.com/
Terpene saver - https://grovebags.com/
As always thank you all for stopping by, for the love and for it all , this journey of mine wold just not be the same without you guys, the love and support is very much appreciloved and i fell honored with you all in my life
With true love comes happiness Always believe in your self and always do things expecting nothing and with an open heart , be a giver and the universe will give back to you in ways you could not even imagine so
As always, this is shared for educational purposes, aiming to spread understanding and appreciation for this plant. The journey with nature is one of discovery, creativity, and respect. Let’s celebrate it responsibly and continue to learn and grow together!
Growers Love To you All 💚
#EternityGrowCup #RuntzHunt #GrowersLove #CannabisCommunity #AptusHolland #ProMixSoil #TrolMaster #Zamnesia #Plagron #ZiggiPapers #Grovebags


Likes
29
Share


@Myrcene_Dream
Follow
-Began flowering at the beginning of the week
-Watering every second day
-Will give a small top dress soon of Gaia Green all purpose
Likes
62
Share


@Reyden
Follow
Purtroppo le 4 gorilla 🦍 hanno delle carenze importanti e anche dei moscerini che girano nella terra e nelle radici, penso siano i moscerini dei funghi e se tengo le piante senza annaffiare più tempo loro soffrono perché gli piace l umidità e materiale organico di cui nutrirsi, ho sbagliato due settimane fa a preparare quella soluzione forse un ambiente troppo dolce gli ha richiamati…spero di non avere ancora più danni ormai le piante


Likes
17
Share


@herbalistssword
Follow
And same again, smooth week, they get 1 watering a week of about 6litres each.
The buds just keep getting more white pistils and the trichomes are smokey white, waiting to see some more amber in there and for the buds to swell up more.
The lollipopped plant seems to be the fastest.
I reckon another 2 weeks :S I might not have enough supply left and might have to chop a branch off early to keep me going.

Likes
41
Share


@UnorthadoxDude
Follow
Week 2 begins. Everything seems normal so far.
Day 11: Have produced higher quality images and a video.
Day 13: Growth accelerating.
Weekly Summary: Enigma is right where she should be, as yet showing no significant dwarfism.


Likes
15
Share


@Messypies
Follow
Sorry for the lack of uploading !
These plants have been perfect from the start. Budding out nicely and haven't shown any signs if defficiency.
All training has been stopped and I have started cutting back on the nitrogen for the 2 autoflowers.
The peanut butter cookies is growing to be very bushy so I have done some light defoliation to help with light penetrative to the lower canopy of the plant


Likes
7
Share


Likes
7
Share

@GREENPHOENIX6262
Follow
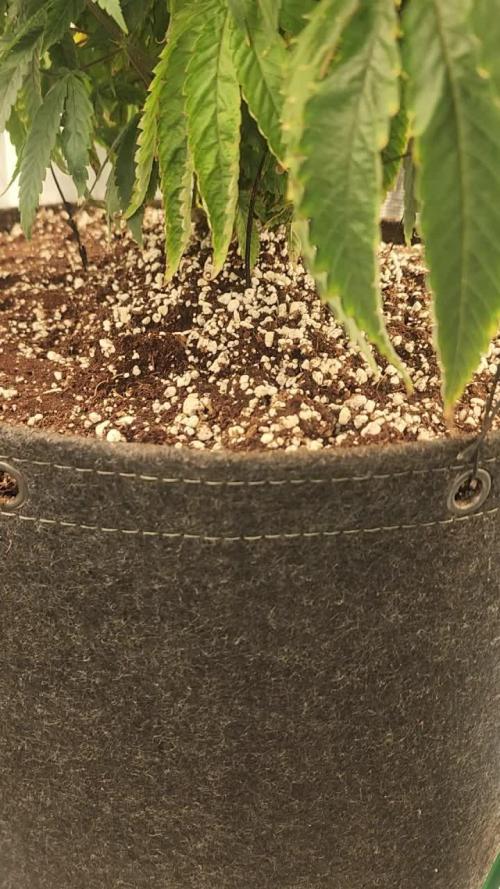
01/19 - Tied her down completely (HST) - full light coverage - running in 2x2 until clones in 3x3 are complete then transplanting into 3x3 - offsetting clean water and nute feeds.
01/24 - She got a little funky on me a couple days ago after the tent and light transfer, She is in recovery mode right now - She should be back to norm by Mon - Tuesday.
Processing
Likes
13
Share


@Canadian
Follow
the plans have been doing very well and despite being very hungry they seem to be doing very well I just need to start feeding them instead of once a week probably twice a week because they are very hungry now that they are in full flower mode .
thank you for reading I will continue to update have a happy grow
