


Likes
Comments
Share

@Snugens
Follow
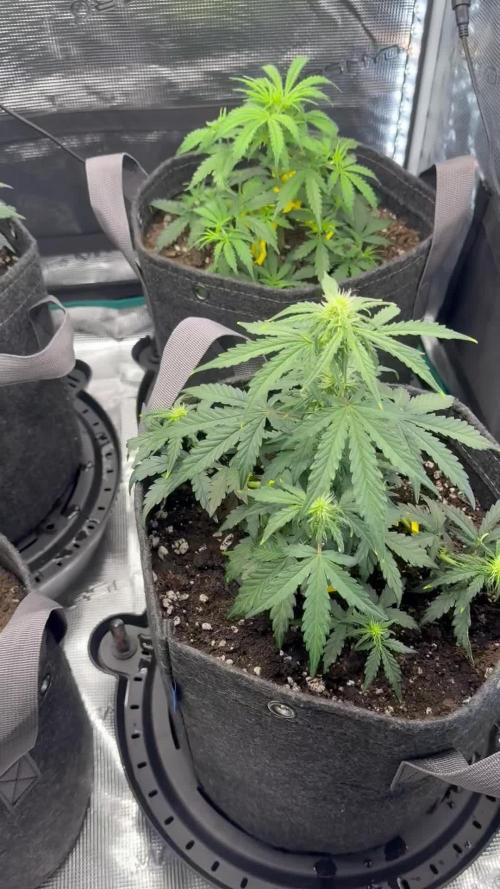
This was a big week for the girls. We added our bud trainer clips updated the light to the EVO4 and they all seem to be doing really well. I also added some black strap molasses into the regimen to get some thick budz and nice resin. Starting to actually smell some smelly smells but the smells are tooooo smelly. All things said and done it’s going as it should. Another week down. Doobz up growmies

Likes
2
Share

@Weed_Wizard
Follow
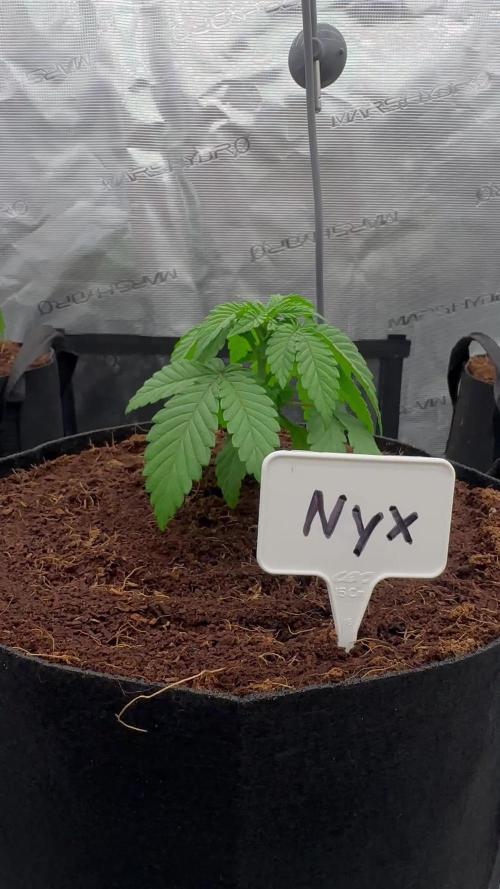
The girls are doing well so far. Advanced nutrients in combination with the Lumatek Zeus 600W Pro 3.1 is a killer combo. Also the coco substrate is working well so far. I placed them in bigger pots today . 🌱

Likes
42
Share


@GanjaReaper
Follow
This week was a very cold week. 13 to 18 degrees during the day and at night like 10 to 13 degrees.
Therefore the buds didn't swell properly. Luckly one Critical Kush is still swelling but the other one seems to have slowed down.
It's oke, i knew this would happen and the kushes might not finish in time.
Might harvest my Shamans at the end of the month. The kushes I will keep until half/end oktober.
Since this is only a outside fungrow, I'm not making any effort to heat up the climate by putting heaters arround the plants.
Critical Kushes are in their 3th week of flowering.
Somehow GD minimalize the videos after putting 10pictures on the diary, Just click on the next picture and
click on the right arrow to go to the videos.
Have fun looking arround :)


Likes
12
Share


@SiriusBlack117
Follow
They’re finally doing their thing. There’s a little smell in the tent now, not crazy but definitely there. The cold temps definitely have them using way less water and nutes but they’re still doing ok despite lights out temps in the 40’s. The Green Crack has gone from the most to the least impressive in my opinion although I’m still looking forward to trying out the flowers. The gelato has blown me away, you’d never know it was 2 weeks younger than the others besides it being a little behind on the flower. Hoping to chop these ladies next month, thanks for hanging out with me for this run, bud shots coming next update!

Likes
66
Share


@GODSGIFT_2005_JM
Follow
Powder: GREENHOUSE BIO FEEDING Line which are organic!
For LIQUIDS ******GREEN BUZZ LIQUIDS***** also organic.
Also i’m using their LIVING SOIL CULTURE in powder form!
MARSHYDRO ⛺️ has large openings on the sides which is useful for mid section groom room work. 🤩
☀️ MARSHYDRO FC 3000 LED 300W
☀️Also special thanks to VIPERSPECTRA P2000 (200W) & XS2000(240w) LED growlights
💨MARSHYDRO 6” in-line EXTRACTOR with speed-variation knob, comes complete with ducting and carbon filter.

Likes
82
Share


@BigBadLion
Follow
Hey all! 👋
Remember last week when I said Falco was getting some chlorosis? Well, the first photos show how bad it is (or was) but the plant is "old", she was quite special as a young plant and her main leaves are doing well so I suppose what is happening is just something normal or maybe some other weird factor... might be affecting her, but more probably I'm just way too worried. In my confusion I added 2ml of Green Grow (which is the growing fertilizer I previously used) thinking that she needed the extra nitrogen but in the end it seems it was unnecessary (as it's a normal process of the plant), I just removed the old leaves and left her to be. 😝
Besides what I previously said I saw a lot of bud progress this week (and I tried to picture all that! 😋). There are plenty photos of the same flower (most of the times!) showing how trichomes were constantly appearing during this week.
Next week I'll be adding some extra Potassium and Phosphorus and I hope those products will help my babies to get bigger buds! I also made a video at the end of the week to show how my plants look at a normal speed plus two time-lapses. There are also some photos I took with my DSLR and an inverse ring just to see how the plant would look... and I think they look amazing! 😍
Anyway, I hope you all like the photos and thanks for reading! 👋

Likes
5
Share


@Chucklebrother1
Follow
Still stretching but also flowering nicely, started her on advanced nutrients big bud today at full strength along with Ionic grow just for the last stretch. Bit worried about the EC so might drop BigBud down to half if there's any burning tomorrow fingers crossed she's fine.
Likes
4
Share


Likes
14
Share


@Zeven_Xero_Fyve
Follow
.
End of Week 12 (Day 84):
She is doing good and unmistakably into flower. I've moved nutrient ratios into bloom and she's showing no sign of burn or distress from it. Leaves are filling up with trichomes and getting sticky. The smell in the tent is quite delicious, a candy aroma of cherry blasters and citrus, with a mild skunky undertone. I can see why this 2.0 gets rave reviews from growers.


Likes
11
Share


@Chubbs
Follow
420Fastbuds
FBT2303 Week 1
Week 1 of the start of veg for these 2 FBT2303 plants. So far I've switched to 18/6 light cycle and keep a 75'f day temp with a 65'f night time Temps. I give them 500ml of straight well water every other day. I did to a pm spray and didn't realize my lights would be coming on as soon as they did. Lesson learned it'll burn the leafs. 😆
All in all Happy Growing

Likes
51
Share


@Seldom_Seen
Follow
Day 1: I got two of these Sweet Gelato seeds free from @Zamnesia. I’m only planting one at the moment . I’m really excited about growing it. I’ve really loved any Gelato I have tasted. I have my substrate prepared and my veg space is ready to go. I have put the seed in Ph’d water for 24hrs first and I will add to the soil tomorrow night. I’ll wet the soil down tomorrow morning with Ph’d water and I’ll put it the veg space with the lights on to warm up the soil before adding the seed.
Day 2: Seed has been moved into the substrate and pot is now in Veg Space under 40watt CFL bulbs but once the seed germinates I will switch on the 200watt CFL. This is my least favourite part of growing, the wait for the seedlings 🌱 to break through the soil. I’ve planted the seed to one side of the pot as I find this makes LST easier. The plant will be spending it’s first 2 to 3 weeks in this veg space while I wait for my Purple Punch to finish in my main grow space.
72hrs Later: Houston we have lift off 🚀
The seed first started to peed through the soil after only 48hrs. That’s the fasted I’ve ever seen, hopefully it’s a sign of things to come. Leaves still haven’t opened but it’s fully above ground now.

Likes
12
Share


@iHateSativa
Follow
Day 29 of Veg
Watered once in the past week
Defoliated large leaves
Plant 1 = 8 inches
Plant 2 = 10 inches
Plant 3 = 8 inches
Likes
34
Share


@gottagrowsometime
Follow
7/5/22 VD8 Coming along ok. Hoping for much better growth this week after starting a negative pressure environment I'm hoping this will increase co2. I'll monitor her for now and keep your on the same ppm/EC. I'll be taking away Artios Touch for this week and adding Atlas. Maybe during the week I'll increase PPM.
9/5/22 Up and coming plans. I'm going to top 1 of this in the coming week. Also I have a few ideas to help out in the pre flowering stage and have sorted out a temp controlled (AC intake fan). This will enable me to turn it on for 5mimd out of every 30 and pump cold 18c air into. I've also turned the light from 65% - 87.5%. Holding that lil bit of an extra kick for preflowering given with as much co2 time I can give them in their new homebox ambient 150+ 150x150x220 will allow me to go big and will widen in most areas what I can do with these girls. I'll be keeping a 50x50 space free in my tent for the 20l dehuimifier that will be running in the tent with my 800m3 6 inch EC/TEMP C9NTROLLED PRIMA KILMA intake fan will be turned on, by request OF the new automated dehuimdifying/temp controlled area which will allow me to grow in high co2 environment for at least 25 mins out of every 30. It'll all depend how quick my 3 co2 bags can bring up the ppm. And I'll only be doing this for preflower only then I'll go back to a negative pressure environment
15/5/22 Great week for growth. Had a look at the ends of the pots and roots where coming out of the end of the holes. Days ago. Hmmm, I'll only know if I waited too long if they stall.
16/5/22 So, as I suspected, both pots were root bound. Had to break up the soil instead of putting right into new pot minimising shock, sadly that's not gonna be the case, expecting considerable shock as I had to break up the soil, not fully but enough so roots will hopefully grow down. At best it'll set me back 2-4 days at worst 1-1.5 wks of a stall.
Likes
16
Share


@CannaTrope
Follow
I tried to tie down and make an even canopy with FBT2311 and 2312. These two plants are now starting to fill in nicely with pistils and hopefully are nearing the end of stretching
FBT2313 is a very stout plant. I beleive that my lights were turned too high and the fan blew too hard, causing a phenotypic response. Much further into flower development then 2311 and 2312. A much smaller plant means ot needs less nutes, but the soil was amended with organic inputs at the beginning of the grow and I didn't cut back on supplement feeding enough, so it seems to have more P and/or K then it needs. I did not need to tie down but I used the trellis as a way to open the canopy some for air flow and light penetraion.
FBT2314 ended up slightly larger and stretched a little more then 2313. Flowers are developing nicely and some signs of deficiencies and possible light burn. Otherwise going pretty good. It's difficult to trim the back part of the grow tent so I am letting these ride and see what happens.
Likes
16
Share


@Lol_You_Looked
Follow
Starting to see some more amber, but minimal amounts. Definitely seeing the trichomes turning milkier though. Might end up cutting the plant down in half, maybe a week and a half tops, she's been going for sooo damn long.
It's day 119 and we decided we're gonna take it down this weekend, the 19th of February will mark the 17th week since it first sprouted, so what better time to chop!
We're also going to go the fridge dry method and then cure in Grove bags, hoping for some real nice smelling buds after all this.
Processing
Likes
1
Share


@sandro20
Follow
got my dehumidifier delivered, set it up today, I'll see if it works.
Likes
4
Share


@Trinidad
Follow
10.04.25 day 38. Plants are progressing nicely. Decided to defoliate today. As stated previously I mixed up plants so don't know which is name is for what plant. I think plant in back is chemdawg as it has a grow time of 9-10 weeks while other have 8-9 weeks. Both plants in front are more sativa so maybe tropican cookies. The struggling plant had purule stripe in flower so maybe banana purple punch or lemon cherry cookies. Will continue observations and try to figure out name.
Likes
241
Share


@Tropicannibis_Todd
Follow
💩Holy Crap We Are Back💩
Well i took the summer off to do some outdoor but thats all done so , we are back indoors and at it again 😁
So super happy to be trying this one out , can't wait😝 .....I'm really interested to see what kind of terps and colors we may get ..👍
We are 7 days from seed and everything is good to go .. 👌
Lights being readjusted and chart updated .........👍rain water to be used entire growth👈
👉I used NutriNPK for nutrients for my grows and welcome anyone to give them a try .👈
👉 www.nutrinpk.com 👈
NutriNPK Cal MAG 14-0-14
NutriNPK Grow 28-14-14
NutriNPK Bloom 8-20-30
NutriNPK Bloom Booster 0-52-34
I GOT MULTIPLE DIARIES ON THE GO 😱 please check them out 😎
👉THANKS FOR TAKING THE TIME TO GO OVER MY DIARIES 👈
Likes
17
Share


@m0use
Follow
This was a fun project that was a few years in the making and a year later to see if they would last a season for this upload to happen. Before any of this I would bike aorund town grabbing up all the old Ikea solid pine bed slats that I could find and storing them in the basement. I have a lot of wood down there, any size worked as long as I have enough of them. The hot days to find them were the first and last of the months because that's when people where moving in/out. I also kept an eye on the free section on local online classifieds as well. The entire purpose of this was to recycle as much off the streets as I could before buying anything to finalize the project. In the end I only bought sealer, screws and some takeaway/beers. All the wood was 100% free and salvaged off the streets of Toronto saving it from the dumpster bin.
After collecting all the slats for about 2 years I was playing aorund with them on how I wanted to make this work. I had previously done a little project like this before but I messed it up and the boxes where crap. did not last longer then 2 seasons, they where thin and shallow as well could not grow much of anything in them. I Was talking to my friend who is renovating their house and we brainstormed some ideas on the boxes, I found some designs I liked online and said lets make something like this out of what I have here. We tossed out a few of the design features when looking at them as it would have been wasted wood and extra work not needed. If I had more wood them maybe it could have been an option but simple was the name of the game. They taught me what I needed to know like how the miter saw and sander worked, plus all the other tools I was using. They did help out with a table saw and creating the triangle support joints in the corners, They used some pine left overs they had while making a staircase indoors. I did not feel up to the task of using a table saw given all the relatives I know who have lost a finger to them.
In the end we decided the design would be three boards high and take an alternating pattern on corners. layer one short, layer 2 long, layer 3 short. Went with a galvanized and painted deck screw so it can take the weathering. Ran into some problems like making everything level as some of the boards were warped and other ones had undesired aspects like knots and tacky sticker goo I could not remove. So I used them for the base that will not been seen so much. Clamped everything down and called it a day.
Once it was all done and over with, I then brought them back home from my buddies work garage and started to seal them. I went with a boiled linseed oil as its a food safe option should the wood degrade into the soil I will plant in them. I will need to reapply it to the boxes year after year but the main coat is the most important one and I put it on 3 layers with a good dry in between coats. the inside of the boxes that where coated did not degrade at all as the sun did not hit them so it will not need a new coat just the outside. Overall the end result was very impressive for myself, I've never taken a woodworking class ever and It was a near perfect outcome for me. Heavy Duty Planter Boxes for all my gardening needs. I made a last min decision to add in a plastic liner to preserve the wood even longer and stapled that into the frame. it has held up quite well and may need replacing end of 2nd or 3rd year out in the sun. Used a thick moisture wrap plastic with UV protectors in its formula.
Lets see what I can grow in them this year!
m0use's haus of projects - garden box edition
Likes
10
Share

@FPVGROWCZ
Follow
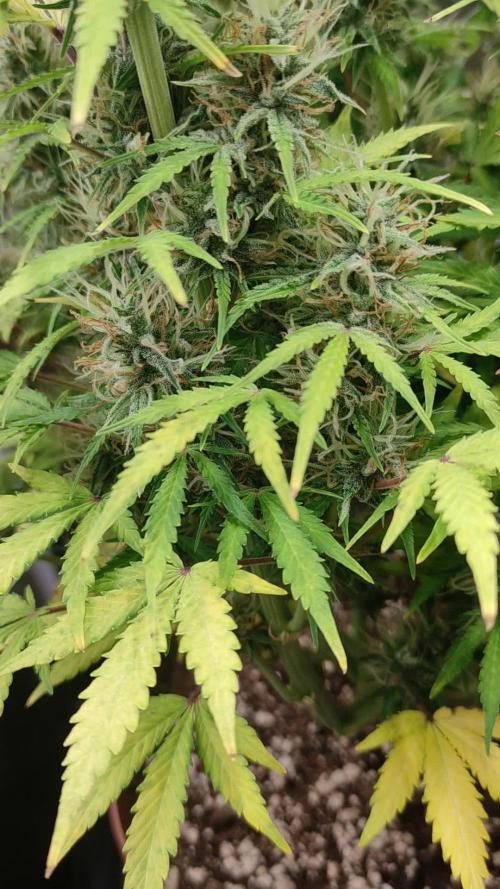
Ahoj. Holky krásné kynou a voní neskutečně.
Po dalším týdnu bude následovat proplach a snad už kosábo.
U Crystalky každej den čekuju trichomy. Už je tam dost mléčných, pár jantarů.
Zkittlez voní opravdu jak ten sáček bonbónů.
Ta má zatím všude jen čiré trychomy.
Potřebuji aby už dojely abych mohl zvýšit vlhkost pro LemPayu 😅
Zdar všem a ať to roste 🥦