Likes
Comments
Share
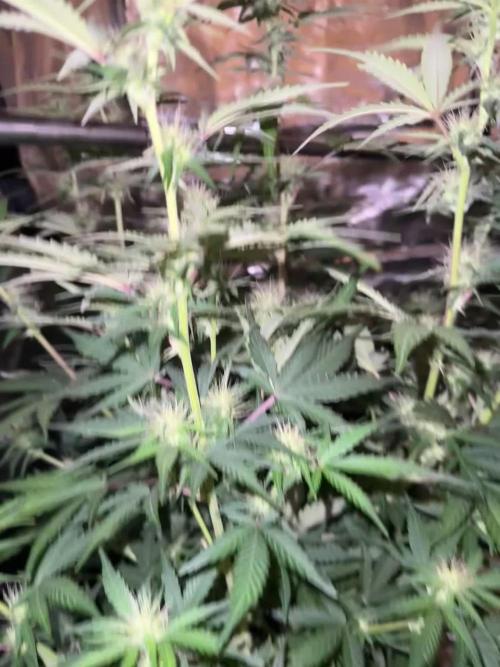
Welcome to Flower Week 2 of Fast Buds Blackberry Auto I'm excited to share my grow journey with you from my FastBuds Project . It's going to be an incredible ride, full of learning, growing, and connecting with fellow growers from all around the world! For this Project , I’ve chosen the Feminized Auto strain Blackberry : Here’s what I’m working with: • 🌱 Tent: 120x60x80 • 🧑‍🌾 Breeder Company: Fast buds • 💧 Humidity Range: 60 • ⏳ Flowering Time: 9-10 Weeks • Strain Info: 23%THC • 🌡️ Temperature: 26 • 🍵 Pot Size: 12 • Nutrient Brand: Hy-Pro • ⚡ Lights : 600W x 2 A huge thank you to Fast Buds for allowing me to try my Best with this amazing collection from Automatic and Photo Strains they managed to Sponsore . Big thanks for supporting the grower community worldwide! Your genetics and passion speak for themselves! I would truly appreciate every bit of feedback, help, questions, or discussions – and of course, your likes and interactions mean the world to me as I try to stand out in this exciting competition! Let’s grow together – and don’t forget to stop by again to see the latest updates! Happy growing! Stay lifted and stay curious! Peace & Buds!
Likes
60
Share
@Roberts
Follow
Alaskan Purple auto is doing good. She had a solution change. I also trimmed out the bottom of the plant today. While doing some selective defoliation in the canopy. She is doing good under the Medic Grow Mini Sun-2. She is stretching now, and should start developing her colas soon. Thank you Seedsman, and Medic Grow. 🤜🏻🤛🏻🌱🌱🌱 Thank you grow diaries community for the 👇likes👇, follows, comments, and subscriptions on my YouTube channel👇. ❄️🌱🍻 Happy Growing 🌱🌱🌱 https://youtube.com/channel/UCAhN7yRzWLpcaRHhMIQ7X4g
Likes
8
Share
It's Day 54 Week 08 0f Flower For My 02 Kombucha Cream by atlasseed . And For My Snow White and SpliffStrawberry by Spliff Seeds Amsterdam . So Today I Started My Day By Checking My Tricomes On My 2 Kombucha Cream. The 02 Where Looking Fully Milky So My 02 Kombucha Cream Got Flushed TODAY with Some Flawless Finish by Advanced Nutrients . The 2 Received 80ml of Flawless Finish mix with 1OGallons Of Water Ph at 6.0. Tomorrow they will get Rinse off with ph balance water. Yesterday I watered my Snow White and SpliffStrawberry Ppm where down to 100ppm. All 4 Plants will get a nice ice bath in a few days. My plan is to check the Tricomes on the SpliffStrawberry In a few more days she was still Milky when I check her yesterday. I will chop her down next weekend. And the rest will get the chop at 30%Amber Tricomes. Happy Growing Growmies 🤘🏻
Processing
Likes
4
Share
Deviam estar maiores os brotos para o tempo que tem se floração, mas por causa de stress a mais e eu ter estado ausente atrasou bastante.. mas nada q o revive da advanced nutrients nao resolva cm tempo nada esta perdido.. Foi dia de lolipoing nas mais desenvolvidas mais uns dias e faço na mais pequena tambem
Likes
8
Share
She got her first feeding today. Will likely be only feeding with grow big, potentially 1 more, then switch over to tiger bloom. Everything seems to be going smoothly. Video/photos taken 35 days after breaking soil.
Likes
5
Share
@Lazuli
Follow
She has smaller flowers this time but more dense, purple fade at the end that indicates shes very blueberry
Likes
4
Share
I can't believe how big she has gotten for surviving in just a solo cup! Kinda opens doors in my mind on ideas for gorilla grows at low cost (only takes 1gal to run vs 3+ in a normal dwc bucket). I'll be honest and admit I've made the biggest rookie mistake and overfed, I knew I was really pushing her and wanting to see how far I could actually take her and burnt her tips in the process. The new growth is still green at the tips by the buds which is promising. I lowered her nutrient uptake slightly by 1ml for each base nutrient and gave a little less than 1/8 tsp of bloom booster. She got pretty tall and therefore top heavy, so the one afternoon I checked her and she was tipped over but no breakages, which was awesome. I tied her to the ceiling of the tent and now she is going nowhere. Been removing lower leaves and small growth that isn't showing sex yet. Once the colas have pre-flowers I remove all lowers that don't to help send energy upwards. I'm still seeing evidence of what I believe is rust fungus, though its growth has become much less noticeable than a few weeks ago.
Likes
Comments
Share
@ctm_dzagi
Follow
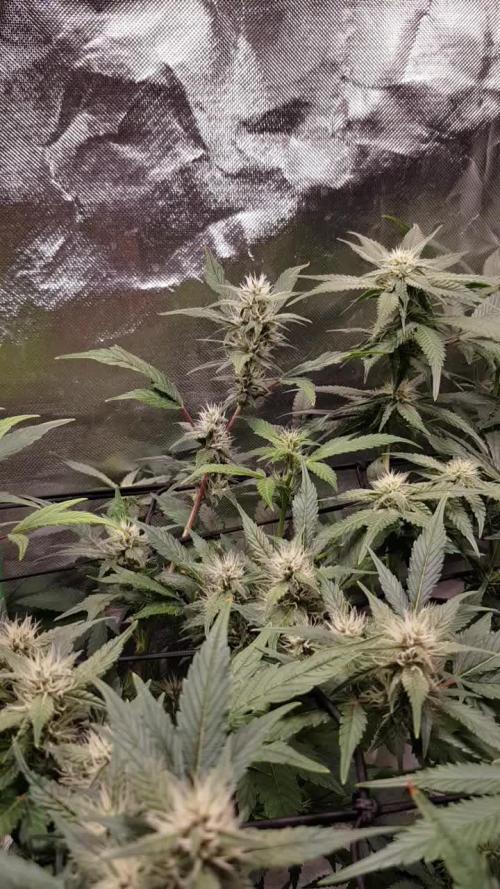
**Strain:** Sour Puffs photo fem by Doctor's Choice The name says it all: a sour, aromatic strain with a smooth and pleasant smoke. **Genetics:** Northern Light × Sour Diesel × Thailand Sativa A sativa-dominant hybrid (approximately 65% sativa). **THC:** High **Flavor:** bittersweet + diesel + apricot + citrus. **Effects:** balanced — first comes a light uplifting and energetic feeling, followed by calmness and relaxation (described as “floating on clouds”). Sour Puffs is a photoperiod hybrid with a slight sativa dominance, known for its fast growth. The plant grows like a typical hybrid: medium height, with uniform stems and numerous side branches. The buds are elongated, dense, and rock-hard, with a distinctive sour aroma. Flavor & Effects One of the defining features of the feminized Sour Puffs strain is its distinctive taste and aroma. Its unique terpene profile provides a smooth and enjoyable smoke. Sour Puffs has a strong bittersweet aftertaste with a tangy citrus edge and diesel notes. Despite its distinctive flavor, Sour Puffs is undoubtedly one of the smoothest and most refined strains in our catalog. Growers who appreciate a rich and complex flavor profile will certainly appreciate this strain. Sour Puffs has high THC levels and delivers a balanced combination of a head high and a relaxing stone effect. From the first inhale, you can feel an uplifting rush of energy and a mild psychedelic sensation, creating the feeling that you are floating somewhere among the clouds. Soon after, a relaxing stone effect sets in, gently carrying you toward a state of peace and relaxation. Sour Puffs is an ideal choice for an enjoyable daytime smoke, offering a diverse range of sensations and emotions. Thanks to Sasha Doctor's team for the generous gift! Considering full-time work throughout the day and living in an apartment in a major city, it is difficult to imagine any outdoor grow that could be genuinely practical and responsible. In this case, the only option is to pretend to be part of Babylon while remaining invisible in plain sight. In my view, the answer to this riddle is a stealth micro-grow built into a PC case, since this form factor provides a perfectly plausible explanation for the presence of ventilation. Moreover, by using an all-in-one PC or concealing the actual PC components, you can seamlessly integrate the grow box into the observer’s everyday surroundings. Even the fact that the case is closed and its internal components are inaccessible is completely justified and beyond suspicion by the simple fact that the key has not been lost (a much more plausible story than a humming cabinet or a locked refrigerator). Grow box dimensions: External: 67 × 20.5 × 54 cm / Usable volume: 50 × 20 × 43.5 cm. The lighting is controlled independently for each of the four channels via an iOS app. The cooling fan speed is regulated through PWM controllers with temperature sensors according to predefined temperature settings. The lighting system and the grow chamber are equipped with two independent ventilation circuits and are completely thermally isolated from each other.
Likes
15
Share
@valiotoro
Follow
Easy trim✂️ As always first the top buds then after 7 days the lower buds✂️ The smell is divine citrus & ripe cherry super sweet🤤🍋🍒 Imagine if you mix a scoop of amarena & lemon sorbet gelato and you have the smell!
Likes
7
Share
Another boring week in flower. One of the indigo childs is fading to yellow. Checked the trichomes and I'm starting to see some ambers. Will probably wait till 7.5 week. The rest of the indigos will probably go 8-8.5 weeks. The medipak needs a lot more time. Not a resinous as I would have liked to see at this point. But I have a feeling that it might be my fault with not providing them proper environment for a sativa. I also suspect there might have been a fungal issue from the medipak tent as one suddenly died. Classic fusarium. We shall see with the others.
Likes
18
Share
First day went as expected. I put the paper towel in a small see-thru plastic container and put it on the table. With a bit of water and the seeds in side, the germination has now started! Day 2 no progression, moved the tray into my furnace room (pitch black and warm) Day 3 major progression. I got them out and started to prep the jiffy pellets. Shortly after I transferred the roughly half inch tarp roots with seeds into the jiffy pellets, root down, seed up, slightly covered with dirt. I soaked them in water (like a beginner i overwatered heavily knowing what I know now). I placed them back in the tray and put them at a window for light. (Note) the plan was to do outdoor so no light or tent was ordered at this point. Day 4-7 not much progression seeing as the clouds and rain showed up...
Likes
220
Share
These had a pretty good life. I actually only fed NPK the one time . Germinated them in a Zambeza propagator, i really recommend getting one of those propagators, they're reusable and really take the heat off those first days when you're sweating. Pooped them into their plugs they sprouted out strong, germinated 5 kept 3. transplanted them no problem. Veged these for 4 weeks, then they shot up. during veg they stretched out a bit early on i should have been giving some specialised micro i had on had but for some reason on the other i didnt. They needed extra support for their first three weeks, so i decided to LST them around week 2. Two camping hooks one anchor for the main stem and one to keep the plant down. Once i dialed in my lamp to plant distance they benefitted by slowing down on the stretch a bit. they all took to LST extremely well, bushing out and creating an nice even canopy. They pushedout these thick indica leaves, one of my plants was a lighter colored leaf pheno, the vertafort one. The Six Shooter genetic really stretches, if just off the top of my head it seems that the plants quadrupled in size over an 8 week period, completely eclipsing their neighbours and creating a thick dense canopy throwing shade down below. Each turned into a bush with three or more mains sticking out the top by week 6. IThe results start to look real pro around week 8. Before that though I hadn't been defoliating. This and simple lack of light means that I had loads of undevellopped colas. If I'm honest I should have tried to harvest in stages but by colas. Anyway these kind of grew like a gorilla glue but with much different and much better flower structure. The plants started pushing out flowers and pistils and preflowers etc early, but then took a while to gear up towards towards getting fat. The flower branch out in a spiral pattern up and down the main and secondary colas evenly, creating this misssile shaped colas, but they branch out once sometimes twice, which means less branch to nug ratio than a gorrilla glue by a full multiple. They started smelling like lemons around the time they were fattening up. Then they started getting buff, really little by little, what did rippen rippened evenly. Some colas was basically waste especially the colas stuck on the sides of the tent and some of the colas where for some reason or another there was no light there due to the dense canopy. Truly a BEAST OF A PLANT, HIGH POTENTIAL, great BRANCHING, if you look carefully each plant has more than a dozen colas, Timed it so the harvest was on a day the plants were chock full for plain water after ten day's worth of additive aided flushing. hung to dry slowly in the tent, got it around 55RH inside the buds over 12 days then trimmed and jarred in miron glass with boveda 62. The trim was a great experience, took a while but not that long because the flowers were so nice in the way they are. you do have to trim every sugar leaf one by one though if you're doing it by hand, broke these sizzors that @Mrs_Larimar sent me because of the resin lol. so I pull these plants out my tent and I just kinda look at them and they're basically dark green because of all the sugar leafs, i'm thinking to myself "shit i messed up this isnt even that frosty". well, what i found out is every time i clipped one of those trademark long sugar leafs off it revealed absolutely resious white frost. That's what can keep someone motivated. ! Once jared, if there's boveda in your jar, you dont really need to burp it daily, or even weekly i just let it sit there, obviously i've been smoking it and following the cure, let me tell you this one needs longer to cure than you're used to maybe, at least two more weeks of cure after a slow dry. Four weeks after the chop , it's a strong weed ! Didn't smell all that loud, but I have a 1300M3/H exhaust so... i'm not surprised. I will say though that my neihbour said she could smell weed even when I wasnt home and she could smell weed in the corridor, from the times I was trimming and basically every time I open my jar. Gonna need a new carbon filter for the next grow. I retired my lightbulb too. Hard to put my finger on the taste because the smoke is so smooth, and when i saw GD had a tag for Woody, i knew right away this was that taste i felt. I will say this though, cure this correctly, dont rush, dry it real slow, then cure it, citrussy tastes, usually those will evaporate, leaving this distinguished terpene heavy hitter much better tasting. So what can i tell you, this weed is white weed, so frosty. Bag appeal is great too, this strain pushes out pistills like no other, maybe even more than the gorilla glue. that means this is a chill weed right? One of the phenos I grew had more pistils than the other two. Mr. B's did, but i dont know if you can really tell from the close ups, i'll try to put some more pictures up. I got two maybe three phenotypes in terms of taste. Mr. B’s is much pine-ier than the others, and when the joint goes out and you light it again, it’s even more piney … I’m actually really happy about that reminds me of white rhino from the east coast back in the day but way piney-ier than that even. When you smoke the other phenos the smell is incense and the taste is really really smooth & woody. Sometimes I find different after tastes on the exhale like coffee, pepper, and maybe sweet/fruity sometimes too depends on the pheno I'm toking on. It is LOUD THOUGH, always have a spare filter on hand IT’S NOT WORTH IT get it ! Well at the end of my first grow, i'd like to quickly review all of Bulbi's own : Bulbi"s Own Early VegMicro: Fine green powder with calcium and all the rare metals in it. I didnt use it ! Damn, next time I'll amend my soil with it like i did this time on the FBT1 Bulbi's Own Cal Mag : Organic fine white powder with calcium and magnesium, i used it in the feed and sometimes as a spray. I didnt know how much to put in because these things dont come with instructions so i ended up putting 1/4 doses most of time. The correct amount should have been 2.5G/L. Bulbi's Own Flower Micro : Organic fine beige powder that I used mixed in with the sulfur. I think this one's a keeper, really helped my plants make it through the stress of bottom feeding and all that heat. Bulbi's Own Mag Sulfur : Organic fine red powder that I used mixed in with the Flower Micro I used this one in my spray too , to great effect, in my opinion Bulbi's Own Beneficials Trio : This was the base beneficials mix I had, you need to put 7.5 to 15g/l , watch out for clumps, use at the night fall, or when still dark. Bulbi's Own Anti Afid : I threw it in there i think just in time to protect my plants when I intentionally overwatered when I went on my trip. There were some white flies that emerged, because... well that's what they do isnt it. but there were just a few of them and they ended up flying around wierdly, and within four days, no more white flies, didnt even use yellow sticky tape ! You mix this one with the trio for even more effect. I used these in a spray I think , also. Bulbi's own Anti-Worm : This one is more directed against larvae, and can be combined with the base trio. I was weary of using it, but I'm glad i did to give my soil matrix that full spectrum of biological protection. Bulbi's own Humic Acid : This one i loved, looking back I'm regretful not having used it more. the dry humic acid is a great experience, the quality of it was impressive, clumps would seperated into more clumps ad infitum the feed slowly turning completely ink black. definituely using this once a week from now on Bulbi's own Amino Acids : this one is just amino acids, maybe next time I'll use it at the same time as the humic acid, but I'm not 100% on that. What i did do was spray the top layer of the soil with amino acids when I accidently ran into some issues from spraying kelp all over the place. So in that sense it's an absolute life saver and a must to have on hand. Bulbi's Own Kelp Extract Concentrate. Loved this one too haha, so thick, and green, check out the video of when i pour it lol. Worked great, raises the pH some so be careful, i used this one as a sprat aswell to get those plant growth hormones pumping during the seeding and veg stage. Bulbi's Own CO2 : well part of what I set out to do was to test the CO2 theory. Like roots do absorb CO2 but at a lower efficiency than leaves say 15% vs. 85% the theory being enriching your water or feed with CO2 would ultimately benefit the plant. So i enriched water with these ceramic based co2 tablets, because CO2 is a soluble gas, it stays in water. Then i fed the plants in this manner in the feed and also as a spray. The idea behind that was that co2 enriched water would come in direct contact with the plant allowing for absorption of some quantity of CO2 through the leafs. Someone explained to me that these are actually old school techniques. Well I know i started late and didnt follow a regular schedule like i wished for but the plants didn t die, or show any immediate negative upon innoculation, so what can I say? I'm doing this again, perhaps. Only problem is that these things are really a pain to pH correctly General Hydroponics Dry pH Down : GREAT PRODUCT, hard to find but amazing – not registed on GD for some reason I still have to make my bubble hash so any advice welcome ! 🚀
Likes
5
Share
Looks absolutely gorgeous, again I'm dealing with some fungus gnats and that's why it's full of yelllow sticky traps everywhere guys haha, the smell is now starting to be very noticeable It's pretty sweet and at the same time kind of spicy and herbal, let's see how this lady keeps developing her beautiful flowrs, stay tuned guys!! 👨‍🌾🔝
Likes
27
Share
@WestOzzie
Follow
Smells strongly like pepper and mandarin,start to thicken up now,3 maybe 4 weeks left,have about 1 week of perfect weather coming, have trimmed off the really tiny buds to focus the growth on the big ol nugs
Likes
18
Share
🌸 Week 10 – Gorilla Cookies Auto Pheno Hunt Another week has passed, and the girls continue to impress with their flower development. 🌸🔥 The canopy is filling out nicely, and every pheno is putting more energy into building bigger, denser buds. It's exciting to see how each phenotype is expressing its own unique characteristics as flowering progresses. 📈 Current observations: Bud development has been excellent across all six phenos. We performed another lollipopping session and removed additional fan leaves to improve light penetration and airflow around the buds. The canopy is much more open now, allowing the lower flower sites to receive more direct light. Pheno #6 continues to surprise me. Even though it was the slowest plant in the beginning, it is now steadily developing its flowers and catching up nicely. Pheno #4 is already showing a very unique terpene profile. It has an incredibly sweet aroma with strong Kush-like notes, making it one of the most exciting phenos so far. 📊 Current environment: Temperature: 31°C Relative Humidity: 63% VPD: ~1.66 kPa SANlight fixture at maximum height Light intensity: 90% 🌿 Looking ahead: The plants are now entering one of the most exciting stages of the grow. Over the next few weeks, the flowers should continue to swell, resin production will increase, and the terpene profiles will become even more pronounced. I'm really looking forward to seeing which phenotype delivers the best combination of structure, aroma, and overall flower quality. 💬 Which pheno would you keep as a mother based on what you've seen so far?
Likes
52
Share
OVERALL: ~ Very happy with the grow, I really dialled everything in well this run. ~ She grew super fast, I put it down to the constant oxygenation of the rootzone along with consistent and constantly optimized light DLI and leaf to air temp variance. The extra Co2 helped push the plant to its limit in terms of heat, allowing it to push its hardest. ~ The lack of HST and Defoliation I feel let it finish faster due to lack of stress and stunting. The faster finishing time along with the big yield and efficient MarsHydro light, it hugely reduced my electricity costs per gram and freed up space much sooner for the next plant. ~ Turned into a very dense bush of buds, there is even smokable dense buds at the base of the plant due to the under canopy lighting (Not as dense as top canopy buds but still decent) ~ Ran a thin line between stressing the plant and letting it flourish. The buds came out big and very dense, also it's hard to see on camera but they're very frosty too (Prob from UVB) YIELD: ~ 145g (dry) in just 9 weeks from seed. ~ 753g (Wet) ~ 0.91g/watt GENETICS: ~ MSNL - Gorilla Glue Auto ~ my favorite strain, as you can tell by my username! STRAIN REVIEW: ~ Heavy hitter, like an indica but has some of that "feel it in your face" sensation of a strong sativa. Not as heavy or as strong as other GG#4's I have smoked, which would make me question the genetics used to produce the auto version. I will wait till after a cure and judge it again. TRAINING: ~ No defoliation or HST (Bar last week for pics) ~ A little LST and leaf tucking but largely just left the plant alone to do its thing. I felt chopping healthy parts off the plant would slow the plant down and leave it with less chlorophyll to photosynthesize the light. ~ I did prune by lightly plucking dead leaves away, when the plant was ready to let them go easily. DRYING ~ 20/21'C 50% RH with air circulation. ~ Homemade Drybox made using: 2 x Bankers Boxes ~ 2 x USB Desk Fans ~ 1 x Carbon Filter ~ 6 x Clothes Hangers UPDATE: Day 5 after Harvest: ~ Fast dried some small batches, as we couldn't wait to sample. ~ Chopped off branches as some are down to 12% moisture whilst bigger buds are up at 18%. Moving to paper bag for couple of days to even moisture out then transferring to jars CURING: ~Curing in jars 3/4 full. ~ Dark closet/18'C/50% RH ~ Jars burped once Hygro passes 65% and sealed when it drops to 58%. ~ Stabilised it at 62% and after 2 weeks I'll drop it some more and stabilise it at 58% to bring out more of the flavour. ~Sitting in jars with Boveda 62% at this stage. ~ Already tastes and feels great. WATER: ~ Condensed (Starting at 40ppm) ~ Disinfected prior to adding nutrients etc. (Using COOSPIDER UVC - 253nm & 187nm bulb) CLIMATE: ~ Ambient Air Temp = 29'C ~ 28'C LST ~ Leaf to air temp variance of between 1'C ~ Night Temp = 22/23'C ~ Day/Night temp differential 6-7'C ~ Under Canopy Temp: 26'C (Day) ~ 21'C (Night) ~ Relative Humidity = 50-60%RH (Avg. 55%RH) ~ VPD = 1.45kPa (Avg.) ~ Co2 ranges from 900ppm to 1500ppm (Avg. 1200ppm) AIR PRESSURE: ~ Ambient Air Pressure (outside tent) = Mean Avg. 1010 mbars (101 Kilopascals) ~ Actual Air Pressure (inside tent) = Mean Avg. 1005 mbars (100.5 Kilopascals) ~ Air Pressure Differential = up to 0.5 kPa range between inside & outside LIGHT: ~ UVB (High intensity @ 45cm) ~ 2 hours daily mid light cycle. ~ Warm White 3000K/White 5000k/Far Red (660nm) ~ At plant canopy = PPFD 900-1000umols/s/m2 ~ Lux 45,000-55,000 ~ Daily Light Integral 55-65 ~ Under canopy lighting ~ Blue (460nm)/ Red (630nm) NUTRIENTS: ~ Mostly Advanced Nutrients (For base nutrients and most additives, as only company I could find scientific data on) ~ Canna (For Calmag Agent and Cannazym) ~ Plant Success (Great White Mycorrhizae) ADDITIONAL GROW TECHNIQUES: INFECTION PREVENTION & CONTROL: Infection control practices i.e ~ PPE, Alcohol Hand wash ~ Gray room outside tent, ~ Carbon filter ~ HEPA filter ~ Plasma Ionizer ~ Inline UV-C germicidal bulb ~ Also using an additional higher powered COOSPIDER (UVC) 253nm & 187nm bulb, to disinfect the gray room outside of the tent once a week for 30 mins. ~ Ozone (o3) gas that is produced using the COOSPIDER, is then directed into the tent to further control any unwanted pathogens. ~ Ed Rosenthal (Zero Tolerance organic pesticide), sprayed once a week as preventative measure. On hand for heavier use (Once every 3 days before lights out for 15 days) in the case of an outbreak (No outbreaks yet, due to aforementioned preventative measures)
Likes
12
Share
*Early Flower 09/10* (2) Fastbuds - Mimosa Cake Auto Aggressive LST was applied for even light coverage. Smaller-Lagging budsites and bigger fan leaves under net have been removed. Slight increase in nutrient feeds, thus far 0 signals of deficiencies. *Mid week update - 09/13* Both plants have grown approximately 6 inches in height Early flowering continuing to progress accordingly Half a gallon increase in water feed (Nutes included) *End of week recap 09/16* Mimosa Cake (Auto) - Both in week flowering accordingly Small increase on nute feeds - Moderate increase in filtered plain water feed (1.5 gallons ) *SEE END OF WEEK RECAP VIDEO*