


Likes
Comments
Share

@CologneGrow
Follow
In dieser Woche lag mein Fokus klar auf dem weiteren Aufbau des SCROG. Ich habe die beiden Pflanzen im 107-Liter-Beet weiter unter das Netz gearbeitet und versucht, die Fläche möglichst gleichmäßig zu füllen. Die Triebe wurden weiter horizontal geführt, damit später ein geschlossenes, gut ausgeleuchtetes Dach entsteht. Unterhalb des Netzes sieht man schon gut die kräftige Struktur der Hauptarme und Seitentriebe.
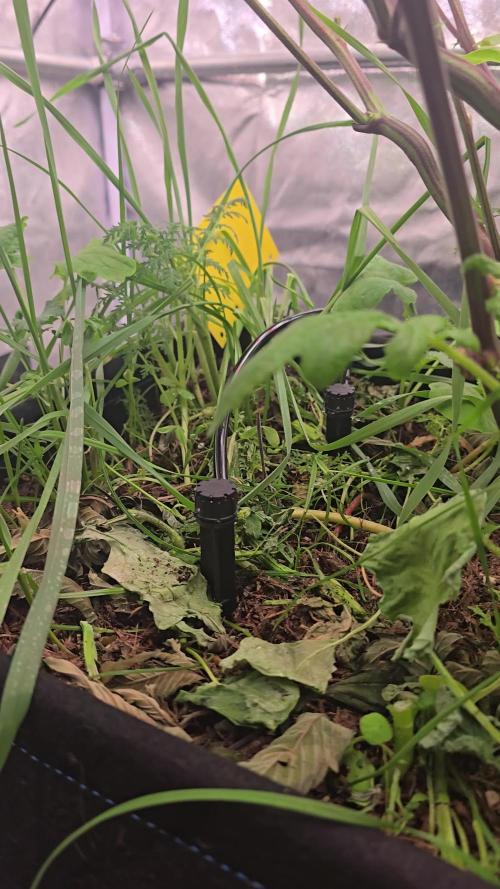
Auch der Boden entwickelt sich spannend. Im Beet läuft ein lebendiges System mit Mulch, Pflanzenresten, Würmern und Begleitgrün, was mir bei diesem Grow wichtig ist. Gleichzeitig beobachte ich das Feuchtigkeitsverhalten sehr genau, weil so ein großes Living-Soil-Beet ganz anders reagiert als normale Töpfe. Die Bewässerung und die Verteilung im Substrat sind hier ein echter Schlüssel.
Insgesamt bin ich mit der Woche zufrieden. Die Pflanzen haben das Training gut angenommen, die Fläche wird voller und der Grow nimmt immer mehr die Form an, die ich mir vorgestellt habe.
07.01.2026

Likes
7
Share


@brapzky
Follow
I figured nothing could go wrong with 50% amber / 50% milky trichomes.
Harvest day, Medical Mass: Huge buds and no traumas but got bud rot because of too high temps. The best I've ever smoked.
Harvest day, Pineapplex Express: Got an early trauma when transplanting but handled it beautifully. Potent smoke.
Pretty satisfied for a first grow, and I have a lot of changes for my 2nd grow!


Likes
10
Share


@Kardo
Follow
Noch 1 letzte Woche dann ist die Lemonberry Haze bereit für die Ernte ich hab sie schon probiert weil ich nicht warten konnte sie ist so lecker und macht gut breit ich bin gespannt wie sie schmeckt wenn sie komplett trocken ist

Likes
29
Share


@nonick123
Follow
Día 6 (29/04) Spray solo agua el top del sustrato. DLI 13
Día 7 (30/04) Spray solo agua el top del sustrato. DLI 13
Día 8 (01/05) Spray solo agua el top del sustrato. Subo a DLI 17
Día 9 (02/05) Elimino la cúpula casera de humedad y empiezo a regar con 300 ml solo agua
Día 10 (03/05) Empiezo a luchar con una ola de calor inesperada para esta época, que me trae temperaturas exteriores de 30 ºC y humedad relativa del 30%...
Mantengo la cúpula casera de humedad
Día 11 (04/05) Hace muchísimo calor.. 30 °C. A ver como lo llevan
Hago un invento casero para aumentar la humedad
Día 12 (05/05) Primera alimentación con Aptus! 300 ml H2O + Regulator 0,15 ml/l + CaMg-Boost 0,25 ml/l + Startbooster 0,25 ml/l - pH 6.2
Creo que las plantas se ven un poco pequeñas para tener 12 días... esperando por explosión de crecimiento en los próximos días....
💦Nutrients by Aptus Holland - www.aptus-holland.com
🌱Substrate PRO-MIX HP BACILLUS + MYCORRHIZAE - www.pthorticulture.com/en/products/pro-mix-hp-biostimulant-plus-mycorrhizae
Likes
35
Share


@Master_weeda
Follow
Bonjour à tous les padawans et les maîtres jedis
Pour cette semaine je prévoit de pratiquer comme technique spéciale le LST et juste un arrosage.
Pour cela comme à mon habitude j'attend le cinquième noeud ou que je juge la plante robuste.
Je profite que cette semaine qui va être relativement calme pour faire un LST appliqué et vous faire un rappel de ce qui est pour moi la meilleure technique pour arroser une autofloraison et la façon dont je pratique le LST.
En suivant ces quelques simples conseils vous obtiendrez un résultat optimal tout au long de votre culture :
Le cannabis est une plante qui n’aime pas recevoir un léger arrosage en continu. Il est impératif de l’arroser en grosse quantité, puis d’attendre que la terre soit bien sèche avant d’arroser à nouveau!
Pour calculer la quantité d’eau nécessaire à chaque plante, suivez cette règle :
Le volume d’eau à donner lors de chaque arrosage doit représenter au moins environ un quart du volume du pot !!
Exemples :
pour un pot d’1L, donnez 0,25L d’eau à chaque arrosage pour un pot de 4L, donnez 1L d’eau à chaque arrosage pour un pot de 12L, donnez 3L d’eau à chaque arrosage pour un pot de 30L, donnez 7,5L d’eau à chaque arrosage !etc…
Pour donner un tel volume d’eau, il est souvent nécessaire d’arroser en deux (voir trois) fois, lentement et uniformément sur toute la surface. Disposez de bonnes coupelles sous les pots, celles ci se rempliront d’eau qui remontera dans le pot par capillarité en moins d’une journée. Il est également très important d’utiliser un bon terreau de qualité, avec une bonne capacité de rétention d’eau mais qui assure également un bon drainage (celui ci doit contenir de la perlite, et/ou de la coco, etc..)
Il vous faut alors maintenant attendre quelques jours en sous-pesant régulièrement les pot avec vos bras. Quand ils seront redevenus très légers, vous pourrez arroser à nouveau !!
En effet, comme l’eau pèse beaucoup plus lourd que la terre, un pot gorgé d’eau pèse plusieurs fois le poids d’un pot d’une plante prête à être arrosée. Avec un peu d’entraînement, vous apprendrez donc très rapidement à sous-peser vos pots pour savoir quand une plante a soif.
C’est une technique à la fois très facile et très efficace, et qui peut être appliquée à toutes les plantes en pots !
En arrosant de cette façon, en général vous devrez arroser vos plantes tous les 3 à 6 jours.
Pour cette semaine 3 au jour 17 ma plante fais 12 centimètres et son cinquième noeud apparaît je décide donc de pratiquer un LST sur ma plante.
Pour ce j'utilise du fil de fer galvanisé que je plante directement dans le substrat en faisant attention de ne pas endommagé les racines car n'oublions pas que ce qui pousse dessus pousse aussi dessous.
Jour 17 je pulvérise du une solution composé d'une cuillère à café de savon noir mou dilué dans un litre d'eau en prévention d'éventuels nuisibles.
Je corrige mon LST suivant la pousse de ma plante ...
Pour ma par c'est la manière dont je procède. Comme promis petit rapel de:
Quand commencer à appliquer la technique LST
De nombreux cultivateurs commencent la manipulation dés que les plantes possèdent entre 3 et 6 nœuds ou une paire de feuilles. Durant cette première étape de la croissance, le tronc encore flexible est pliable sans risque qu’il ne se casse, même si au fur et à mesure du développement de la plante il sera de plus en plus difficile de le plier. Nous pouvons continuer à guider la croissance des branches durant toute la culture, même durant la floraison, ce qui pour cette étape représente un grand avantage face à la taille, qui n’est pas du tout recommandé une fois que la formation des têtes commence, cela stressera en effet la plante, ce qui aura pour effet de retarder la récolte.
Comment appliquer la technique de guidage LST
Si nous sommes prudents, la flexibilité naturelle des fibres du cannabis permet de plier leur tronc et branches avec une relative facilitée, même durant la floraison des plantes.
En utilisant une corde fine, nous pouvons accrocher la pointe de la plante à la base du pot par exemple ou à un tuteur que nous aurons planté dans le substrat. Nous plierons le tronc avec précaution et nous le fixerons avec la corde, à partir de là, nous pouvons augmenter progressivement la tension de la corde, chaque jour un peu plus, jusqu’à obtenir la position souhaitée. Soyez attentif à la réaction de la plante, essayez de ne pas appliquer trop de pression sur la corde et rappelez-vous que la flexibilité des branches peut varier d’une plante à l’autre.
Pour obtenir de meilleurs résultats, il suffit de suivre quelques règles simples. Pour commencer, nous devons choisir une corde fine mais pas trop pour ne pas blesser les troncs au fur et à mesure qu’ils grandissent et qu’ils deviennent plus gros.
Nous pouvons utiliser des crochets en plastique souple ou de n’importe quelle autre matière flexible pour éviter d’endommager les plantes. Spécialement en intérieur, utiliser des cordons en plastique de couleur (voir les diaries de @Silky) est très pratique pour voir facilement les accroches et faciliter le travail au milieu du réseau formés par les cordes, les tuteurs, les mailles ou les supports que nous aurons dans la culture. Bien entendu, en culture extérieure et surtout en guerilla nous ferons juste le contraire et nous utiliserons des matériaux de couleur qui n’attirent pas l’attention pour que notre jardin reste discret.
Pour stresser les plantes au minimum, la mieux est de réaliser ces manipulations le soir ou juste après que les lampes en intérieur s’éteignent, ce qui leur permettra de se remettre durant la nuit. Normalement, le jour suivant nous pourrons observer comme les pointes des branches que nous avons pliées se dressent de nouveau vers le haut à la recherche d’une source de lumière.
Que la force soit avec vous
Likes
9
Share


@Mr_nugs_lover_David
Follow
She's developing very nice on her second week, she's not developing as good as her sisters but she's definitely coming along. Let's see how she performs. 💎💚👨🌾

Likes
6
Share


Likes
15
Share


@Northern_Ent
Follow
Aug 1: strong start to the week- it’s been hot and sunny lately and this will be our third and final day at 30 C.
Lemon Cream Kush looks great and is flowering now after two full weeks of force flowering (12h of darkness).
Aug 4: added another loose Scrog net layer to hold it together but to also allow separation of the colas to expose them to sunlight.
Aug 5: plants in this wagon are getting too big to move easily into garage. Will stop forcing and switch back to 15.5 h of daylight in yard. Still using far red light at dusk as a bloom booster.

Likes
18
Share


@rockbo47
Follow
SUMMARY: Started late bloom nutes this week on day 69. Still no issues with her and she's taking 1.8-2L per day and giving around 30% runoff on average. Just hoping all the buds fatten up as there aren't many.
DAY 65
-----------
Sunday 7th March 10:45
I made 5L of mid bloom nutes with tap water and molasses at a pH of 5.8. I made 5L of late bloom nutes with tap water and molasses at a pH of 5.7.
Sunday 7th March 18:00
I fed the NL 1.8L of mid bloom nutes which produced 300ml runoff (17%). [27°C/49%]
DAY 66
-----------
Monday 8th March 18:00
I fed the NL 2L of mid bloom nutes which produced 710ml runoff (36%). [25°C/47%]
DAY 67
-----------
Tuesday 9th March 10:45
I made 5L of mid bloom nutes with tap water and molasses at a pH of 5.8. I made 5L of late bloom nutes with tap water and molasses at a pH of 5.8.
Tuesday 9th March 18:00
I fed the NL 1.8L of mid bloom nutes which produced 700ml runoff (39%). [25°C/51%]
DAY 68
-----------
Wednesday 10th March 18:00
I fed the NL 2L of mid bloom nutes which produced 600ml runoff (30%). [27°C/54%]
DAY 69
-----------
Thursday 11th March 11:00
I made 20L of late bloom nutes with rain water and molasses. 5L at 5.7, 5L at 5.8, 5L at 5.9, and 5L at 6.2.
Thursday 11th March 18:00
I fed the NL 2L of late bloom nutes which produced 700ml runoff (35%). [26°C/47%]
DAY 70
-----------
Friday 12th March 18:00
I fed the NL 1.8L of late bloom nutes which produced 250ml runoff (14%). [26°C/48%]
DAY 71
-----------
Saturday 13th March 19:00
I fed the NL 2L of late bloom nutes which produced 350ml runoff (18%). [26°C/48%]
Likes
22
Share

@Sundancers
Follow
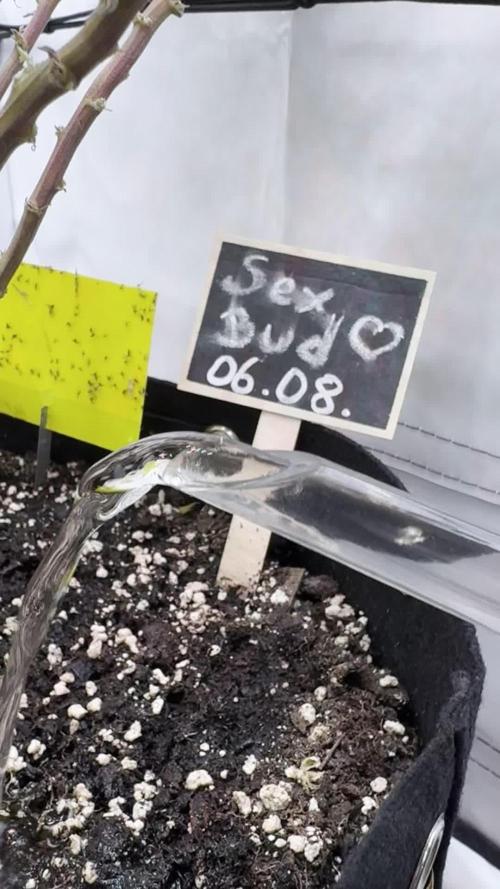
Einfach schön zuszusehen, wie die Sex Bud an Masse zulegt. Die Farben überaschen jedes Mal wenn man das Zelt öffnet. Der Geruch wird langsam merklich stärker.
Wir haben die ersten braunen Trichome entdeckt. D.h. wir gehen in den Endspurt.
👽

Likes
8
Share


@taylordarling
Follow
This week was when I first recognized that there was something wrong....
Initially I only realized that the stems of my little girl were slightly bent downward. In some cases I have experienced this orientation when a plant is exhausted and about to got through its sleeping period but, this seemed different. In the following days I began to notice that the lower leaves were beginning to fade, the stems began to turn red, and still the leaves were bending downward and not praying to the light!
At first I just figured that my plant was in need of a feeding and transplanting to a larger container but, after doing a bit of research I realized that the I may have been experiencing a phosphorus deficiency. From my understanding I knew that these plants require nutrients that is high in nitrogen during the vegetative part of its life however, I did not realize that it's still needed an adequate amount of phosphorus in this stage too.
As I mentioned perviously, I decided to reuse my soil for this grow and as a result of sterlization my growing medium no longer had any nutrients to offer my plant at the time. I believe this is the reason I began to see signs of deficiencies and going forward if I ever reuse my medium again I will make sure to re-amend it before using it.
*I also topped the plant at the 5th node this week as well*

Likes
45
Share


@MadeInGermany
Follow
Info:
Unfortunately, I had to find out that my account is used for fake pages in social media.
I am only active here on growdiaries.
I am not on facebook instagram twitter etc All accounts except this one are fake.
Flowering day 61
since time change
to 12/12 h.
Hey everyone :-).
We arrive in the flowering week before the last :-).
She has developed perfectly up to now 👍.
It will be harvested in the next 10-14 days.
Until then, she still has enough time to use up all her nutrients.
The trichomes are already 60% milky, 30% clear and 10% amber.
This week it was poured 3 times with 1.2 l each.
As always, the tent was cleaned and everything checked.
Have fun with the update.
Stay healthy 🙏🏻
You can buy this Strain and Nutrients at :
https://greenhouseseeds.nl/
☝️🏼☝️🏼☝️🏼☝️🏼☝️🏼☝️🏼☝️🏼☝️🏼☝️🏼☝️🏼☝️🏼☝️🏼
Green House Seeds Company Cup Clone 🏆
Type:
Wonder Pie
☝️🏼
Genetics:
Wedding Cake x OG Kush
👍😍
Vega lamp: 2 x Todogrow Led
Quantum Board 100 W
💡
Flower Lamp : 2 x Todogrow Led
Cxb 3590 COB 3500 K 205 W
💡💡☝️🏼
Earth: Canna Coco
☝️🏼
Fertilizer: Bio Grow Feeding ( GHSC ) , Enhancer ( GHSC ) , Bio Bloom ( GHSC)
☝️🏼🌱
Water: Osmosis water mixed with normal water (24 hours stale that the chlorine evaporates) to 0.2 EC. Add Cal / Mag to 0.4 Ec Ph with Organic Ph - to 5.8
Likes
2
Share


@Ganjagrandaddy
Follow
Hi Growmies , I hope your all mean and green in the right places.
Here we are at week 10 flowering for this #Exoticseeds strain . It has been a steady process so far and the doner plant #1 has kept the dankruptcy at bay just right. the early harvested tip buds are very active and hit the spot for sure. They do need a proper dry and cure for the main crop but the quick drying has not done to much injustice to the overall finish. buds are nice and tight and crumble nicely with a tackiness so not all lost to rhe quick dry.lol
The rest of the #1 lady has been steadily taking advantage of the light to the lower and much smaller buds and they have made a great effort to swell and become the mains. another week and they will be done for sure with the lower pistils being ripened.
The other ladies are looking ready to burst open with a new flush of pistils any day . I think at least another 10 days for them and a final feed of the Dragon force before just using a basic weak feed for the final week. There is definitely 2 different phenotypes among these girls with the #5 being the odd girl in the pack. She is a beautiful colour with a dark purple to her leaves. Her buds smell like juicy fruit gum so strongly too. I am looking forward to her final finish so much now. The other girls have a more diesel/fuel smell to them with a lemonene sweetness to them too and are very tacky to touch too now , all good signs. I want.to push them to their very final ripening before harvest so I can give them the best chance to increase their overall yields. I did very little to their growth patterns beside a little lst and topping initially so they would benefit from more light access to lower buds and I did not steip much leaf put either. A very lazy grow for me this run .lol. Until next time , be well

Likes
21
Share


@ethnoGrow420
Follow
o Added a PK booster this week
o Defiliated at end week 13
o 1.00 VPN
o feeding twice a day


Likes
6
Share


@Cannabis4Crohns
Follow
Plant fading and changing colour nicely. Day 77 Trichomes are still milky or clear. Waiting for the first signs of amber Trichomes, at which point I plan to harvest. Day 77 might be the plants last watering depending on the Trichomes in the next few days.


Likes
2
Share


@Grandillustrator
Follow
Having to constantly move the ties as each branch keeps pulling in closer together , keeping on top of defoliation starting to get a weak smell when opening the tent overall plants healthy

Likes
4
Share


Processing
Likes
93
Share


@Ferenc
Follow
Week 6th started. I will add each plant 100 ml water 2x a day so 400ml altogether. I still always spray the topsoil also. The same fertilization method will be done, Monday, Wednesday, Friday 2x 100ml acacia honey and bat guano water mix for each plant. I changed their places so Purple Punch is the left side now and the Gelato Cookie D'ohpe placed to the right. I always rotate them to get equal light. Last day of the 6th week. Gelato Cookie D'ohpe doubled its height. I decided to make the Purple Punch flower but it is not autoflower I separated it for 36 hours darkness and then I will give 14 hours darkness and 10 hours light the first 7 days. So every night I will put it in the tent with the other one and remove in the morning to be in darkness. I also need to reset the timers. End of this week Gelato Cookie D'ohpe is 65 cm, Purple Punch is 35cm.

Likes
31
Share


@KushReloaded
Follow
Rotated the pots to help get better light and lst on a few other spots overall looking pretty good for my first grow I would say
