


Likes
Comments
Share

@Brotanical
Follow
Nach ein paar Schwierigkeiten am Haus die nun beseitigt sind geht es nun nahtlos weiter 👍
Diesmal in Blütewoche 3 zum Start gleich mit dem Infrarotmatten Upgrade von Calorique 100x50cm (110w) in Verbindung mit Thermostat das nach Feintuning nun gut eingestellt ist was man auch direkt am Durst der Damen merkt 😁🤚
Es geht mit Blühkomplex von hesi weiter und teilweise auch mit Alfa Boost bei Bedarf natürlich pH angepasst
Und der kleinen Reihe an Plagron zusätzen wie zum Beispiel CalMag
Es wird bald radikal entlaubt(für meine Verhältnisse 😄)und auch kleine Triebe werden weichen müssen da ich es versuchen werde flach zu halten und das Scrognetz als Stütze nutzen werde/möchte 🌝 die Mutti wurde aussortiert aber ihr geht's gut in ihrem eigenen "space"
Die infrarotmatte steht mit einem von mir angefertigtem Lattenrost🤫😄 in dem 120er Zelt naturbelassen Fichte unkompliziert aber für die Wärmeverteilung und erhalt super 👍 ( der Geruch erinnert etwas an die alte NDL Zeit/Hitze im guten Sinne haha. Die LEDs laufen mit etwa 500ppfd gleichmäßig auf beiden Seiten und werden die nächsten Wochen langsam nach oben geschraubt 💫.
Es geht entspannt weiter bis dahin 🌱👍?
Liebe Grüße 🌿

Likes
19
Share


@HisHope
Follow
4/30 Week 2
Some discoloration, moved light up.
Most likely be ready to transplant in a couple of days, color good
Slowly increasing nuets Leave them here a while.
5/1 Pic
5/3 TRANSPLANT DAY!
Time to move her, her roots are three inches beyond the garden bag and her veg growth has kicked in.
Roots are very white, very strong and very long.
Transplanted into 5 gallons of prepared/buffered/triple washed coco and 40% perlite.
Pot soaked well with goodies to get things going quickly, she has some catching up to do 😏
5/4
Pics
She is thriving! 😎
5/5 Pics
Almost doubling in mass every day
5/6
Pics
Added Silicon and increased Grow nuets slightly
She has tripled in size this week color is good and stems are strong.


Likes
3
Share


@erpiccione69
Follow
very good week, after a slow start this lsd from barneys seeds its exploding! by getting bigger day after day, next week i will probably top the plant and start the training!

Likes
33
Share


@Ema26
Follow
Hey guys! I chopped all the top half of the plant on 6/4 21:30 and the bottom half on 7/4 23:00. It’s now the 9/4 at 11:30 all of it sits in jars. Dried quicker than I wanted it to but all the buds were very dry too touch so I jarred them. I figured it was easier to remove moisture from the jars than it is to put moisture back into them so hopefully this plan works out🤞 she has a hay smell to her and I’m hoping this goes while curing her. All the nugs look great and some are mega dense and others are very airy. The more airy ones being from lower down I just didn’t have time to keep her going. She weighed in at 110+ grams wet, But I didn’t weigh any of the lower nugs. Dry weight all combined is 35.8 grams. 9.2g from the bottom half and 26.6g from the top half. I’ll re weigh it once I’m done curing. Very happy with this first grow I wasn’t expecting to have this good of a finish even if it isn’t the best💪 both jars are around 21c, the jar with smaller nugs has been sat at 55%-65% and the bigger nugs are getting up to %70 so I’ve been opening the big ones letting the humidity go back down again. I don’t expect to get the drying and curing done %100 but that’s what the first grow is all about. Roll on to my next 3 plants harvest day😎 I smoked all the material that went through the sieve while trimming and damnnn.. tasted like something out of Amsterdam. If the flowers end up like that I’ll be very happy😁 I’ll be adding a smoke report once she’s ready, really looking forward to it🤣
Id like to give a huge thanks to everyone who has helped and advised me on this journey! I’m taking all the info onto my next grow a lot more confident. My next 3 plants are doing brilliantly so far I’d appreciate it if you’d check them out! Onwards and upwards, stay safe and happy growing everyone!
With thanks Ema26😎🍁🌱

Processing
Likes
11
Share


@MajorBudGreen
Follow
D044 V38 ALPHA: LST continues with light defoliation - only to expose branches that are hidden. Diluting nutrients to a 1/3 strength. Currently 16 oz RO to 8 oz nutrient solution.
D041 V33 BRAVO: Growth and recovery from nutrient burn and caterpillar munching seems to be in full swing. Diluting nutrients to a 1/3 strength. Currently 16 oz RO to 8 oz nutrient solution.
D045 V39 ALPHA: 16 oz RO
D042 V34 BRAVO: 16 oz RO
D046 V40 ALPHA: Diluting nutrients to a 1/3 strength. Currently 16 oz RO to 8 oz nutrient solution.
D043 V35: Diluting nutrients to a 1/3 strength. Currently 16 oz RO to 8 oz nutrient solution.
Processing
Likes
73
Share


@Andres
Follow
she has 161 days outdoors .... and 98 days of flowering ... a lot of patience ... her smell is still strong ... a smell of mint. to pine ... the smell of indica is felt .. she will give some big buds .. especially her main crown ... she is a champion and fighter with the inclemency outdoor ... I believe that I will cut her on Sunday with 100 days of exact flowering ... but maybe ... I'll check your buds one by one ... I'll try more information ...

Likes
1
Share

@gammacrowns
Follow
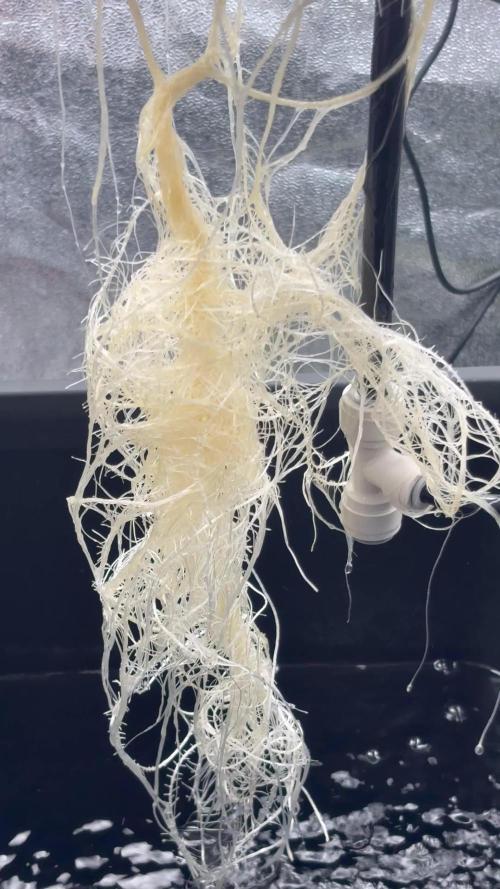
Fixed the splashing issue from the top-feed DWC drip system. Also cleaned up the lower suckers and weak damaged branches.
Likes
62
Share


@Hou_Stone
Follow
Thanks to Creepy_Steeve for the legendary tips, in this diary he guided me to remove a shell that was stuck on a seedling, now it has become one of the biggest plants in the crop 💪🙏
Flowering begins.I did defoliation on the lower tiers on day 4 of flowering
------------------------------------------------
Water: tap water at 300 PPM, I add 0.7G of Hybrid powder per liter to reach 800PPM and I adjust the PH to 5.8. Currently I water my pots with about 1.5L of water every 4 days
-Daytime temperature: 27°C
-Night temperature: 23°C
-Humidity: 45-65%
-Lamp: Mars Hydro FC3000. intensity 80% at 40cm from the top leaves
-Room: Mars Hydro 100x100x180cm
-Extractor: Mars hydro 402 CFM Max. power 2/10
-Substrate : 70% coco, 25% perlite, 5% vermiculite.
My instagram : https://www.instagram.com/p/CuMhQ_BsjRP/?utm_source=ig_web_copy_link&igshid=MzRlODBiNWFlZA==
Looking for MarsHydro equipment for your crop? 🔥
You can use my promo codes! 🙏😻
3% off with "houstone3" for: TS LED Grow Light, Tent, Ventilation
5% off with "houstone5" for: FC&FC-E&SP LED Grow Lights; Grow Tent Kits
https://www.mars-hydro.com/?acc=hou-stone

Likes
17
Share


@JonnyKush
Follow
hello growmies! day 51 finally the pre-flowers begin to appear. I apologize for the few photos but unfortunately they really filled the box and I find it difficult. overall I have to say they look in perfect shape! I will keep you updated thanks for passing by. like and comment! good day and beautiful growth to you 🌳🌱

Likes
26
Share


@DrRobeRt
Follow
Hope you all enjoy the video, but don't share ok it has an uncleared Beatles Song that The good Dr. loves ;-) Peace

Likes
30
Share


@Kloud9gardenz
Follow
She picked up a lot of spider mites out of nowhere when I didn't have any during veg. Did a heavy neem treatment and defoliation so hopefully that will take care of it. Buds are still getting fat and I'll wait to see how it goes in the last 4 weeks.

Likes
30
Share


@MrGoonai
Follow
10/24/24 Short facts:
- Continued with LST
- Watered: 1 x 1.2L, 1 x 1L, 1 x 0.8L — 3L
- VPD @ 1.0 — raised by 0.1
- Light @ 70% ~580 to 720 PPFD
- Defoliation
- Nutrients increased and added: BioBizz Top-Max and Bio-Bloom
- No Root-Juice anymore
---------------------------------------------------------------------------------
I don’t know what happened, but my pictures are not very good this week. It’s probably time to buy a good camera, maybe a used one with a decent lens.
I defoliated the Lemon Cherry Cookies this week. I had to remove some leaves so that the branches and their tops could get direct light. But honestly, she looked pretty bad afterward. I really don’t like cutting off branches or leaves; it hurts me to see them like that. Sadly, I accidentally cut one of the better branches in half, which was really devastating.
On that occasion, I also did a bit more LST, but that was the only session this week. There probably won’t be much more LST to do in the upcoming weeks.
I increased the light intensity and also upped the nutrients.
The LCC (short for Lemon Cherry Cookies) is the smallest plant in the tent and has fewer branches than the others. She also doesn’t use much water. But it was incredible to see how fast she went into flower, it basically happened from one day to the next. Her buds are the biggest and prettiest in the tent.
Because she was the smallest plant, I put something under her pot on Day 28 to ensure she had the same distance to the light as the other two plants.


Likes
Comments
Share

@LegacyGrow
Follow
Englischversion below
Deutsch:
Tag 49 Veg:
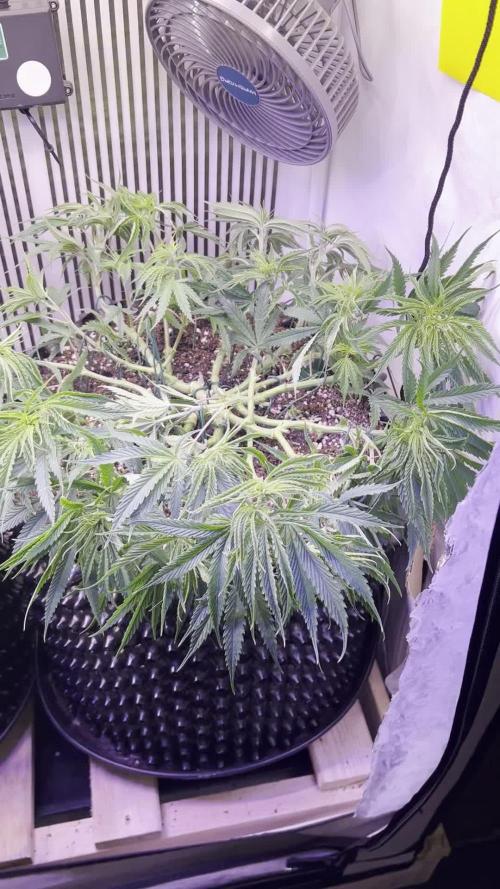
Alle Pflanzen haben das Ziel erreicht - den Rand des Topfes. Eine starke Entlaubung und Entfernung der kleineren Triebe stand an. Dadurch soll verhindert werden, dass die Pflanzen viel Energie in die Biomasse stecken, die später ohnehin beschnitten wird.
Ein Pulse-Zero und ein Bodenfeuchtigkeitsmesser ergänzen nun das Setup. Im angesicht der kommenden Blüte wird der VPD in Richtung 1-1,2 gepusht ( hauptsächlich durch ein geringeren RLF%).
Sobald sich die Ladies vom Stress erholt haben, wird die Blüte eingeleitet - im Streach wird dann wahrscheinlich das SCROG-Netz eingespannt.
--------------------------------------------------------------------------------------------------------------------------------------------
Day 49 – Vegetative Phase:
All plants have reached the target — the edge of the pot. A heavy defoliation and removal of smaller shoots were carried out. This is intended to prevent the plants from investing excessive energy into biomass that would later be pruned anyway.
A Pulse Zero and a soil moisture sensor have now been added to the setup. In preparation for the upcoming flowering phase, VPD is being increased toward a range of 1.0–1.2, primarily by lowering relative humidity.
Once the plants have recovered from the stress, flowering will be initiated. During the stretch phase, a SCROG net will likely be installed.

Likes
9
Share


@HUMO_Cultiva
Follow
We start week 3 of bloom!! Goofiez 2 amor compound genetics it’s the champions!!

Likes
40
Share


@BudXs
Follow
The frostiest plant I have ever grown, I will enjoy watching my growmies do the same. Buy this seed and share it. It is a wonderful cultivar. I had two disteonct phenos, both absolutely gorgeous and unique

Likes
38
Share


@Cariboo_OG
Follow
Utopia Haze is a rare heavily sativa dominant hybrid (90% sativa/10% indica) strain created through back crossing Brazilian Sativa strains. This tasty little bud took home 1st Place for Best Sativa in the 2008 High Times’ Cannabis Cup and for good reason – with its potent 18-22% average THC level and long lasting cerebral effects, Utopia Haze is one powerhouse smoke. The Utopia Haze high comes on soon after you finish your first toke, hitting you with a strong cerebral lift that infuses you with a sense of hazy relaxation.
Type: Feminised/Photoperiod
Cultivation: Indoor/Outdoor
Flowering Time (days): 70-75
Indoor Yield (g): Up to 650
Feminised Outdoor Harvest Month: October
Feminised Outdoor Harvest Month Week: 3rd-4th week
Aroma: Citrus, Woody, Pungent, Mint
Effect: Cerebral Lift, Hazy Relaxation, Sleepy
Welcome Everyone to the Final Entry of my Utopia Haze Grow !
There is so much to discuss ! I have been extremely busy as of late trying to get this Harvest together, but i am happy to have it here for you now !
I Seriously under estimated the amount of time, help from others, and my own necessary skills to pull this off.. and i still kind of screwed it up lol !
But its worth noting i have never actually done this before and trying to document it during....was extremely hard.
It is next to impossible to work an iPhone with rubber gloves on !
First I want to discuss everything step by step so before you jump straight into the comments on how the end product is so small in "quantity"
Rest assured i am happy with its"quality"...and thats all that matters to me because Life is a journey not a destination! and i have learned so much from this grow that I couldn't be any happy even if i messed some things up :)
But at the very least I hope you read through this entry in its entirety with an open mind and focus more on the process, rather than just the outcome!
I ran out of Ice & i was only able to wash three times..(normally I've heard you should go sometimes 5-6 washes)
Preparation is Key & things will be much better next round :)
Photos 1-22
These are pretty self explanatory but for those of you just tuning in now.. this is what happens to a very happy plant when you don't have the necessary tools to monitor key components of growing cannabis.. Ph, as well as EC levels play a very key role in the outcome of your grow lol that being said I was just able to save this plant by purchasing both tools but that doesn't mean the plant didn't suffer because of the prior events.. This was a Huge reason behind me choosing to turn this harvest into what i would consider
"Solventless Hash Rosin" from "Ice water extracted Bubble hash".
Pictures 23
The idea here is the process of using "fresh Frozen Cannabis" this has been discussed many a time online on such sites as instagram and here on grow diaries as well.. I personally have Never tried the process so i decided to try it out and make a judgement for myself..
Video 24
The Cannabis has now been in the freezer for 72 hours making it very well frozen.. as you can tell i struggled getting it all into the 25u Screen Wash Bag. One thing of note i would do differently is i will de-stem my next batch as i also believe this played a part in the amount of plant matter that escaped through the sieves.
Photo/Video's 25-28
The idea here is "ice water Seiving" & especially with the bags that I am using here that are only have screen material on the bottom portion of the bag it is very important to have spaces in-between the screens to allow the water to pass directly through the screens into the bottom bucket with the least amount of resistance.. because the hash is so extremely temperature dependant if it gets warm on the side of the bag.. it will stick there and not make it to the bottom to become use able product..
29
You do not need to use as much Ice as i used here lol... the idea is to keep everything very cold..i certainly achieved that but at the sacrifice of using so much that i ended up grinding product and producing "contaminants" but in the end they are just plant matter that i would be smoking when i rolled up my joint either way so.. I'm not super disappointed..
But it should be noted that what you want to achieve here is a Layering effect where you have the wash bag between two small layers of ice while the "water current" washes the Trichomes away allowing them to be separated by the screens setup below :)
Before Starting the machine you should allow some time (i.e.;10-12minutes pre soak to allow the product to become saturated) before the first cycle.
By video 32 I have just ran out of ice lol..
Video 33-34
Here I have a tip for you.. to separate the screens that you sieve through.. cut 5 gallon buckets to stretch them across nice and tight.. it'll make scooping your Bubble that much easier ! i learned this from the many "Frenchy" videos I have watched :)
Picture 35
Here in lays the problem for most people.. drying your hash without loosing vast amounts of "Terpenes" whilst also stay ever vigilant against mold !
Thanks to all those videos I've watched on youtube.. id like to think this was one of my most successful parts of this process..
Things to Note; Terpenes start to seriously evaporate at temperatures 68F or 20C
you need to stay as cold as possible whilst bringing the Relative Humidity in the space down into the 40-30% to stay away from that nasty mold !
I used my cold storage room in the basement.. with a dehumidifier running to keep the space at 45% RH & staying at a constant 15c.
All while spreading the hash as thin as possible across parchment paper, on top of the white screens with a fan moving air across both sides of the paper.
Pictures 36-38
These are some macros i took in the middle of my drying session I fell in love with the colour.
Yes i know the black spots are plant material but they will get caught when i bag the hash & squish the oil out.
Thing to Note; at this stage it is important to ensure you 'micro plane" the hash down as fine as you can whilst staying weary of the temperature... any "chunks" will hold pockets of moisture.. that lead to potential problems..ie; mold ...
Picture/Video 39-41
Successfully planed bubble hash ready to be bagged and Squished !
Picture 42
Ive decided to follow Pedro.. from Pedros Grow Room and double bag to be on the safe side so i don't have any blow outs.
So thats One 25u bag inside one 160u bag ! :)
Pictures 43
This is almost 3 grams of the bubble hash from above, already melting in the bag.. this is where i ran into trouble again lol things started getting to warm in the house and i was only able to get one of the three squish's i did on video :( things started getting sticky.
Picture 44
This is basically just a photo of the equipment I'm using; 3x5 LowTemp Cage in the frame I built myself, with a 20Ton bottle jack.
Something to note here is this is an older Lowtemp model with only a single heating zone which is which i have it closed here heating Both sides of the press :)
As well as the importance of having adequate pressure on your plates.. my rig is very overkill for the size of hash bags..lol
Video 45
Here is the lovely press video.. its didn't quite work the way i wanted either lol my directional folding wasn't quite tight enough for a big "drip" :)
&the Press was set to 65°c
Photo's 46-50 are pretty self explanatory :) I had a blow out.. but still managed to pull an 80% return from the hash once squished...& yes it tasted amazing :)
Was it worth it in the end... that could be debated.. for some..i understand..its not your thing, but for those of us that are interested in making our own concentrates.. free from Solvents...
I wouldn't make it any other way :)
If even ONE of you reading this diary finds it helpful to reference for ANYTHING.....even if its "what not to do" ill consider it a success !
Thanks again for tagging along on this garden adventure.. its been one heck of a journey !
Much Love from B.C. Canada,
Until Next time,
Cariboo
Likes
44
Share


@I_and_I
Follow
All going well, week 10 flower, thinking of harvesting next weekend, would be around day 73~, I'll keep an eye on them and see how they look, but I'm definitely bringing down the sour diesel and one or two others :)


Likes
11
Share


@FumoGrande
Follow
Hi guys!
For this run i got some nice looking clones. Really looking forward for this one.
11x Gelato Sorbet (Dna Genetics) left side in the box
13x Cookies&Cream (Exotic Genetics) middle of the box
8x French Macarron (T.H. Seeds) right side of the box
My setup got a nice update with the Sanlight Evo 5 100 with 320w. Aim to upgrade all of my S1 Q6w soon. All together with 985watt now.
I use Biobizz-Lightmix and started to add Nutrients at week 3 after i planted it in the 8l pots.
For this run ill use Hesi Nutrients because i use them for years and worked most of the time pretty well for me.
I fimmed some plants and trained most of them with LST-Training.
I will send them into flower in the middle of week 5
---‐-------------------------
Week 4: Plants are looking ok. I wanted a higher humidity and tried to increase it with a humidifier.
Week 5: The fimming worked quite well on the plants i used it on and i got a nice increase in height and strength
Aiming to send them into flower in the next few days. :)
Week 6: Day 3 of Flowering plants look nice and healthy. Some gelato sorbets had issues from stress but they catched up ok.
Week 7: End of week 2 of flowering plants look ok most of them. After i saw some nice results at tents from friends and had some own nice experience with the terpinator i start giving "purpinator" this run a go and start mixing it into my feeding schedule every watering
Week 8: it looks ok so far but i would be a bit more satisfied if the plants would be a little taller... :)
Hope u like the diarie and follow with this run!


