


Likes
Comments
Share


@Crwfz1
Follow
Lots of training on all the girls this week all original sensible two gorilla glue one is the biggest under scrog already ghost is right behind then going to lay the last babby gorrilla across light range stay tuned

Likes
6
Share

@trustno1
Follow
HI 👋
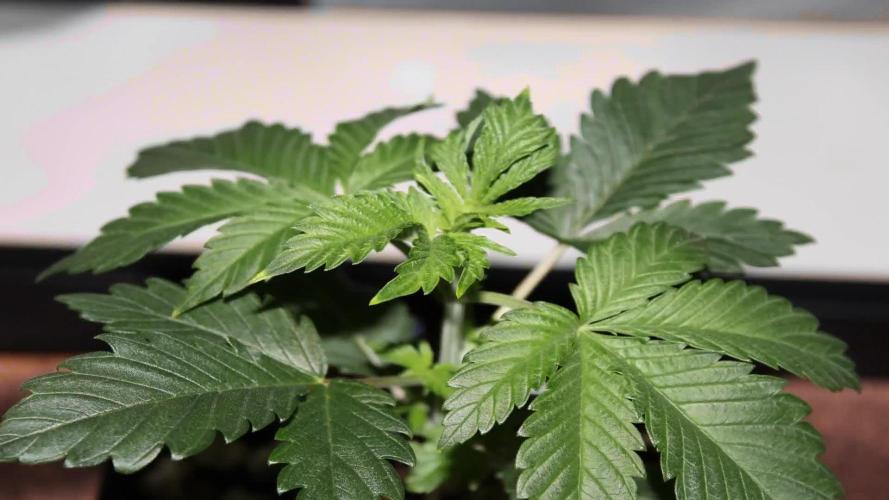
Dem jungen Gemüse geht es hervorragend. Das Tray2Grow System läuft seit Dienstag.
Nächste Woche wird die Lady getoppt.
Nährstoffe sind immer noch reichlich vorhanden.
Gruß M.


Likes
41
Share


@BOMbolenath
Follow
Big plant going to develop big buds. It smells something like sweet floral.

Likes
17
Share


@BalconyBoy
Follow
24.08.26 nachdem die kleinen Autos geerntet wurden konnte ich die großen Photos etwas auseinander rücken und mehr Platz schaffen. Das Blütenwachstum nimmt nun deutlich Fahrt auf und jeden Tag gibt es eine Hand voll gelber Sonnensegel die ich abpflücke. In ein bis zwei Wochen werden die Pflanzen deutlich anders aussehen und weniger Sichtschutz zu den Nachbarn bieten. Der Wasserbedarf ist mit den Temperaturen spürbar zurück gegangen. Es hat in der vergangenen Woche nach langer Zeit geregnet.
Happy growing allerseits!


Likes
38
Share


@MadeInGermany
Follow
Hey guys .
A wonderful week goes by with a super growth :-).
After I topped it for the first time last week, it recovered very quickly and showed great growth.
I don't think I will use topping again on the lady because I should slowly blossom with a few other women :-)
think it will be ready in the next 7-14 days for Flowering 👍.
This week it was poured 3 times with 1 l each time
(for nutrients, see table above).
The tent was cleaned and the health of all women was checked :-).
After the photos she was sprayed again with neem oil so that the last little tripse disappeared.
Even if you can't see any more trips I will spray it one last time next week to make sure :-).
I wish you all a happy new year 2022 ☺️.
Stay healthy 🙏🏻
👇🏼👇🏼👇🏼👇🏼👇🏼👇🏼👇🏼👇🏼👇🏼👇🏼👇🏼👇🏼
You can buy this Nutrients at :
https://greenbuzzliquids.com/en/shop/
With the discount code: Made_in_Germany you get a discount of 15% on all products from an order value of 100 euros.
👇🏼👇🏼👇🏼👇🏼👇🏼👇🏼👇🏼👇🏼👇🏼👇🏼👇🏼👇🏼
You can buy this strain at :
https://www.exoticseed.eu/de/hanfsamen/hippie-therapy-cbd
Water 💧 💧💧
Osmosis water mixed with normal water (24 hours stale that the chlorine evaporates) to 0.2 EC. Add Cal / Mag to 0.4 Ec Ph with Organic Ph - to 5.8 - 6.4
MadeInGermany

Likes
55
Share


@BodyByVio
Follow
Just got done with trimming the 4x4 @greenhouseseedco Super Silver Haze / @blimburnseeds Silver Surfer Haze tent.
The final yield is exactly 1000g plus some (kind of a lot)that I smoke in the last 2 weeks 😃
Also got 6, gallon size ziploc bags filled with good quality trim for concentrate.
To be honest I was expecting a little more but keeping in mind that this grow I did not supplemented with bottled CO2 I think I’m good with the results.
Definitely I enjoyed a lot this grow and I’ve learned even more.

Likes
17
Share


@ipoke_smot420
Follow
Day 21 - as of today, the Alaskan Diesel(@seedsman) is showing her girl parts. The Face Fat(@atlasseed) did the same yesterday. Which means......I got 5 girls, as I suspected I would. But it still blows my mind🤯. I love when they do that😍😁. Thanks to @fast_buds, @atlasseed and @seedsman🙏🏼🙏🏼🙏🏼


Likes
24
Share


@el_cultivito
Follow
Middle 2 plants stretched a lot week 3 of flower. They were growing slower in veg so I flipped to flower as soon as their canopy reached the net (barely LST these 2 plants with the net given their slower growth). Then week 2-3 of flower they took off.
Did some defoliating to expose bud sites further down with the intent to increase yeilds.

Likes
57
Share


@Todzilla
Follow
4 Purple Push Pops PPP (grew 2023 outside). Clones from my clone guy.
1000w LED, 4G Autopots, coco/perlite 65/35, RO water, Jacks RO, AC pro Controller and T8, 5x5 GG Tent with extension. Garage grow SoCal
We concluded the ripening this week with AC and dehumidification at 70° 40% relative humidity lights on and 65° and 45% relative humidity lights off.
We’re feeding Jacks RO and silica to the end, hence the fan leaves are still relatively healthy. This is a no flush grow.
I’ve n been growing at 80% lights (800w) for most of the Grow. During ripening, I pushed it to 90% or 900 W. On the final day, I run the lights 24 hours and I run 15 minute cycles of 900 W and 1000 W.
Just following the science; No more flushing and push the lights higher and higher at the end.
We started a slow chop to fine tune the quality and get more light deeper into the canopy.
After 4 more days of testing and monitoring they were ready, it all came down and we filled the 6-tier drying rack.
We’re curing At 70° and 55% relative humidity for two days and then bumping that humidity to 62%. The test round (top colas) is already in jars and beginning the burping stage.
Fiancé is happy, the hard work is coming to an end, and it’s time to start enjoying the fruits of our labor.
Best of luck on your grow.
Processing
Likes
6
Share


@SniperFourTwenty
Follow
Oh well, not my (our) week 🙄
During the week the Ladys start to look a overwatered and I had no idea how this could happen ... Well, first I tried to rise temperature slightly and had the fans run more often to dry them out a bit quicker, did not work. Than I took them out of the System ... All together worked, at least it looked so ... for 1 day ... Yesterday I found the real reason. The Humidity Controller was broken ... During the night they had around 90% humidity and during the day only 25-30%, way to high and way to low. Replaced the Controller today, hope next week will start smoother 🙂
Beside of this they made huuugggeeee progress, some nearly tribbeld in size and are around 5-6 Nodes now, will top them all next week when they recovered a bit 🙂
Also added some Alfaboost to help them a bit.
In the Videos the Vanilla Ice are in the right 🙂
Thanks for your time, I hope you enjoyed this entry 🙂
See you next week 💚

Likes
7
Share


@Double_AAs_Garden1
Follow
The madeshift Co2 hanger I had broke and fell on the Norther Lights! It almos split the plant down the middle . I tape it up and it's seem to be enough to keep it alive .


Likes
5
Share


@glenk222
Follow
Transplanted week 5 put it 3 gal cloth pots 1/3 strawberry fields soil, 2/3 Happy frog, 1/2 cup rice hulls total, mixed into both soils. watered with recharge mix 1/4 tsp to a gallon of water. Back in to the veg tent.
Likes
12
Share


@JeyGanesha
Follow
Prossime settimane via....anche queste forbidden runtz sono pronte da conciare,🤣❤️💛💚... quest'ultima settimana la notte la sto lasciando fuori in balcone per fargli un buon sbalzo termico..,,.......
Ho tagliato anche quest'ultima forbidden runtz


Likes
1
Share


Likes
113
Share


@PEAKYPLANTERS
Follow
my experience with these strains has not been one of the best .... in the last few weeks there has been a sharp increase in temperatures making things very difficult ...
very slow growth for coockies considering that in the same tent I had 3 other autoflows that had been ready for a few weeks.
discrete power .... almost light ... lighter flowers inside the buds ...
ABUNDANT HARVESTS FOR ALL OF YOU ... FRIENDS
PEAKYPLANTERS GREETS YOU
