


Likes
Comments
Share

@GoodTimesOrganics
Follow
Hi liebe Community and Welcome Back! 💚
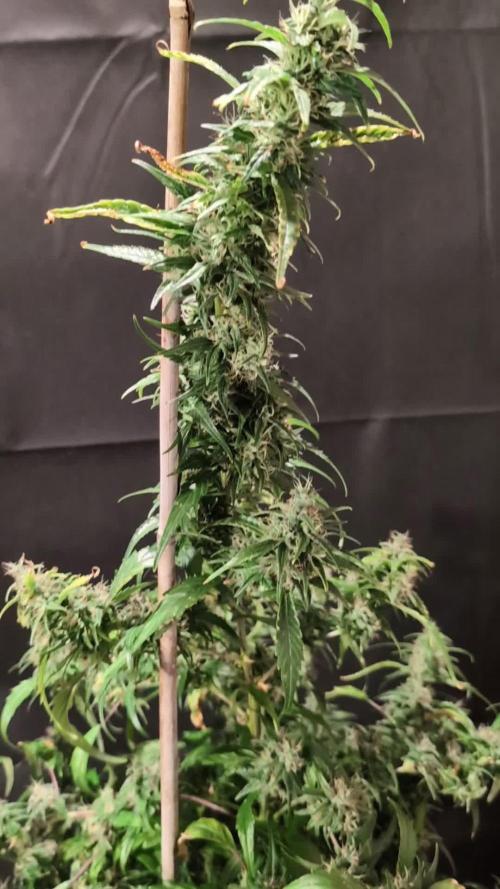
Nach der fünften Blütewoche entwickelt sich die Orange Bud weiterhin akurat.
Die Pflanze bildet viele Stugmen aus und die Dichte zieht sich so von Kopf bis Fuß durch.
Ein bisschen Spitzen Burning ist zu verzeichnen. Dafür bilden sich die Blutentriebe sehr schön aus. Und die Stigman fangen an zu sprießen.
Durch das ReVegitieren, hat die Pflanze leider etwas an Stabilität verloren, daher tragen die Seitäste nun das Gewicht der Blüten nicht so gut.
Diese Woche gab es noch einen Bio Tabs PK Booster Komposttee 🌿☕
Ich hab nochmal ein paar Blätter rausgenommen, so dass die Pflanze auch im unteren Bereich schön ausgeleuchtet werden kann.
Die Umgebungsgegebenheiten sind aktuell hot and dry:
—————
🌞 Temp: 27°C
🌚 Temp: 18°C bis 19°C
💨 RH: 49%
VPD: 1,42 kPa
💡ppfd: 830 mpm
—————
Viele Grüße 👋

Likes
9
Share


@sunshinegroww
Follow
Little brucey starting to fatten up for sure as she looks she mite produce some big colas,the smell is insane and so sticky wow and amount of resin she have its a wow ,I’ve should trained her a bit due to not much space in the tent just left her as it is ,not long now 💪🔥🎄💦


Likes
14
Share


@Mr_nugs_lover_David
Follow
This lady has been Transplanted on day 39 since she was planted (may 10th) and I've prepared the 15L pot with the complete line of biotabs using 2 spoons of startrex for every 5L, sprinkled a couple of grams of mycotrex on the transplant hole before putting the plant and then I added 3 slow release tabs one biotab for every 5L of soil, so that's why in this case I added 3, after the Transplant was done I immediately watered the plant with 1ml/L of orgatrex and 1g/L of bactrex, I hope you guys enjoy my work this season!!


Likes
24
Share


@Firepharmer
Follow
Update the to a 4x8 this week and added a HLG 300 V2 RSpec with the futur vert FM8 flora max 660watts pumping 960 watts now ..
Every thing is stacking up an fattening up beautiful in week 4 , The frost is coming out like a snow storm now in to week 5 flower ... I’m very impressed with the bud size on the slurricane ix this early on !!


Likes
1
Share


@HerrnLubitz98
Follow
Welcome to week 2 day 2!
Started the day with transplanting as the roots were showing - as Said 20L/5gallon pots Unfortunately one ripped so I gotta use one 7L again.
Started the transplant with .4g of microbes per liter and got them all 1L for the transplant.


Likes
5
Share

@DE_BW
Follow
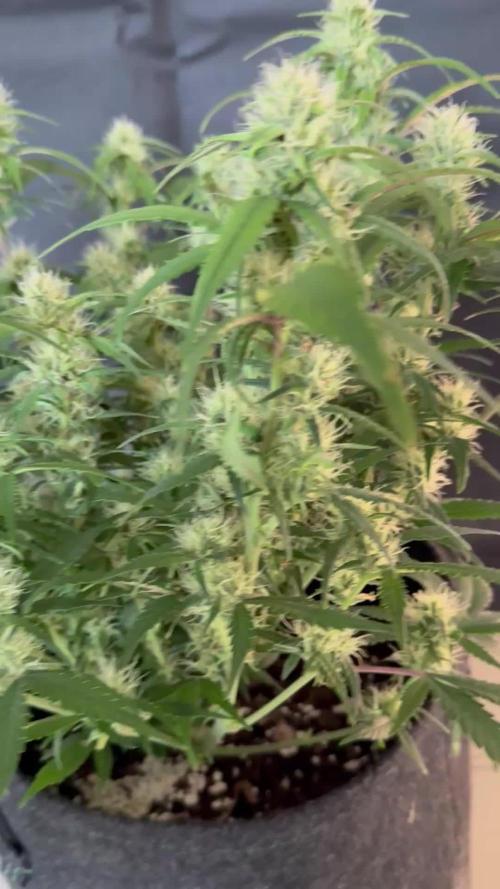
This week showed a massive step forward in bud development. The plant stretched just enough to improve spacing, but overall stayed compact and well-structured. The canopy is now leveling out nicely, with multiple tops catching up and forming a very even surface.
What stands out the most is the number of bud sites. Despite the plant’s relatively small size, it has developed an impressive amount of tops, all of which are already stacking early and showing strong potential. The structure is open enough to allow good light penetration, especially after some light defoliation to clean up the inner canopy.
Bud formation is progressing quickly. The flowers are building density earlier than expected, with tight clusters forming along nearly every branch. The main colas are clearly defined, but the secondary sites are not far behind, which could lead to a very balanced yield across the plant.
Leaves are healthy and vibrant, with a deep green tone. Slight adjustments in feeding have been made to support the transition fully into bloom, focusing more on phosphorus and potassium while reducing nitrogen.
Overall, this plant is performing exceptionally well. The combination of compact size, high bud site count, and early stacking makes this one of the most promising runs so far. If development continues at this pace, the final result could be very impressive.
Likes
6
Share


Likes
92
Share


@DogDoctorOfficial
Follow
Week 10 - Second Week of Flowering 🌸
As week two of flowering begins, the garden’s growth is unstoppable! These ladies are thriving, stretching up while staying beautifully vibrant and green. Every inch of this tent is optimized—each plant is soaking up light, nutrients, and water precisely as they need, filling the room with energy.
Room Conditions 🌡️
• Temperature: 27.3°C
• Humidity: 62.6%
• CO₂ Levels: 800 ppm
• VPD: 1.36 kPa (excellent range for robust flowering)
• Lighting Intensity: 818 PPFD
Solution & Medium 💧
• Solution Temp: 21.5°C | TDS: 470 ppm | pH: 6.02
• Medium: Moisture 100% (recently dried to 67%), TDS 510 ppm, Temp 22.5°C
The “dry-out” to 67% was a strategic move, helping boost nutrient uptake and root strength. Meanwhile, our slight increase in reds seems to be having the desired effect, nudging these ladies further along in the flowering process.
Eye Safety & LED Lighting 🌞🕶️
With powerful LED systems like the ThinkGrow and ICL-300, eye protection is critical. LED grow lights emit high-intensity light across the full spectrum, including intense UV and infrared components that are not easily detected by the human eye. Long-term exposure without adequate protection can lead to eye strain, and in extreme cases, damage to vision.
• Blue Light Hazard: LEDs often have elevated levels of blue light, which can harm the retina over time if proper precautions aren’t taken.
• UV Protection: Even low doses of UV can accumulate and harm eyes, so grow glasses with UV protection are essential for any indoor gardener.
Investing in quality grow room glasses can help protect from glare, UV, and infrared rays, making plant care safer and more comfortable.
Lighting Enhancements: ICL-300 In-Depth 🔆
The ICL-300 is our newest addition, specifically designed for inner canopy illumination. This LED offers a targeted light boost under the canopy, enhancing flower growth in lower and shaded areas—ideal for maximizing yield and light efficiency.
• Dual Spectrum Technology: The ICL-300 provides a custom spectrum designed to penetrate deeper into the plant canopy, promoting robust bud formation throughout.
• Enhanced Light Distribution: With strategically positioned diodes, the ICL-300 reduces shadowing and balances light distribution to all parts of the plant.
• Energy Efficiency & Heat Management: This light is designed to be energy-efficient, running cooler and reducing the risk of heat stress within the grow space.
The inner canopy light gives the plants exactly what they need, particularly during the flower stage when bud sites deep in the canopy can benefit from more direct exposure. However, after noticing slight leaf burn on some plants, I’ll hold off a bit longer before fully integrating this light to ensure optimal adjustment.
Looking Forward 🌟
As we continue dialing in conditions, it’s all about balance, precision, and taking proactive steps to optimize every aspect of the grow environment. We’ll keep a close watch on the canopy height, and next week, I’ll aim to fine-tune the light integration even further with the ICL-300.
P.S. - ICL-300 and CO₂ Sensor 🌱
The TrolMaster CO₂ Sensor (MBS-S8) has been crucial for real-time CO₂ adjustments, ensuring the plants get exactly what they need without constant monitoring. Combined with the ICL-300’s spectrum flexibility, these tools make an unbeatable setup, allowing for nuanced control over plant growth and development.
As always, a huge thanks to the Grow Fam for the tips, support, and enthusiasm! I’m excited to see what these next weeks will bring as these plants reach their full flowering potential. Stay tuned for more updates, and don’t forget: eye safety first, growers! 🌞🌿
Discount Codes so you can save big on your next check out 💚💚💚
Kannabia - DOGDOCTOR 30% off
SeedsmanSeeds - DOGDOCTOR 10% off
CannaKan- DOGDOCTOR 15% off
terpyz.eu - DOCTOR 15% off
The Neutralizer - PORKIT5-DOG 15% off
As always thank you all for stopping by, for the love and for it all , this journey of mine wold just not be the same without you guys, the love and support is very much appreciated and i fell honored and so joyful with you all in my life 🙏
With true love comes happiness 💚🙏 Always believe in your self and always do things expecting nothing and with an open heart , be a giver and the universe will give back to you in ways you could not even imagine so 💚
Friendly reminder all you see here is pure research and for educational purposes only
Growers Love to you all 💚💚💚


Likes
36
Share


@Cannabeast40
Follow
Welcome back to yet another short update☺️
Transplanted and filled with tender care and love 🤗 A bit colder temperatures then inside the veg tent , but I’m not worried at all🤩
Videos show the process, hope you enjoy 💯💚
See you next week🤩
------------------------------------------------------------------------------------------
Light source:
Medicgrow SpectrumX
880W LED
Build in PPFD
4 controllable spectrums V1, F1, VS, FS
Visit https://medicgrow.com/ for more informaton.
Light measurement:
Apogee MQ-610 & Apogee DLI-600.
Fertiliser:
Organics Nutrients
https://www.organicsnutrients.com/en/
Green Buzz Nutrients
Discount Code: GD42025
Grants 25% with a minimum Order value at 75 Euro.
https://greenbuzzliquids.com/en/shop/

Likes
21
Share


@BLAZED
Follow
Week 18 (30-6 tm 5-7)
30-6
Temperatuur: 31.4 graden (licht aan) 22.5 graden (licht uit)
Luchtvochtigheid: 69% (hoogste) 50% (laagste)
Ik heb de trichomen bekeken en heb besloten haar nog een dagje langer laten staan.
Watergift: Geen.
1-7
Vandaag heb ik de trichomen opnieuw bekeken en die zien er goed uit! Veel cloudy en best wel wat amber.
Ik hou echt van deze trichome foto's, echt mind blowing hoe dat er uit ziet!
Dus vandaag gaat de schaar er in!
2-7
Ik heb besloten om een wet trim te doen zodat als ze droog is ze gelijk in de cure pot kan.
Geloof het of niet, maar ik ben wel 12 uur lang bezig geweest om alles te knippen 😅
Op 1-7 ben ik in de middag begonnen en in de vroege ochtend van 2-7 was ik klaar.
Het natte gewicht van de buds is 283 gram, en het natte gewicht van de trim is 61 gram.
Ik ben nu al super tevreden met het gewicht! Dit is meer dan het dubbele aan gewicht vergeleken met mijn eerste grow.
De buds zien er ook echt mooi uit. Ik schat dat het tussen de 50 en 75 gram droog gaat zijn. Ik ben benieuwd, nu een paar dagen drogen!
Droogtent:
Temperatuur: 23.4 graden (hoogste) 21.2 graden (laagste)
Luchtvochtigheid: 59% (hoogste) 42% (laagste)
3-7
Droogtent:
Temperatuur: 23.2 graden (hoogste) 21.5 graden (laagste)
Luchtvochtigheid: 50% (hoogste) 41% (laagste)
4-7
Droogtent:
Temperatuur: 23.1 graden (hoogste) 22.1 graden (laagste)
Luchtvochtigheid: 53% (hoogste) 46% (laagste)
5-7
Na 3 dagen is ze droog genoeg om te curen. Wel heb ik iets te lang gewacht want de LV in de jar geeft nu 57% aan.
Ik hoop dat dit over een dag wat om hoog gaat. Nu een paar weken curen en dan kom ik met de rook verslag 😁
Ik zal binnenkort ook even berekenen wat de gram per watt is, aangezien ik de lamp niet de gehele grow op 100% had staan.
Het droge gewicht van de buds is precies 75 gram, en het droge gewicht van de trim is 19 gram.
Samen maakt dat 94 gram! (De trim gebruik ik om een CBD cake of bubble hasj te maken)
Ik wil iedereen bedanken voor het volgen van dit avontuur! Tot de volgende keer!
Likes
7
Share

@Hazeberg
Follow
Day 63 Jungle Jimmy 69 cm / Day 64 Pink Cookies 99 cm: Nothing to do today.
Day 64 Jungle Jimmy 69 cm / Day 65 Pink Cookies 99 cm: Nothing to do today, except cleaning the reservoir.
Day 65 Jungle Jimmy 69 cm / Day 66 Pink Cookies 100 cm: Nothing to do today.
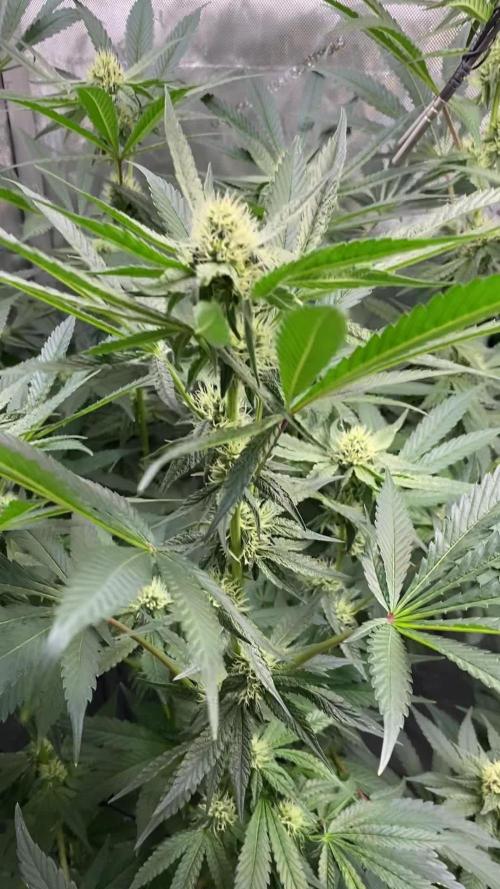
Day 66 Jungle Jimmy 69 cm / Day 67 Pink Cookies 100 cm: Nothing to do today. I noticed something, I thought I would never see in my grow, some leaf buds on Jungle Jimmy 😍
Day 67 Jungle Jimmy 69 cm / Day 68 Pink Cookies 100 cm: Nothing to do today.
Day 68 Jungle Jimmy 69 cm / Day 69 Pink Cookies 100 cm: Nothing to do today. Day 29 after switching to 12/12.
--------------------------------------------------------------
🙏 Thanks for visiting and follow for daily updates 🌱
Likes
31
Share


@Bbfcfm3414
Follow
SCROGING is an amazing technique that I will get better at but this being my first real attempt I clearly see how important it is to get everything cleaned up under the net. I’m not touching anything now and I’ll just do better next time.
Anyways my garden looks really good, and the buds look real good and my canopy is pretty even. I mean it’s 4 or 5 inches off and if I would have tucked one more time I could have got things a bit more even. The Grand daddy purples buds are definitely going to be lighter. The vanilla frostings buds are going to dense and thick.
If I take what I’ve seen from the past couple harvests my light will really turn these buds into little dense monsters. The viperspectra PAR1200 is a good light and makes heavy dense buds. I highly recommend the PAR1200 for a 3 x 3 space.
Happy 420!
Update - I think I missed 1 week in my grow. Today’s the last day of week 4 and I gave the girls a little trim today and cleaned those big fan leaves off. What a difference a little trim makes! I took these new photos about 8 hours after their trim. All those buds sites that were being covered reached out and here’s a few pictures of what was underneath. Have a great weekend!


Likes
2
Share


@Abreuvoir
Follow
18 september 2022
flowering: week 8
-now 2 weeks of water only
-the 10 heavy top heads need assistance
-I used wires to keep them up
-Harvested the smaller-lower-more mature branches
-- 154g wet
-felt like it would speed up maturation of main heads
-also fun having less mature weed

Likes
5
Share

@Ibgrowing
Follow
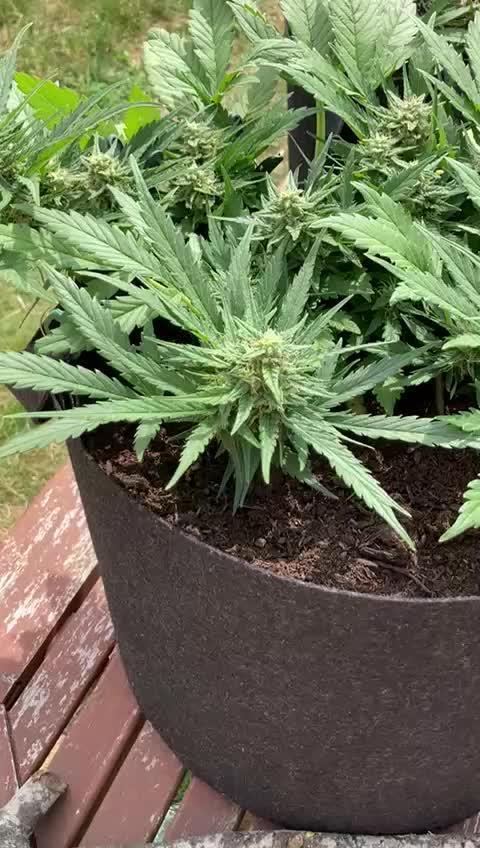
I am not home at the moment so I have someone taking care of my girls. The quality of the video is a bit grainy because of WhatsApp, sorry about that. She is still getting the same amount of nutes, but i will probably up it.
Likes
20
Share


@Naujas
Follow
megaite doesn't look beautiful and happy, of course I didn't expect anything else, to be honest I didn't expect to go this far :) so as long as she lives I'm happy :)

Likes
26
Share


@MadeInGermany
Follow
Flowering day 37
since time change
to 12/12 h.
Hey guys :-)
The buds have developed incredibly nicely this week.
The smell is getting more and more extreme :-) .
The whole plant itself looks perfect 👍.
The growth has slowly stopped as the full energy goes into the production of the buds.
This week it was watered 3 times with 1.2 l each (nutrients see table above)
They were individually inspected and checked for their health.
Osmosis water for the coming week was refilled in a 100 l tank 👍.
Have fun reading the diary and stay healthy 💚🙏🏻
👇🏼👇🏼👇🏼👇🏼👇🏼👇🏼👇🏼👇🏼👇🏼👇🏼👇🏼👇🏼
You can buy this Nutrients at :
https://greenbuzzliquids.com/en/shop/
With the discount code: Made_in_Germany you get a discount of 15% on all products from an order value of 100 euros.
👇🏼👇🏼👇🏼👇🏼👇🏼👇🏼👇🏼👇🏼👇🏼👇🏼👇🏼👇🏼
You can buy this strain at :
https://www.exoticseed.eu/de/hanfsamen/lemon-candy
Water 💧 💧💧
Osmosis water mixed with normal water (24 hours stale that the chlorine evaporates) to 0.2 EC. Add Cal / Mag to 0.4 Ec Ph with Organic Ph - to 5.8 - 6.5
MadeInGermany

Likes
57
Share


@Regenwurm
Follow
Die Lady die an Tag 56 geflusht wurde, wurde an Tag 61 erneut mit Flawless Finish solange gespült, bis der Ec wert zwischen 0.2 und 0.3 war (Summe 30 l für 11 l Töpfe). Bis zum Hacken am Tag 65 bekommt die Ladie kein Wasser mehr. Alle anderen bekommen nach wie vor die volle Menge. Die Tricome sagen, dass Sie noch nicht so weit sind.... ich denke es dauert immer noch min 10-14 Tage. Warum die eine Pflanze so viel schneller ist.... keine Ahnung.Die Buds werden bei den 3 anderen immer dicker und stehen gut im Saft. RLF steht nun zwischen 35-43 % um Schimmel keine Chance zu geben. Die Temperatur ist auch konstant gut....
Likes
92
Share

@DogDoctorOfficial
Follow
Week 9 - First Week of Flowering 🌸
The dark period has ended, and these ladies came back into the light fully energized and ready for action! It’s just the first week of flower, and they’re all praying, stretching, and absolutely thriving—filling up every inch of the tent. This grow space is officially packed from wall to wall, with each plant competing for its share of light and showing off some of the biggest, healthiest leaves I’ve seen yet! 🌱
A few strategic plucks here and there have kept airflow smooth and light penetration balanced. Those big leaves? They’re a sign of happy, healthy growth. Large leaves help the plant capture maximum light energy, essential during this stage, especially as they start focusing on developing those flowers. When plants grow huge, vibrant leaves like these, it means they’re well-nourished and content in their environment—a true testament to the well-balanced conditions we’ve got going in the tent!
Flowering Parameters 🌡️
Room Environment:
• Temperature: 26.7°C
• Humidity: 63.3%
• CO2: 960 ppm
• VPD: 1.29 kPa (prime zone for flowering health!)
Lighting:
• Light Intensity: 835 PPFD (ideal for boosting flower growth)
• Solution: pH 5.96, TDS 460 ppm, temp 21.1°C
• Medium: Moisture: 100%, TDS: 520 ppm, Temp: 21.6°C
Carbon Filter Installation & Smell Management 🌬️🌱
With the transition to flower, the scent profile is already starting to kick in—crazy for the first week, right? 🌸 To keep everything fresh and under wraps, I’ve set up a carbon filter system. Here’s how it’s working: I’ve connected the filter to my Aerofan, which pulls air directly from the tent. This air is cleaned by the filter and released into the main room, where it then passes through another filter before exiting my space. This dual-filter setup means no scent escapes into the wild, keeping things stealthy and the grow room a peaceful, scent-contained environment. Perfect for anyone concerned about keeping their home free from that telltale aroma! 🕶️🌬️
Enhanced Lighting with Emerson Effect 🌞
This week, I’ve introduced an extra 15 minutes of red light at the beginning and end of each light cycle. Why? Well, this red boost taps into the Emerson effect, enhancing photosynthesis efficiency, especially during the flowering stage. By stimulating a little extra wake-up and wind-down light, we’re mimicking the natural sunrise and sunset experience for these plants, which can help reduce flowering time. Not only does it encourage smoother transitions into day and night, but in theory, it’ll help these ladies finish a bit faster, while giving them a little nudge to build more substantial, quality flowers. 🌇
Nutrient Adjustments 🌱
Now that we’re in flower, I’ve swapped out the Start Booster for P-Boost and TopBooster to specifically support flowering needs. Here’s why:
• P-Boost brings in additional phosphorus, vital for energy transfer and cell division as the plant channels more resources into budding sites.
• TopBooster supports the flowering phase by improving flower quality and density, helping to build those big, aromatic buds we’re after.
These changes bring the nutrient mix in line with what’s most beneficial at this stage. All this precise dialing in is easy to manage thanks to the TrolMaster system. From pH to nutrient scheduling, the TrolMaster ecosystem and ThinkGrow LEDs have been the ultimate teammates in this grow journey, giving me real-time data, fine control, and peace of mind. 💯
(Not introducing UV light just yet, but stay tuned as that’s coming soon for an added boost!)
Looking Forward 🌟
Next week, we’ll be upping the reds, giving us an even greater chance of activating those flowering signals for a smoother, faster transition through the cycle. I’ll keep tweaking and fine-tuning every parameter to make sure these ladies get exactly what they need to thrive.
Big thanks to the TrolMaster system for keeping everything in balance and optimized, along with the supportive Grow Fam following this journey! Your enthusiasm, advice, and support are a huge part of this grow’s success. Keep following for more updates, and stay tuned for what’s next! 🌿✨
P.S. Deep Dive: TrolMaster’s MBS-S8 CO₂ Sensor & Smoke Detector 🚨
The MBS-S8 CO₂ Sensor from TrolMaster is a powerhouse for growers, especially when it comes to optimizing plant growth and efficiency in a controlled environment. This sensor continuously monitors CO₂ levels and integrates directly with the TrolMaster ecosystem, giving you real-time data on CO₂ concentration. Ideal levels of CO₂ can significantly boost growth and yield during certain stages, so understanding and managing CO₂ is key. With the MBS-S8, I can control CO₂ levels precisely, keeping them within the optimal range for photosynthesis. This sensor is a game-changer because it adjusts CO₂ delivery automatically, giving plants exactly what they need without any extra monitoring from me.
Meanwhile, TrolMaster’s Smoke Detector is an essential safety device, especially in spaces with electrical equipment, lights, and heat-generating components. This detector can be set up to alert me instantly via the TrolMaster app if any smoke is detected, allowing me to respond immediately to any potential issues. Fires and smoke are rare in controlled grow setups but having this safety measure provides peace of mind and lets me focus on the plants without constant worry. It’s an incredible tool for any grower prioritizing safety and proactive monitoring.
Discount Codes so you can save big on your next check out 💚💚💚
Kannabia - DOGDOCTOR 30% off
SeedsmanSeeds - DOGDOCTOR 10% off
CannaKan- DOGDOCTOR 15% off
terpyz.eu - DOCTOR 15% off
The Neutralizer - PORKIT5-DOG 15% off
As always thank you all for stopping by, for the love and for it all , this journey of mine wold just not be the same without you guys, the love and support is very much appreciated and i fell honored and so joyful with you all in my life 🙏
With true love comes happiness 💚🙏 Always believe in your self and always do things expecting nothing and with an open heart , be a giver and the universe will give back to you in ways you could not even imagine so 💚
Friendly reminder all you see here is pure research and for educational purposes only
Growers Love to you all 💚💚💚