


Likes
Comments
Share

@ThatsmyGrow
Follow
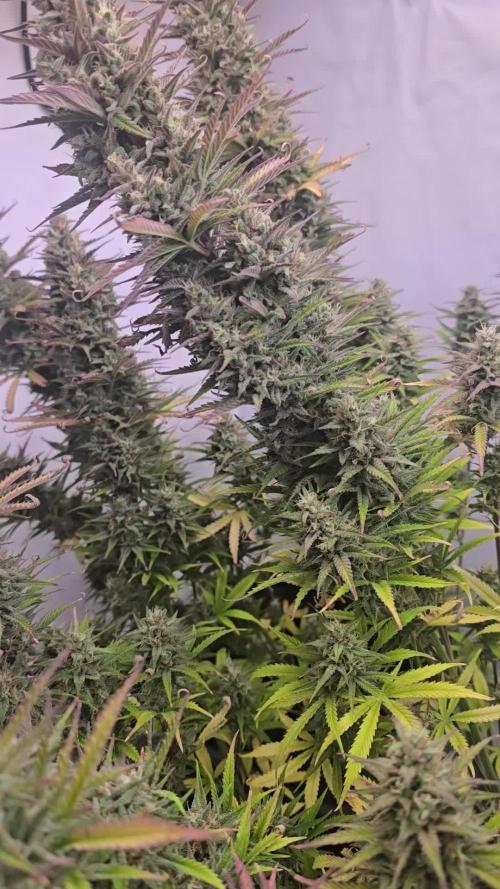
It's shocking how long the pound cake takes to grow. In the end, it has the whole tent to itself... We're still two weeks away from harvest; let's see what the beast turns out to be.

Likes
13
Share


@Robeeriegenetics
Follow
Second week of flowering in the bag, and they’re all looking really healthy, even healthier than when I first threw them in the flower steady as she goes
Likes
16
Share


@HegauHillsFarmers_M11
Follow
Tag 14 - Beginn der 3 Woche.
Die Pflanze wird nicht mehr besprüht und die Luftfeuchtigkeit wird niedriger gehalten.
An Tag 9 der letzten Woche wurde die Pflanze gedüngt.
Nährstofflösung:
1 ml/l - B-52 Advanced Nutrients.
1 ml/l - Voodoo Juice Advanced Nutrients.
0,5 ml/l - pH Perfect Sensi Grow Part A
0,5 ml/l - pH Perfect Sensi Grow Part B
Davon hat die Pflanze 250ml an Tag 9 erhalten.

Likes
10
Share


@OrganicAutomatic
Follow
The girls moved to they're 4 gal pot and begin to settle down under 120w led 301h samsung
About 120cm away from the top
Temperature 22c and lower the humidity to 60 and increase the air circulation to the point the leaves are moving just a bit.
I can notice how they are growing a little each day.
At this point i only spray the top soil when ever it dry just tap water 8ph.
My soil have organic matters that pull the ph constantly to 5.5 so it balanced itself around 7-
That's it for now i think. Happy growing.
Likes
10
Share


@Cauli
Follow
So far nothing special, everything seems to be fine.
She had some sunny days at the beginning, but weather got cloudy and relatively cold – this has slowed her growth for sure.
But want her to adapt well to her conditions, so only put her inside in really cold nights.
She got her endpoint directly on day 3, it's a 9L airpot. root was already at the bottom of the small starting pot. so maybe this stressed and slowed her too.
Let's see how she will grow the next days.
Video for this week will follow. Filming quality of my phone is not as good as would have liked it.
But working on it.
Processing
Likes
30
Share


@CBD_Sweden
Follow
2018-03-20 Week 12 Day 1
New week and not much to say. No water or nutes today, just the regular weekly check to see that they look nice and healthy.
Raised the lamp about 10 cm to make sure that the girls don't get burned again.
Sour Ripper nr1 is 59 cm
Sour Ripper nr2 is 57 cm
-----------------------------------------------------------------------------------------------------------------------------------------
Strain information
After much effort Ripper seeds can introduce one of the most appreciated varieties by genetic collectors.
They have worked to get one of the few lines of Sour Diesel feminized version preserving the main qualities of a good Sour D: flavor and potency.
Sour Ripper has a sativa structure with a wide distance between branches, little foliage and a more compact and desirable bud than the Original Sour Diesel we work.
It's flowering period is 65-70 days.
The most "undergrown" taste of the United States available for your collection.
Vegetative: 1 to 2 weeks
Genotype: 60% Sativa / 40% Índica
Indoor flowering: 65/70 days.
Outdoor flowering: Mid October
Yield: Medium / High
Effect: Powerful.
---------------------------------------------------------------------------------------------------------------------------------------

Likes
32
Share


@Scandinavia
Follow
Fast grow from day 7 till today day 14. I have added a humidifier to help get my RH up cause it was too low. It is still not as good as i would like, but its okay. I started doing some LST and leaf tucking on Day 12 on the biggest plants and those i felt like could benefit from it. Today i lowered my lights so now my MH 600w light is down to 50cm from the canopy and the LED is at 45cm.
I also bought a Lux meter (Urceri Cloc – Lux Meter) to measure but im really confused about it after it showed that the LED puts out way more Lux than the 600MH but its supposed to be better at measuring HID light and not catch all the light from the full spectrum LED but still the LED seems to work better. You can judge yourself with the video ill post with this update. The 2 biggest plants is under the 600W bulb though, so there is alot to take in count at this moment.
Also i removed one more plant, so now the total is 16 plants and i will continue experimint with the height of the lamps. I would love some feedback 😎
Day 15: I took both lights up to 64cm.. Changed the MH bulb to a Full spectrum Bulb which gives more light to my girls
Day 20: posted new pictures, its going good until now, i just wish they were a little bigger but i have many different phenotypes it seems. When they go into flower i may add 400w more hps, but only if they will get big enough
Likes
116
Share


@GERGrowDesigns
Follow
🌸 Final Cure & Smoke Report Sticky Broccoli Feminized
After 12 days of controlled drying and an additional 2 weeks of curing, Sticky Broccoli has fully revealed its final character.
The flowers were dried under stable environmental conditions and cured in Terploc Grove Bags at 19°C, allowing the terpene profile and overall flower quality to develop exceptionally well.
👀 Appearance & Bag Appeal
One of the most striking features of Sticky Broccoli is its visual appeal.
The flowers display:
-Dense and well structured buds
-Heavy trichome coverage
-Beautiful green grey and slightly bluish coloration
-Vibrant deep red pistils tightly wrapped around the flowers
The contrast between the frosted buds and the intense red pistils creates outstanding bag appeal and gives the flowers a premium appearance.
The SCROG training throughout the grow cycle clearly paid off. Aside from a small amount of popcorn buds (approximately 33g), the harvest consisted almost entirely of large, uniform flowers with excellent structure and consistency (Total 318g).
👃 Aroma & Flavor
The aroma closely reflects what was observed during late flowering.
Sweet candy like notes dominate the profile, accompanied by creamy dessert characteristics and fruity undertones reminiscent of Gelato and Zkittlez type cultivars.
After curing, additional depth emerged, introducing a slightly sharper and more complex edge to the bouquet.
The flavor translates remarkably well from aroma to smoke, delivering:
-Sweet fruity notes on the inhale
-Creamy dessert-like undertones
-A noticeable gassy and slightly plant-forward finish on the exhale
The combination creates a rich and enjoyable smoking experience with multiple layers of flavor.
✨ Overall Impression
Sticky Broccoli proved to be an exceptionally rewarding cultivar from seed to cure.
The strain combined:
- Excellent genetic stability
- Strong training response
- Heavy resin production
- Attractive coloration
- Dense flower structure
- Complex terpene expression
From cultivation to the final cured product, the entire process remained consistent, predictable, and highly satisfying.
The final result is a harvest with impressive visual appeal, strong aroma, enjoyable flavor, and flower quality that fully reflects the effort invested throughout the grow cycle.
A cultivar that successfully delivered on every stage of the journey.

Likes
563
Share


@Ju_Bps
Follow
Hello my friends 👩🌾👨🌾,
This 8th flowering week was good 👊, maturation Buds continue 🌲❄️, I thought it will be the last week, but need one more.
The end is for this week end I think, for moment trichromes not really full milky, and I like something like 20% amber.
I've started flush with flash cleaner
The senesence is started on the #3.
💦 1 Watering this week 1.8l/plant .
Water + flash cleaner
PH@6
Lamp @100%
Bisous 💋😘, and see you next week.
Thanks community for follow, likes, comments, always a pleasure 👩🌾👨🌾❤️🌲
Mars Hydro - TS 1000
https://www.mars-hydro.com/ts-1000-led-grow-light
Mars Hydro - FC3000
https://www.mars-hydro.com/fc-3000-samsung-lm301b-led-grow-light
Mars Hydro - SP3000
https://www.mars-hydro.com/sp-3000-samsung-lm301b-greenhouse-led-grow-light
The High Chameleon - Bisous Au THC 💋💋🌲🌲😘😘
https://www.thehighchameleon.com/shop/bisous-au-thc-83
Likes
35
Share


@Bud_Koenig
Follow
Yo, what’s up, friends! Harvest day is getting closer 😍 Cannalope Haze is pretty much ready, but I’m holding off until Sleepy Joe catches up — I think just a few more days. The trichomes are mostly milky, with a few amber ones showing, which is exactly how I like it for a more uplifting effect to keep me productive throughout the day.
For drying, I’ll hang the plants in my tent and aim for 20°C and 60% relative humidity. Let’s see how it goes—I’m excited to see the final result. Stay tuned for updates!


Likes
39
Share


@Skunk_Life85
Follow
She is loving the 1000watt light. She is starting to stretch a little. There is 12 tops total. I put the tomatoe cage around her and her sister to help with support and training. Large internodal distances. Couple of calixs have popped up besides the pre flowers. No deficancys or issues, so far east strain to work with.
Processing
Likes
2
Share


@Cogollo_eu
Follow
**Encontrarás la traducción a español al final de la descripción**
From/Desde: 09/09/19 || To/Hasta: 15/09/19
From day/Desde día: 08 || To day/Hasta día: 14
Blueberry Cookies Diary / Diario de las BlueBerry Cookies:
https://growdiaries.com/diaries/38769-dinafem-039-s-blueberry-cookies-at-the-ocean
-----IMAGES & VIDEOS-----
V1 - Transplanting day. I'm using 10 l Aeropots as final recipient. I've used:
- Small layer of ATAMI HydroRokz (perlite) at the bottom of the pot, just for cover bottom holes and to retain a bit of humidity
- Over the perlite i placed 1l of mixture with BioBizz "All Mix" and Volcanic Soil
- Again over, 1l of mixture with BioBizz "Light Mix" + Volcanic Soil & Guano
- And filled the rest with BioBizz "Light Mix" + Volcanic Soil
It's the second time that i broke half of the roots of a plant doing a transplant, It happened to me just for not being careful enough to hold the soil by the lower part. While this is no good, no further signs of that mistake other than the recorded video ;).
V2 - Quick show up on how to correct the color of photos taken under red/ping/purple light.
First I merge the HDR image from 3 bracketed shots, then I apply my custom color adjustment in the HDR resulting image.
As i show in the video, to correct the red light, you have to enhance the blue and green curves, just play with a point in the curves until you find the best adjustment for each of both curves. Then you should go to tones, and play a bit with reds, pinks & purples... and.... Voilá, you can see the results, easy and effective..... but no more easy than using the right white spectrum.
P1 - Cookies Showdown before transplant
P7 - Volcanic soil and Guano
-----WEEK SUMMARY-----
This week was very easy, i didn't do anything to these babies apart from the transplant. This is the first time im mixing something with the soil, I hope not to overfeed the Cookies with the nutes, as i'm going to use the same nutrients i was using.
The first 10 days they were growing in my 60x60x40 tent (DP60), with a terrible chinese light that i always use the first week wen I plant.
PandaGrow 100W (50W draw) - http://www.pdgrow.com/index.php?m=Show&a=index&cid=12&id=53
So after transplanting when i place the plans under the Quantum Board or the Platinum LED, i've notice it on them immediately, they really don't like this kind of chinese lights.
Thus after the transplant the plants has started to grow and wide much more and much quickly.
-----WATERING CALENDAR-----
12/09/19 DAY 11 - 1,5 l after transplant with all week nutrients @ 0.8 EC & PH5.8
*****ESPAÑOL*****
-----IMÁGENES & VÍDEOS-----
V1 - Día de transplante. Transplantaré a AeroPots de 10 l. Para el transplante he usado:
- Una capa pequeña de ATAMI HydroRokz (perlita) en el fondo de los tiestos, sólo para cubrir los agujeros y retener un pelín de humedad.
- Encima de la perlita he puesto 1 l de mezcla de BioBizz "All-Mix" con tierra volcánica
- De nuevo encima he puesto otro litro de mezcla de BioBizz "Light-Mix" con guano y tierra volcánica
- El resto está relleno con una mezcla de BioBizz "Light-Mix" con tierra volcánica
Es la segunda vez que se me parter unas raíces por la mitad en un transplante, eso me pasa por no ser lo suficientemente cuidadoso como para agarrar el sustrato por su parte baja. Esto no es algo bueno, pero he de admitir que aparte del mal rato de que se te partan las raíces, a la planta no le sucede nada de nada, sigue creciendo al mismo ritmo que su hermana.
V2 - Un ejemplo rápido de como corregir la iluminación de una foto tomada bajo un espectro rosado o rojizo
En el vídeo primero compilo el HDR compuesto de 3 fotografías horquilladas y una vez compilado le aplico mi ajuste de color.
Como muestro en el vídeo, para corregir este tipo de luces hay que realzar las curvas de color azul y verde, simplemente con un punto por encima de la mitad de la línea media hasta encontrar los puntos más adecuados para tu luz. una vez encontrados, sólo hay que ir a los tonos y ajustar un poquito el rojo, rosa y morado.
P1 - Muestra de las Cookies antes del transplante
P7 - Tierra volcánica y Guano
-----SUMARIO SEMANAL-----
Esta semana ha sido muy sencilla, no les he hecho absolutamente nada a las pequeñas a parte del transplante. Esta es la primera vez que mezclo algo con el sustrato y espero no sobrealimentar las cookies ya que voy a seguir usando los mismos nutrientes que he usado con anterioridad y de la misma manera.
Los primeros 10 días han crecido en mi tienda de 60x60x40 (DP60), con una luz china terrible:
PandaGrow 100W (50W draw) - http://www.pdgrow.com/index.php?m=Show&a=index&cid=12&id=53
Siempre uso esa luz los primeros días de cada cultivo, por lo que al cambiarlas a la Quantum o al Platinum LED lo noto al toque, realmente no les gusta nada la luz china esa, inmediatamente se ponen a crecer y ensanchar mucho mas.
-----CALENDARIO DE RIEGO-----
12/09/19 DÍA 11 - 1,5 l después del transplante con todos los nutrientes semanales @ 0.8 EC & PH5.8

Likes
144
Share


@roro_204
Follow
I received the clones from An out of province breeder.
It reached me after three days of driving on the road with no light. Their future was not certain.
I didn’t think I would need that many fans for the clones because they are so tiny, I figured they didn’t need that much maintenance.
I was 100% wrong when I’m working with this many plants.
I ended up getting mild mildew on top of the soil on the first week because there was barely any air circulation.
At this point I didn’t have any Ventilation put up yet. And one fan on the floor. I ended up installing three fans in one room. No issues


Likes
16
Share

@TrickzGrowz
Follow
Servus Moin!
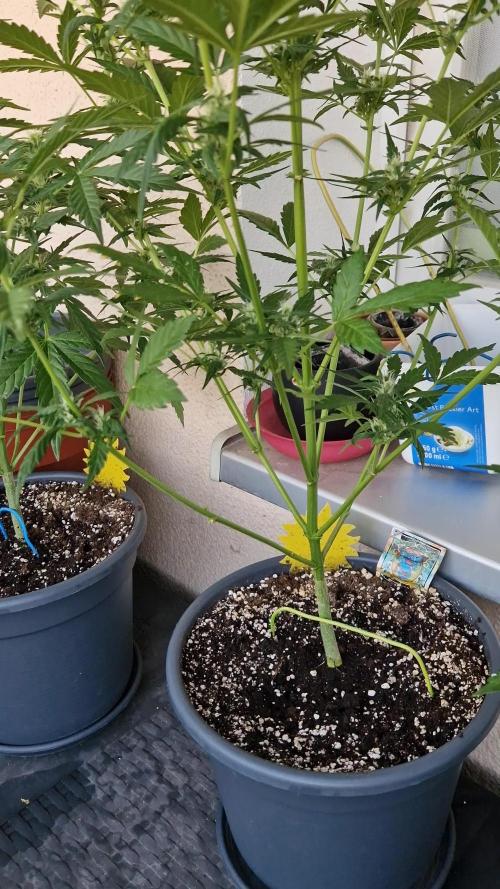
Die Pineapple Slush XL macht im Stretch ihren Namen alle Ehre. Ich habe das Gefühl, sie will gar nicht mehr aufhören in die Höhe zu wachsen. Langsam geht die Budentwicklung los. Bin gespannt wie sie mit den heißen Sommertenperaturen klar kommt.


Likes
32
Share


@Borberad
Follow
Die erste Woche der Blüte beginnt. Habe die Clips entfernt und wir versuchen uns mal mit unserem selbst geknoteten Netz. Mal sehen wie wir damit zurecht kommen. Die Pflanzen erscheinen noch recht klein für die Fläche, gehe aber davon aus, das Netz noch in der ersten Woche fast vollständig zu füllen.
Likes
12
Share


@HIAZ_urbanbudfarmer
Follow
Saturday 16-11-24 , Flowering day # 53 week 8. Harvest day!
Cut branches off plants & hung the 2 front plants off the light.
Put scrog net back in with a large flyscreen laying on top, & spread branches from the back plant over it. This allows complete air flow around the buds. Running a single oscillating fan beneath pointing to the bottom.
Temperature is around 24°C & RH is 55%