
Likes
Comments
Share


Likes
6
Share


@LokalGrenz
Follow
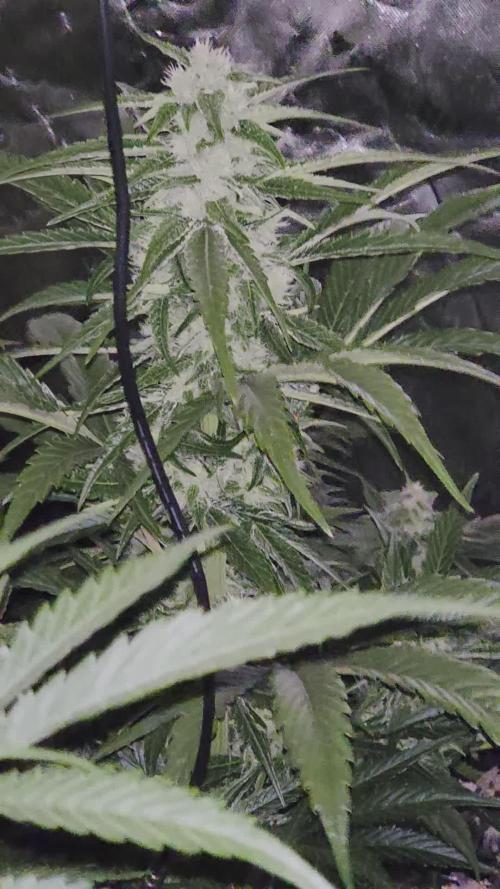
Still dealing with some deficiencies in Thai one growing three other plants in same tent no issues like the one with this one


Likes
13
Share


@eldruida_lamota
Follow
Que pasa familia, vamos con la cosecha de estas Tropicanna Poison F1 de Sweetseeds.
Esta variedad me resultó bastante sencilla de cultivar, y si no la maltratas crece sana a mi parecer, la flor se ve increíble, tiene una cantidad de resina considerable y unos tonos rojos muy peculiares, se ven muy apetecibles.
El olor que desprende es muy peculiar es muy dulce con toques terrosos, a mi parecer, no pinta nada mal, las flores están prietas.
También os comento que la variedad es muy fácil de cultivar y no da mayores problemas, el ciclo no es largo, cuiden con la altura ya que se desmadran un poco.
IMPORTANTE destacar: En las fotos comprobaréis que ya no hay botes de cristal con sobres de bóveda, ahora hay Grovebags.
Que son una especie de sobres o bolsas que retienen el peso, previene la aparición de moho y mantiene intacto el terpeno, para que el curado sea más óptimo.
Hasta aquí todo, Buenos humos 💨💨💨


Likes
3
Share


@TheBudWhisperer
Follow
Week 10 to the day and it’s time for the chop. Won’t be a whole lot see in that regard. It’s all being hand trimmed, packaged and frozen fresh - right from the plant.
Then processing via bubble bags, pressing for live rosin, decarbed and finally - carted.
I’m guessing about a years worth of vapable concentrate.
Likes
170
Share


@Tropicannibis_Todd
Follow
👉Alrighty Then👈
84 days in flipped at 28 days
we are just now over 8 weeks or flowering so most all strains are between 8 and 9 weeks so ......
👉We are now at the final week so too speak 👈 there a few that are top heavy and smoothered in resin 👌 had to do some tie ups and downs .....
We in full flush mode , water Only 😳
Persian Pie from Greenhouseseeds
Full Gas from Greenhouseseeds
Babba Kush from Greenhouseseeds
Rainbow Melon from Fastbuds
Papaya Sherbet from Fastbuds
Weddingcheesecake FF From Fastbuds
Purple Oreoz F1 From Seedsman
Slurricane From Premium Cultivars
Soil by Promix
Nutrients by Cronks
Well this should be fun 🙃
Thanks to all my growmies out there for stopping by its much appreciated 👈
👉Happy Growing👈


Likes
40
Share

@Momentum
Follow
Also wir sind hier in ein etwas größeres Zelt umgezogen, letzte Woche. Die Pflanzen müffeln schon und entwickeln langsam ihre Blüten. Die gesamte Brut ist gesund und munter.
Die Hollywood zeichnet sich zum jetzigen Zeitpunkt mit größeren Buds aus. Hab unten ein wenig MicroBuds gezupft und meine Finger rochen nach Kirsch/Himbeer Zitron Soda und rosa Hubba Bubba.


Likes
4
Share


@ZzTooRightOGzZ
Follow
She smells and tastes great 🔥🔥🔥🔥she also looks good with her purple buds.
Likes
82
Share


@UnorthadoxDude
Follow
Hello growmies! Welcome to week four of An Epsilon Adventure!
The girls are already transitioning into flower, I will get some photos of that later in the week.
Massive thanks to both Shogun and Royal Queen Seeds for sponsoring this grow.
Daily Updates:
###
Week 4 Day 1 11:00 16/7
Removed some lower growth.
###
Week 4 Day 2 23:00 17/7
Tallest plants were showing signs of heat stress so I have raised the light about 30cm more. Unfortunately this now means the lower plants aren't getting as much light as they could, so I have put the cycle back to 20h (I may even increase it).
###
Week 4 Day 3 14:00 18/7
Photographed.
###
Week 4 Day 3 19:00 18/7
Fertigated 2l.
Okay these girls are now starting to concern me a little on the basis that they are supposed to grow to "50-70cm". At just over 3 weeks old the shortest of these girls is 53cm, the tallest (plant 3) is now 76cm tall. The worrying thing is they do not at all look like they are slowing down and as they are just pre-flowering now, the flowering stretch hasn't even started.
So I need some genuine advice here now:
Do I keep the faith and hope that they don't exceed the space I have?
Do I top or super crop them now?
These ladies are beastly, at the end of the week I am going to take some individual videos and more photos to really try and capture how magnificently well these girls are doing. I think I may be in the process of growing the biggest Epsilon F1's so far? Exciting to find out!
###
Week 4 Day 4 21:00 19/7
James has assured me they wont go much more than 85 so I am not going to mess with them. They are due a defoliation at the end of this week though.
Measured each plant as follows:
Plant 1: 81cm
Plant 2: 75cm
Plant 3: 80cm
Plant 4: 67cm
Plant 5: 59cm
Plant 6: 58cm
Might photograph later or leave until tomorrow.
###
Week 4 Day 5 10:00 20/7
Photographed and measured.
Plant 1: 85cm
Plant 2: 79cm
Plant 3: 81cm
Plant 4: 71cm
Plant 5: 63cm
Plant 6: 63cm
So they've all grown about 4cm in about 13 hours, except plant 3 - which seems to have slowed down a lot. The top of plant 3 is also the most advanced looking in terms of pistils. I forgot to take close ups of the preflowers I will do that tomorrow.
I have had to raise the light again today and it is now much further away than the younger plants than I would like. So I am thinking about adding a 300w LED into my 4x4.
I have another 3 inches I can raise the light on the hangers, after that I can removed the adjustable handers and tie it to the top of the tent... that'll gain me another 4 or 5 inches. If I need to go higher my only option would be to set them up without the tent which is not an option right now. Hopefully they all just stop getting taller now and focus on flowering... but my gut tells me there's more growth to come.
Watch this space!
###
Week 4 Day 6 15:00 21/7
Measured. Average 10cm growth 29 hours. 😳😳😲
Plant 1: 96cm
Plant 2: 89cm
Plant 3: 88cm
Plant 4: 81cm
Plant 5: 73cm
Plant 6: 72cm
###
Week 4 Day 6 23:00 21/7
Defoliated. Only photographed plants 1 and 2 individually as I was short on time. Some lovely pics though!
###
Week 4 Day 7 15:00 22/7
Fertigated. 2l Will photograph and measure later when they've had 24h since training.
###
Week 4 Day 7 23:00 22/7
Photographed and measured:
Plant 1: 102cm
Plant 2: 93cm
Plant 3: 89cm
Plant 4: 85cm
Plant 5: 76cm
Plant 6: 75cm
Well here we are at the end of week 4 and I am quite shocked by the growth of these girls. This strain averages 50-70cm in height. We have six plants here and every one of them is taller than the average... but would you just look at plant 1? She is a giant! 102cm!! Where will she stop?
Next week will see the full transition to flower and we will start to see the bud sites developing. I have no idea at this point what the heights will look like at the end of next week. This is sort of new territory really, they weren't meant to get this big!
---
Thanks for reading growmies! 👊
==========
Tent: 120cm x 120cm x 180cm
Light: 600w HID Elite Dual Spectrum HPS + Angel Wing Reflector
Air: 5" duct fan system with carbon filter ~300 m3/hour + RAM 9" floor fan + 4" intake fan
Pots: Air Pruner Fabric Pots 30l - UGro XL Coco + horticultural grade perlite (~20%)
Seeds supplied by Royal Queen Seeds https://www.royalqueenseeds.com
Nutrients supplied by Shogun Fertilisers https://www.shogunfertilisers.com/en
==========
Likes
6
Share

@Grow_for_Happiness
Follow
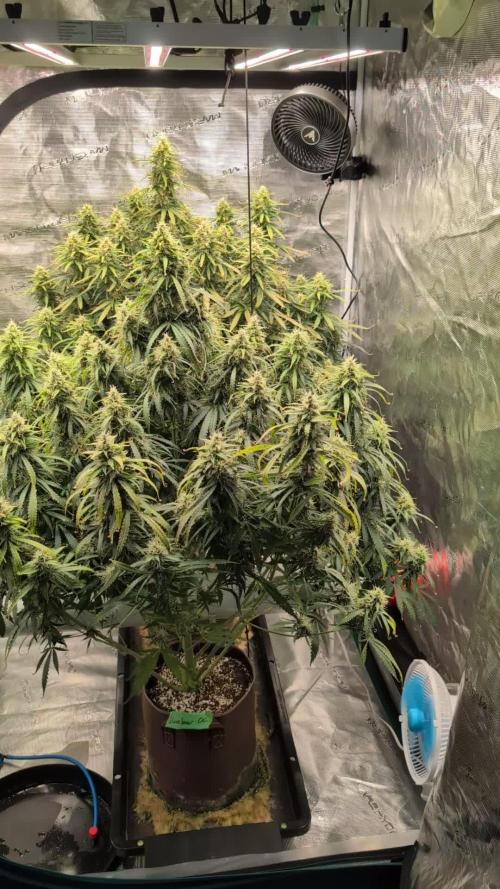
Wow these girls are looking great! Nice big naturally shaped canopies that are just bursting with buds. Speaking of which the buds are just beginning to swell up and produce trichomes this week, so they are for sure 1-2 weeks behind the other strains in the tent. But with the size the buds are already we could be looking at some chinky ladies in a few weeks.
Have noticed that some areas of the root on the tray of the front plant are showing a bit of green. Looks like maybe algae, or something of the sorts. Will start mixing in some hydroclean to the res, helps flush roots and clean lines. Could just be to exposure to air as well, not that humidity between 53-55%. Back plant doesn't show any discolouration on the roots as far as I can tell, but it's pretty hard to get all the way back they so not 100% sure.
Girls still getting 650-700 umol/s for 20 hours a day. Ran out of B52 and and the temp enhancer, so am supplementing with some nutrients I got in a bulk buy. Using Nutes Nutrients Microbooster. Seems to have many of the same benefits of B52 and Bud Candy, so far plants seem happy with it.


Likes
39
Share


@valiotoro
Follow
Hello everyone 😎
Last week for the Auto Cinderella Jack from Dutch passion ❤️🔥
I will harvest in 2-3 times first the top bud

Likes
3
Share


@laksjhdf22
Follow
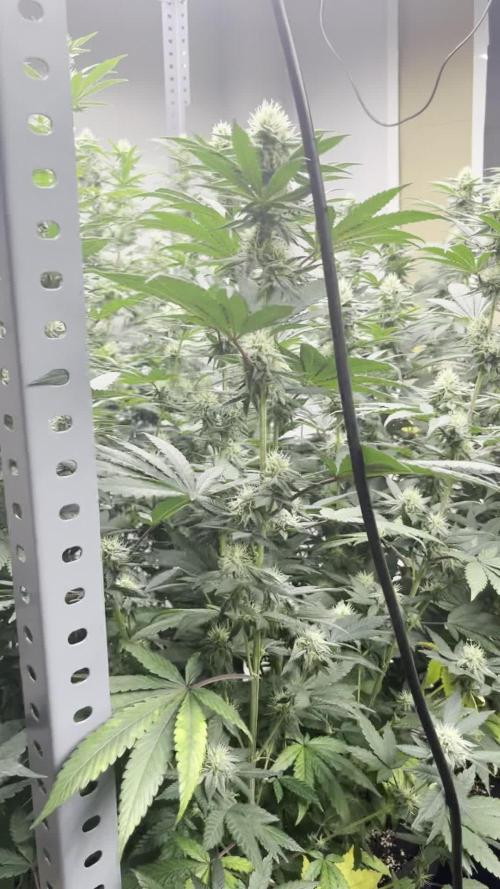
Buds are dense and very frosty .
Still no sign of any deficiencies that I can find.


Likes
7
Share

@Ribemarti
Follow
COMO DICHO FINALIZO CON BARNEYS AUNQUE AQUI ESTA ALGO MEJOR ESTA BANDEJA
LOS RIEGOS SON IGUALES QJE LA OTRA BANDEJA VEREMOS SI ESTAS NOS DAN UNA ALEGRIA
PERO SE VAN A RETRASAR MIUCHO MAS DE LO QUE ELLOS TIENEN EN SU WEB
Likes
175
Share


@love_2_grow
Follow
Day 29 Flower (Day 71)
Woohoo! First day of week five of flower and an easy day at that. I just gave the right girl 3 liters of pH 6.2 water and took some pics.
I'm still experimenting with bud photography. This time with a tripod but still no additional lights. I also need to take the pics when the lights are off as the flowers look funky under the LEDs.
The right girl is slowly starting to bulk up, but the left girl is lagging. That is no wonder, though, considering that she has had much less light due to those space issues.
Also, there's a huge quality difference between the lights in each tent. So I'm looking forward to comparing the bud quality that each tent will generate.
Day 30 Flower (Day 72)
It slipped my mind, but it's been over two weeks since I gave the girls nematodes to get rid of the gnats. As always, the nemos did their job quickly and effectively, and I haven't seen any gnats since. However, to ensure that they stayed gone, I did a second treatment today, mixed up 10 million nemos into 6 liters of water, and gave each girl half at pH 6.6.
Day 31 Flower (Day 73)
Chill day. I just gave the right girl 3 liters of pH 6.5 water and cut some clones from her.
She is deep in flower so I'll try to monster-crop her. Never tried that before but have heard that it creates some really bushy plants. As she already is bushy I'm curious to see how bushy a monster-cropped clone of her will be. She had a few low branches that I left during lollipopping for this reason and I cut four of them with a sterile razor blade, then scraped the lower part of the stem and dipped them in Clonex. They're now sitting in the window with a small LED spot to make sure that they have enough light to re-veg.
Day 32 Flower (Day 74)
I know that I got a new tent for my left girl only a few days ago, but I decided to upgrade to give her a bit more space.
I went to my local grow store today and picked up a tent made by the same company as my main tent (UndrCovrLab).
This new tent is also made specifically for my wardrobe, maximizing the available space. I went from a tiny 40x40 cm tent to a "massive" 75x45 cm tent. Still very small but almost 2x bigger. Woohoo!
The left girl was squeezed into the 40x40 tent for so long that I had to use some LST to spread her out and increase light penetration now when she has some more breathing room.
Speaking of lights, my small ViparSpectra is a bit underpowered now in this larger space, so now I have to consider upgrading that as well. The simplest solution would be to get another ViparSpectra, and while this little light has been performing well, it lacks UV diodes. I'll look around for options.
We have gotten hit by a heatwave here, so now my tents are sweltering. The main tent reached 36 degrees C today at one point :/
Oh well, I cannot do much about it except hope that the heat doesn't stress out the girls too severely.
The girls are very thirsty in this heat though, and I gave each 4.5 liters of pH 6.5 water.
Day 33 Flower (Day 75)
All I did today was to give the right girl 3 liters of pH 5.9 water. A bit low as I used too much pH down and then was too lazy to fix it.
Day 34 Flower (Day 76)
No idea what happened, but an army of fungus gnats invaded my right girl. It's only four days ago since I watered her with Nematodes against gnats, and there were no gnats at all then. A few days later, it is gnat central in my main tent (the left girl in the other tent has no gnats). It's almost like I didn't give nemos to the plant but instead gave her gnats. Weird as the nemos have always worked great in the past. Now I need to start fighting these annoying little shits. Sigh. I'll give nemos another go, and if they don't work, then I'll use some sand. Worst case scenario, I'll use Neem oil, but I really don't want to go that far.
I gave each girl 3 liters of pH 6.5 water, and that was it for today.
Day 35 Flower (Day 77)
The last day of the fifth week of flower and all is (pretty well) well in the tents.
The left girl is 103 cm tall (6 cm increase in a week), and she is lagging quite a bit behind the right girl. She is healthy and quite sticky to the touch, but the flowers still have a lot of fattening up to do. I hope that will speed up now when she has a bit more room to spread out so the light can penetrate the canopy deeper. Getting a more powerful light would also help. When in doubt, add more photons!
Someone who doesn't need more photons, though, is the right girl. The top bud has been burnt slightly, and there's light bleaching on a couple of colas as well as on a few fan leaves. I removed the driver from one of the lights and raised the light a bit higher. Every centimeter counts when you're running out of space! The right girl increased another 3 cm this week and is now 123 cm tall. I hope that is it as I'm now completely out of room.
The gnat army in my main tent is still going strong. So strong that they have now sent out a small expeditionary force to my small tent and started to colonize the area. Sigh. I Will hit the girls in a day or two with nemos, but today I just put up some yellow sticky traps and gave the right girl 3 liters of pH 6.5 water.

Processing
Likes
8
Share

