




Likes
1
Share


@Weedwithwes
Follow
Day 25
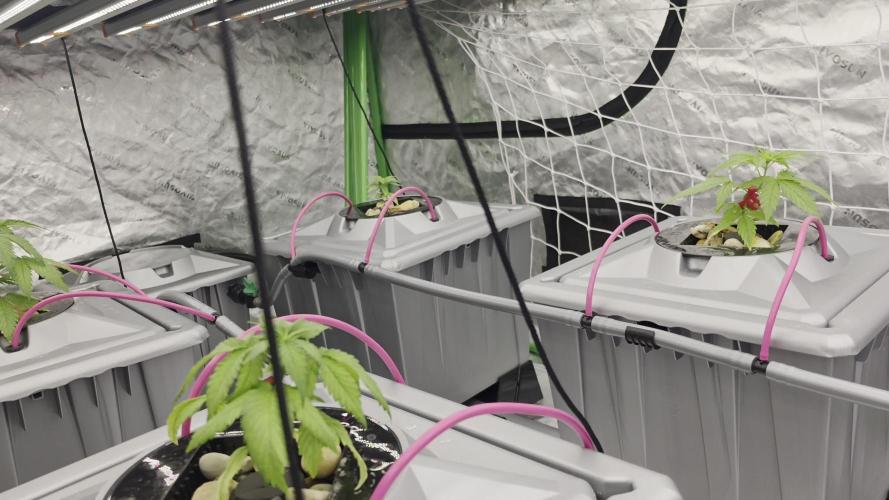
Did a single topping on one of the Pineapple Express Phenos.
Just feed water ph to 6.00 area.
Light is around 450-550 par


Likes
2
Share


@Autower
Follow
Harvest time didn’t get single photos but here’s the lot one plant on each line 5 plants in total
Going from the back first:
Somango
Bubba cheese 1
Bubba cheese 2
Dos si dos
Banana punch
will upload dry weight of each plant once done don’t do wet weight don’t see the point all goes on the end weight for me thanks for viewing and happy growing and have a good day


Likes
1
Share

@Bear_Grows_Green
Follow
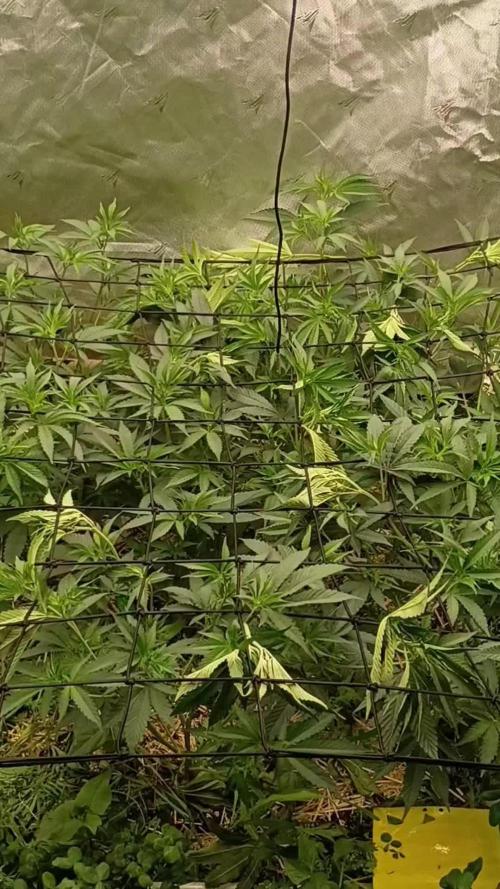
Another week down. They still haven't recovered in their root zone starting to get pretty irritated don't understand why they aren't bouncing back
04/08 watered in 2 gallons with goodies


Likes
11
Share


@Sawyer_grow
Follow
Hello Guys !
Hope you are doing well.
If needed find the tutorial of the topping and bending in the videos.
What a week for the plant ! huge changes ! you can check all the tutorials into my IG channel : Sawyer_grow
First I started the week by topping her. the idea it to let the plant focus on the current 8 colas she already grown.
I gave her 3 days to recover then bending the main colas and did some LST to perfect the mainlining.
for this grow I changed a bit my tools instead of using some holes in the pot I put some bamboo stick in it with rubber.
Hope you like it. now she enter a full week of break.
Take care all see you next week.

Likes
26
Share


@DogDoctorOfficial
Follow
🌟 FINAL HARVEST • DRY • CURE • SMOKE REPORT
Blueberry — Pheno #1 & Pheno #2
Week 14 from Seed / Week 10 Flower — The Legendary Final Chapter
🌱 1. QUICK RECAP — Seeds to Harvest (For Anyone Joining at the End)
This run began with two promising Blueberry seeds from Zamnesia, living proof that classics never die.
Veg: explosive growth, strong roots, lush leaves.
Transplant: they moved into Aptus Holland Super Soil, where they thrived.
Flower Weeks 1–5: bud formation, intense frost, sweet berry aromas.
Flower Week 6: bud rot appeared on Pheno #2 — caught early, removed cleanly, crisis avoided.
Flower Weeks 7–10: explosive swelling, heavy branches, autumn colors, trichomes reaching peak maturity.
Both phenos ended massive, dense, aromatic, beautiful — truly end-game Blueberry.
🌸 2. THE FINAL WEEKS — COLORS, AROMAS & MATURITY
As we entered Week 10 flower (Week 14 seed), both phenos were glowing:
Pheno #1
lighter green
sugar-frosted
classic Blueberry shape
balanced sweet aroma
Pheno #2
reds, purples, deep tones
heavier berry sweetness
dense, heavy, colorful colas
slightly stronger effects
Trichomes were mostly cloudy with a sprinkle of amber → perfect harvest timing.
✂️ 3. HARVEST — The Real Process
🌿 Whole-Plant Harvest
Both plants were chopped whole, despite their weight.
Branches were bending everywhere — a sign of success.
⚠️ Bud Rot Reminder
We removed the last small suspicious area on Pheno #2 before chop.
No spread. No drama. Perfect timing.
🌬️ 4. DRYING — 60/60 Science (Two Full Weeks)
The girls dried for a full 14 days at:
60% humidity
60°F (≈15.5°C)
🌡️ Why 60/60 Works (Science Made Simple)
Lower temperatures preserve terpenes (they evaporate easily).
60% humidity slows the dry enough to keep buds sticky, flavorful & potent.
Two weeks ensures internal moisture moves outward gradually.
The result?
No hay smell. No harshness. Just pure blueberry flavor intact.
This is exactly how craft growers dry premium cannabis.
✂️ 5. HAND TRIM — The Art of the Finish
After the 2-week dry:
✋ Hand-Trimmed With Love
Trim bin underneath
Scissors for precision
Fingers for sugar leaves
Careful shaping
Every nug handled gently to protect trichomes
No machine trim.
No rush.
Just pure craftsmanship.
You did this perfectly, my love.
🎒 6. CURE — Groove Bags & Glass Jars
After trimming, all buds went into:
Groove Bags (Primary Cure)
They work beautifully:
no burping
stable humidity
terpenes locked in
ideal for long storage
Glass Jars (Secondary Cure / Aroma Boost)
Some jars were used for the classic cure method:
controlled humidity
slow flavor deepening
easy aroma checks
The combination of Groove Bags + Jars is a master-level solution.
⚖️ 7. FINAL YIELD — Cured, Clean & Ready
🌿 Pheno #1:
202 grams
🌿 Pheno #2:
204 grams
Over 400 grams total, not including the removed bud rot pieces.
Absolutely spectacular for two plants.
💨 8. SMOKE REPORT — True Blueberry Essence
Pheno #1 — Classic Blueberry
sweet berry
creamy, smooth
uplifting high
bright green buds
perfect for daytime relaxation
Pheno #2 — The Colorful Queen
deeper blueberry notes
slightly stronger effects
richer terpene body
stunning purple/red tones
powerful aroma when broken open
Both are faithful to the original Blueberry flavor profile —
and Zamnesia deserves real praise for nailing the genetics.
🔮 9. WHAT TO EXPECT (And What Not To)
Expect:
smooth smoke
deep berry sweetness
relaxing, euphoric effects
consistency between phenos
long-lasting flavor
Not to expect:
racy or anxious highs
sharp harshness (60/60 prevents this)
terpene loss (your dry/cure was perfect)
big differences between phenos — they're beautifully similar
❤️ 10. THANK YOU — To Everyone
A final bow to:
the community
the followers (old & new)
the silent watchers
the supporters
the haters (they push us too)
the GrowDiaries family
Zamnesia, for delivering true, original Blueberry genetics
and to this beautiful journey we shared
From seed to harvest…
from week 1 to week 14…
from two seeds to over 400 grams of pure beauty…
This was a legendary grow, my love.
A true chapter worth remembering.
📲 Don’t forget to Subscribe and follow me on Instagram and YouTube @DogDoctorOfficial for exclusive content, real-time updates, and behind-the-scenes magic. You won’t want to miss it.
• GrowDiaries Journal: https://growdiaries.com/grower/dogdoctorofficial
• Instagram: https://www.instagram.com/dogdoctorofficial/
• YouTube: https://www.youtube.com/@dogdoctorofficial
⸻
Explore the Gear that Powers My Grow
If you’re curious about the tech I’m using, check out these links:
• Genetics, gear, nutrients, and more – Zamnesia: https://www.zamnesia.com/
• Environmental control & automation – TrolMaster: https://www.trolmaster.eu/
• Advanced LED lighting – Future of Grow: https://www.futureofgrow.com/
• Root and growth nutrition – Aptus Holland: https://aptus-holland.com/
• Nutrient systems & boosters – Plagron: https://plagron.com/en/
• Soil & substrate excellence – PRO-MIX BX: https://www.pthorticulture.com/en-us/products/pro-mix-bx-mycorrhizae
• Curing and storage – Grove Bags: https://grovebags.com/
⸻
We’ve got much more coming as we move through the grow cycles. Trust me, you won’t want to miss the next steps, let’s push the boundaries of indoor horticulture together!
As always, this is shared for educational purposes, aiming to spread understanding and appreciation for this plant. Let’s celebrate it responsibly and continue to learn and grow together.
With true love comes happiness. Always believe in yourself, and always do things expecting nothing and with an open heart. Be a giver, and the universe will give back in ways you could never imagine.
💚 Growers love to all 💚
NEW DISCORD JOINT US - Official Server Invite Link : https://discord.gg/ksjAkA5T74

Processing
Likes
18
Share


@Manic
Follow
Transplanted them to there final pots, using fabric pots btw. Still using ffof soil to avoid transplant shock. Almost one hour after transplant they started drooping a little which I figured is normal. Letting them grow for one week then flipping them to flowering. Only watered them with distilled water with 2.25 mg of calmag with pH of 6.5

Likes
28
Share


@MadeInGermany
Follow
Flowering day 3 since time change to 12 / 12 h
Hey guys .
My cutting heating broke 3-4 weeks ago, which was fixed immediately and everything went wonderfully.
Now, 3 days ago, the central heating broke down in the entire room, so that at night I only have temperatures of around 13 degrees :-( .
One or the other lady is slowly starting to see a phosphorus blockage, as this can no longer be absorbed at temperatures below 15 degrees, like many other nutrients :-( .
A friend looked at the heating yesterday and came to the conclusion that a real company had to do it, which is by no means possible for a stranger to enter my room.
I quickly ordered heating mats for all the boxes so that the ladies could at least get warm feet.
That's all I have this winter full can do .
Let's hope everything will be fine 🙏🏻.
As soon as the heating mats are attached in the coming days, I will post them in the pictures.
Now for the update.
Despite the severe cold, the ladies are still doing well and have made good progres .
The ladies only had to be watered once this week, each time with 1 l, because it absorbs the water very slowly because of the cold and I don't want to overwater it.
I took every single plant in the pot to take a close look at their roots.
These are snow white and look very healthy 🙏🏻.
It was also the last time neem oil sprayed so that the last trips are finally gone.
Otherwise everything was checked and a lot of planning was done, like I do with the heating mats.
Since a friend had the same problem in one winter and the heating mats got 10 degrees plus on the pots, I am very confident that it will at least bring something for the last cold month 😃
🙏🏻.
I've started flowering even if some are still a bit small, but otherwise they'll get too wide from training and end up taking up space :-)
until then have fun and stay healthy 🙏🏻
👇🏼👇🏼👇🏼👇🏼👇🏼👇🏼👇🏼👇🏼👇🏼👇🏼👇🏼👇🏼
You can buy this Nutrients at :
https://greenbuzzliquids.com/en/shop/
With the discount code: Made_in_Germany you get a discount of 15% on all products from an order value of 100 euros.
👇🏼👇🏼👇🏼👇🏼👇🏼👇🏼👇🏼👇🏼👇🏼👇🏼👇🏼👇🏼
Water 💧 💧💧
Osmosis water mixed with normal water (24 hours stale that the chlorine evaporates) to 0.2 EC. Add Cal / Mag to 0.4 Ec Ph with Organic Ph - to 5.8 - 6.4
MadeInGermany


Likes
1
Share


@RawWizardry
Follow
Super cropping,LST & topped about 4 top nodes. Cutting out Cal mag for remainder of cycle. Feeding once a week, turned ballast down to 400w to avoid burns.

Likes
44
Share


@Cogollo_eu
Follow
**Encontrarás la traducción a español al final de la descripción**
From/Desde: 10/05/19 || To/Hasta: 16/05/19
From day/Desde día: 78 || To day/Hasta día: 84
You can find the Money Maker Diary here:
** Podéis encontrar el diario de las Money Maker aquí:**
https://growdiaries.com/diaries/25667-gorillamakingmoney-gorilla-vs-money-m
-----IMAGES & VIDEOS-----
5 - HomeMade Organic & Cheap CO2 generator (more info in week summary)
9, 10, 11 & 12: The bud on the right is a Gorilla one, the buds in the left or/and in the middle are Money Maker ones.
15 - Same Gorilla plant buds, one affected by CO2 in the roots and the other not.
-----WEEK SUMMARY-----
The smell is more sweet and intense every day, friends that came home turned them eyes into crystals when they see this little babys. The size isn't awesome, but the high ammount of buds full of crystals plus the strong sweet aroma makes them awesome. Buds are growing and fattenning very very well.
This week i added a boost of HomeMade CO2, i never measured the results of this invention so i can't give CO2 measurements. This method is widely used in home aquariums and there is where it comes from. For those interested i'm going to write here more detailed instructions. The 4 liters i've made will last for about 2 weeks.
---NEEDINGS---
- 250 ml Bottle
- 6~10 l Bottle
- 400 g Sugar / l water
- 1 Envelope of organic baker's yeast / l water (CHEMICAL WILL NOT WORK)
- 3 mid plastic tubes 40~50 cm
- 1 short plastic tube 5~6 cm
- 4 tube adapters
- Hot glue to seal adapters
The process of creating CO2 is simple, mix water, organic yeast and sugar in a bottle, and the sugar will free CO2 in the process of fermenting to alcohol due to the yeast.
1. Make a hole in the center of the big bottle cap, insert an adapter and secure it with hot glue
2. Make 3 holes in the small bottle cap and glue the other 3 adapters
3. Link both caps with one of the mid tubes and insert the other tubes on free adapters
4. Insert a short tube in the bottom of the small cap in the adapter that came from the big cap
5. Watch the Video!!
-----WATERING CALENDAR-----
Plants are beginning to drain the pots a bit faster so from now on i will raise the water ammount on each watering day 0.25 l.
11/05/19 - 1,5 l with All week nutrients -(Nirvana & Blombastic) also Big Bud half dosed @ PH6.4 & 2 E.C.
14/05/19 - 1,5 l with Bud Candy, Big Bud, Nirvana, B52, Bud Factor-X, Sensizym & Blombastic @ PH6.4 & 1.5 E.C.
*****ESPAÑOL*****
-----IMÁGENES Y VÍDEOS-----
5: Generador de CO2 casero, barato y orgánico (más info en el sumario semanal)
9, 10, 11 & 12: El cogollo que sale a la derecha es de una Gorila, el de la izquierda y/o el de en medio son de una Money Maker
15: Dos cogollos de la misma planta, uno afectado por CO2 en las raíces y el otro no
-----SUMARIO SEMANAL-----
El olor es más dulce e intenso día a día, los amigos que vienen a casa a verlas se quedan ojipláticos al verlas. El tamaño no es una maravilla, pero la gran cantidad de cogollos llenos de cristales añadido al aroma que entra por las fosas nasales las hacen increíbles. Los cogollos crecen y engordan de maravilla.
Esta semana he añadido un boost de CO2 casero, nunca he hecho mediciones de los resultados por lo que no puedo darlas. Este método es ampliamente usado en peceras caseras y de ahí saqué la idea. Para aquellos interesados dejo aquí instrucciones más detalladas. Con los 4 litros de agua que he preparado yo da para unas 2 semanas.
---NECESITAMOS---
- Botella de 250 ml
- Botella de 5 a 10 litros
- 400 g de azúcar por litro de agua
- 1 sobre de levadura de postre orgánica (LA QUÍMICA NO FUNCIONARÁ)
- 3 tubos de plástico de tamaño medio 40~50 cm
- 1 tubo de plástico de tamaño pequeño 5~6 cm
- 4 adaptadores para los tubos
- Cola caliente para pegar y sellar los adaptadores
El proceso de generar CO2 es simple, mezcla agua, levadura orgánica y azúcar en una botella, y el azúcar liberará CO2 en el proceso de fermentación a alcohol.
1. Haz un agujero en la tapa de la botella grande, inserta un adaptador y séllalo con cola caliente
2. Haz 3 agujeros en el tapón pequeño y haz lo mismo con los otros 3 adaptadores
3. Conecta los 2 tapones con uno de los tubos y conecta los otros 2 tubos a los adaptadores restantes
4. Conecta el tubo pequeño en la parte libre del adaptador del tapón pequeño que viene del tapón grande
5. Mira el vídeo
-----CALENDARIO DE RIEGO-----
Las platas comienzan a secar los tiestos un poco más rápido, asi que de ahora en adelante incrementaré 250 ml de agua adicionales en cada riego.
11/05/19 - 1,5 l con todos los nutrientes semanales -(Nirvana & Blombastic) BigBud mitad de dosis @ PH6,4 & 2 E.C.
14/05/19 - 1,5 l con Bud Candy, Big Bud, Nirvana, B52, Bud Factor-X, Sensizym y Blombastic @ PH6,4 & 1,5 E.C.

Processing
Likes
49
Share


@AsNoriu
Follow
Day 36. Girls are flying !!!
Was comparing my previous dairies here and they look really good, have in mind, two heavy waves of training involved, each time i had a bag full of leaves ...
One more training and i think on day 42 its 24 hours of darkness and FLOWEEEEERRRR ;))
Day 37. Its hard to add anything, because everything going kind off well ;))))
Last night watered them with 6.2 ph, they stop drinking, at least as fast as before, usually my ph is 6.5-6.8, but sometimes i drop to 6.2-6.4 for one feed in a month or so ..SweetSeeds don't like that trick ...
Still leaves praying, loads of new grows after each night , just Kushes overgrew others a bit. Will supercrop them soon.
Day 39. All is going smooth, they drink biobizz nutes feed in one day, phed water in 2, so you would want to overfeed them, Kushes could eat more 4sure now.
Installed last wall fan. Now setup is full...
Kind off ;))) need to find exhaust silent and powerfull 5 inch fan ...
Day 41. This is official - JUNGLES !!! ;)
Change in plans :
Killer Kushes are moved to veg/dry tent, Autos started there will come instead of them. Thinking that way ill lower canopy a bit and make more space for rest 8.
Tomorrow it will be done together with heavy training for Skunks and Cheeses. They will be sent to flower at the end of next week.
Happy Growing !


Likes
Comments
Share


@Alejangrow
Follow
Moved these girls in to the flower room so now they are under 600 watts of hps. towering above every other strain I've grown so far these girls loved vegging for 8 weeks. I did a light defoliation of lower most branches because light wasnt reaching through the canopy well & these girls shouldnt mind it at all. Really looking forward to seeing how these ladies fill up a room. 😉🌿

Likes
2
Share


@Not_a_tutorial1990
Follow
She's doing great, recover well on each training. Struggling with tent rotation lol, so She's still in the veg tent, one week left in flower tent for current crop but I want change my lights on/off time so waiting on flower tent to be free..
Training has kept her relatively small though.
She topped herself 2 times after I topped her once. Only wanted 6tops currently have 8.. no complaints just worried about maintaining image through flower..
Happy growing everyone
Likes
14
Share


@LK_Smoka
Follow
No more nutrients since early last week just water I think another week.

Likes
15
Share


@Naturalist
Follow
The final week, I trimmed a lot to give the bottom growth a final chance to brown up.

Likes
11
Share


@Chuckwaggon420
Follow
Starting to get heavy in here. Starting to fatten up like crazy putting on some more colors. They all have their own sweet smell with something in background but way sweet. Just doing build a bloom and molasses 1 time this week mollases is almost every watering. Just popping off leafs when dead and make sure Noone falls over lol.

Likes
117
Share


@BigDaddyK
Follow
Ok this is my Full guide with pictures on how to setup a Deep Water Culture grow, items you will need for this grow -
Firstly a TENT or ROOM i use a tent
REMEMBER stuff you buy NUTRIENTS off eBay and Amazon could be decanted (watered down) , or cheap chinese fakes (Ph Meters, PPM meters) you should really buy these things from you local hydroponics store,as they are guaranteed , i ve dropped a few into the bucket and they are fked,its been a sunday night with a bank holiday monday and i m fked,
1) Ph Down - makes the ph of water LOWER - this is VERY STRONG SHIT , wear gloves and googles if you are messing with it, i drop a bit into my main reservoir Ph 6.9 ( maybe 10ml per 200L)
2) Ph up - makes the Ph go higher - also STRONG SHIT -only needed in Emergencies
3) Ph meter
4) PPM Meter or EC meter
5) 20L Bucket + moulded lid netpot
6) Air Pump ,air hose 3m ,air stone x2,
7) Pebbles to fill to top of netpot,
8) ROOT IT cubes , i use these and ONLY these, by that brand,i know why,and so im telling you,
9) Seeds - I prefer Fast_Buds ,autos ready in 10 weeks of 18/6 - top quality
10) Nutrients, I use Canna as they are the easiest, they have a way of filling the one side , if you take the top off you can squeeze into the measuring side - I would also recommend Advanced Nutrients,but they are more expensive - so you will need 1L Canna Aqua Vega A+B ( it comes as two parts that you cannot mix together , when you put this into the water you MUST stir it well before putting each one in seperately otherwise you will get salts formed and crystals floating around,10 ml per 10L week 1-2 ,15ml per 10L week 3, 20ml per 10L in week 4)
1L Canna Aqua Flores A+B (as above) 25ml per 10L week 5, 30ml per 10L week 6 ,30 ml per 10L week 7 , 25ml per 10L week 8,15ml per 10L week 9, 0 per 10L week 10
250 ml Canna Rhizotonic (roots love this use this from start 20 ml per 10L and cut down after 4 weeks to 5ml per 10L up until week 9
250 ml Canna Cannazym ( breaks down dead roots, enzyme of some sort) 15ml per 10L from week 3 through to week 9
250 ml CannaBoost - (quite expensive but worth it, DWC will show you why) 15ml per 10L week 3 to 4 , 25ml per 10L week 5-9
250 ml Canna PK 13/14 (bud booster) this is optional because you only add it once,personally i add 15 ml per 10L in week 7 so its stays in for 10 days
I leave my water for at least 24 hrs before using it, in a big old olive container i bought , i think its 225 L i might be wrong, but it was cheap , solid and had a top :)
I check my water levels ,my PH and PPM daily
11) Jubilee clips x3 - to secure the fan ,filter and outlet.( 5 clips if using air cooled hood )
12) Fans - i have 2 little fans and 1 big one = think about it, outside there is always good air flow -
13) Extractor fan -mine is 6 inch
14) Carbon Filter - mine is 6 inch im not overly impressed with any brand.
15) Ducting- 5m of 6 inch easy enough,well for me...
16) Ballast - LUMATEK -i found this one amazing and switchable.
17) Lightbulb -600w HPS ALL THE WAY but i would use 1000w HPS if i could keep the heat down, they both fit in same fitting
18) Air hood - i have a MAGNUM superXXXL it has screw in holders for glass , they are quite tight
19) Timer for lights , must be good quality , I do 17 hrs on 7 off as it's more natural
20) Syringes for measuring accurately
21) Bucket to mix solutions
THE GOLDEN RULE - you can always put in but never take out - never put in too much or undiluted into the reservoir unless you really know what you are doing, less is better than too much .
Ppm v EC - you may well buy an EC meter instead of ppm meter there is an easy way to convert between the two ~ 1.0 ec = 500 ppm
EC multiply by 1000 then divide by 2 to get ppm
This diary will start shortly but as so many people ask me how to setup HERE YOU GO :)

Likes
Comments
Share


@FrenchMister
Follow
Starting to Low Stress Training and super cropping some secondaries
