






Likes
19
Share


@RDWCGrowing
Follow
Week 6 Day 1 9/16/2023
Still on Vacation!
Week 6 Day 2 9/17/2023
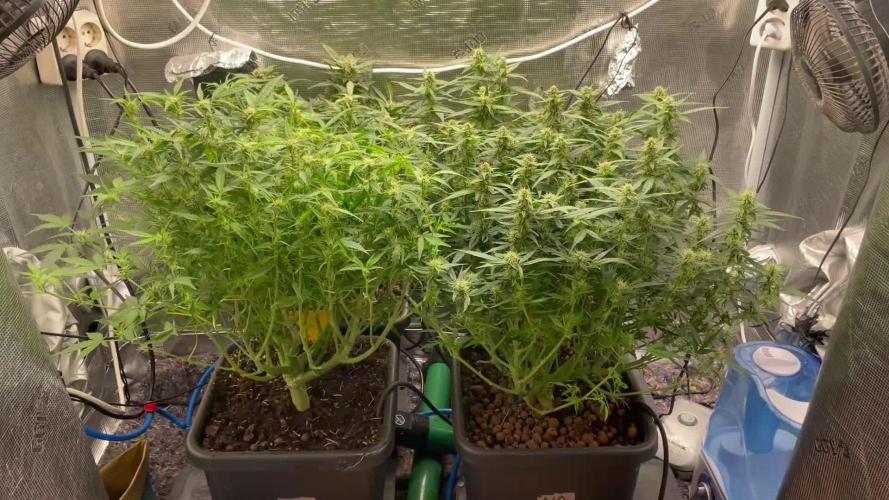
Back from Vacation.. The PH was down to 5.57 and the water was almost to the ring on the 3inch pipe in the Res.. Which is Low.. So Next trip I take, I will add the additional water and Nutes to as close to the net pot as I feel comfortable with.
Added:
10 gallons of Water
CALMag- .75mil/Gal
GH FLoraMicro-4.2mil/Gal
GH FlroaGro-4.0mil/Gal
GH FLroaBloom-3.8Mil/Gal
ORCA-.5mil/Gal
I decided that I wanted to take clones tonight. I took 4 of each and I will cull 2 of each in a few weeks when they are ready, I am going to do a short breeding run with these, Reverse them and Flip them at about week 3 of Veg.
I also gave them an extreme heavy defoliation tonight, and my New Portable AC unit showed up so I installed that.
Week 6 Day 3 9/18/2023
letting her recover from the work we did together yesterday.
Week 6 Day 4 9/19/2023
Took a few tops today as I start to stretch her out on her side of the tent. We have a few branches past our flip mark so we will Super Crop them down soon to ensure we get an even grow to the primary canopy before we Flip. Also want to give her sister a little more time to catch up.
Week 6 Day 5 9/20/2023
Today I received my replacement parts for my Spider-Farmer light that had gone out. Replaced the parts and put the light back in the tent with the clones.
Week 6 Day 6 9/21/2023
Today everything looked great!!
Week 6 Day 7 9/22/2023
She is above the mark for flip. Tomorrow is Water change day, which means decision day.. I have to decide if I am going to Flip to flower and fill with Week 1 flower Nutes, or if I am going to let it go for another week and just start super cropping. Either way I will be super cropping soon but not sure if it will be through the first week of flower or just starting and growing through the first week of flower. The plant shall tell the tell tomorrow.
Likes
21
Share


@BklynBushRx1
Follow
Good morning, day 48 of flower and this will probably be the last update until I chop them. Getting boring for me so I’m sure it’s getting boring for you all! The girls just got plain water 2x last week- no need for anything else at this point as the fade has become quite serious. The smell has really increased along with the size and density of the buds, sometimes I get a candy shop smell and other times I get a tropical fruit scent! Trichs are roughly 50/50 clear and cloudy so I’ll just be checking once a day until I get a tad of amber! Thanks for reading


Likes
21
Share


@Hempy_The_Kid
Follow
Fun little grow, but battled with WPM early on. I'm sure the flavors are buzz is similar to last grow of this strain.

Likes
10
Share


@BruWeed
Follow
Esta planta fue facil de cultivar, no tuve ningun problema con ella. Se encuentra muy resinosa, es la primera vez que tengo unos resultados muy buenos. En humedo pesa 195g, ahora estan en etapa de secado, en unos dias subire mas imagenes de como viene.
Podes seguirme en Instagram como @bruweed_arg

Likes
5
Share


@Rinaldo
Follow
She’s growing well but less than the Zkittlez Auto from my other diary. She’s in pre-flower, shape is good, i’m waiting for a few advanced nutrients products since more than a month, i hope i’ll get these products quick but ain’t much stress because no nutrients deficiencies, but would be great to give them a boost, ✌️ 🍃


Likes
28
Share


@SmokingTiki
Follow
D16 : So far, the weather is really cloudy for the month of June and the plants stretched due to the lack of light. Since this is their final pots I decided to add a bit of soil around the stem to stabilize them. So far, it works pretty well. To test their stability, I've tried to blow on the plant before and after and the difference was clear!
The weather was bad this week but knowing that, the plants grew pretty well.
Parameters :
-------------------------------------------
Humidity range : 60-70%
Temperature range : 18-21°C
SUN Average : cloudy
Plants heights at the end of the week :
-------------------------------------------
Apricot : 12 cm
Gorilla Punch : 10 cm
Orange Sherbet : 10 cm
Pound Cake : 12.5 cm
Likes
21
Share


@603grower
Follow
The girls are starting there beautiful fade! # 3 is much further along than #2 by a week. Im starting to think the reason is # 2 Has so much more room in her pot. And for number 3 has about half because she’s sharing a container. Could be genetics too.
Today I gave them there last feed. # 2 got 1/2 gallon of water with neptunes harvest, recharge and build a bloom. And # got a full gallon with the same inputs.
#3 was definitely to dry In the medium. The top was completely dry underneath the plastic cover.
Today is day 47 of flower I’ll try and remember to take some tricomb shots

Likes
21
Share


@Ultraviolet
Follow
Heyókȟa
I desire naught but the study of nature, to find my way back home.
12x12=144, A dodecahedron is a polyhedron with 12 faces, and in coordination chemistry, it refers to a geometry where ligands surround a central metal atom (in this case, Magnesium) in a specific, 8-coordinate arrangement. Dodecahedrane is a hydrocarbon, meaning it's composed solely of carbon and hydrogen atoms. The carbon atoms are arranged at the corners of a dodecahedron, a 3D shape with 12 pentagonal faces. The water molecules in the dodecahedron form hydrogen bonds that are individually slightly weaker than in either the dimer or the tetramer. However, because three-quarters of the O -H groups in the dodecahedron form hydrogen bonds, it has a more negative energy per molecule than has either the dimer or the tetramer. Magnesium (Mg2+) is the essential, central metal ion in the chlorophyll molecule, crucial for photosynthesis by enabling light absorption and energy transfer. It is chelated by four nitrogen atoms within the porphyrin (or chlorin) ring structure. Chlorophyll appears green because it reflects light in the green region of the visible spectrum, specifically between 490 and 570 nm. The main resonance electronic frequency of a neutral Magnesium (Mg) atom corresponds to the transition from the ground state to the first excited state. Resonance Line Wavelength of Mg2+: 285.1nm (UVB light). The central atom of the chlorophyll molecule is Magnesium (Mg2+), which is coordinated within a porphyrin ring. The electronic "resonance frequency" of this central atom—meaning the frequency at which its electrons absorb energy—is primarily driven by the electronic transitions (ETR) of the surrounding conjugated chlorin ring structure, rather than a discrete atomic transition of the Magnesium atom itself. The resonant electronic frequencies of the chlorophyll porphyrin (technically, a chlorin) ring are determined by the energy required to promote π-electrons within its conjugated system, primarily appearing in the blue and red regions of the visible spectrum.
In standard physics, Chloryphyll b has peak absorption at 460nm (Blue). If we take the peak wavelength 460nm and a UV-B, UVR8 peak absorption wavelength 285nm Tryptophan-285 (W285) Sensing protein. 460/285=1.618 Φ, "natural harmony" and the "structure of light". The cryptochrome photoreceptor (CRY) is a UV-A/blue light receptor that shares this dual sensitivity with several other biological structures and functions, including significant sequence similarity and a common evolutionary ancestor with DNA photolyase enzymes. These are light-activated enzymes that use blue/UV-A light to repair DNA damage caused by UV-B radiation in plants.
Dodecahedrane (C20H20) is a hydrocarbon with a cage-like structure where carbon atoms form 12 pentagonal faces (a regular dodecahedron). It is highly symmetric (icosahedral), contains no delocalized electrons (no aromaticity), and has minimal angle strain, but significant torsional strain. Water Dodecahedron (H2O) forms hydrogen-bonded cages. While individual hydrogen bonds in this structure are weaker than in the linear dimer or tetramer, it has a more negative total energy per molecule. This is because three-quarters (75%) of the groups are involved in hydrogen bonding, creating a very stable, closed-shell configuration. a 3D carbon hydrocarbon (C20H20) to stable water clusters in hydrate, while the Magnesium ion acts as the central activator within a conjugated ring in biological systems, with its electronic absorption dominated by the ring, not the atom itself.
Effective quantum efficiency of photosystem II, often denoted as ΦPSII
In horticultural lighting, adding 730 nm (far-red) LEDs alongside standard red/blue lights has been shown to increase canopy photosynthesis by 20–30% in several crops by acting synergistically with shorter wavelengths. However, the limitation is that excessive, pure IR/Far-red light (without accompanying red light) can trigger the "shade avoidance response," causing plants to grow tall, weak, and spindly rather than robust. Knowing is half the battle however, engineering or utilizing infrared light (specifically the 700-750 nm far-red range) is a viable method to boost photosynthetic efficiency. It acts as a bridge to allow PSII to utilize a broader spectrum of light, breaking the traditional 700 nm barrier.
Extend, then multiply.
UVR8-mediated signaling (often in conjunction with CRY proteins) triggers protective mechanisms that maintain the stability of the photosynthetic apparatus (including LHCII and reaction center proteins), thus ensuring that the efficiency of Photosystem II remains higher in UV-B-exposed plants compared to plants lacking this receptor. ΦPSII indictates the rate of electron transfer from water to plastoquinone, which drives the production of ATP and NADPH. There is a close link between ΦPSII and the true rate of CO2 fixation (Φ*co2), particularly in C4 plants.
Effective quantum efficiency of photosystem II, often denoted as ΦPSII, represents the proportion of light absorbed by Photosystem II (ΦPSII) that is actually used in photosynthetic electron transport. It is a key indicator of how efficiently a plant is using light for photosynthesis, as opposed to losing it as heat or fluorescence. ΦPSII (effective quantum yield of photosystem II) functions primarily as a "multiplier" (a coefficient of efficiency) rather than an additive factor when estimating the overall photosynthetic electron transport rate (ETR). Multipliers are considered far more beneficial than additions because they generate exponential growth, leverage existing resources to their full potential, and create sustainable, self-multiplying capacity, rather than just incremental, linear increases.
Humans, and most other mammals, rely on other mechanisms, such as nucleotide excision repair, to manage and repair UV-induced DNA damage. As such, humans do not have the direct, light-driven repair mechanism that photolyase offers in plants.

Likes
10
Share


@Backwood_scientist
Follow
For my first run I am happy with my results even though the yield was very low . The banana cake is frosty and has a great nose on it . The bud has white ash and overall it tastes great . I will be doing another grow soon and Im going switch it up . Going to be a great next grow so don’t miss it .

Likes
18
Share


@DeepRootsGrowTrees
Follow
PURPLE KUSH / KANNABIA SEEDS
WEEK #7 OVERALL
WEEK #6 VEG
This week she got fresh growth from her topping she split into 4 tops somehow so she bushy! Stay Growing!
Thank you for stopping by and taking a look it's much appreciated!!
Thank you to KANNABIA SEEDS!!!
PURPLE KUSH / KANNABIA SEEDS

Likes
5
Share


@Strangelet
Follow
Day 67. Will give her a couple more days.
Flushed middle of the week and removed all fan leaves.

Likes
3
Share
@Chrisandweed
Follow
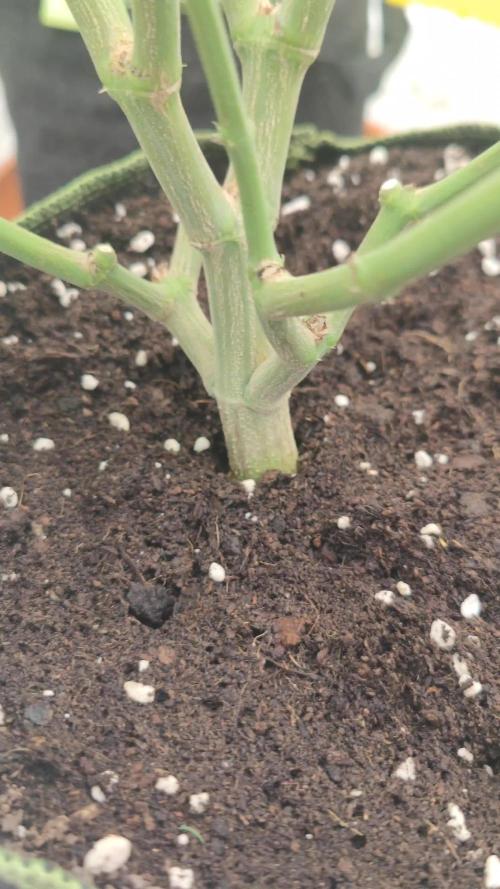
Bueno, ya empiezan a tocar las fotos guapas jajajajaja
Les metí el corte este domingo pasado a todas para dejarlas listas para el engorde. Vamos a ver que tal.

Likes
2
Share


@Sammy420
Follow
Bonne semaine, y'en a une qui a stretché beaucoup... Les autres un peu moins, elles culmine à 30cm. Je vais commencer à travailler avec les engrais floraison. Je mettrai l'ajout sur la semaine prochaine.
Processing
Likes
51
Share


@Eighty8Special
Follow
Definitely got some length on them this week with one in particular that exploded with growth. These are only on day ten but I won’t be home on day 14 so I did it now. They all appear to be loving life so far. but this is my first grow and not really sure if everything up to par. There may be a deficiency in one of the ladies, I'm not completely sure.
Day 13- One of the four ladies appears to be stunted and isn’t growing with the others. I’m gonna let her ride into next week and see where she goes. If I can’t get her growing I’m chucking her.
Day 14- two of the ladies have lime green spots and curling tips. Fed regular ph balanced water with 3ml of CalMag to try and see if I can fix any of this mess. My fourth ladie appears to be mutated rather than deficient.

Likes
35
Share


@DudeGrowsWeed
Follow
January 16, 2019
Everything is moving along nicely now. Bud sites are building day by day. This week I fed some Recharge and some Espoma Organic Bloom (available at most big box stores). I’ve had it kicking around since last season and figured I should use it up before it goes bad. I’m looking into more organic nutrient options for the future. I’m not sure I’m ready to start making my own organic compost teas yet. But BioBizz seems like they will take care of what I’m looking to accomplish without needing to make my own teas (fingers crossed).
I removed the house plant that brought in the bugs and everything is back to normal now, no new bug damage.
I finally received and read “True Living Organics” by The Rev. Its a good book, but growing the “TLO” way is vastly different from other growing methods I’ve read. I’m going to have to read this one again before making any comments.
Thanks to all of the answers on CO2. Seems like its more valuable with larger setups than I’m running.


