Likes
Comments
Share


@eldruida_lamota
Follow
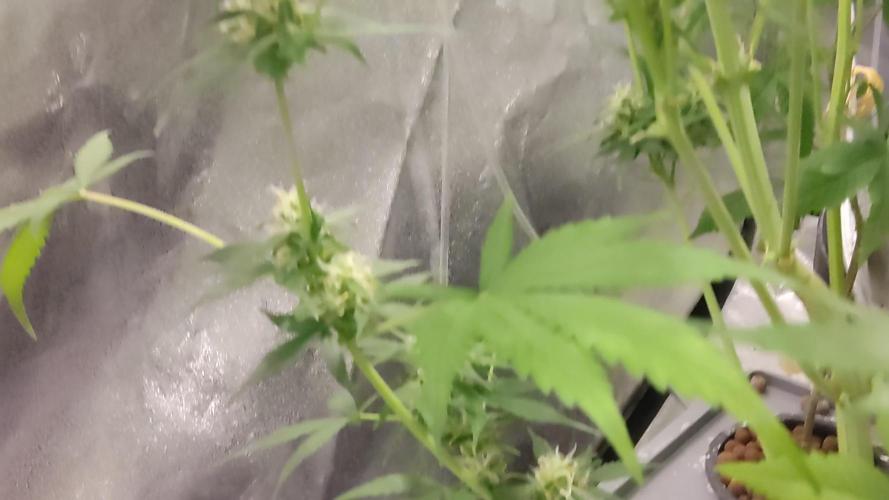
Que pasa familia, vamos con la cuarta semana de floración de estas Mandarine Panties feminizadas de Seedstockers.
Vamos al lío, las plantas se trasplantaron a macetas de 7 litros.
El ph se controla en 6.5, la temperatura la tenemos entre 24/21 grados y la humedad ronda el 50%.
El ciclo de crecimiento puse 12h de luz, el foco está al 75% de potencia.
Tenemos como visitante de nuevo los trips, compré depredadores que colocaré a principios de semana.
Me gustaría estar más encima este cultivo pero la salud me está impidiendo un poco estar 100% con el proyecto.
- os dejo por aquí un CÓDIGO: Eldruida
Descuento para la tienda de MARS HYDRO.
https://www.mars-hydro.com
Hasta aquí todo, Buenos humos 💨💨💨


Likes
10
Share


@DeepRootsGrowTrees
Follow
APRICOT GORILLA AUTO /
GANJA FARMER
Week #9 OVERALL
WEEK #3 FLOWER
This week this lady had no issues and continues to shine her buds are forming nicely and she's looking healthy 👌!! Stay Growing!!
Thank you for stopping by and taking a look it's much appreciated!!
Thank you GANJA FARMER!!
APRICOT GORILLA AUTO / GANJA FARMER

Likes
10
Share

@OrionSparkles
Follow
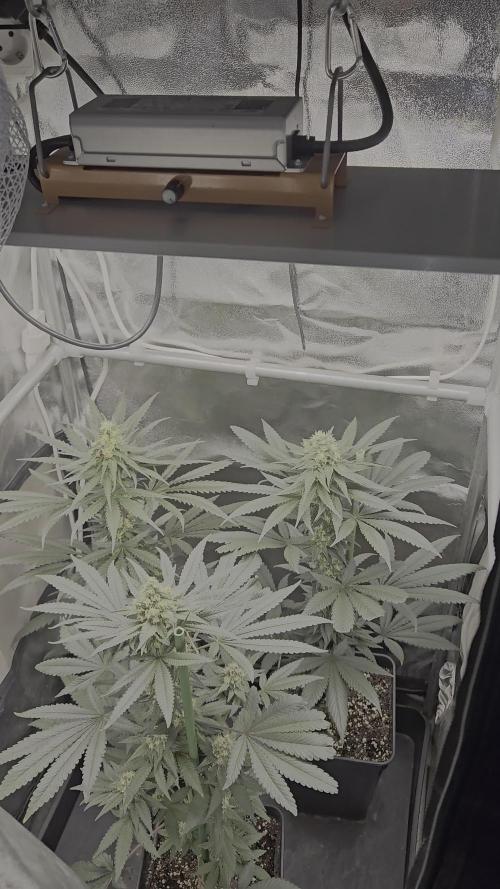
It is very low for harvest; I have been applying overdrive,3ml per 1,5L, three times in the last waterings, I will apply again one last time and proceed to washing roots. Then I will continue watering only with water until the end, I estimate there will be about two weeks or less left for harvest.👌🏻🐦

Processing
Likes
16
Share


@GirlGoneWeed
Follow
I have introduced a second bottle of CO2 to pump flowering weeks, I have cut off nutrients completely to get rid of nutes burn, plants are been fed PH water only.
For this run I have been using a DIY automated drip system that cost me less than $100, this system can be used to feed up to 10 plants, now I can go way for days without a worry :) if anyone is interested here is my Instagram video: https://www.instagram.com/p/Bwm1kO0BTNC/?utm_source=ig_web_copy_link
Stay Lit folks 👩🌾🏻

Likes
105
Share


@Natrona
Follow
Frostbanger Plants 1-6
Week 9 May 18– 24
FLOWER 5
Nutrients : 3 gal
GH Micro 20 ml
GH Gro 10 ml
GH Bloom 30ml
CalMag 15 ml
Recharge 10ml
Green sensation 15ml
Power buds 7.5 ml
5/18 PH 6.67, PPM 935, temp 68.5 1 ltr each
5/20 PH 6.67, PPM 1330, temp 68.5 2ltr each
5/23 PH 6.6, PPM 1570, temp 68.5 2ltr each
5/24 pics & vid
Since all 6 gals are getting frosty, I did some trichome pics. The statistics on Frostbanger indicate 50-day flower. Pics show mostly clear and milky.
There are a few with amber trichs and many orange pistils indicating maturation. At least 3 more weeks for maturity on these gals.
I continue manual control of the environment and using 3 circulating fans and the 4” exhaust vent from my 3x3.
I have the AC pushing air in and the exhaust pulling air out. This creates a neutral pressure tent environment-neither positive nor negative.
It looks like growth has stopped and plant height has been reached. Now is the time for buds to fatten and frost up. All 6 of them are short remaining less than 3 ft. They range from 15 to 31 inches. #4, 5 &6 are showing some fade, particularly #4.
Upon opening the tent, a melon smell comes off the buds if I get close, and more stickiness was observed during the process of defoliation. They are living up to the new strain’s name. #5 is the frostiest followed by #2. Wow week 3 of flower and that much frost already. Before FastBuds announced the strain name and characteristics, I was disappointed that FBA2502 could be an indica sleepy strain but the universe provides what you need at the time. The new strain profile indicates a whopping 29%THC with mainly sativa uplifting, euphoric, social effects with sweet fruity flavors which I love and enjoy. In addition, I recently bought a dap press and this strain is frosty and resinous. She will be great to press for live rosin.
FBA2502 is FROSTBANGER. Meet Frostbanger Auto, an autoflowering and Indica-leaning hybrid packing a staggeringly high THC content averaging 29%, making this one of the most potent strains on the market. It was created by Fast Buds through crossbreeding Gorilla Glue and Chemdawg, two equally iconic strains. Growers must know that these difficult-to-grow plants will pose specific challenges in terms of environmental control and nutrition, making them best suited for cultivators with some experience under their belt. The flowering cycle is short, averaging only 50 days, and yields are usually around 300g/m². The Frostbanger Auto flavor and aroma are both mouthwatering with a delightful combination of sweet, fruity, and flowery notes. The high is mainly Sativa-driven with uplifting and happiness-inducing effects that lead to euphoria and a general sense of well-being. You might feel sociable and talkative, but too spacey to say something. Following this surge of energy comes a deepening sense of relaxation, leaving you sedated and completely at ease with the world. Due to its potency and these long-lasting effects, medical patients hail Frostbanger Auto for treating chronic pain, stress, and even depression.
Measurements:
#1 15”
#2 20”
#3 17”
#4 30”
#5 31”
#6 24”
P.S I added a no churn ice cream recipe in week 4 of Natronas recipes. It is easy 3 ingredients. I bought Mango puree instead of fresh and reduced that to reduce water content. Try it. 😋
Your likes and comments are appreciated. Thanks for stopping by.
Growers love 💚🌿
💫Natrona💫

Likes
9
Share


@Pot_Portraits
Follow
Grandaddy Purple is also ready for flower, shape came along perfect thanks to the defoliation of fan leaves, now the lowers caught up and we are ready to produce some nice flowers.
Super healthy plant, excited to see what she will produce !


Likes
4
Share

@Ensign420
Follow
|»» LOG DISCLAIMER: Not intended as a grow guide. Grow log entries are usually posted 3 weeks later and are for my learning reference. ««|
Introduction - Week 26 Summary -
Ensign's log, stardate 17608.3,
Wow what a week!
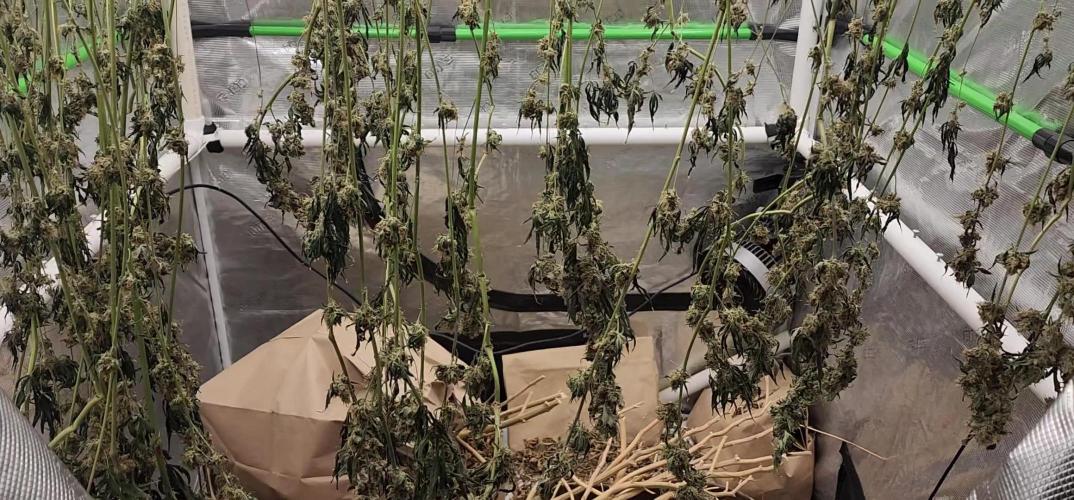
Drying is always pretty simple and been checking daily. Buds are drying nicely and terps are smelling pretty dank!!
Most of the week has been in the veg tent with tissue culture! Mixed another batch of establishment media and took proper explant cuttings. Also super-cropped the mothers to even out the canopy.
Ahh yea! Getting hyped for trim day next week!
Next week will also be the last week for this grow log, but am already planning out the next cycle.
Anyways! Onwards to next week!
[START OF WEEK 26]
==========================================================
---------- [ 4x4 MAIN TENT ] ----------
Heady OG BX1 #1 [Round4 ~Wk19] - WEEK 26 - Dry Wk1
----------- [ 3x3 VEG TENT ] ------------
TKO - WEEK 09 - Full Veg
Gorilla Goat #1 - WEEK 05 - Full Veg
Heady OG BX1 - WEEK 09 - Full Veg
Garlic Budder OG#1 - WEEK 05 - Full Veg
10/13/25 → 10/19/25
This Week's Estimated Goals
----------------------------------------------------------------------------------------------
DLI: ~0 mol/m²/d
PPFD: ~0 μmol/m²/s
VPD: ~1.5 kPa
This Week's Meter Readings & Averages
----------------------------------------------------------------------------------------------
Light On/Off: 00:00 - 00:00 | Wattage: ~000.0W [LV00]
Distance From Canopy: ~00”
DLI: ~0.00 mol/m²/d
PPFD: ~0 μmol/m²/s
VPD: ~1.17 kPa
Soil %: [47.4, 34.1, 35.0, 55.7, 43.7, 43.6, 44.0, 43.3]
==========================================================
Day 01 - Monday - 10/13/25 - Total Days: 183
-----------------------------------
Daily Averages ~[+01:00]
- Temps: 78.8°F [26.0°C]
- Humidity: 64.4%
- VPD: 1.19 kPa
- Soil %: [49, 34, 35, 57, 44, 44, 44, 42]
-----------------------------------
- [22:05]: Night check on the 4x4 tent.
--- Ca-Caw!! Looking great!
--- Heady OG BX1 #1 is drying along and no signs of mold. Also airflow and RH is stable and within the 60-70% range.
--- Getting stoked! Trim day is 9 days away!
- [22:09]: Checked the Ecowitt soil moisture sensor data:
------------------ [ 4x4 MAIN TENT ] ---------------
------ 48% - [CH01 FT » G30 - Heady OG BX1 #1]
------ 35% - [CH02 FB » G30 - Heady OG BX1 #1]
------ 35% - [CH03 BT » G20 - TKO]
------ 56% - [CH04 BB » G20 - TKO]
------------------ [ 3x3 VEG TENT ] ----------------
------ 46% - [CH05 BL » GR7 - TKO]
------ 40% - [CH06 BR » GR7 - Gorilla Goat #1]
------ 40% - [CH07 FL » GR7 - Heady OG BX1 #1]
------ 40% - [CH08 FR » GR7 - Garlic Budder OG#1]
--------- Veg: 38% - 45% | Flower: 45% - 55%
--------- General: 30% [Dry] «| 45 - 60% [Moist] |» 70% [Wet]
- [22:18]: Checked the 3x3 veg tent.
--- Looking healthy in the veg garden!
--- All of the vegging mothers are looking great and the canopy is starting to even out.
--- Also clones look healthy and no need to water yet.
--- The stems, err, I mean, explants, don’t show any signs of contamination.
--- Staying positive, glad the growth media is sterile and the overall procedure was successful.
--- Anyways! Plan to create more establishment media and cut proper explants soon!
- [22:21]: Checked the humidifiers.
--- Tanks are still full and no leaks found.
Day 02 - Tuesday - 10/14/25 - Total Days: 184
-----------------------------------
Daily Averages ~[+01:00]
- Temps: 76.9°F [24.9°C]
- Humidity: 64.8%
- VPD: 1.11 kPa
- Soil %: [46, 34, 35, 56, 43, 43, 44, 43]
-----------------------------------
- [21:44]: Night check on the 4x4 tent.
--- Looking good in the dry tent!
--- Heady OG is drying along and humidity levels look great!
--- Nothing to do but maintain and wait to trim in 8 days!
- [21:55]: Checked the Ecowitt soil moisture sensor data:
------------------ [ 4x4 MAIN TENT ] ---------------
------ 45% - [CH01 FT » G30 - Heady OG BX1 #1]
------ 34% - [CH02 FB » G30 - Heady OG BX1 #1]
------ 35% - [CH03 BT » G20 - TKO]
------ 56% - [CH04 BB » G20 - TKO]
------------------ [ 3x3 VEG TENT ] ----------------
------ 41% - [CH05 BL » GR7 - TKO]
------ 40% - [CH06 BR » GR7 - Gorilla Goat #1]
------ 47% - [CH07 FL » GR7 - Heady OG BX1 #1]
------ 46% - [CH08 FR » GR7 - Garlic Budder OG#1]
--------- Veg: 38% - 45% | Flower: 45% - 55%
--------- General: 30% [Dry] «| 45 - 60% [Moist] |» 70% [Wet]
- [21:59]: Checked the 3x3 veg tent.
--- Looking healthy and growth is raging!
--- All mothers are looking beautiful!
--- Clones are getting taller and looking healthy!
--- Gorilla Goat #2 needs watering. Let’s go Ensign!
- [22:03]: Here is the starting initial watering range:
------ Gorilla Goat #2 » 255.4g → 300.3g and was last watered 4 days ago.
--------- General Solo Range: [Dry] «| [Initial Cup Weight] + ~55-100g |» [Wet]
--- Took the starting weight before watering,
------ Gorilla Goat #2 » 230.8g
--- While on a scale,
--- Gently misted her straw mulch with RO water.
--- Tried to keep the top growth dry.
--- Misted 5-10 sprays. Waited a few seconds, then misted again.
--- Made sure to reference the watering weights.
--- Repeated this process until the cup weighted at least 300g.
--- There was no runoff.
- [22:23]: Took the saturated weight after watering,
------ Gorilla Goat #2 » 345.7g
--- Marked the watering date on the side of the cup. Also marked the saturated weight on the back.
--- Placed her back into the tent.
--- Decided to train and super-crop both clones.
--- Bent the taller branches to lower the canopy.
- [22:38]: Checked the humidifiers.
--- Tanks are still full and no leaks found.
--- Onwards Ensign!
Day 03 - Wednesday - 10/15/25 - Total Days: 185
-----------------------------------
Daily Averages ~[+01:00]
- Temps: 75.6°F [24.2°C]
- Humidity: 63.8%
- VPD: 1.09 kPa
- Soil %: [48, 34, 35, 56, 44, 43, 44, 42]
-----------------------------------
- [+01:33]: Quick night check on the 4x4 tent.
--- Looking great in the dry tent!
--- Also starting to smell dank!
--- 7 more days until the big trim!
- [+01:37]: Checked the 3x3 veg tent.
--- Veg garden is healthy and growth is green!
--- Both the Heady OG BX1 #1 and TKO mothers will need another topping soon.
--- Clones in the propagation tray also look great and no need to water.
--- The explant media is still looking sterile with no signs of contamination.
--- Easy night in the garden. Nice!
- [+01:40]: Checked the humidifiers.
--- Tanks are still full and no leaks found.
--- Okay! Tomorrow plan to dive back into tissue culture and prep more growth media.
--- Onwards Ensign!
Day 04 - Thursday - 10/16/25 - Total Days: 186
-----------------------------------
Daily Averages ~[+01:00]
- Temps: 74.6°F [23.7°C]
- Humidity: 62.2%
- VPD: 1.11 kPa
- Soil %: [46, 34, 35, 56, 43, 44, 44, 45]
-----------------------------------
- [11:41]: Alright! Back to tissue culture and time to start another batch of establishment media!
--- Took the plant growth regulators out of cold-storage (my fridge).
------ [ » SMOKES A BOWL « ]
--- While the products warmed up, gathered the necessary supplies and setup my workstations.
--- Currently, focusing on:
------ PHASE 01 » ESTABLISHMENT
--------- » DAY 01 » MEDIA - PART 01 - Mixing the growth media
--------- » DAY 01 » MEDIA - PART 02 - Sterilization of media and tools [via autoclaving]
--- Going to use the same establishment formula, but doubling the yield.
--- Also using RO water instead of distilled water.
--- Here's the establishment media formula:
--- [» VER.0001 |» INITIAL TROPICAL PLANTS FORMULA |» 0.5L (500mL) RO WATER «]
------ MS [Muashige & Skoog]
--------- » 2.22g
------ Sucrose [Cane Sugar]
--------- » 15g
------ BAP [6-Benzlaminopurine | Cytokinin]
--------- » 0.5mg » 0.5mL » 500μL
------ IBA [Indole-3-Butyric Acid | Auxin]
--------- » 0.05mg » 0.05mL » 50μL
------ AGAR [Jelling Agent]
--------- » 3.5g
------ PH [Potential Hydrogen]
--------- » 5.7
--- [» 1mg/mL CONCENTRATION ratio | 1mg = 1mL | 1mL = 1000μL «]
- [12:59]: Time to prep the growth media!
--- Made sure to turn OFF the lung-room's oscillating fan.
--- Filled a measuring cup with 400mL of RO water.
--- Dropped a clean magnetic mixing bar into the measuring cup.
- [13:05]: Placed the measuring cup on the magnetic stirrer.
--- Turned the unit ON and have the unit on LOW.
- [13:11]: Using a precision scale (sensitive to 0.01g) along with a micro-pipette (1000μL capacity along with tips) and disposable (100mL) weigh boats,
------ Added 2.22g of MS [Muashige & Skoog]
------ Added 15g of Sucrose [Cane Sugar]
------ Added 500μL of BAP [6-Benzlaminopurine | Cytokinin]
------ Added 50μL of IBA [Indole-3-Butyric Acid | Auxin]
------ Added 3.5g of AGAR [Jelling Agent]
------ Then filled the measuring cup to the 500mL line before covering the top with plastic wrap.
--- Alright!
- [13:46]: Let the media mix on the magnetic stirrer for a bit.
--- Have the unit set to LOW with a steady vortex.
------ [ » ~20 MINUTES LATER « ]
- [14:09]: Okay! Time to pH the establishment media!
--- Gently removed the bottom cap of the AC Infinity PH Meter PRO [AC-PHM7]. Placed the cap in the storage case for later. Covered the top with plastic wrap (KCL solution still inside the cap).
--- Swirled the probe in a cup of RO water to rinse off the storage solution.
--- Shook the excess water out and wiped the unit with a clean paper towel making sure all mineral buildup was removed (kept away from the very tip of the probe).
--- Temporarily placed the meter back into the cup of RO water.
--- Removed the plastic wrap of the establishment media.
- [14:13]: Using the AC Infinity PH Meter PRO [AC-PHM7],
--- Took the establishment media's initial pH reading.
--- The pH was at 5.14
--- Using the micro pipette,
------ Added pH Up solution.
--- Made sure to let the media solution mix for a bit before checking for pH readings.
- [14:21]: Adjusted the media's pH until it stabilized to 5.58
--- For this batch, tried to go for a range of 5.4 to 5.8 pH.
--- Also glad that I did not need to add PH down.
- [14:43]: Poured the pH'd establishment media into separate polypropylene containers.
--- Made sure to re-mix the media solution between container fillings.
--- Ended up splitting the media solution into 12 containers.
------ 8x » 125mL Polypropylene Bottles [with screw cap lids]
------ 4x » 236mL (0.5pt) Glass Mason Jars [with polypropylene jamming lids]
--- Have the lids of all vessels loosely on and set each aside for later autoclaving.
--- Also filled 12 empty polypropylene bottles with RO water and placed the lids on loosely (4 bottles are re-used).
- [14:58]: Prepped the tools for sterilization.
--- Took a new 5.25in x 10in sterilization pouch and added the following tools:
------ 3x stainless steel forceps
------ 3x stainless steel scissors
--- Before placing into the pouch, wiped each tool with a paper towel sprayed with 70% isopropyl alcohol.
--- Sealed the bag and marked the date.
--- Time to autoclave everything in the pressure cooker!
--- Filled a Presto 23qt-Pressure Cooker with 12 cups of RO water.
- [15:06]: Added a few aluminum foil balls to the bottom of the pressure cooker.
--- Placed the first rack on top of the foil.
--- Made sure the rack was level and stable resting above the water.
--- Gently placed the containers of media into the pressure cooker and onto the first rack. Lids are still loose.
--- Made sure to give space for each container and kept them away from the sides of the pressure cooker.
--- Placed a second pressure cooker rack on top of the containers of media.
--- Placed the containers of RO water onto the second rack. Lids are still loose.
--- Placed the third rack on top of the containers of water.
- [15:16]: Lastly, placed the sterilization bag of tools on top of the third rack.
--- Took the pressure cooker lid and made sure the release vent was clear of debris before placing it on.
--- Sealed and secured the lid.
--- Pressure vessel has been sealed!
--- Alright! Time to sterilize!
--- While keeping the vessel level and straight up, moved the sealed pressure cooker to the kitchen for heating.
- [15:23]: Placed the pressure cooker onto a butane-gas stove.
--- Turned the stove ON and set it to HIGH.
------ [ » ~20 MINUTES LATER « ]
--- Once steam was venting out of the release vent,
--- Placed the metal rocker onto the vent.
--- Shortly afterwards, the pressure top-lock sprung up to indicate the vessel was under pressure.
--- Then the pressure gauge started to rise.
------ [ » ~10 MINUTES LATER « ]
--- At 15psi, the metal rocker started to rock!
- [15:56]: Turned down the stove down to LOW.
--- Set a timer for 15 minutes and began monitoring the pressure gauge.
--- Maintained the 15psi by making minor adjustments to the stove.
------ [ » ~15 MINUTES LATER « ]
- [16:12]: Turned the stove completely OFF and waited until the pressure cooker's top-lock dropped down which indicated that pressure levels were safe to open.
------ [ » ~40 MINUTES LATER « ]
--- Once the pressure cooker was at safe levels (0psi) and the top-lock was down,
- [16:48]: Moved the pressure cooker into the lung room.
--- The pressure cooker was still quite hot so was careful to keep the vessel straight up and level during transport.
--- Used towels for insulation.
--- Rested the hot pressure cooker onto a stack of 5-gallon buckets covered with layers of towels and folded paper bags.
--- Gently opened the pressure cooker and set the lid aside.
- [16:57]: While wearing nylon gloves, sprayed my hands with 70% isopropyl alcohol.
--- Gently removed the bag of sterile tools placed it onto a Pyrex dish.
--- Removed the top rack and set it aside.
--- Then one container at a time,
--- Gently tightened and secured the lids of each bottle of sterile water before placing onto the Pyrex dish.
--- Removed the middle rack and set it aside.
--- Then one container at a time,
--- Gently tightened and secured the lids of each bottle and jar of sterile media before placing onto the Pyrex dish.
--- Throughout the entire process, kept the gloves on and sprayed my hands regularly with 70% isopropyl alcohol.
--- Decided to store all the bottles in the Pyrex dish.
- [17:16]: Have the dish resting on a shelf in the lung room. The jars of media are set right next to the Pyrex dish on a towel.
--- To prevent dust, covered everything with towels.
--- Done for now and will check on the growth media tomorrow.
--- If all goes well, should be taking new explant cuttings in a couple days!
- [17:39]: Night check on the 3x3 veg tent.
--- Looking beautiful and healthy in the veg garden!
--- All moms are getting bushy and getting pretty close to the grow light.
--- Since I plan to take explant cuttings soon, not going to top or train quite yet.
--- Clones also looking healthy and seem unaffected by the super-cropping. Nice!
- [17:57]: Checked the Ecowitt soil moisture sensor data:
------------------ [ 4x4 MAIN TENT ] ---------------
------ 45% - [CH01 FT » G30 - Heady OG BX1 #1]
------ 34% - [CH02 FB » G30 - Heady OG BX1 #1]
------ 35% - [CH03 BT » G20 - TKO]
------ 55% - [CH04 BB » G20 - TKO]
------------------ [ 3x3 VEG TENT ] ----------------
------ 43% - [CH05 BL » GR7 - TKO]
------ 45% - [CH06 BR » GR7 - Gorilla Goat #1]
------ 42% - [CH07 FL » GR7 - Heady OG BX1 #1]
------ 44% - [CH08 FR » GR7 - Garlic Budder OG#1]
--------- Veg: 38% - 45% | Flower: 45% - 55%
--------- General: 30% [Dry] «| 45 - 60% [Moist] |» 70% [Wet]
- [17:59]: Checked the 4x4 main tent.
--- Ca-Caw!! I got Headies!
--- Wow! Heady OG BX1 #1 is drying along beautifully and she is smelling dank!
--- Also no signs of mold and RH levels look stable!
--- 6 more days until the big trim!
- [18:11]: Checked the humidifiers.
--- Tanks are still full and no leaks found.
--- Wow what a day!
--- Still gots more to do!
--- Let’s go! Let’s grow!
--- Onwards Ensign!
Day 05 - Friday - 10/17/25 - Total Days: 187
-----------------------------------
Daily Averages ~[+01:00]
- Temps: 76.0°F [24.4°C]
- Humidity: 62.0%
- VPD: 1.16 kPa
- Soil %: [48, 34, 35, 55, 44, 44, 44, 42]
-----------------------------------
- [22:57]: Night check on the 4x4 tent.
--- Ca-Caw! Headies is smelling dank!
--- RH levels are getting a bit dry, but are okay.
--- Wow buds are frosty with trichomes!
--- With 5 days until trim day, getting stoked!
- [23:04]: Checked the Ecowitt soil moisture sensor data:
------------------ [ 4x4 MAIN TENT ] ---------------
------ 47% - [CH01 FT » G30 - Heady OG BX1 #1]
------ 34% - [CH02 FB » G30 - Heady OG BX1 #1]
------ 35% - [CH03 BT » G20 - TKO]
------ 55% - [CH04 BB » G20 - TKO]
------------------ [ 3x3 VEG TENT ] ----------------
------ 46% - [CH05 BL » GR7 - TKO]
------ 40% - [CH06 BR » GR7 - Gorilla Goat #1]
------ 45% - [CH07 FL » GR7 - Heady OG BX1 #1]
------ 50% - [CH08 FR » GR7 - Garlic Budder OG#1]
--------- Veg: 38% - 45% | Flower: 45% - 55%
--------- General: 30% [Dry] «| 45 - 60% [Moist] |» 70% [Wet]
- [23:11]: Checked the 3x3 veg tent.
--- Looking healthy in the veg garden!
--- Mothers are getting bushy and tall!
--- Super-cropped and trained the taller branches down to lower the canopy.
--- Plan to take tissue culture cuttings tomorrow so glad there are plenty of tops to choose. Still deciding on which mother to preserve next.
--- Clones in the propagation tray look healthy!
--- The original Garlic Budder #2 clone needs watering.
- [23:26]: Here is the starting initial watering range:
------ Garlic Budder OG#2 » 256.4g → 300.2g
--------- General Solo Range: [Dry] «| [Initial Cup Weight] + ~55-100g |» [Wet]
--- Took the starting weight before watering,
------ Garlic Budder OG#2 » 258.9g
--- While on a scale,
--- Gently misted her straw mulch with RO water.
--- Tried to keep the top growth dry.
--- Misted 5-10 sprays. Waited a few seconds, then misted again.
--- Made sure to reference the watering weights.
--- Repeated this process until the cup weighted at least 300g.
--- There was no runoff.
- [23:40]: Took the saturated weight after watering,
------ Garlic Budder OG#2 » [000.0]g
--- Marked the watering date on the side of the cup. Also marked the saturated weight on the back.
--- Placed her back into the tent.
- [23:45]: Checked the humidifiers.
--- Tanks are still full and no leaks found.
Day 06 - Saturday - 10/18/25 - Total Days: 188
-----------------------------------
Daily Averages ~[+01:00]
- Temps: 76.8°F [24.9°C]
- Humidity: 60.3%
- VPD: 1.25 kPa
- Soil %: [47, 34, 35, 55, 44, 44, 44, 47]
-----------------------------------
- [15:19]: Decided to decrease the VPD level a bit.
--- Within the AC Infinity App,
--- Changed the schedule name from 'Flower [12/12]' to 'Drying [0/24].' Oops.
--- For the Main Tent [4x4] controller,
--- Adjusted the 'Drying [0/24]' Schedule for the exhaust fan.
------ Decreased the VPD LOW trigger value from 1.5kPa to 1.4kPa
--- Adjusted the 'Drying [0/24]' Schedule for the humidifier.
------ Decreased the VPD target value from 1.5kPa to 1.4kPa
--- This should increase the relative humidity a bit and will maintain a 60-65% range
- [16:59]: Evening check on the 3x3 veg tent.
--- Wow the veg garden is raging with healthy growth!
--- Even with the lower veg temps, growth has been perky and bushy!
--- The TKO mother has been looking a bit on the purple-side, but I plan to increase the temps back after trim day.
- [17:23]: Okay! Time to continue the tissue culture journey!
--- Checked on the sterilized media, water, and tools.
--- Ooo yea! The growth media in the glass jars have solidified nicely!
--- The media in the bottles also look great! Found only one that did not gel properly.
--- Hmm. The sterile water bottles are not looking sterile. Unlike the first batch (using distilled water), each RO bottle had tiny white particles floating in the water.
--- I think this was due to the water source. The RO water used was from the plant reservoir. For the next sterilization, will try using water straight from the tap. Will discard the entire batch and try again later.
- [17:34]: Anyways! Time to cut and sterilize another batch of explant cuttings.
--- Using the similar protocols as last time, but with a few changes.
--- Instead of distilled, using reverse-osmosis (RO) water.
--- Also simplifying the workflow and will not be using the sterile water.
--- Only taking cuttings from one cultivar.
--- Today, attempting to preserve Heady OG BX1 #1
--- Unlike the last attempt, going to be cutting apical nodes and will leave all leaf growth on.
--- Last attempt was more for monsteras and not cannabis.
- [17:35]: Made sure the lung room's oscillating fan was OFF during the entire process.
--- Put on a fresh pair of nitrile gloves.
--- Okay! Let's grow Ensign!
- [17:47]: Filled a glass beaker with 180mL of RO water.
--- Using a micro-pipette,
------ Added 20mL of Clorox bleach
--- Mixed the solution.
- [17:52]: Poured the bleach solution into a glass mason jar.
------ Added 1 drop of Dawn dish soap.
--- Dropped a magnetic mixing rod into the jar before setting it onto the magnetic stirrer.
--- Turned the unit ON and set it to a low setting.
--- Placed a polypropylene lid loosely on.
- [18:02]: Rinsed and filled the glass beaker with 70% isopropyl alcohol.
--- Filled another glass beaker with RO water before adding a drop of Dawn dish soap. Mixed the solution.
--- Okay! Time to take the cuttings!
--- Using a clean pair of trimmers,
- [18:09]: Gently cut two clone cuttings from the Heady OG BX1 #1 mother.
--- Stripped each cutting down to 2-inch apical nodes making sure to leave about 0.5 inch of stem growth for planting.
------ Prepared a total of 2 nodal cuttings.
--- Dropped the nodal cuttings into the cup of soapy water.
--- Swirled the cuttings in the soapy water for a bit.
--- Opened the jar containing the 10% bleach solution.
--- Using clean tweezers,
--- Took each cutting out of the RO water and carefully submerged it into the beaker of 70% isopropyl alcohol for about 30 seconds.
--- Then transferred the cutting from the isopropyl alcohol straight into the jar of bleach solution.
--- Once both cuttings were in the jar, sealed the top with the polypropylene lid.
- [18:23]: Flipped and set the entire bleach jar upside down onto the magnetic stirrer.
--- Started using the magnetic stirrer.
--- But the cuttings were getting hit by the bar so ended up turning the unit OFF.
--- Instead, made sure to swirled the bottle every few minutes to agitate the cuttings.
--- For a proper sterilization, the cuttings should be agitated in the hypochlorite (bleach) solution for at least 20 minutes.
--- While waiting for the explants to sterilize, prepped the still air box.
- [18:39]: Unfolded and placed a Safloga still-air box onto my desk.
--- Thoroughly misted the inside of the air box with 70% isopropyl alcohol making sure to coat the entire chamber.
--- Then isopropyl misted and placed the following items inside of the still air box,
------ x1 » Jar of Establishment Media
------ x1 » Bottle of Establishment Media
------ x1 » Glass-Bead Sterilizer
------ x1 » Roll of Plastic Wrap [pre-cut]
------ x1 » Sterilization Bag Containing:
--------- x3 » Stainless Steel Forceps
--------- x3 » Stainless Steel Scissors
--- Made sure to fully coat the outside of the tool bag and each of the containers with 70% alcohol.
--- The bag had a torn corner (Oops), so made sure to spray the inside with a few mists of isopropyl alcohol.
--- For the glass-bead sterilizer,
------ Wiped the entire unit with isopropyl alcohol.
------ Before filling the unit with the included beads, misted the heating chamber with a spray of isopropyl alcohol.
------ Misted the glass beads again with a spray of isopropyl alcohol.
--- Set the cleaned glass-bead sterilizer into the still air box.
- [19:02]: Still air box fully prepped for explants!
--- Okay! Explant nodal sterilization complete!
--- While still wearing gloves,
--- Misted the outside of the explant jar with 70% isopropyl alcohol before placing it into the still-air box.
--- Turned the glass-bead sterilizer ON.
--- Made sure to re-seal the chamber.
- [19:05]: Okay! Finally time to start the tissue culture transplant!
--- Let's go Ensign!
--- Sprayed my gloved hands with 70% isopropyl alcohol (also put on a pair of cloth arm sleeves),
--- Placed my hands through the arm holes and into the still air box to begin the process.
--- Started by laying out my initial workspace:
------ » Far Left Quadrant » Jar of Sterile Establishment Media
------ » Far Center » Bottle of Sterile Establishment Media
------ » Far Right Quadrant » Glass-Bead Sterilizer
------ » Mid Center » Bleach Jar with Explant Cuttings [Main Workspace]
------ » Near Left Quadrant » Empty [Trash Area]
------ » Near Right Quadrant » Bag of Sterile Tools & Roll of Plastic Wrap
--- Opened the bag of tools and placed the forceps and scissors into the pre-heated glass-bead sterilizer.
--- Set the bag in the trash area (near left quadrant).
--- Loosened the lids of both containers of sterile media but did not remove the lids. The lids were resting on top and could easily be lifted.
--- Also took lid off of the bleach jar and gently set it on the table.
--- Took the jar of sterile media and set it in the center of my workspace (to the right of the bleach jar).
--- Using my left hand, took a set of scissors from the glass-bead sterilizer and gently cut the bottom of the first cutting.
--- Once the bottom cut was made, placed the scissors back into the glass-bead sterilizer.
--- Using my left hand, lifted the lid off of the jar of sterile media and inserted the trimmed end of the cutting straight into the growth media (using my right hand).
--- Covered the jar with the lid and placed the forceps back into the glass-bead sterilizer.
--- Tighten the lid of the jar and set it aside.
------ [ » REPEATED THE ABOVE PROCESS FOR THE BOTTLE OF GROWTH MEDIA « ]
--- Once the last cutting was transferred from the bleach jar into the sterile media,
--- Turned the glass-bead sterilizer OFF.
--- Cleaned up my workplace and placed the scrap stem tips and bleach jar out of the way (near left quadrant).
- [19:28]: Wrapped the lid of each explant container with plastic wrap before setting it in the center of the workspace.
--- Explant transplant completed!
- [19:59]: Using a label printer (Brother DT410), made a set of labels for each container:
------ Heady OG BX1 #1 | 04.24.25 | Photo | Reg
------ Formula: v0001 | ExBatch: 0002 | Lot: 01 | Pod: 01
------ Establishment Media | Sealed On: 10/18/25
--- Opened the still air box.
--- Then one container at a time, took an explant out and wrapped the lid with a label.
--- Set the labeled containers onto the propagation tray (in the 3x3 veg tent).
- [20:07]: Done!
------ The explants are around 37 μmol/m²/s which gives a DLI of 2.40 mol/m²/d under an 18/6 light cycle.
--- Will check daily for contamination.
--- Ca-Caw!! Ahh yea!
--- Heady OG BX1 is now officially my first true attempt at cannabis tissue culture!
--- Using this new workflow, I may try reusing the TKO media. Do plan to take new cuttings soon. May even try using the liquid media.
--- Shout out to microclone and Bill Graham! His 'Tissueponics' video contains tips and tricks of the trade that have straight up changed the way I think of DIY cannabis tissue culture.
--- Plan to further refine my process and will continue to refine the workflow with each attempt.
- [20:15]: Checked the Ecowitt soil moisture sensor data:
------------------ [ 4x4 MAIN TENT ] ---------------
------ 54% - [CH01 FT » G30 - Heady OG BX1 #1]
------ 34% - [CH02 FB » G30 - Heady OG BX1 #1]
------ 35% - [CH03 BT » G20 - TKO]
------ 55% - [CH04 BB » G20 - TKO]
------------------ [ 3x3 VEG TENT ] ----------------
------ 43% - [CH05 BL » GR7 - TKO]
------ 48% - [CH06 BR » GR7 - Gorilla Goat #1]
------ 42% - [CH07 FL » GR7 - Heady OG BX1 #1]
------ 45% - [CH08 FR » GR7 - Garlic Budder OG#1]
--------- Veg: 38% - 45% | Flower: 45% - 55%
--------- General: 30% [Dry] «| 45 - 60% [Moist] |» 70% [Wet]
- [20:56]: Checked the 4x4 tent.
--- Ca-Caw! Looking great my ladies!
--- Humidity levels are still a bit on the dry side, but still okay.
- [21:08]: Checked the humidifiers.
--- Tanks are still full and no leaks found.
--- Wow what a day!
--- Oh yea, 4-more days until trim day!! Ca-Caw! Let’s go!
Day 07 - Sunday - 10/19/25 - Total Days: 189
-----------------------------------
Daily Averages ~[+01:00]
- Temps: 76.7°F [24.8°C]
- Humidity: 59.4%
- VPD: 1.27 kPa
- Soil %: [48, 35, 35, 55, 44, 43, 44, 42]
-----------------------------------
- [07:08]: Quick morning checked on the 3x3 veg tent.
--- The veg garden is healthy and perky!
--- All moms and clones are healthy and raging with growth!
--- Both Heady OG BX1 #1 explants also look alive and green!
- [19:26]: Night check on the 4x4 tent.
--- Ca-Caw! We got MENDO DOPE in the trunk!
--- Wow terps are getting loud and buds are drying along nicely!
--- Looking frosty and coated in trichomes!
--- Three more days until trim day!!
- [19:33]: Checked the Ecowitt soil moisture sensor data:
------------------ [ 4x4 MAIN TENT ] ---------------
------ 46% - [CH01 FT » G30 - Heady OG BX1 #1]
------ 35% - [CH02 FB » G30 - Heady OG BX1 #1]
------ 35% - [CH03 BT » G20 - TKO]
------ 54% - [CH04 BB » G20 - TKO]
------------------ [ 3x3 VEG TENT ] ----------------
------ 40% - [CH05 BL » GR7 - TKO]
------ 43% - [CH06 BR » GR7 - Gorilla Goat #1]
------ 47% - [CH07 FL » GR7 - Heady OG BX1 #1]
------ 41% - [CH08 FR » GR7 - Garlic Budder OG#1]
--------- Veg: 38% - 45% | Flower: 45% - 55%
--------- General: 30% [Dry] «| 45 - 60% [Moist] |» 70% [Wet]
- [19:35]: Checked the 3x3 veg tent.
--- Vegging along beautifully in the garden!
--- Mothers are getting taller and probably could train, but will wait until tomorrow.
--- Clones and explants also look healthy and green!
--- Gorilla Goat #2 needs watering!
- [19:44]: Here is the starting initial watering range:
------ Gorilla Goat #2 » 255.4g → 300.3g and was last watered 5 days ago.
--------- General Solo Range: [Dry] «| [Initial Cup Weight] + ~55-100g |» [Wet]
--- Took the starting weight before watering,
------ Gorilla Goat #2 » 244.9g
--- While on a scale,
--- Gently misted her straw mulch with RO water.
--- Tried to keep the top growth dry.
--- Misted 5-10 sprays. Waited a few seconds, then misted again.
--- Made sure to reference the watering weights.
--- Repeated this process until the cup weighted at least 300g.
--- There was no runoff.
- [20:04]: Took the saturated weight after watering,
------ Gorilla Goat #2 » 345.6g
--- Marked the watering date on the side of the cup. Also marked the saturated weight on the back.
--- Placed her back into the tent.
- [21:41]: With a few days before the big trim, decided to sample a few buds!
--- Cut and trimmed branch for sampling and wow she’s got terps!
--- Buds are dense and have a gassy diesel funk! Ca-Caw!! Wow!
--- Without even curing, pretty sure she’s the one!
--- Plan to grow out another cycle (in clone of the same pheno), but I think I found my female for my first breeding project!
- [22:01]: Checked the humidifiers.
--- Tanks are still full and no leaks found.
--- Ahh yea! Three more days until the big trim!
--- Also next week will be the last for this log.
--- But already stoked for the next!
--- Planning on popping more seeds and continuing the pheno hunt for another female!
--- Since I lost TKO this harvest cycle, plan to grow a clone cutting of the same pheno (#2).
--- As for seeds, popping more regulars and going to attempt to grow some of Mr. Grow-It’s Chillout OG!
--- Got a pack of F3s and am stoked to give them a try!
--- Also going to sprout some beans of Dead Ops OG from Zaza Genetics!
--- Chillout OG, Dead Ops OG, and another round of TKO! Let’s go! Let’s grow!
--- Hunters of the dank! Ca-Caw!
--- Anyways!
--- Onwards to next week!
[END OF WEEK 26]


Likes
13
Share


@gr3g4l
Follow
De esta semana destacaré el cambio de luminaria, los Cob por el ATS Pro 300W. al 75% que vendrian a ser 225W. áprox. Algo menos de W de lo que estaban pero al tratarse de una nueva luminaria con más umoles no creo que se me estresen mucho. Más adelante cuando ya estén floreciendo subiré al 100% 300W.
Riego cada 3 dias , a final de semana 900ml / planta.
Último dia de la quinta semana poda de bajos , añadido unos tutores y el esperado 😜CAMBIO DE FOTOPERIODO a 12/12h. 🙏

Likes
9
Share


@GrowinSho
Follow
I could chop them today but, I'm going to wait another week. I already chopped a few branches down they were looking at me funny.



Likes
10
Share


@Kosta_boy16
Follow
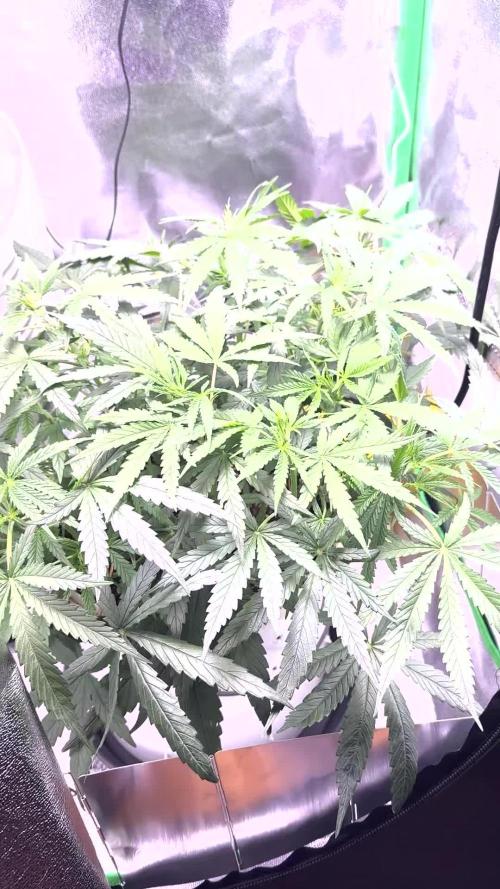
Ppm spike this week read around 2700
Topped up with fresh water
Still learning will do things a little different next time
Her height seems to have maxed out
Room temp still an issue high 33 deg cel day temps lately .

Likes
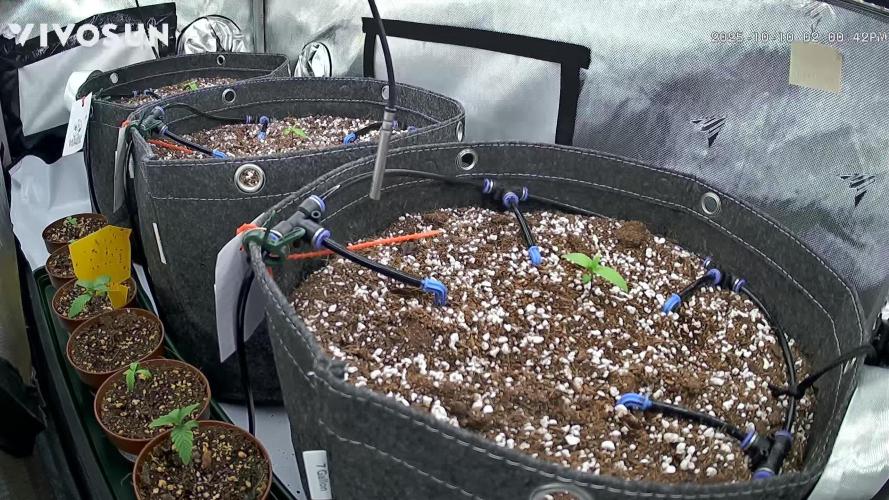
1
Share


Likes
22
Share


@RDWCGrowing
Follow
1/25/2024 Vegetation Week 3 Day 1- took 2 Tops today and cleaned up a few lower leaves that were hanging down. The FiM seems to have worked well and looks like I have three branches coming in where it was FiMed.
1/26/2024 Vegetation Week 3 Day 2- took 2 Tops from the sides and took a little of the foliage that was touching the lid. She seems to be doing very well.. Water change day tomorrow.. YAY!! will get a good picture of the roots and see how she is doing.
1/27/2024 Vegetation Week 3 Day 3- Water Change Day! I noticed a slight red coming in on the STEMS which I added a pinch of EPSOM salt to help correct.
I added 36 Gallons of Water
I added the following Nutes:
Silica = .5Mil/Gal= 18Mil
CalMag= .75Mil/Gal= 27Mil
FloraMicro = 4.2Mil/Gal= 187Mil
FloraGro= 3.8Mil/Gal= 137Mil
FLoraBloom= 3.0Mil/Gal= 108Mil
ORCA = .5Mil/Gal= 18Mil
EPSOM- 1 big pinch
1/28/2024 Vegetation Week 3 Day 4- I cleaned her up just a little bit on stuff hanging down. I also made sure the PH is balanced so she could soak up the New Nutes.
1/29/2024 Vegetation Week 3 Day 5- I Got sick, Possibly food poisoned.. Luckily for me the system was able to do what it do and hold it down until I was feeling better.
1/30/2024 Vegetation Week 3 Day 6- I was still to sick to go to my grow room... Possibly food poisoned.. Luckily for me the system was able to do what it do and hold it down until I was feeling better.
1/31/2024 Vegetation Week 3 Day 7- First day back.. Her PH was down to 5.72 so I raised the PH back up closer to 6.0, I took a few pictures and got her height.. Feeling better through prayer so was able to get some pics today.

Likes
15
Share


@MuckmanMelts
Follow
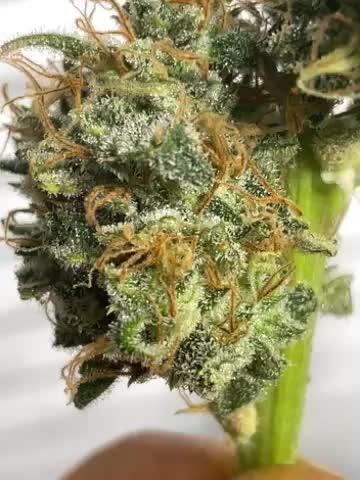
Processed 2 plants and took some colas off one of the remaining plants make sure my washing volume is consistent. Holy smokes some amazing rosin. Consistency and terps are loud and stinky. Very potent effects. This mfker will put you on ur ass. The fresh press rosin is just outta this world. This strain dumps trichromes. What a great experience. Half way done and I have nearly 80 grams of rosin. Insane! Business is boomin

Likes
10
Share

@Miketama
Follow
Fractal ~ Here We Go! 🌿
Tomorrow (day 53 of flowering) harvesting all the top colas Will complete the full harvest at day 60 of flowering - exactly the timeline indicated by Divine Seeds breeders🇨🇦🇺🇦 Nothing but love for them! 💚
First harvest complete! Trimmed all top colas fresh, removing parts without trichomes and selecting only useful trim. Largest cola split to prevent mold, main stem removed.
Harvest stats:
• Trimmed weight: 127g from this first harvest
• Now drying at 57% humidity and 19°C
• Very little material without trichomes
• Trim sealed in freezer bags (air removed with straw) and frozen - not weighed yet
Thanks to everyone for checking in! 🙏 Appreciate you taking a look!
More updates soon! 📸

Likes
78
Share


@Basementganja
Follow
Gave her a heavy defoliation! She's growing very strong, and needed a little thinning out!
The defoliation promotes the lower buds growth, by allowing more light penetration!
The defoliation also ensures that airflow throughout the plant is strong!
Likes
4
Share


@DrewbieDoobieNoobie
Follow
In the immortal words of Garven Dreis "Almost there" One more week I hope, I want to see calyx bursting with beans. There has not been a lot of growth or weight this last week. looks like a medium yielder with tight sticky nugs.