


Likes
Comments
Share

@Growfather2
Follow
Hello everyone,
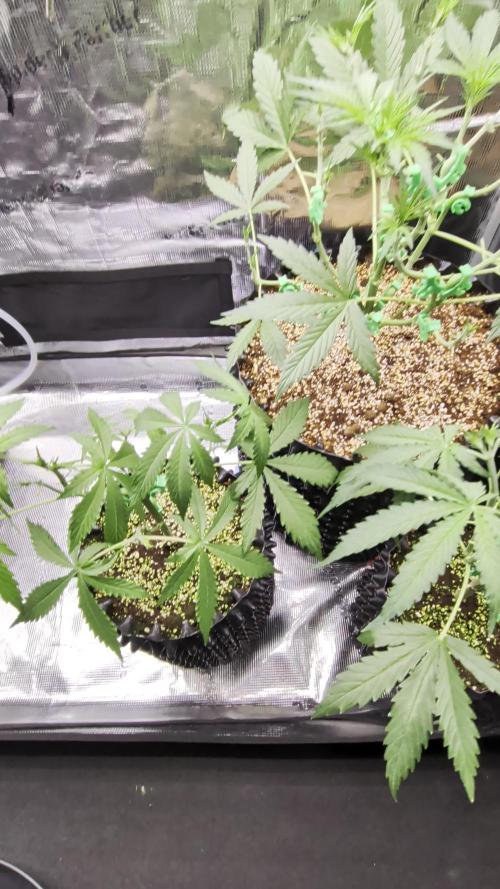
The 3 Afghan skunk plants are doing well 2 of them are growing fast and will put the one in the 10 gallon airpot (39 liter) into flower next week.
The other 2 plants need to be transplanted to the 10 gallon airpot and will need to sit in it for at least two weeks before switching into flower.
Thanks for stopping by and have a great day.
Best regards,
Growfather

Likes
19
Share


@MaxGrowCanada
Follow
Not much to report this week.
Going well, 4 more male growths.
These girls are on autopilot for the next 4 or 5 weeks. Finally done the last big defoliation. I am happy with the amount of tips, I dont mind sacrificing a little size and quality for a potentially much larger yeild.
No real stretch to be seen, I guess the scrog is to blame for that.
A side note, I may have a little bit of a micro nutrient deficiency, iron in particular. I know this is rare but I did miss the iron last week, long story. Its presenting from the top down with choloris near the leaf base moving outwards. I also think I have a slight k abundance at this stage but the plant should take care of that as it begins to demand more.

Likes
53
Share


@cheetah844
Follow
Yay! Finally they get space in the bigger grow room, been waiting for weeks. The few mother's that were still flowering were able to fit into the tent.
Many of the seedlings were ready for transplant so I made room for them in the clone closet as well.
Likes
6
Share


@MisterFlavonoid
Follow
This one was Baked in Paris by PerfectTreeSeeds, grown with AptusPlantTech only! Check the other weeks to see the ones with GreenPlanetNutrients!
Great gassy notes, awesome structure, beautiful colours. I know this one came out a little too early, but I was having problems with humidity and also with smell so I decided to take 'em all out at the same time.
Forgot to take pictures of her on the drying screen, will update soon (:

Likes
5
Share


@Eaegifts
Follow
Thinned throughout the week and increased p&k on the later side of the week so next update should show results if any. Hmu on ig eaegifts to talk plants👍🏾. Happy growing growmies


Likes
51
Share


@Chumpkilla
Follow
12/17/23 - Day 41 - It flipped to flower today. I didn't document it via video because it's just like all the other videos. Except this change uses different level of the nutes for Flowering.
Alot of the bud sites have tons of pistles on them. The plant itself is so round and bushy. The plants branches are very close together.
There is a video up there of me using the software to change from veg. to flower.
I'll update you tomorrow once the lights come on. Now I only get 12 hrs of light instead of 18.
12/18/23 - Day 42 - FLOWER POWER! Look at those flowers starting to form! It looks amazing!!!!! I think starting from a good seed is better than a clone. If this ends up better than the last grow..... it's already off to a better start. The leaves looks super healthy.
12/23/23 - Day 47 - What a WEEK! The whole family got sick and I was the lone ranger on the battlefield taking care of all the units! So posting had to take a back seat! I did manage to grab some pictures during those days. I posted them up top. This week is the first week of Flower, and its going great! As you can see in the pictures that the buds are starting to take off from the bushy part of the plant.
I installed a second Scrogg net, the buds are already starting to launch upwards and I can tell they are going to need some support as they get bigger.
The Leaf box has been taking great care of the nutes, humidity, temp, and lighting. There is only one thing that I have had to do manually. Toward the last day of the week, the day before the water change the PH seems to dip down to 5.5. It's not a bad thing to be there for a couple of hours, but it is the lowest range I would ever let PH go in a hydroponic (DWC) setup. I have been adding 2 cap fulls of PH+ to get the PH in check. To be honest, adding 2 caps full of PH+ once a week is NOTHING. I feel like it's the least I could do. The box is creating the perfect environment. It's the perfect Cannabis Oasis, I treat my girls to the finest of living before the end. :)
Happy growing and I'll post again after the water change tomorrow!
If you like this experience and would like to have the same one, you can order your Leaf system from www.GetLeaf.co.
(full disclosure, I paid in full for my Leaf unit. I was a Kickstarter backer back in 2017 this is not an advertisement, this is real life)
Likes
67
Share


@Maryjane23
Follow
Ciao ragazzi finalmente è giunto il momento del raccolto! Questa volta ho deciso di appendere a testa in giù la pianta intera a farla seccare sicuramente ci vorrà più tempo ma voglio provare se secca in modo più omogeneo!!!
Continuate a seguirmi ✌️✌️
Lasciate un like 👍👍
Maryjane23 🤪🤪

Processing
Likes
11
Share


@Microsun
Follow
Flowering is going amazing, this candy cane is growing some very fast weight and caking up with Trichome’s. The sweet and slightly minty berry smell is growing in power day by day, and I’m very happy with how the size of the buds are developing since adding the increase of 2-8-4 and fish bone meal, just a little bit, not too much at all and she’s reacting great, knowing that the candy cane is a larger auto in size makes me a bit sad with the total size of this plant, but in its young age as my very first auto I believe I probably stunted it, but after all this and how she looks now Im more than happy with the growth, yield and quality of it, just speaking now as I do not obviously know how much I Will revive from it, I’m guessing about a ounce. No small bud sites other than maybe one on a lower branch that already has a main top cola on it. The main cola is massive and packing on a lot of size. I’ve switched the light to a hour less now as I am growing 2 photo indica L.A grape and with the season change I am having to fix my temp and humidity more for the photos, so changing to a 17-7 schedule has actually helped quite a lot and also has helped my other autos veg slightly better. But all in all I’m very exited!

Likes
65
Share


@Roberts
Follow
Gold Sativa from Quebec Seeds germinated, and sprouted right away. Temperature may be a issue. But will see once plants get some foliage going. Growing her in a New Level Hydro bucket link below. Also using the SE5000. I did have it on 40 percent. But after seeing stretch I turned to 60 percent now. Thank you Spider Farmer, New Level Hydro, and Quebec Seeds. 🌱
SE5000
https://amzn.to/3qFpAML
Spider Farmer Official Website Links:
US&Worldwide: https://www.spider-farmer.com
UK: https://spiderfarmer.co.uk
CA: https://spiderfarmer.ca
EU: https://spiderfarmer.eu
AU: https://spiderfarmer.com.au
Coupon Code: saveurcash
Thank you grow diaries community for the likes, follows, comments, and subscriptions on my YouTube channel. 🍻🌱👍 Happy Growing 🌱
https://youtube.com/channel/UCAhN7yRzWLpcaRHhMIQ7X4g
www.newlevelhydro.com

Likes
2
Share


@Khalifa_Genetics
Follow
End of course for this Persian Prince project!
Unfortunately, he failed to cut short this flowering a few days in advance following the start of a pest attack. Our two beautiful ones would have certainly enjoyed crunching life with full roots for another week, but prudence forced us to cut a little prematurely.
Never mind, our flowers have dried for 10 days and are now ready to begin their maturing period in a jar.
Despite these conditions, which are very well known to them, our Persian Princes still present impressive characters: the buds are huge, covered with a thick layer of trichomes and very fragrant.
In terms of flavors, cheesy dominates 🧀 the two phenos smell strongly of semi-roller/Emmental style hard cheese, definitely the dominant aroma, for one of our two plants it is the only aroma that I am capable of to raise. The other phenotype is more complex, on the salty-cheesy smell a fresher and tangy/lemony smell is superimposed, very pleasant and different from its sister and at the same time linked to it by its common dominant cheesy aroma.
For those who would still take a break from sweet/fruity strains and would like to try something more unique, consider this Persian Prince! :)
🌱 @khalifa.genetics
🍱 @gaiagreenorganics @greenhousefeeding_worldwide
💡 @official_marshydro
🌬️ @acinfinityinc
🍄 @bigfootmycorrhizae @promix_cannabis
BY ZOUZOUCANNA ON YOUTUBE AND INSTAGRAM

Likes
19
Share


@pifflestikkz
Follow
Day 29
29/07/24 Monday
Nice feeding today with De-chlorinated tap water pH 6.
Gave her 300 ml and she had a small run off.
Getting chunky in the stem now 💪💚
Day 31
31/07/24 Wednesday
De-chlorinated water pH 6 today with Plagron pk13-14 5ml to 5L
Plagron power buds 5ml to 5L
Used 300ml of the 5L solution.
I will be using these on water days from now on as they are advised to be used every irrigation.
We'll see how they perform 💪💚
Day 32
01/08/24 Thursday
Another feed today using de-chlorinated tap water pH 6, there now taking 300ml every evening.
Day 35
04/08/24 Sunday
END OF WEEK 😁
De-chlorinated tap water pH 6 today with Plagron products. 300ml each.
Had a issue with leaf invaders this week, I have treated and am checking every 48 hrs so far seems ok and not progressive.

Likes
8
Share


Likes
1
Share

Likes
4
Share

@Ensign420
Follow
|»» LOG DISCLAIMER: Not intended as a grow guide. Grow log entries are usually posted 3 weeks later and are for my learning reference. ««|
Introduction - Week 16 Summary -
Ensign's log, stardate 17547.8,
Wow what a great week in the garden!
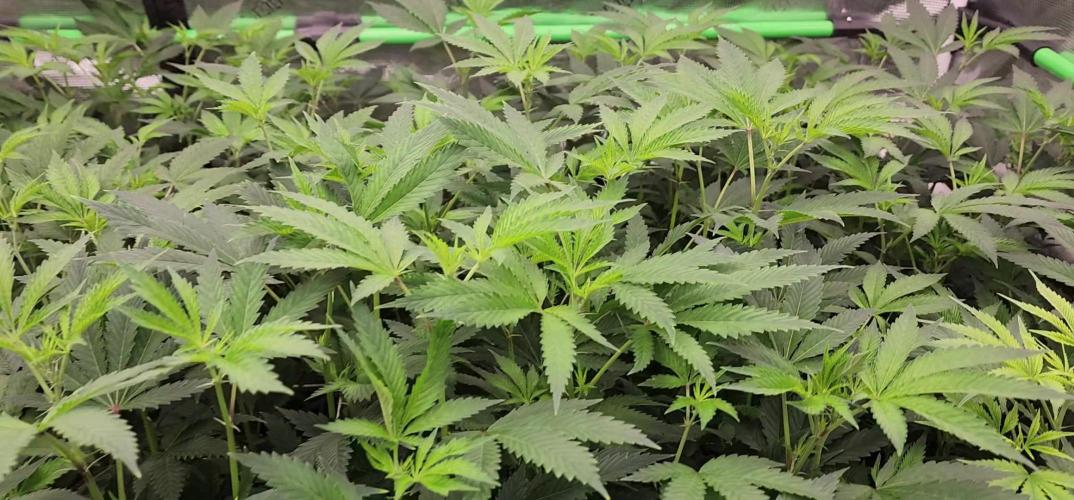
By the end of the week, the main tent has pretty much doubled in size! Upgraded the scrog frame and now have a second layer of netting about 14in above the original netting which is already filling in and looking incredible! The tent’s floor slightly flooded, but fixed it. Also trying Stash Blend for the first time!
As for the veg tent. To preserve the genetics, started the mother plant cycling process and took more clone cuttings (which were rooting in Coco Coins by the end of the week). To make more room, also bonsaied all mother plants.
The stretch is starting to slowing down and next week begins the first week of bloom!
Ca-Caw! Let’s go! Onwards Ensign!
[START OF WEEK 16]
==========================================================
---------- [ 4x4 MAIN TENT ] ----------
Heady OG BX1 #1 [Round4 ~Wk9] - WEEK 16 - Pre-Bloom [Stretch Wk2]
TKO [Round2 ~Wk14] - WEEK 16 - Pre-Bloom [Stretch Wk2]
----------- [ 3x3 VEG TENT ] ------------
Garlic Budder OG#1 - WEEK 09 - Full Veg
Garlic Budder OG#2 - WEEK 09 - Full Veg
Gorilla Goat #1 - WEEK 09 - Full Veg
Gorilla Goat #2 - WEEK 09 - Full Veg
08/04/25 → 08/10/25
This Week's Estimated Goals
----------------------------------------------------------------------------------------------
DLI: ~13 mol/m²/d
PPFD: ~300 μmol/m²/s
VPD: ~1.0 kPa
This Week's Meter Readings & Averages
----------------------------------------------------------------------------------------------
Light On/Off: 19:00 - 07:00 | Wattage: ~326.5W [LV04]
Distance From Canopy: ~31”, 27”
DLI: ~15.60 mol/m²/d
PPFD: ~361 μmol/m²/s
VPD: ~0.69 kPa
Soil %: [40.7, 47.0, 38.1, 56.6, 41.9, 42.7, 42.9, 43.9]
==========================================================
Day 01 - Monday - 08/04/25 - Total Days: 113
-----------------------------------
Daily Averages ~[+01:00]
- Temps: 83.6°F [28.7°C]
- Humidity: 83.6%
- VPD: 0.66 kPa
- Soil %: [49, 37, 45, 60, 44, 43, 43, 45]
-----------------------------------
- [+00:14]: Night check on the 4x4 tent.
--- Holy Cannoli! Wow! These girls are in full stretch!
--- Both cultivars have grown beyond the netting and have stretched beyond the (green) Vivosun’s CFM bars! Heady is a bit low on the left, but the canopy is pretty even and perky!
--- Ca-Caw! Let’s go cuddies!
--- Heady OG (BX1 #1) is starting off shorter than TKO, but am pretty confident that she’ll catch up.
--- TKO is looking incredibly healthy! She’s the larger plant, but also in the smaller 20-gallon pot. Well she is 5 weeks older than Heady OG so makes sense. Regardless of the growth difference, absolutely stoked for this grow cycle!!
- [+12:19]: Checked the Ecowitt soil moisture sensor data:
------------------ [ 4x4 MAIN TENT ] ---------------
------ 46% - [CH01 FT » G30 - Heady OG BX1 #1]
------ 37% - [CH02 FB » G30 - Heady OG BX1 #1]
------ 48% - [CH03 BT » G20 - TKO]
------ 62% - [CH04 BB » G20 - TKO]
------------------ [ 3x3 VEG TENT ] ----------------
------ 41% - [CH05 BL » GR7 - Garlic Budder OG#1]
------ 44% - [CH06 BR » GR7 - Garlic Budder OG#2]
------ 40% - [CH07 FL » GR7 - Gorilla Goat #1]
------ 50% - [CH08 FR » GR7 - Gorilla Goat #2]
--------- Veg: 38% - 45% | Flower: 45% - 55%
--------- General: 30% [Dry] «| 45 - 60% [Moist] |» 70% [Wet]
- [+00:14]: Checked the 3x3 veg tent.
--- Ooo yea! The veg garden is looking incredible!
--- All mamma plants are looking bushed out and beautiful!
- [+00:37]: Super-cropped and bend the canopy down a bit.
--- Lowered the canopy down a few inches. Really need to defoliate soon. The top growth is bushing out and getting really thick!
--- Clones are also looking incredible and both are rotting along beautifully! Heady is going to make it and she is looking great!
- [+00:38]: The cuttings are looking good for the most part. One is looking pretty droopy (damnit Ensign).
--- Misted the cups with RO water.
--- Think the RH may not be consistent enough and the cups might be drying out too quickly.
- [+00:41]: Checked the humidifiers.
--- Tanks are still full and no leaks found.
--- Another day done!
--- Okay! Since growth is raging upwards, decided to upgrade the scrog frame and plan to add a second layer tomorrow.
--- Ahh yea! This grow is turning out to be an epic one!
Day 02 - Tuesday - 08/05/25 - Total Days: 114
-----------------------------------
Daily Averages ~[+01:00]
- Temps: 83.3°F [28.5°C]
- Humidity: 83.3%
- VPD: 0.67 kPa
- Soil %: [49, 38, 47, 62, 41, 43, 43, 45]
-----------------------------------
- [16:25]: Evening check on the 3x3 veg tent.
--- Ooo yea! The clones are looking incredible!
--- The cuttings still seem to be struggling.
--- Hmm.
- [16:27]: Misted the cups with RO water.
--- Made a slight modification and wrapped the top of both cups with plastic wrap.
--- Cut a slit from the middle to the edge. Misted the cup through the slit with RO water (2-3 sprays each).
--- Then gently slipped the cups over each cutting.
--- Also slightly misted each Coco Coin with RO water.
--- Great! This should hopefully make a better seal and will keep the RH higher. I think.
--- Anyways!
--- The mother garden is vegging along beautifully!
--- Growth is getting really bushy and need to do a heavy defoliation soon.
- [16:56]: Checked the Ecowitt soil moisture sensor data:
------------------ [ 4x4 MAIN TENT ] ---------------
------ 48% - [CH01 FT » G30 - Heady OG BX1 #1]
------ 36% - [CH02 FB » G30 - Heady OG BX1 #1]
------ 47% - [CH03 BT » G20 - TKO]
------ 61% - [CH04 BB » G20 - TKO]
------------------ [ 3x3 VEG TENT ] ----------------
------ 41% - [CH05 BL » GR7 - Garlic Budder OG#1]
------ 43% - [CH06 BR » GR7 - Garlic Budder OG#2]
------ 41% - [CH07 FL » GR7 - Gorilla Goat #1]
------ 49% - [CH08 FR » GR7 - Gorilla Goat #2]
--------- Veg: 38% - 45% | Flower: 45% - 55%
--------- General: 30% [Dry] «| 45 - 60% [Moist] |» 70% [Wet]
- [19:03]: Night check on the 4x4 tent.
--- Ooo yea! Wow these girls are stretching!
--- Growth has clearly grown since the last checkup and getting taller!
--- Ca-Caw! Let’s go ladies!
- [19:14]: Wait. Uh-Oh!
--- The tent seemed to have flooded slightly.. DAMNIT ENSIGN!
------ [» A FEW HOURS LATER.. «]
--- Okay! Think I figured out why the tent flooded and how to fix it.
--- The main reason was the new soil sensor which was probably not in proper contact with the soil.
--- Fixed this by re-seating the unit. Also adjusted the drip ring a bit.
--- Also poured about a cup of water straight onto new sensor. This should make the surrounding soil wetter and will hopefully fix the dry pocket. I think.
--- For added redundancy, added additional trigger conditions to both Ecowitt WittFlows (TKO and Heady OG).
- [23:45]: Adjusted the watering triggers for the auto-watering system for TKO.
--- Changed the ON trigger from:
--------- When CH3 soil moisture is under 45%
------------ Updated to:
--------------- When CH3 soil moisture is UNDER 45%
--------------- AND When CH4 soil moisture is UNDER 50%
--- Changed the OFF trigger from:
--------- When CH3 soil moisture is OVER 50%
------------ Updated to:
--------------- When CH3 soil moisture is OVER 50%
--------------- OR When CH3 soil moisture is OVER 50%
--- Applied similar watering triggers for Heady OG.
--- Changed the ON trigger from:
--------- When CH1 soil moisture is under 45%
------------ Updated to:
--------------- When CH1 soil moisture is UNDER 45%
--------------- AND When CH2 soil moisture is UNDER 50%
--- Changed the OFF trigger from:
--------- When CH1 soil moisture is OVER 50%
------------ Updated to:
--------------- When CH1 soil moisture is OVER 50%
--------------- OR When CH2 soil moisture is OVER 50%
--- Will check back daily to make sure the flooding has completely stopped.
--- Well that pushed everything back a bit.
--- Okay! Anyways,
- [23:57]: Time to both build and install the second frame and netting. Let’s go!
--- Got four 1in PVC corner fittings (local Lowes) along with four 1in PVC pipes (10ft long each). Also got more self-tapping screws.
--- For the netting, using mason string. Usually use the braided nylon, but the twisted variant is a lot cheaper.
--- To build the frame, I cut the 1in PVC pipes down to two different lengths:
------ [» x2 @ 42.5in «] – Front / Back
------ [» x2 @ 44in «] – Left / Right
--- This makes the frame slightly thinner from left to right.
--- Saving the extra piping for future projects.
- [+04:04]: Okay! The new frame is built and looking sturdy!
--- Did not use any glue and simply dry fitted each component.
--- For easier fitting, smoothed the ends of each pipe with sand paper.
--- Also marked each pipe to indicate the front, back, left, and right sides.
--- For the fittings, used corner fittings and have open slot facing downwards. This way I can add the legs.
--- After the frame was built, marked and drilled screws about 3in apart (self-tapping). Made sure to mirror the screw spacing on the opposite side.
--- Time to weave the netting!
- [+04:06]: Using some mason string,
--- Started at one corner and strung all the horizontal lines.
--- Double-wrapped each screw.
--- After the horizontal lines were strung, continued and wrapped the vertical lines.
- [+04:44]: Now that the frame is built and the netting fully weaved, time to install the frame!
--- First the support poles. Cut and sanded more 1in PVC piping.
------ [» x4 @ 14in «] – Vertical Support
- [17:56]: Installed the back support poles before the front ones.
--- Temporarily removed the front CFM bar and had to raise the fan up a bit (was not easy, but got it done).
--- Once the support poles were installed, gently set the new frame on top.
- [+06:07]: Done and wow she’s a beauty!
--- Well that took a bit longer than anticipated (also the flooding did not help), but glad the frame fit perfectly and the netting looks great!
- [+06:12]: Checked the humidifiers.
--- Tanks are still full and no leaks found.
--- Ooo yea! What a day!
Day 03 - Wednesday - 08/06/25 - Total Days: 115
-----------------------------------
Daily Averages ~[+01:00]
- Temps: 83.9°F [28.8°C]
- Humidity: 83.1%
- VPD: 0.69 kPa
- Soil %: [42, 54, 43, 60, 42, 43, 43, 45]
-----------------------------------
- [+00:17]: Night check on the 4x4 tent.
--- Ca-Caw!! Let’s go cuddies! Growth is looking beautiful and green!
--- The second layer of scrog netting was not the easiest to install, but wow the garden is looking incredible!
--- Both Heady OG and TKO are still stretching upwards with new nodes branching out everywhere!
--- The canopy hasn’t reached the top net yet but hoping a few will make it.
--- Regardless, absolutely hyped for this flower cycle!
- [+00:23]: Checked the 3x3 veg tent.
--- Looking beautiful in the veg garden!
--- Wow the mothers have bushed out and have reached the grow light!
- [+00:32]: Super-cropped and lowered the canopy
--- The canopy is getting really thick! Plan to do a pretty heavy defoliation tomorrow.
--- Clones look great and stoked that both Heady OG and TKO seem to be rooting along in the cups. Need to check the weights. Let’s go!
- [+00:37]: Here are the starting initial watering ranges:
------ Heady OG BX1 » 261.4g → 301.2g
------ TKO » 240.9g → 301.4g
--------- General Solo Range: [Dry] «| [Initial Cup Weight] + ~55-100g |» [Wet]
--- All cups were last watered 5 days ago.
- [+00:37]: Took the starting weight of both clones before watering,
------ Heady OG BX1 weighed 250.4g
------ TKO weighed 240.9g
--- Oops! Probably should have watered earlier, sorry ladies!
--- Stoked that Heady OG is clearly going to make it! Also good to know the soil dryback can be at least 10g from the initial pre-saturated weight.
--- Anyways!
--- While on a scale,
--- Gently misted the straw mulch of both cups with RO water.
--- Focused on the straw and sprayed as evenly as possible.
--- Misted 10-20 sprays. Waited a moment, then misted again.
--- Made sure to reference the watering weights.
--- Repeated this process for both cups.
--- There was no runoff.
- [+01:08]: Took the saturated weight of both clones after watering,
------ Heady OG BX1 » 335.5g
------ TKO » 345.1g
--- Marked the final wet weight on the back of each cup. Also marked the watering date on the front.
--- Placed both phenos back into the tent.
--- Cuttings are looking better!
--- Glad that the slight modification to the cups helped to keep the moisture in (covered both with plastic wrap).
--- Gently removed both cups and re-misted each with RO water (~2 mists).
--- Carefully placed the cups back onto the cuttings.
- [+01:21]: Checked the Ecowitt soil moisture sensor data:
------------------ [ 4x4 MAIN TENT ] ---------------
------ 34% - [CH01 FT » G30 - Heady OG BX1 #1]
------ 52% - [CH02 FB » G30 - Heady OG BX1 #1]
------ 39% - [CH03 BT » G20 - TKO]
------ 58% - [CH04 BB » G20 - TKO]
------------------ [ 3x3 VEG TENT ] ----------------
------ 44% - [CH05 BL » GR7 - Garlic Budder OG#1]
------ 47% - [CH06 BR » GR7 - Garlic Budder OG#2]
------ 41% - [CH07 FL » GR7 - Gorilla Goat #1]
------ 46% - [CH08 FR » GR7 - Gorilla Goat #2]
--------- Veg: 38% - 45% | Flower: 45% - 55%
--------- General: 30% [Dry] «| 45 - 60% [Moist] |» 70% [Wet]
- [+01:23]: Checked the humidifiers.
--- Tanks are still full and no leaks found.
Day 04 - Thursday - 08/07/25 - Total Days: 116
-----------------------------------
Daily Averages ~[+01:00]
- Temps: 84.9°F [29.4°C]
- Humidity: 82.0%
- VPD: 0.75 kPa
- Soil %: [32, 51, 37, 57, 42, 43, 43, 45]
-----------------------------------
- [09:42]: Quickly checked on the propagation dome (in the 3x3 veg tent).
--- Nice! Clones are both looking great!
--- Heady OG is clearly recovering and looking better!
--- Wow! TKO is looking incredibly healthy! Top growth has perky leaves with a few nodal growth sites starting to stretch. As far as cloning, she has been healthiest with no issues the entire way!
--- Both Heady OG cuttings are looking beautiful and should be rooting. Plan to check for roots in a few days.
--- Plan to do a pretty heave defoliation today.
--- Also going to start the mother plant cloning process.
- [17:12]: Evening check on the 3x3 veg tent.
--- Mother garden is looking beautiful and the canopy is bushy with growth!
--- Both Heady OG and TKO clones also look green and healthy!
--- My main focus for today is the veg garden and the preservation of the genetics .
--- Lots of work to do and time to also start the mother cycling process!
--- This time, going to do a pretty heavy defoliation!
--- Going to pretty much bonsai each mother while taking a few clones to preserve the genetics.
--- Let’s go Ensign!
- [17:58]: Filled a measuring cup with 1.5 cups of RO water.
------ Added 1/8tsp of Horticultural Aloe
--- Mixed the solution and poured it straight into a clear solo cup.
--- Repeated this process until 4 cups were filled.
- [18:05]: Also marked each cup with the corresponding mother plant name.
--- Time to defoliate and take the clone cuttings!
- [18:07]: Using a pair of trimmers (AC Infinity),
--- Bonsaied each mother plant. Removed over 75% of overall growth leaving several branches and nodes.
- [19:44]: Done and wow what a difference!
--- Pretty much removed all growth leaving a few nodal growth sites to heal.
--- This is my first time going this heavy and am hoping that they recover.
--- If this bonsai defoliation heals up with healthy growth, this can also be an alternative to a full plant cycling.
--- Anyways!
- [19:46]: To preserve the genetics, made sure to cut clone cuttings from each mother plant.
--- To ensure successful rooting, took several cuttings.
--- Made sure to clean each cutting by trimming most of the branches off leaving the top one or two nodes.
--- Did not cut any leaf fingers and made sure to cut the tip of the stalk (about 45°) before placing into the cup of aloe solution.
- [19:55]: Placed the fresh cuttings into the 3x3 veg tent.
--- Have each cup resting on top of the corresponding mother plant.
--- Okay! Let the two-day soak begin!
- [20:00]: Mulched the trimmings in a paper bag.
--- Since the bottom of the paper bags tend to decompose, have the bag in a used BuildASoil soil bag which should not decompose (these are meant for soil).
--- Also added a bit of Kashi Blend and worm castings to the bottom of the bag.
--- Back to the Heady OG cuttings!
--- Gently removed the cups and misted the inside of each with RO water (~2 mists each).
- [20:02]: Carefully placed the new cups onto the cuttings.
--- Great! Plan to check for roots soon.
- [20:08]: Checked the Ecowitt soil moisture sensor data:
------------------ [ 4x4 MAIN TENT ] ---------------
------ 31% - [CH01 FT » G30 - Heady OG BX1 #1]
------ 51% - [CH02 FB » G30 - Heady OG BX1 #1]
------ 35% - [CH03 BT » G20 - TKO]
------ 56% - [CH04 BB » G20 - TKO]
------------------ [ 3x3 VEG TENT ] ----------------
------ 41% - [CH05 BL » GR7 - Garlic Budder OG#1]
------ 40% - [CH06 BR » GR7 - Garlic Budder OG#2]
------ 42% - [CH07 FL » GR7 - Gorilla Goat #1]
------ 44% - [CH08 FR » GR7 - Gorilla Goat #2]
--------- Veg: 38% - 45% | Flower: 45% - 55%
--------- General: 30% [Dry] «| 45 - 60% [Moist] |» 70% [Wet]
- [20:12]: Checked the 4x4 tent.
--- Ca-Caw! Ah yea! The garden is looking incredible and wow growth is raging!
--- The tallest growth is just barely under the netting!
--- Not much to do in the main tent now but to wait until the stretch slows down.
--- Time to relax and let the grass grow! Let’s go!
- [21:34]: Have an extra stainless steel rack and thought of a better way to hold the solo cups in the veg tent.
--- The cups are balancing on the edge of the pots am concerned that they may tip over.
--- Carefully too each cup out of the tent.
- [21:36]: Placed the rack upside-down in the middle of the tent.
--- Have the rack positioned on top of all 4 pots just above the center floor fan.
- [21:39]: Gently placed each cutting cup onto the rack.
--- The floor fan can easily still blow through the grid of the rack. Great!
--- This should be way more stable while still allowing decent airflow.
- [21:40]: Checked the humidifiers.
--- Tanks are still full and no leaks found.
Day 05 - Friday - 08/08/25 - Total Days: 117
-----------------------------------
Daily Averages ~[+01:00]
- Temps: 84.5°F [29.2°C]
- Humidity: 82.5%
- VPD: 0.72 kPa
- Soil %: [32, 50, 30, 53, 40, 42, 41, 42]
-----------------------------------
- [23:02]: Night check on the 4x4 tent.
--- Ahh yea! The garden is thriving!
--- Both Heady OG and TKO are still stretching upwards and the canopy is getting dense!
--- Wow! TKO has reached the top netting! Heady OG is just under the top netting.
--- Ca-Caw! Let’s go ladies!
- [23:11]: Checked the 3x3 veg tent.
--- The veg garden is looking great!
--- The bonsaied mother plants are still recovering from the heavy defoliation. But growth is looking a lot better than I would expect from such a large biomass reduction. Nice!
--- Cuttings are looking great as well!
- [23:13]: Time to swap the aloe water out!
--- Replaced each solo cup with a clean one filled with fresh RO water (1.5cups).
--- Plan to start using the propagation dome soon!
--- Going to let these soak for another day before transplanting into Coco Coins for rooting.
- [+02:05]: Quickly checked on the auto-watering system.
--- System is still charged and no leaks or kinks found in the tubing.
- [+02:08]: Checked the humidifiers.
--- Tanks are still full and no leaks found.
Day 06 - Saturday - 08/09/25 - Total Days: 118
-----------------------------------
Daily Averages ~[+01:00]
- Temps: 83.4°F [28.6°C]
- Humidity: 83.3%
- VPD: 0.67 kPa
- Soil %: [32, 50, 35, 52, 41, 40, 41, 41]
-----------------------------------
- [07:55]: Quickly checked on the 3x3 veg tent.
--- Looking great in the veg garden!
--- Mothers are all recovering nicely from the bonsai defoliation. Great!
--- Cuttings also look healthy and ready for transplanting!
--- Both Heady OG and TKO clones are looking perky and getting bigger!
--- Heady OG cuttings also looking green and rooting! I think. Will check for roots in a few days.
- [20:58]: Night check on the 4x4 tent.
--- Ca-Caw! This is why we grow! Wow!
--- Also hyped that the canopy is getting dense with nodal growth!
--- TKO has more tops stretching through the top scrog netting! Heady OG has not reached the net yet.
--- Stoked the 14in space in between the netting is filling quite nicely and just going to let everything grow!
- [21:01]: Checked the Ecowitt soil moisture sensor data:
------------------ [ 4x4 MAIN TENT ] ---------------
------ 29% - [CH01 FT » G30 - Heady OG BX1 #1]
------ 50% - [CH02 FB » G30 - Heady OG BX1 #1]
------ 34% - [CH03 BT » G20 - TKO]
------ 53% - [CH04 BB » G20 - TKO]
------------------ [ 3x3 VEG TENT ] ----------------
------ 40% - [CH05 BL » GR7 - Garlic Budder OG#1]
------ 40% - [CH06 BR » GR7 - Garlic Budder OG#2]
------ 40% - [CH07 FL » GR7 - Gorilla Goat #1]
------ 40% - [CH08 FR » GR7 - Gorilla Goat #2]
--------- Veg: 38% - 45% | Flower: 45% - 55%
--------- General: 30% [Dry] «| 45 - 60% [Moist] |» 70% [Wet]
- [21:05]: Checked the 3x3 veg tent.
--- Growth is still recovering quite nicely! This may be my solution to maintain mother plants longer between cycles.
--- Mother clone cuttings are also looking healthy and ready to be rooted!
--- Was originally planning on rooting all of the cuttings, but since the mother plants are recovering better than anticipated, just going to plant one of each pheno.
--- Let’s go!
- [21:23]: Filled a measuring cup with 1.5 cups of RO water.
------ Added a pinch of Quillaja Saponaria Extract [60]
------ Added 1/64tsp of Horticultural Aloe
------ Added 1/32tsp of Mycrobe Complete
--- Mixed the solution thoroughly.
- [21:26]: Dropped 4 Coco Coins into the measuring cup.
--- The coins immediately started to expand.
------ [» ~10 MINUTES LATER «]
--- Placed each fully saturated Coco Coin into half-cut solo cups.
- [21:41]: Using a squeeze bottle filled with Clonex,
--- Gently filled each pre-made hole with Clonex rooting gel.
- [21:43]: Time to plant the cuttings!
--- Using a pair of clean trimmers, made a final 45° cut.
--- Also stripped and scrapped some of the stem’s outer membrane.
--- To help with planting, gave each Coco Coin a squeeze to loosen the coco.
--- Made sure to insert each stem straight and snug with the tip about a 1/4 inch from the bottom of the Coco Coin.
--- Also secured the stem by pinching and pressing in the top of the Coco Coin.
--- Once each cutting was planted,
- [22:11]: Placed each pheno into the propagation dome’s tray.
--- Made sure to keep each clone properly tagged.
--- Added 1/4 cup of RO water to the bottom of the tray.
--- Placed the side extensions onto the tray.
- [22:15]: Misted the top of the propagation dome before covering the cuttings.
--- Vents are fully closed.
--- Also lowered the intensity from 5 to 1.
--- At the current light intensity (LV1), the PPFD is around 110 μmol/m²/s which gives a DLI of 7.13 mol/m²/d under an 18/6 light cycle
--- Will check back daily to cycle the air under the dome.
- [22:17]: Placed the extra mother cuttings back on the rack. Will try to keep these cuttings alive until the planted ones root.
--- Will need to change the water every day or two.
--- Also need to water the Heady OG and TKO clones.
--- Ca-Caw! Let’s go!
- [11:33]: Here are the starting initial watering ranges:
------ Heady OG BX1 » 261.4g → 301.2g
------ TKO » 240.9g → 301.4g
--------- General Solo Range: [Dry] «| [Initial Cup Weight] + ~55-100g |» [Wet]
--- All cups were last watered 3 days ago.
--- Took the starting weight of both clones before watering,
------ Heady OG BX1 weighed 257.0g
------ TKO weighed 259.7g
--- While on a scale,
--- Gently misted the straw mulch of both cups with RO water.
--- Focused on the straw and sprayed as evenly as possible.
--- Misted 10-20 sprays. Waited a moment, then misted again.
--- Made sure to reference the watering weights.
--- Repeated this process for both cups.
--- There was no runoff.
--- Also defoliated and removed the lowest growth on both clones.
- [23:03]: Took the saturated weight of both clones after watering,
------ Heady OG BX1 » 345.3g
------ TKO » 355.4g
--- Marked the final wet weight on the back of each cup. Also marked the watering date on the front.
--- Placed both phenos back into the tent. Have them now resting on the rack (on drip trays).
- [23:14]: Checked the humidifiers.
--- Tanks are still full and no leaks found.
Day 07 - Sunday - 08/10/25 - Total Days: 119
-----------------------------------
Daily Averages ~[+01:00]
- Temps: 83.9°F [28.8°C]
- Humidity: 83.6%
- VPD: 0.66 kPa
- Soil %: [49, 49, 30, 52, 43, 45, 46, 44]
-----------------------------------
- [08:02]: Quickly checked on the 3x3 veg tent.
--- Ooo yea! Looking great in the veg garden!
--- All mothers are still green and recovering. New growth is starting to develop and growth is looking healthy!
--- Quickly checked on the propagation dome.
--- All clone cuttings are looking green and healthy!
- [19:04]: Night check on the 4x4 tent.
--- Ca-Caw! Ah yea! Heady OG has reached the top scrog net!
--- TKO has several tops above the netting and she is raging with healthy!
--- Canopy is also showing more signs of pistil crowning and vertical growth seems to be slowing down. I think.
- [19:07]: Checked the Ecowitt soil moisture sensor data:
------------------ [ 4x4 MAIN TENT ] ---------------
------ 48% - [CH01 FT » G30 - Heady OG BX1 #1]
------ 49% - [CH02 FB » G30 - Heady OG BX1 #1]
------ 36% - [CH03 BT » G20 - TKO]
------ 55% - [CH04 BB » G20 - TKO]
------------------ [ 3x3 VEG TENT ] ----------------
------ 41% - [CH05 BL » GR7 - Garlic Budder OG#1]
------ 43% - [CH06 BR » GR7 - Garlic Budder OG#2]
------ 43% - [CH07 FL » GR7 - Gorilla Goat #1]
------ 43% - [CH08 FR » GR7 - Gorilla Goat #2]
--------- Veg: 38% - 45% | Flower: 45% - 55%
--------- General: 30% [Dry] «| 45 - 60% [Moist] |» 70% [Wet]
- [19:10]: Checked the 3x3 veg tent.
--- The veg garden is recovering beautifully!
--- Since the stretch seems to be slowing down in the main tent, going to give these ladies a little extra.
- [19:17]: Going to feed some Stash Blend for the first time.
--- This blend of beneficial microbes and mycorrhizal fungi also includes a bit of silica which should help during the bloom phase.
--- Also shout out to Mr. Grow It, Rob (from CLTV), and Pigeons420! Stay lifted!
- [19:19]: Filled a pitcher with 16 cups (1gal) of RO water.
------ Added 1/8tsp of Quillaja Saponaria Extract [60]
------ Added 1tsp of Stash Blend
--- Mixed the solution before pouring 6 cups straight into a pump sprayer.
--- Gave the sprayer a good shake before spraying the entire solution onto Heady OG’s straw mulch.
- [19:52]: Repeated this process again for TKO.
--- Depending on how growth develops, may start feeding these ladies weekly.
--- From personal experience, the veg phase can easily be grown with straight RO water.
--- Flower is probably the most important time to feed because there are more roots and the plants are trying to produce more biomass. I think.
--- Anyways!
- [20:10]: In the veg tent, repeated the watering process for all mothers (1 cup + 1 cup RO each).
--- Focused mainly on the straw (2 cups each).
- [20:13]: Checked the humidifiers.
--- Tanks are still full and no leaks found.
--- Wow what a grow week!
--- The difference in growth from Monday until now has been incredible!
[END OF WEEK 16]
Likes
4
Share
@Organic710
Follow
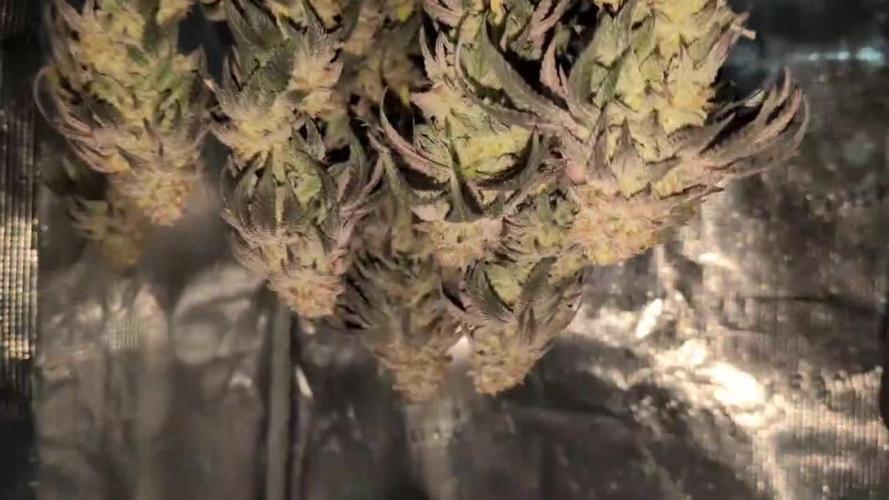
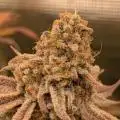
Chopped all 5 plants and cleaned the tent before hanging 4 plants up to dry. The 5th plant was the runt in the bottom right corner its finished and has some nice flowers but I feel this harvest will be pretty big and Im a solo person. 10 plants can become a chore all within a few weeks so I thought I may aswel freeze the 5th plant and turn it into cannacaps eventually. I usually make bho or wash it though mesh bubble bags and decarb the bho/bubblehash then put into empty pills with MCT oil and lecithin. I make 5 caps per 1g of product estimating them at 100mg each. These are 10/10 for my epilepsy 🙏

Likes
10
Share


@frenchincaliweed
Follow
Oh so this is my first entry on GrowDiaries.
This Red Dragon started from seed I believe sometime early April.
It's been in a 2 gallon pot for a good month and now is ready to be transplanted in a 15 gallon cloth pot. I'm probably gonna do that today, with some fiming.
I have a mix ready, made of 1/5 dirt,1/5 chicken manure, 2/5 peat moss, 2/5 perlite, and roughly a tablespoon of lime and sulfur, as well as bone meal and stove ashes.
I'm a newbie experimenting so feel free to tell me if I'm doing it all wrong :D
Likes
11
Share


@Jays_Not_Here_Man
Follow
The girls have been doing great this week ❤️ lots of fattening and stacking. They are giving off a greasy kerosene smell mixed with sandalwood at the moment and are stinking up my house whenever the tent is open. I have had to run my exhaust fan at level 10 for the past 2 weeks so that the smells aren’t overwhelming when you walk in.
Temps have been consistent, and I haven’t had the need for added humidity, it’s been steady around 55-60% I have turned the fans up to ensure good airflow, hopefully we can just ride her out to some fat colas !


Likes
4
Share


@Cogollo_eu
Follow
**Encontrarás la traducción a español al final de la descripción**
From/Desde: 09/02/19 || To/Hasta: 15/02/19
From day/Desde día: 71 || To day/Hasta día: 77
----WEEK SUMMARY----
10/02/19: Photos 1 to 5
- I must apologize for the colours of this photos, lightroom dng format and custom white balance seems to made me a bad play this time.
11/02/19: Photos 6 to 21
12/02/19: Photo 22
13/02/19: Photos 23 to 25
15/02/19: Video 26 & Photos 27 to 36
This is the last WEEK!!!!, i will only make one more irrigation with nutrients, and past 3 days 7 consecutive days of just water with Flawless Finish.
You can see the amount of crystals of this babys, and i can't tell you how good it smells, touching any bud make the fingers get too sticky. Previous week and this week i was removing a huge amount of big leaves, to enable the light penetration to the lower parts where buds are not totally finished.
I'm terribly impatient for Harvest time 😭
---IRRIGATION CALENDAR---
10/02/19 (Night)
I prepared a solution with 3l water and (Big Bud, Bud Candy, Nirvana, Sensizym, Rhino Skin, Bud Factor X & Bloombastic) @ 1.6 E.C. PH6.4
~750ml for each BlueBerry Mazar
13/02/19 (Day) 600ml of water & Flawless Finish @ EC 0.4~0.5 PH6.5
14/02/19 (Day) 400ml of water & Flawless Finish @ EC 0.4~0.5 PH6.5
15/02/19 (Day) 750ml of water & Flawless Finish @ EC 0.4~0.5 PH6.5
20/02/19: HARVEST TIME COMING!!!!!!!
*****ESPAÑOL*****
----SUMARIO SEMANAL----
10/02/19: Fotos 1 a 5
- Debo pedir disculpas por el color de las fotos de este día, el ajuste de blancos manual de los archivos dng de la app lightroom mobile me ha jugado una mala pasada.
11/02/19: Fotos 6 a 21
12/02/19: Foto 22
13/02/19: Fotos 23 a 25
15/02/19: Vídeo 26 y Fotos 27 a 36
¡¡Esta es la última SEMANA!!, sólo haré un riego más con nutrientes y 3 días después empezaré el ciclo de 7 de agua y flawless.
Podéis ver en las fotos la cantidad de cristales de estas pequeñas, y no podría explicar lo bien huele (es maravilloso). Tocar cualquiera de los cogollos te deja los dedos muy pegajosos. La semana pasada y esta he estado quitando muchas de las hojas grandes para dejar pasar la luz a los cogollos inferiores que no están tan hechos como la parte superior.
¡¡¡¡¡¡Estoy impaciente por hacer la cosecha!!!!!
---CALENDARIO DE RIEGO---
10/02/19 (Noche)
Preparo un solución con 3l de agua y (Big Bud, Bud Candy, Nirvana, Sensizym, Rhino Skin, Bud Factor X y Bloombastic) @ 1.6 E.C. PH6.4
~750ml para cada BlueBerry Mazar
13/02/19 (Día) 600ml de agua y Flawless Finish @ EC 0.4~0.5 PH6.5 cada BlueBerry
14/02/19 (Día) 400ml de agua y Flawless Finish @ EC 0.4~0.5 PH6.5 cada BlueBerry
15/02/19 (Día) 750ml de agua y Flawless Finish @ EC 0.4~0.5 PH6.5 cada BlueBerry
20/02/19: ¡¡SE ACERCA LA COSECHA!!
Likes
22
Share

@Chumpkilla
Follow
8/19/23 - Day 67 - Things are still looking good. We just had a water change. A couple more weeks!
8/21/23 - OK, ok ok, we have a lot of work coming up. Right now is like the calm before the storm. The storm I'm talking about is harvest, trimming, drying, and curing. This is the kind of labor that you LOVE to HATE. Especially with how many buds ill be pulling from this LEAF box.
Let's talk about progress real fast. She is getting bulkier every day. Overnight she drank about 300+ ppm of nutes. She likes the nutes a lot. I'm taking this as a reason for all the little snowy crystals and the enlargement of the buds.
Flushing:
For about a week before harvest I will empty the water+Nutes and refill only with Water. We want the plant to suck up and replace all the nutes in the buds with water. This is called flushing.
Trimming plans and Tools:
When it's time to trim the plant, I've got a plan in mind. I'm going to trim the buds while they're still wet, and I'll leave them attached to the stems. To simplify the drying process, I will split the LEAF into two parts – the top and the bottom. Since space is a bit tight in the LEAF with this grow, I will keep just the buds on the branches. This will help the air circulate the buds better. I've even found this cool trimming tray on Amazon that I'm planning to use.
I've realized that having the right tools for trimming is essential. Just like I'd put on gloves to work on a car, I will use nitrile gloves to keep things clean while trimming. And I'll use proper trimming scissors instead of regular ones. These scissors are designed for this job and should make the process much smoother.
Amazon - Trimming Tray - (somewherr brand pictured above)
Amazon - Nitrile Gloves
Amazon - Trimming Scissors
Drying Plans and Tools:
Once I'm done trimming, it's time to dry the buds. I'm thinking of using simple tension rods, like those small shower curtain rods, to hang the branches. This way, I can create two levels inside the drying box. The lower part can rest on a SCROG net to ensure good airflow and even drying for all the branches. The LEAF box will handle the drying parameters. The environment inside the LEAF box will focus only on keeping the humidity at 60% and moving the air around getting the buds to a non-mildew amount of humidity.
Amazon - Tension rods 16-28”
Curing Plans and Tools
After the buds are dry (60% humidity), the next step is curing. This means I'll be storing the buds in sealed glass jars. I've got mason jars and hygrometers to monitor humidity levels. Once the jars are filled with buds, I'll seal them and put them in an cool, dark spot. I plan to open the jars briefly every day to let in some fresh air. (15min). I'll know the curing is done when the humidity inside the jars stays around 62% during these "burps." That's when my perfectly cured buds will be ready to enjoy!
Amazon - Hygrometer 12 Pack
Target - 32oz Ball Mason Jars 12 Pack
I use a smell-proof duffle bag. It has double zippers, and smell prof lining. The brand is www.420stock.com, and the model I use is the X-Large Trap Pax Duffle Bag.
8/23/23 - 20% more nutrients were added. She went from about 900 at the beginning of the week to about 330. Now she's back up to 500ppms. We change the water in one more day.
8/24/23 - Day 72 - It's official: I have moved the smell slider up! Holy shit, does it smell potent. I put my arm in there through the Weed forest, and when my arms came out, I was attacked by the Skunk BOSS. I had to shower and change my outfit to eliminate the smell.
If you are looking for this experience, check out https://www.getleaf.co/


