


Likes
Comments
Share

@Antarctic
Follow
11.02.2026 – 17.02.2026
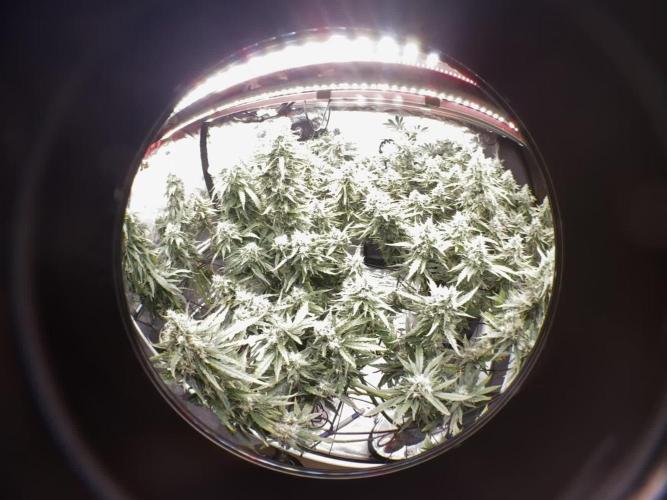
Canopy Adjustment: To ensure an even light spread, I’ve raised the Wonder Pie by placing it on a container. Now, all tops are leveled for maximum photon absorption.
The "Draft" Hack: To combat the late-flower heat, I’ve implemented a new ventilation strategy. By opening windows in both the grow room and the adjacent room, I’ve created a cross-ventilation effect (draft).
Temperature Drop: Success! I managed to drop the peak temperatures from 30°C down to a perfect 24°C. This drop is crucial for preserving terpenes and increasing resin production as we head toward the finish line.
Current Specs: pH 5.8, PPM 1000. Stability is the name of the game right now.

Likes
14
Share


@KannaKullektiv
Follow
Sie ist soweit. Die Farbe ist intensiv und sie richt verdammt gut.
Zum schnellen trocknen im Zelt, habe Ich jeden Zweig einzeln aufgehängt und versucht die Relative Luftfeuchtigkeit zwischen 58 - 62% zu halten und die Temperatur unter 18 Grad Celsius zu bekommen.
Sobald die Stängel knacken schneide ich die Buds runter und lege sie im Zelt in Pizzakartons damit sich die Feuchtigkeit gleichmäßig verteilt.

Likes
38
Share


@PrairieFrostGrow
Follow
******** Week 7 - January 20 to 26, 2020 (Days 43 to 49 from germination)
She continuers to impress with her resilience as I have thrown a couple of curves at her.......but she continues to fatten and grow her buds😎 It was also not without learning though and thats what is so cool about growing this plant.......you always seem to leave a grow feeling like you could do even better next time and therefore challenging yourself to do better......and have dab while doing it😂
Not sure if I have a little different pheno but if I ran her again I would find a way to train her out wider. 5 gal pot diameter idea........maybe don’t fill with as much medium? Again, simply to keep light hitting all the lower sites. Where does the “XL” come into play as well I guess. Removed branches early on that were low. This grow, her narrow leaves have allowed a lot of light down below but it will be felt in a little less yield.....think the pH got a little high....or potassium excess......Terpinator too early? If left to a single cola she would be tall and have a huge cola I suspect......Gorilla Grow with the extension type of potential! She has loved the water feeds. Missed out bit by backing off of the CalMag a bit too much.....stems say deficiency that but leaves show toxicity? (Back to that you always feel you can do better thing😬)
Got a little crazy with the PPM and saw tip burn in week 7. Gave a quick little flush with RO water and Sensyzime to clean up the roots of the salts. Didn’t get crazy though because it was just the top leaves burnt. Been building the medium up to this point so don’t want to wash it all away just yet. She didn’t claw down and over night appeared to still keep moving forward with bud growth.
I did notice a small amount of hairs starting to turn red by weeks end......likely won’t be long before more are red and we go to flush👍 (Make it to end of week 8??) No rush though.......still lots of room to fatten up yet.
In the week a head there will be the last push to get her medium in as good a shape as my skills will warrant. I want to get a good 10 + days of flush but her leaves are going to finish dark from what I can see. Run-off has been reasonable though so will keep fingers crossed 😄🤞
Little more detail....
Jan 20/20 - Day 43
- Drinking lots right now, close to 4L per day, so 2L plain water only in AM. 6.2pH,.
- Feed in PM was light as well. Sensyzime @ 2ml and LW8 & Rezin @ 1.5ml only. 2L given with 75ppm. 5.9pH
- She was given a good feeding yesterday.
- Buds sites are stacking.......she is making me 😃
Jan 21/20 - Day 44
- AM - 3L with Dual Fual A&B @ 1.5ml/L. 725ppm and 5.9pH.
- PM hit her again - full feeding minus Rhino Skin, Sensyzime and Vitrathrive and VeloKelp. 2.5L 1000ppm and 5.9pH.
- Runoff - 1100ppm and 5.9pH.
- top leaves were droopy so the extra feeding in the evening.
Jan 22/20 - Day 45
- Backing off quantity a bit and down to 2L feed in PM. Her pot was still fairly heavy.
- Mass & Terp @ 3ml, Rezin & LW8 & DF @ 1.5ml, CalMag @ 0.5ml = 1300ppm
- Very perky today....standing up all the way down the plant. Liked the feed yesterday.
*******should have reduced this PPM feed......you want to push when you see potential😕
Jan 23/20 - Day 46
- Supplemental feeding only today. Happy so don't rock the boat :)
- Sensyzime @ 2ml, LW8 & Rezin @ 1.5ml = 80ppm 6.1pH
- 2L only today.....still some weight to the pot
Jan 24/20 - Day 47
- Nute burn on Green Poison’s tips seen today.
- Flushed through 7L of plain RO water pH to 5.95. - Runoff: 325ppm and 5.9pH.
- Followed right away with 2L more water with Sensyzime @ 3ml/L
- happy and praying in the evening......little surprising actually👊👌
Jan 25/20 - Day 48
- 2.5L of full strength feeding for this week.
- ppm for that was 1275 so watered down to 1100ppm.....only need 1ml of base nutes at full strength to hit roughly 1,000ppm.
- Runoff: 600ppm & 5.95pH
- Swear her leaves are bigger, more mass today!! Still narrow and dark though.
- she is 30” x 30” now
Jan 26/20 - Day 49
- Feed was full strength one for the week, 1150ppm 6.1pH.
- Removed some more leaves today.
- guessing only another 1.5 weeks of feeding.
Happy growing fellow enthusiasts and thanks for the time to read🙏🙏

Likes
46
Share


@German_GrowLab
Follow
Soooo, nach langem Warten (ich bitte um Entschuldigung, es kam immer irgendwas dazwischen), nun die Ernte! Nachdem ich jetzt alle Sorten verkostet habe, kann ich euch nun mein Fazit präsentieren.
Im Großen und Ganzen bin ich eigentlich ganz zufrieden mit dem Ergebnis, muss aber auch gestehen, dass ich bei der ein oder anderen Strain doch etwas mehr erwartet habe. Bei den nun folgenden Bewertungen möchte ich noch anmerken, dass sich diese rein auf den Outdoor-Anbau der jeweiligen Sorte und nur auf den einen bekannten Phäno beziehen. Man kann grundlegend behaupten, dass sich alle Sorten doch sehr solide geschlagen haben, und das bei diesem … naja, sagen wir mal wechselhaften Sommer. Allerdings merke ich einfach, dass sie lange nicht ihr volles Potenzial ausgeschöpft hatten, was ich immer etwas schade finde. Ich bin trotzdem froh, dieses Projekt durchgezogen zu haben, und gehe mit reichlich neuen Erkenntnissen sowie einem abwechslungsreichen Stash in die besinnliche Zeit.
Was hat mich grundlegend bei den meisten Sorten gestört?
Bei fast allen Sorten, mit Ausnahme der Hella Jelly und der Lemon Tree (wer hätt's gedacht), waren die Terps doch sehr flüchtig. Im Vape kamen sie wirklich gut zur Geltung, wenn man sie allerdings im Joint (pur, versteht sich) geraucht hatte, haben sie oft nach den ersten Zügen an Präsenz verloren, was wirklich schade ist. Dies ist aber wahrscheinlich auf die Anbaubedingungen zurückzuführen und soll den Breedern keinesfalls ihre Qualität absprechen. Wie schon in einem vorigen Kommentar erwähnt, haben sie einfach nicht ihr volles genetisches Potenzial erreichen können.
Ich bin mir des Weiteren auch nicht sicher, ob ich beim nächsten Mal wieder auf die Dryferm-Bags setzen werde. Es war doch ein ziemliches Gefummel, bis man die Blüten ohne Kontakt zueinander in die Beutel verfrachtet hatte. Außerdem hat es meiner Meinung nach die Trocknungszeit eher verkürzt, obwohl ich mich an die Temperatur- und Luftfeuchtigkeitsrange gehalten hatte, was ich auch nicht unbedingt begrüße. Und zu guter Letzt sind sie auch echt nicht billig, wenn man bedenkt, dass ich pro Pflanze teilweise über 4 Beutel benötigt hatte (pro 3 Stk. ca. 25 Euro) und sie laut Hersteller nur dreimal verwendet werden sollten. Das ist doch auf Dauer ein ganz schönes Investment. Aber das sind nur meine 2 Cent zu dem Thema :).
Nach und nach sollten jetzt hier die Erntereports eintrudeln. Ich hoffe, ich schaffe alles heute. Falls nein, seht es mir bitte nach. Falls ihr noch spezifische Fragen zu einer Sorte habt, lasst es mich einfach wissen, dann bekommt ihr noch eine ausführlichere Beschreibung.
PS: Die Filmore-Slim musste ich leider fast komplett entsorgen. Sie hatte die festesten Blüten, die ich je bei einer Outdoorpflanze gesehen habe, was ihr leider zum Verhängnis geworden ist (durchgeschimmelt). Von ihr hatte ich leider keine rauchbaren Blüten. Von der Optik war sie auf jeden Fall ein Champion!
Ich habe von allen Sorten Fresh Frozen in der Gefriertruhe, die ich in der kommenden Zeit wachsen möchte (auch von der Filmore Slim). Also kann ich sie hoffentlich als Konzentrat verkosten.
Das soll es gewesen sein. Ich wünsche euch viel Spaß mit den folgenden Ernteberichten und eine ruhige, besinnliche Weihnachtszeit mit euren Liebsten! Wir hören uns dann hoffentlich im nächsten Jahr wieder, mit vielen neuen spannenden Projekten.
Peace!


Likes
41
Share


@Growing88
Follow
For now I'm happy with the germination,Even the transplant in the organic coco hydro growth modules all right yesterday✌️🏿


Likes
14
Share


@Wenz004
Follow
Next grow week done
Nothern light topped...started to grow better after one week of my absence and pure stress for the plant...nutrients data above are only for this plant
Northern light untopped which gets only aptus nutrients (data see last week) shows impressive grow...develops monster leaves which is a bit problematic...lower part does not have enough light...however I decided not to influence this plant much...only done some light lst
Likes
5
Share


@Rizza78
Follow
Malt is sad after transplant. Red Hot good. Oozecake good. Seedlings are liking the new environment.

Likes
15
Share


@Venabr96
Follow
Armario posto em fase de floraçao.
Rega de 4 a 4 dias com 2l de agua desmineralizasa.
Deixei a lampada cair sobre elas , piqueno incidente 😣😣
Mas esta tudo bem só perdi uma folha da piquena uma da grande e algumas queimaduras 😣😣

Likes
52
Share


@DevilsBud
Follow
New week for the 2 purple berry Kush
I think the purple berry Kush needs couple days more then the rest but it's going great there at a size that adding extra nutrients is waste and only making flushing take longer so starting to lower all nutrients and preparing for last week exited times
Happy growings Growmies 🤜🏻 🤛🏻
visit www.marshydro.eu
for your best gear and use the PROMO CODE: DEVILSBUD
Some info about the Marshydro FC-4800
Superb Quality LED Chips: The whole light is composed of 1206 pcs Samsung lm301b and Osram 660nm chips. More than two times as many LEDs are used to drive the grow lights at low currents and to avoid overdrive. Quality is guaranteed and efficiency is up to 2.8 μmol/j.
Even PAR Distribution and High PPFD Output: The multi-light bar design and the densely distributed light chips enable the LED grow lights to achieve the optimum PPFD required for plant growth over the entire effective coverage area.
Specifically Designed Spectrum: To ensure even plant growth, blue and red light are enhanced on the basis of a full spectrum combination. Not only does this accelerate plant growth, but it also improves the yield and quality of the plants at the same time.
Dimming Daisy Chain Function: The dimming function saves on electricity costs and enables brightness from 10% to 100% for the different stages of plant growth. A single master light can connect up to 30 lights in a daisy-chain system.
Business LED Grow Light: The light's wavy heat sink dissipates heat quickly and the IP65 waterproof allows the light to operate in humid conditions. 180° collapsible feature for easier installation. All these features provide favorable assistance for commercial cultivation.
And some tent info
●【Lock All Light Insid】MARS HYDRO Grow Tent Interior is made of diamond mylar. Non-toxic to the environment, no harm to plants. High-quality 1680D canvas being double stitched, (ALL OTHERS BRAND grow tent is 601D canvas) which is tear-proof for perfect light locking, No light leaks or rips at all.
●【Durability Grow Tent】Stable Metal corner adapters and poles are the trustful supporters of the tent. No rusting nor paint-falling. Quick easy tool-free installation. Carries strong heavy-duty SBS zippers, double layer lining to create a light-proof seal.
●【Easy Observation of your Plants】Special peeks window made by double layers of cloths. Observe the growing conditions of your plants without opening the tent and avoid disturbing plants. The peek window also serves to dissipate heat and ventilate air.
●【Removable Tray Keep Clean】The package includes a removable waterproof floor tray to hold soil and fallen leaves. The tray can be taken out easily to wash. Removable and water-proof makes cleaning easy.
●【Good Ventilation&Fast Assembly】 Circular double-sleeved vent holes with adjustable nylon strap for air circulation by exhaust fan, ducting, carbon filter, or reflector. Better allows proper light, heat, and airflow. Quick tool-free installation. Reinforced by a sturdy metal frame to ensure security and stability, supports up to 140lb. Perfectly safeguard your plants to thrive even in winter


Likes
40
Share


@ZoobZoob_farmZ
Follow
ce jour 27:11:2021 j'ai pratiqué au peut de défoliation mais j'ai malheureusement cassé une branche vue le stade de développement je pense tenté la bouture mais j'ai des doute car bien abimé
👍Description
White Widow Automatic Female Cannabis Seeds
Hybrid. (Brazilian Sativa x South Indian) x NL Special x Afghan Lowryder. Fast, robust and very frosty. Earthy, hash-like aroma and taste.
By crossbreeding our original White Widow with NL Special and Afghan Lowryder, we created White Widow Automatic. This autoflowering variety has a short life cycle and provides above average yields that are covered in frost. Its NL Special heritage also ensures that this strain is well prepared for growing outdoors in colder climates.
As with our other autoflowering strains White Widow Automatic is short and bushy and grows one main cola with a couple of side branches. From about half way through flowering she will be covered in frost, making sure that even the smaller buds are potent. This strain can go from seed to harvest in 9 weeks, but will usually take around 11. Outdoors White Widow Auto can reach a height of around 150 cm and yield up to 85 grams per plant. Optimal indoor yields were obtained under a 18/6 light cycle.
She has an earthy, hash-like incense aroma and taste. This hybrid variety has a strong indica effect and provides a potent, couch-locking body stone. Medicinally, White Widow Automatic is highly effective against stress and depression and chronic pain.
https://marshydro.eu/products/100x100x180cm-grow-tent/
https://marshydro.eu/collections/ts-series/products/ts-1000/
Likes
17
Share


@Ksouth1
Follow
5/10-Last week went well. She is still growing like crazy! The clones are growing super fast also. I can't imagine what it will do once put into the ground. It's a super drinker and is a very vigorous grower. It takes all forms of training with ease such as topping, lst and supercropping. Hope it's a colorful plant so it will look nice when done. Will be going outside in the next 2-3 weeks from today. Until next time happy growing to everyone!

Likes
4
Share


@KhaVigga
Follow
i went to work like 2-3 days not coming home and she is nearly dry out to dead but luckily i came back in time and fix it.

Likes
7
Share


@Chubbs
Follow
Weekly update on these beautiful ladies. They're starting to stretch upward and started the preflower stage. Seeing no issues from the transition from Athena Grow A&B to the Bloom A&B with some added P&K. I did a light defoliation taking off the lower fan leafs and really anything at the soil level. All in all Happy
Likes
21
Share


@Mr_Motalovah
Follow
Hello Growers and Tokers! 👋 👩🌾 🧑🌾.🔥💨
THE MOST PHOTOGENIC
Thinking about changing the title of the diary to that.. 😂😂
I swear the camera loves this one..
And it's not the placement because I've tried moving them to that same spot and the pictures just don't come out the same.
I guess the others just need to mature a bit more and they'll be more appealing in pictures because in person they really are.. 😍
Green sensation is really bringing it to the table. Buds are getting fat, stinky and sticky!
I'll have to add a bit of support for sure because some are starting to bend a bit.
Smell is just grrreat!
She's definetly not ready yet so those 40-45 days of flower aren't that correct.. No problem with me though, i'm glad they've got more time to rippen up.
Not much difference in nutrients.. I do use 2ml/L of enzymes every 10 days or so in flower.. Noticed it does great work in the roots during flower.
Hope you enjoy the pics and vids. Taken on day 42 of flower.
Check out the other strains i've got going as well.
Take care out there!
One love!


Likes
72
Share

@World_Breeders
Follow
🌿 Final Result 🌿
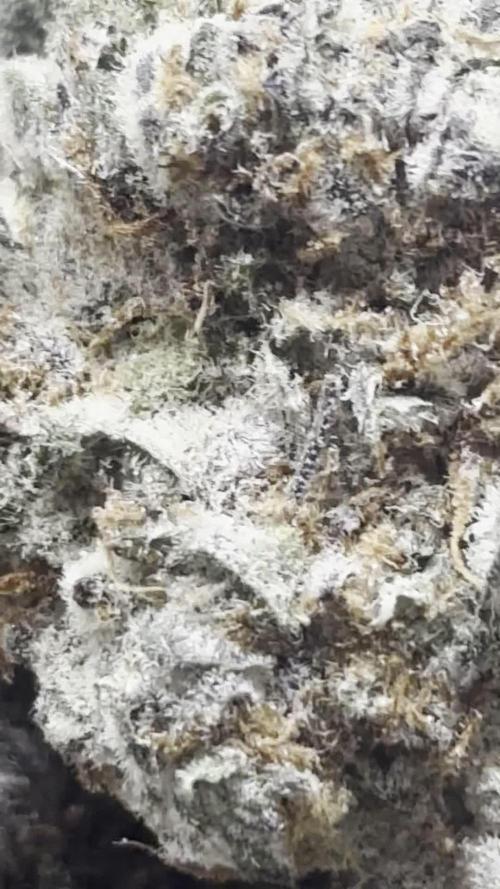
After weeks of watching Hokuzan develop, it's incredibly satisfying to finally see the finished flowers.
The buds came out dense, extremely frosty, and beautifully colored, with deep purple tones hidden beneath a thick blanket of resin. Trimming revealed just how well this cultivar expresses itself, and the final bag appeal is exactly what I was hoping for.
The aroma became even richer after drying, and I'm looking forward to seeing how it continues to evolve during the curing process. From start to finish, this was a smooth, healthy grow that rewarded me with beautiful flowers covered in trichomes.
I'd definitely grow Hokuzan again. Thanks to Hidden Group Genetics for creating such an outstanding cultivar.
Genetics: Hokuzan
🌍 Breeder: Hidden Group Genetics
Likes
32
Share


@Platinouuu
Follow
Seguimos en este lindo caminar con mis hijas! ya prontito a probar el fruto.
