
Likes
Comments
Share


@Mr_BFL
Follow
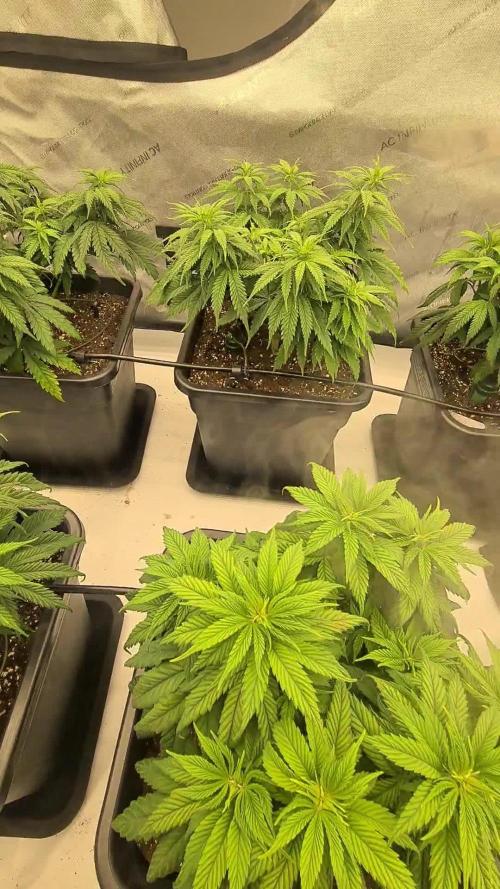
bloom, swell, with problems with salting. Lemon after 1-2 weeks on Harv, today I will start to rinse


Likes
6
Share

@El-Goki
Follow
Nie Wieder Gießen !!
Heute haben alle babies ihren final topf bekommen , alle von 6l - 18l töpfe umgetopft.
Dafür wurde :
Lightmix
Wurmhummus 10%
1g/l GHF BioGrow
2.5g/l GHF BioBloom
Und das ganze mit wasser+recharge am ende gegossen. Beim umtopfen wieder MYKOS von xtreme benutzt bin "xtreme" zufrieden damit :)
Biochar habe ich leider nicht rechtzeitig vorbereiten und chargen können daher bleibt das diesmal aus.
Blumat system habe ich selbst zusammen gestellt , für jeden topf 1 maxi-tropfer + 3 tropf verteiler, mit zwei hauptleitungen (1 für je 6 töpfe) die am ende sich treffen und einen geschlossenen kreis bilden , jetzt wird das ganze für zwei wochen beobachtet und justiert.
1 woche ruhe dann ab in die blüte ! :')


Likes
14
Share


@CannabisHerald
Follow
Overall looking good, despite the persistent spider mite problem. Spraying them with my garlic concoction for that. Having cooler temperatures now; Green Crack tends to display a show of colors when exposed to colder temperatures during flowering. I'm starting to see a few red streaks in the flowers.
Giving them their last feed this week. Going to start flushing. Ordered a pocket microscope to check on the trichomes.😎
Likes
25
Share


@XperencdGmanXG
Follow
this should be the last week of vegetation. Flowering should be starting soon. Seems like no end to this drought we are suffering from in Southern Ontario.

Likes
36
Share


@OGTrauma
Follow
Im coming closer to the ✂️ time, i tried some pics without the lights on to show a more realistic approach of how plants are evolving besides al the self inflicted plages and nutrients burn , i can wait to the plants mature while im searching for the 🕵️♂️to check if thricome ratio should be mostly amber ... Because fuck im such a sedative whore, big gaz leaks homies!!!!

Likes
9
Share


@Growlife23
Follow
No purple yet kind of bummed out about that but we'll see what happens the buds are getting fatter so I'm happy about that nice and hard the smell is awesome can't wait to smoke this


Likes
10
Share


@Murojuanna
Follow
Pulled the girls down today, on day 58.
Drying in 55% RH / 19c-21c - seems to be stable.

Likes
21
Share


@Jordy_klyff
Follow
26 giorno di fioritura, le ragazze stanno crescendo bene nessun problema riscontrato struttura resistente ,lampada led bavagreen 480w a 40 cm dalla cima ,soluzione nutritiva N20P20K20,TEMP-24 EC 1680 PH 6.0,provero ad aumentare lentamente EC della soluzione ,si accettano consigli per aumentare la resa se possibile

Processing
Likes
32
Share


Likes
74
Share


@PureMedicin
Follow
Still a few week before harvest. I have stopped adding N as much as possible to my nutrient solution. It might help the bud swell up a little more the last few weeks. Also been adding big bud and bud candy from Advanced Nutrients. I will feed the girls 2 weeks more before going into flush.
My soil Sour diesel is ready for flush anytime soon.
#1 (back right) have suffered from being to close to the light while also not having enough airflow around it. Have fixed the air problem but cant bring my light any further up. kept around 22 cm from the tallest branch 30< cm from the rest which is the minimum recommended.
They smell really pungent and the suger leafs and buds are coted with crystals. My autoflower (front left) is doing good too and i really cant wait to taste it.
A good week (kinda)

Likes
45
Share


@AsNoriu
Follow
So Early Tangie, aka TheRealFoxtailQueen had made 72.03 of airy a bit foxtailed daytime smoke, she is a bit weaker on taste and strengh than her sister Fatty, the only other Tangie i tried already. So from all 3 curently choped and dried plants ( and i quess the rest ) she is the worst.
Day 99. Strawberry Cough and other girls run fine, need to do defoliation for her, but work and future hollyday takes all my time away...
Day 100. Two girls are jared, life is good,numbers are far off my expectations and i am happy with that ;)))))
Day 104. Sativa pheno aka Lanky tangie falled today, her photos and videos in harvest diary, there i will put dry bud photos later.
Strawberry Cough finally had time to go to hairdresser and thats what we got ;)))
Never trimed any plant ever so hard as this round and its third defoliation round for her. Lets see.
Pure ph water to both girls today.
I never do any hard training with nutes in watering cycle, girls always get pure ph water.
Strawberry Cough loves CalMag as FastDiesels. Have in mind !
Day 105. Strawberry took it like a champ and looks like a champ, believe it or not, flowers smells now with strawberries and thats above the moon for me !
Late FastDiesel will get last round of nutes on friday and only 3 weeks of water for her left.
I am going on holidays for 3 weeks and one friend will be watering them, dont want anything of him than just 6.5 ph, strawberry will survive without one or two feeds, soil is ritch still tho, i hope at least ;)))
We shall see ..
End of week !


Likes
Comments
Share


@Tryhard1988
Follow
Should of taken a cut of this one absolute fire she smell and getting better each week i started my flush a bit early so I'm going to take her as long as possible if I get ten days from now be buzzing
Likes
4
Share


@OHighOBoyz
Follow
Plant is showing tremendous growth even after the stem partially breaking from the LST clip, But plant hasn’t yellowed or wilted and continues to grow so it’s still pulling nutrients fine.

Processing
Likes
1
Share


@Esebees
Follow
Cambiamos de fotoperiodo y las plantas rápido han pegado el cambio y ya sacan los primeros pelitos
Likes
6
Share


@rvabudman
Follow
Cant take my eyes off my plant. This is my second round of growing and I am the type of person who learns through failure (not gonna upload the pics of the first round plants lol). The buds are thickening up very nicely. Hoping to get between 3-4oz , the strain is high yielding but I have a smaller tent. My auto yielded 2oz with the same space (2 plants in one tent splitting the space), but the buds definitely didn't develop as well as these buds.

Likes
20
Share


@WILLIAMSII_Fr_Farm
Follow
Jour 63, les calices du cola prennent du volume, mais pas encore ceux des fleurs du bas. Le cola est très près de la lampe ce qui explique cela, et je le couperait sûrement avant le reste pour que les autres fleurs puissent mûrir.

Likes
7
Share


@BIYEI
Follow
Vegetación (Tiempo estimado 28 días)
Cuarta Semana de Vegetación
28/12/2023 - 5:00hrs y 22hrs: Se Hace cambio de solución nutritiva y se limpia el recipiente, se verifican parámetros básicos del agua, mantener cuidados específicos, el Ec y PPm Varean por los aditivos.
Agua de osmosis: Ph 6.0, PPm 1050-1300, Ec 2.1-2.5, Temperatura 20°C - 24°C, Humedad 75%
Ambiente: Temperatura 22 °C, Humedad 75%, Ventilación 15%, 18 hrs de luz , 6 hrs de obscuridad.
29/12/2023 - 5:00hrs y 22hrs: Se verifican parámetros básicos del agua, mantener cuidados específicos.
Agua de osmosis: Ph 6.0, PPm 1050-1300, Ec 2.1-2.5, Temperatura 20°C - 24°C, Humedad 75%
Ambiente: Temperatura 22 °C, Humedad 75%, Ventilación 15%, 18 hrs de luz , 6 hrs de obscuridad.
30/12/2023 - 5:00hrs y 22hrs: Se verifican parámetros básicos del agua, mantener cuidados específicos.
Agua de osmosis: Ph 6.0, PPm 1050-1300, Ec 2.1-2.5, Temperatura 20°C - 24°C, Humedad 75%
Ambiente: Temperatura 22 °C, Humedad 75%, Ventilación 15%, 18 hrs de luz , 6 hrs de obscuridad.
31/12/2023 - 5:00hrs y 22hrs: Se verifican parámetros básicos del agua, mantener cuidados específicos.
Agua de osmosis: Ph 6.0, PPm 1050-1300, Ec 2.1-2.5, Temperatura 20°C - 24°C, Humedad 75%
Ambiente: Temperatura 22 °C, Humedad 75%, Ventilación 15%, 18 hrs de luz , 6 hrs de obscuridad.
01/01/2024 - 5:00hrs y 22hrs: Se verifican parámetros básicos del agua y se rellena de 1.5 litros más de solución nutritiva con los valores ajustados a esa cantidad de agua, la planta empieza a chupar agua cada vez más, mantener cuidados específicos, corregimos deficiencia de CALIMAGIC esperando vea mejoría en las hojas de la planta.
Agua de osmosis: Ph 6.0, PPm 1050-1300, Ec 2.1-2.5, Temperatura 20°C - 24°C, Humedad 75%
Ambiente: Temperatura 22 °C, Humedad 75%, Ventilación 15%, 18 hrs de luz , 6 hrs de obscuridad.
02/02/2024 - 5:00hrs y 22hrs: Se verifican parámetros básicos del agua, mantener cuidados específicos.
Agua de osmosis: Ph 6.0, PPm 1050-1300, Ec 2.1-2.5, Temperatura 20°C - 24°C, Humedad 75%
Ambiente: Temperatura 22 °C, Humedad 75%, Ventilación 15%, 18 hrs de luz , 6 hrs de obscuridad.
03/02/2024 - 5:00hrs y 22hrs: Se verifican parámetros básicos del agua, mantener cuidados específicos.
Agua de osmosis: Ph 6.0, PPm 1050-1300, Ec 2.1-2.5, Temperatura 20°C - 24°C, Humedad 75%
Ambiente: Temperatura 22 °C, Humedad 75%, Ventilación 15%, 18 hrs de luz , 6 hrs de obscuridad.


