
Likes
Comments
Share


@Ribemarti
Follow
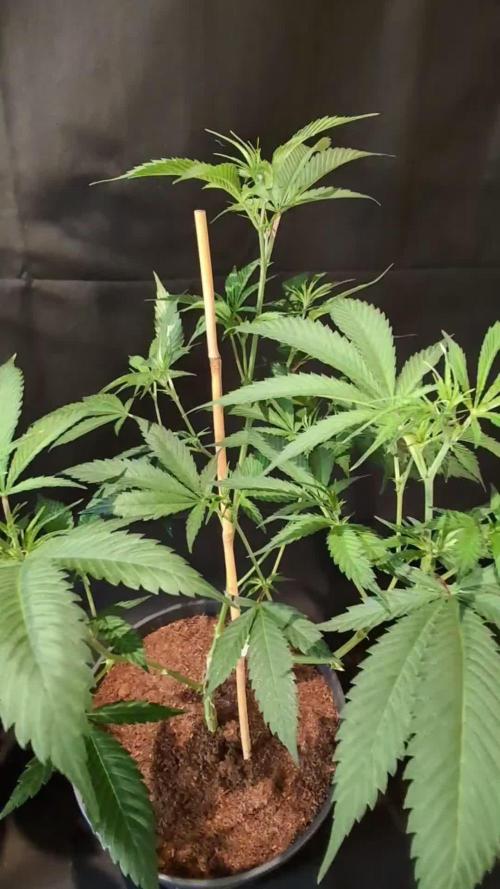
LAS PLANTAS ESTAN ADAPTANDOSE MUY BIEN AL LED 600W Y A LAS MACETAS DE 14 LITROS,
ESTOY REGANDO CADA PLANTA CON 2 LITROS Y UNA EC DE 1300 Y PH 6,5
TODAS LAS PLANTAS ESTAN PULVERIZADAS CON PREVENCIÓN, ACEITE DE NEEM I LA PROXIMA SEMANA
LA ULTIMA PASADA Y AÑADIREMOS PROPOLIX TODO NATURAL

Likes
4
Share

@GoodTimesOrganics
Follow
Hi liebe Community and Welcome Back! 💚
Weiter geht's im Vergleichsgrow!
Bio Tabs NL. vs. Weedefix (Stuttgart/ Germany)
Hier im Bio Tabs NL Grow haben wir nun nach Tag 35 des Einpflanzens eine Höhe von 53 cm Erreicht.
Die Triebe bilden sich schön und akkurat aus.
Die Blattfarbe ist im Bio Tabs Grow mit einem tieferen etwas dunkleren Grün zu beobachten, im Wuchsverhalten lässt sich ein etwas moderater es Wachstum beobachten. Weniger Buschig mit schlankeren Seitentrieben.
Leider ist mir ein Seitentrieb abgebrochen, daher habe ich der Fairness wegen, bei der anderen Pflanze auch einen Seitentrieb an der gleichen Stelle entfernt.
Diese Woche, habe ich mit Wasser und 5ml Orgatrex (Melasse mit Pflanzenextrakten) gegossen.
Und es zeichnet sich ein immer stärker werdendes Aroma ab.
An nächster Woche, wird es Zeit die Pflanzen in die Blüte zu schicken.
Die Bedingungen im Growschrank sind Top!
—————
🌞 Temp: 21
🌚 Temp: 18°C bis 19°C
💨 RH: 58%
VPD: 0,75 kPa
💡ppfd: 330 mpm
—————

Processing
Likes
16
Share


@LittleBigTrees
Follow
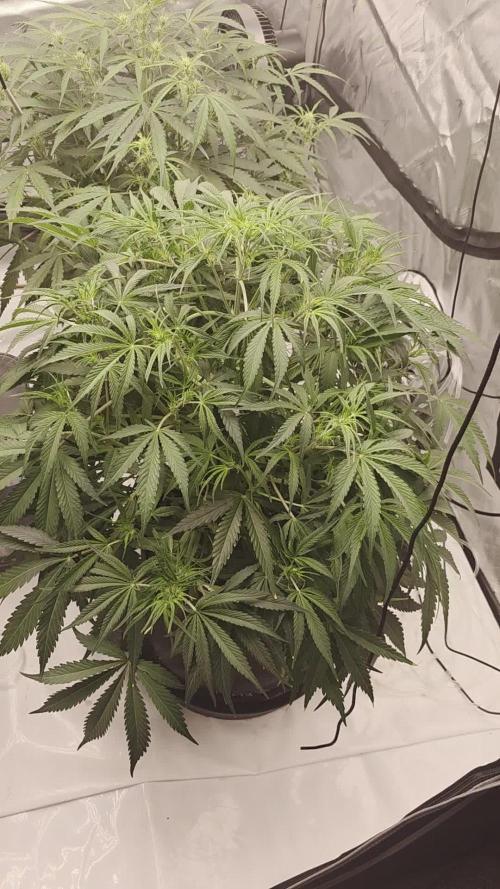
I've increased the food.
Fungus gnats are still there, they seem to go then return 😭 they love organic that's for sure

Likes
19
Share


@DevelGrow
Follow
Hallo Freunde 👋 die Mac #1 sind 14 Tage Alt und wachsen fleißig! Ohne Probleme geht es in Woche 3 und freuen uns auf das Wachstum! Growers Love keep Green and grow High ✌️🍀💚🍀


Likes
4
Share

@fadedgreentaurus
Follow
Strong week plants are bulking and showing signs of reveg, tops are all small popcorns these ladies should get huge and throw off a ton of tops.


Likes
17
Share


@Hawkbo
Follow
Autos are just starting to flower the photos are dying for some bigger pots. I've been trying to bring up the overall plant health in general since moving everything to a basement the temps are a little lower than ideal. I had a space heater delivered today and monitored the temps but they only went up to around 78°f I want it to be atleast 82°f ideally 85. The heater uses 1500 watt and only increased it about 2 or 3°. I dont think it's worth the extra cost for such little boost. I'm thinking about returning the heater and throwing a 1000w hps in one of the other tents and see if that will raise it anymore. Especially with LED and co2 higher temps would be very beneficial in veg and early flower but the room is so big its gunna be tough to pull off without killing me on electric costs. Any suggestions are welcome. I know this room does decent in flower but I havnt done much veg work down here and I'll have some autos growing this round so it's important I get it up.

Likes
9
Share


@PlumpPelican
Follow
Nothing much has changed with the plants this week besides those buds slowly growing.
Same feeding/watering schedule, just letting them do their thing...

Likes
111
Share


@Teamdirtbag2
Follow
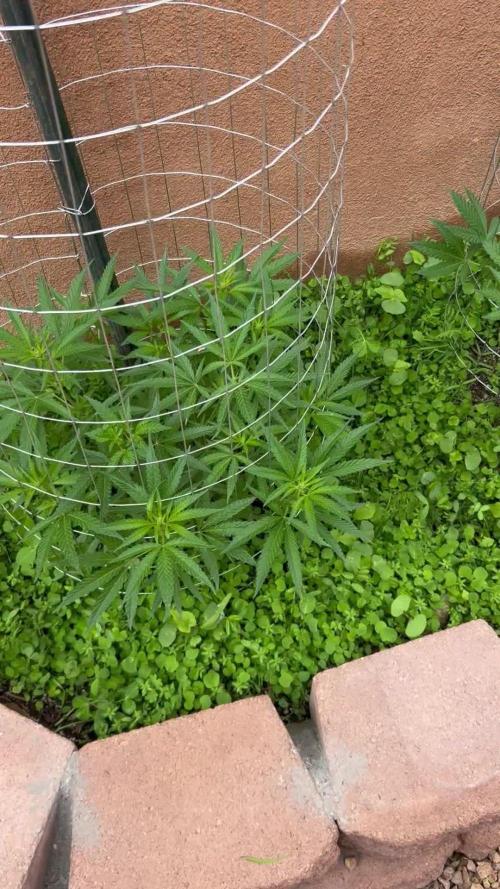
She is keeping up with the Critical Kush thsts for sure. All have grown almost 1 foot this past week. All I can do is smile. I made my goal. 48 inches by June 15 , it's only the 1st of June. Trees to be.....
So it's time to shit or get off the pot. Wtf am I going to do. Time to transplant....

Likes
19
Share


@EmeraldLakeCannabis
Follow
It's been a wonderful week despite a handful of deficiencies mainly affecting the UKBS varieties. UKBS 2 seems to be getting hit with a phosphorus deficiency; which fingers crossed will be solved next watering. UKBS 2 had some PH issues which led to multiple deficiencies, those seem to have been remedied at this time as no further symptoms are appearing.
I really want the weather to get nice already, the tent is turning into an absolute jungle and I need to clear some space. I'm quite glad I've never tried to flower 4 plants in a 2x4.
4/3/2021- Did some bending and twisting, as well as a bit of defoliation with UKBS 2, to make it branch outwards slightly as well as lighten up on how much shade it's creating in the tent.
4/5/2021 - Some kind of cal/mag issues are cropping up on UKBS 1 and Carl 1, looking to resolve those ASAP.

Likes
22
Share


@Muscaria710
Follow
21.04.2025
was geht?
ich bin absolut überwältigt von der Kombination Autopot und Biotabs----
die Lady ist himmlisch
und auch schon fertig , also nach dem letzen Fotoshoot ist dann ernte angesagt
ich denke das sind über 200g - wir werden es shen
die buds sind wunderschön, eine anhäufung von vielen kleinen knospen zu wunderbar dichten Buds
glitzer und klebrig
die lady duftet den ganzen Raum voll
immernoch frisch, fuchtig- keine komischen untertöne ( die kommen dann beim schneiden denke ich
also nächste woche fotos machen und dann wird geschnitten😭
xxxxxxxxxxxxxxxxxxxxxxxxxxxxxxxxxxxxxxxxxxxxxxxxxxxxxxxxxxxxxxxxxxxxxxxxxxx
Ich gehe mit der "Just Add Water"- Strategie von Biotabs-
Zusätzlich nehme ich Green Senstation von Plagron bei jedem Gießen dazu
Ds bedeutet ich mische alle Dünger und Pflanzenhilfstoffe in die Erde, und gieße dann nur noch mit Wasser.
Das einzige, was man beachten muss ist ein niedriger EC in der Erde ( um die 1.2 -1.5)- sont wirde es den
kleinen zu " heiß"
ich nutze organische , torffreie Erde mit Holzkohleanteil und diversen additiven ( myco/ Bacterien etc.)
und Zach habe ich " supersoil- Living soil"
INFOS DES ZÜCHTERS
Marke Zamnesia Seeds
Eltern Gelato x Zkittlez x Ruderalis
Genetik Auto Hybrid
Blütentyp Autoflowering
Blütezeit 9-10 wochen von der Saat bis zur Ernte
THC 23%
CBD Gering
Innenhöhe 100cm
Außenhöhe 120cm
Ertrag Innenanbau Bis zu 500g/m²
Ertrag Außenanbau Bis zu 150g/Pflanze
Gattung Feminisiert
Erhältlich Als Feminisierte Samen
*
Laut Züchter, wenn unter idealen Bedingungen angebaut


Likes
4
Share


@The_Projexx
Follow
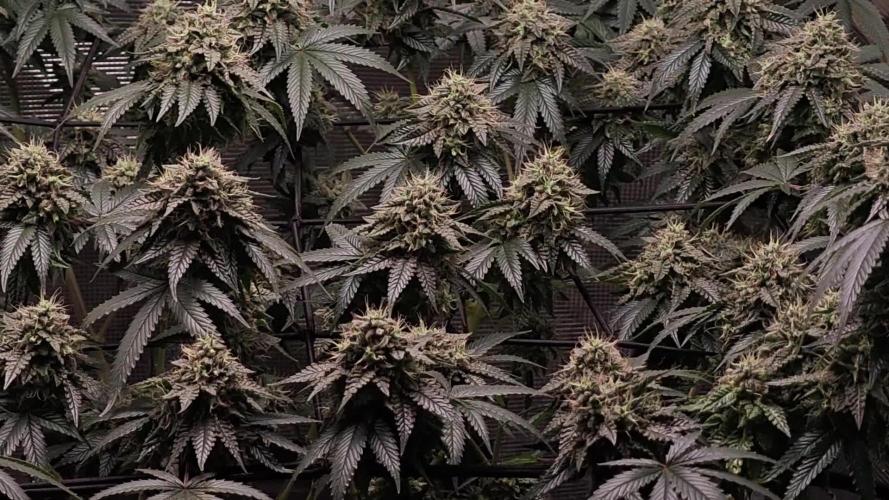
Welcome to week 3 of flower for these fine ladies! As the stretching period comes to and end in about a week or so I'm excited to see the plant's develop their flowers. Some of the plants have already developed quited the frost for their age and as the cycle continues its just going to get more pronounced. Some of the plants are giving off a faint smell now mostly the Banana Smoothie smelling of cream and bananas so far. Overall I'm really pleased with what's going on so far and can't wait for further development of the flowers!
Huge shout out to both Hidden Vault Genetics as well as @MarsHydroLED for all the work they put in to make growing a breeze
Extra special shout out goes to all my followers and people who stop into the diary alike. Keep inspiring to grow!
-The Projexx
Day#15F Ladies continue their stretching, will be looking to remove some leaves to open the plants up soon.
Day#16F Watered ladies 4L each at 550PPM. Things are moving along as the plants keep stretching like crazy
Day#17F Ladies are producing more and more size on their cotton balls while stretching up and stacking hard.
Day#18F Ladies are producing quite the frost levels for their age. Watered 4L each at 550PPM.
Day#19F Pictures N/A. Plants continue to stretch and stack.
Day#20F Ladies look like their slowing down on their stretch hopefully haha. Watered ladies 4L each at 550PPM.
Day#21F The plants are still stretching abit while putting mass on their flowers slowly. Wont be long till we see some giant flowers covered in trichomes!
Recap: Things went very well this week, some of the plants are starting to put out a smell and everyone's pumping trichomes like crazy! With about a week or so left on the stretching period I will be looking to place my secondary nets very very soon. I'm looking forward to seeing
what the plants smell like and how they continue to develop their flowers!
Likes
224
Share

@yan402
Follow
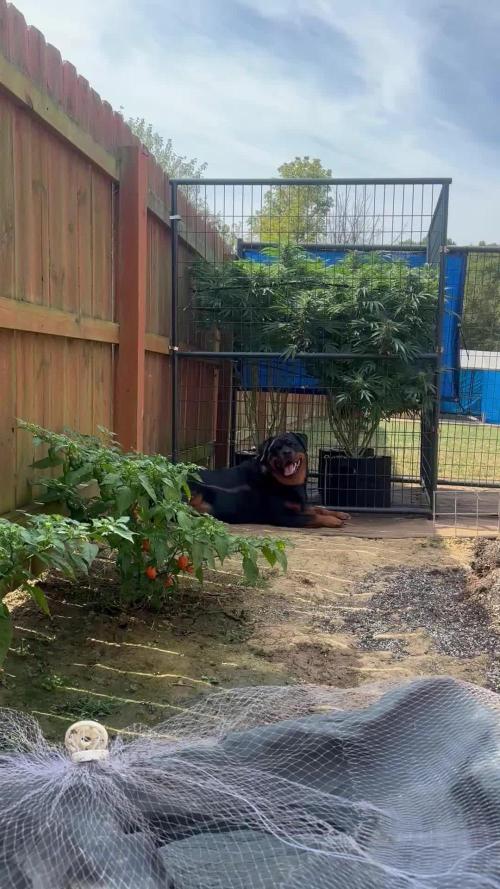
This two were part of another diary and got moved out due to space reasons at VW8 and moved back indoors at VW20
https://growdiaries.com/diaries/218151-auto-god-s-glue-grow-journal-by-yan402
13.09.25 VW21 Both are looking good and are developing tighter nodes than when they were outside, I'm going to have to keep cutting them back every once and a while I also applied nematodes against thrips and fungus gnats.
20.09.25 VW22 some spots and some yellow leafs, I think it's a root problem, probably root bound, but both seem healthy and are getting thicker so maybe just top up with Coco coir and give a slight different nutrient schedule less Tri Part Bloom could do the trick MAYBE lol.
27.09.25 VW23 Topped up the pots with extra coco coir and trimmed the side roots a bit, both plants were root bound 📹
03.10.25 VW23 did a HST/LST session 📹
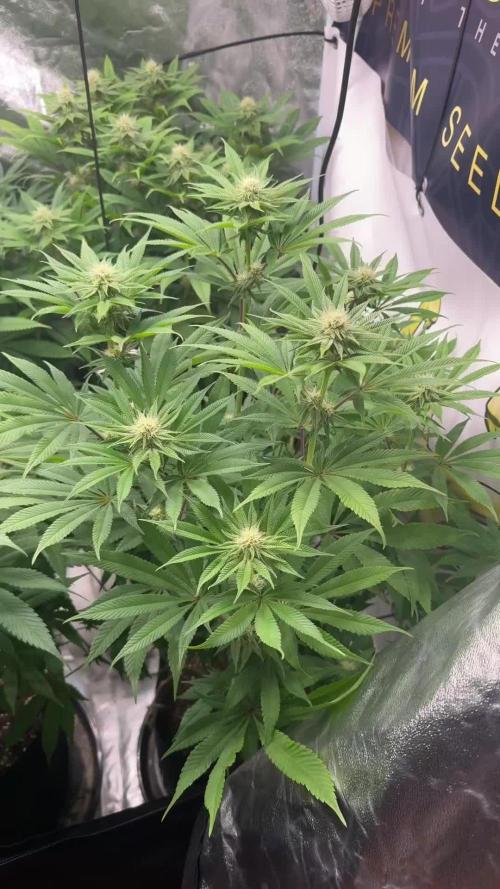
12.10.25 VW25 Done a major HST session to try and keep them in line with the Sunset Sherbet GF I have going in the same tent, rest in the video 📹
17.10.25 VW25 ffj/fpj/fish 30 → 60 ml
19.10.25 VW26 it just became a one plant diary, keeping #5, #6 gets it's own diary for testing nutrients.
20.10.25 VW26(?) Feed tweak: added 3 g Calcium Nitrate/ 30 L (≈ 15 ppm N + 10 ppm Ca)
24.10.25 VW26 did a defoliation and trimming session 📹
25.10.25 VW26 I'll be repoting tomorrow, 26.10.25 VW27 rest in the video📹
27.10.25 VW27 Epsom Salt 0 → 2.5, Calcium Nitrate 3 → 9 g
01.11.25 VW28 CalMag 60 → 30ml, TriPartBloom 20 → 30ml, Magnesium 2.5 → 3.5g
04.11.25 VW28 no more yellowing between the veins and no new spots, the changes to the schedule worked, rest in the video 📸
09.11.25 VW29 Did what I'm hoping is a last cleanup 🎥
12.11.25 VW13 Did another cleanup in the tent 🎥, also switched to the FERMAKOR PK Micro schedule, (10.11.25) added Phosphoric acid as a pH down in preparation for flowering
🌱💦🌱💦🌱💦🌱💦🌱💦🌱
Day to day tasks & actions 🌿
🌱💦🌱💦🌱💦🌱💦🌱💦🌱
08.11.25 VW28 – no feed no water
09.11.25 VW29 – Fed 5l of FERMAKOR PK → 2l runoff
10.11.25 VW29 – Fed 5l of FERMAKOR PK → 2l runoff
11.11.25 VW29 – Fed 5l of FERMAKOR PK → 2l runoff
12.11.25 VW29 – Fed 5l of FERMAKOR PK → 2l runoff
13.11.25 VW29 – Fed 5l of FERMAKOR PK → 2l runoff
14.11.25 VW29 – Fed 5l of FERMAKOR PK → 2l runoff
15.11.25 VW29 – no feed no water
(*RUNOFF reused for indoor house plants)
🍶💧🍶💧🍶💧🍶💧🍶
💧 Nutrients in 30 L #1 Veg — FERMAKOR
🍶💧🍶💧🍶💧🍶💧🍶
💧 Calcium Nitrate (Calcinit / Nitcal): 45 → 40 g
= 1.33 g/L → 207 ppm N + 253 ppm Ca
🍶 PK Concentrate (FERMAKOR Base): 30 → 40 ml
= 1.00 → 1.33 ml/L → balanced 1:1 P:K + light micros (from extract)
💧 Home-made FFJ/FPJ (Fish + Veg): 30 ml
= 1.00 ml/L
🍶 Epsom Salt (MgSO₄·7H₂O): 8 g
= 0.27 g/L → 26 ppm Mg + 35 ppm S
💧 Fetrilon Combi 1 (Micros): 0.5 g
= 0.017 g/L → Fe 0.7 ppm • Mn 0.7 ppm • Zn 0.3 ppm • Cu 0.3 ppm • B 0.1 ppm • Mo 0.02 ppm
🍶Phosphoric Acid (pH down) + Citric Acid (chelation): as needed
→ First set pH with phosphoric acid, then add a little citric only if you want extra chelation
💧 Target pH: 5.8 – 6.0 (drop test yellow-green)
📦 TOTAL: 60 → 70 ml / 48.5 g inputs per 30 L
= 2.00 → 2.33 ml/L + 1.62 g/L
⚙️✂️⚙️✂️⚙️✂️⚙️✂️⚙️
✂️ Tools & equipment ✂️
⚙️✂️⚙️✂️⚙️✂️⚙️✂️⚙️
✂️ 2× MarsHydro SP3000
⚙️ MarsHydro 150mm ACF Ventilator
✂️ Trotec dehumidifier (big unit)
⚙️ Mini no-name dehumidifier
✂️ Kebab skewers (LST – stainless)
⚙️ Wire + roast skewers (LST assist)
✂️ Scissors (HST)
⚙️ Vacuum (for spills & cleanup)
✂️⚙️✂️⚙️✂️⚙️⚙️✂️⚙️✂️⚙️✂️⚙️
🍒🍭🍬🌈🍒🍭🍬🌈🍒🍭🍬🌈🍒
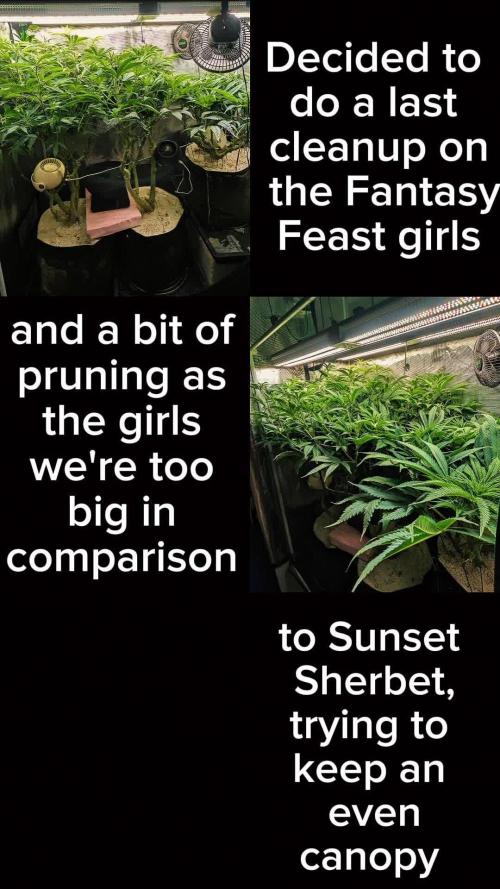
🦄Fantasy Feast ( Seeds)🦄
🌈🍒🍭🍬🌈🍒🍭🍬🌈🍒🍭🍬🌈🍒
Species: Hybrid (Regular)
Genetics: The mother is Unicorn Whip by Dirty Bird Genetics. The father is Charcuterie by Cannarado Genetics.
Effect: Unknown Mixed effect body and head high
Flavor: Some phenos are Skunky gassy fruity, some are fruity sour citrus with a chemical touch and a touch of skunk
Flowering: Estimated 8–10 weeks
Resistance: Strong — Testing phase done
YouTube Link: https://youtube.com/-m8h?si=A7x4Zlr2kj-_ga31
Likes
Comments
Share


@BlumenBot
Follow
Took off all of the tops from the shoots that were getting tall. Mayne a bit too much we will see how she responds. Tied down the 4 mains to the edges of the pot. Need to top the 2 remaining mains towards the end of the week when she recovers from today's stress. Needs water, may do a full feeding this time.
Likes
11
Share


@goeser
Follow
More details and photos are coming when all buds are dried in about 6-7 days00


