


Likes
Comments
Share

@Danger_Mouse
Follow
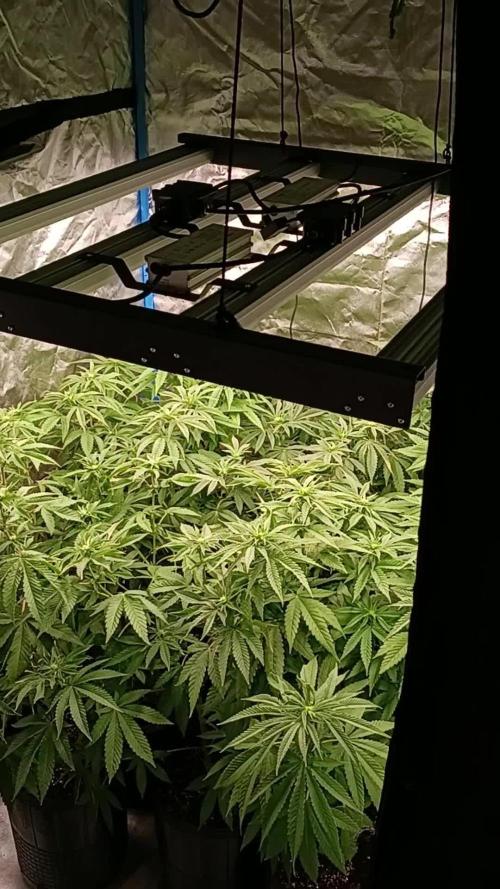
6 hs en exterior y 6 hs en interior (a menos que llueva o el dia este nublado)


Likes
7
Share


@Rabidreject
Follow
UPDATE - Thurs 4th March
The week has been fine. I am going there today so you may get an update this evening.
Iv been posting on TheWeedTube also so I have much more videos explaining what’s going on.
Plants are looking great.
I got paid today so I bought an online fan to plug into the thermostat and pull fresh air in through a duct from a cooler part of the flat. In summer it won’t be as useful but to be honest I’ll probably just duct tape the sucky end of the duct to a small ac or Friday type thing, iv not really looked into it yet. Even a hillbilly cooking system would be better than nothing. ( filling a bucket up with ice, water and salt and put the end of the duct into that so it sucks in the cold air). We’ll see!
Update - Monday 8th March
All is well, I just want the buds to start swelling now. I found some awesome supports in Aldi. They are metal rings that the plant weaves through and has spikes that go into the pot rather than a scrog net being fixed in place. Therefore I can still move them and drain the run off.


Likes
11
Share


@BudBeezy
Follow
Welcome to week 8 of my grow diary. This week we had really good weather. Due to the high temperatures the soil dried out quickly so I had to water 8 litres almost every day instead of every 2 days. The plant was defoliated 3 times this week. The aphids were successfully controlled with neem oil.
See you next week ✌️
Likes
2
Share

@trelopoulos
Follow
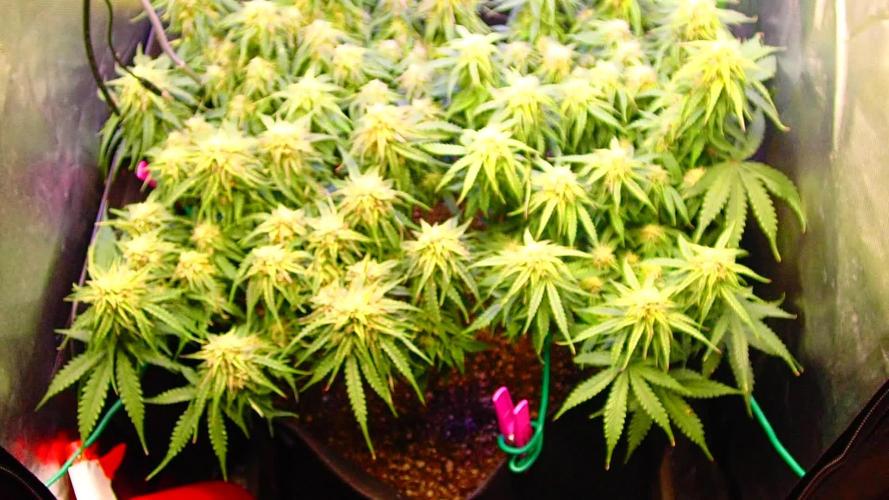
Nice colorful yummi Buds... cant wait to dry them.. they almost ready💪 waiting for the one next to catch up.

Likes
21
Share


@GERGrowDesigns
Follow
A Special Project from Germany and Welcome to Veg Week 3 of GoodTimesGenetix Blue Cream Haze
I'm excited to share my grow journey with you from my
GoodTimeGenetix Seeds .Im the First Person outside my Friends Company who got hands on this Strain .
He Managed over a long time to Cross these Strains:
-Blue Dream (Blueberry x Super Silver Haze - Female)
-Ice Cream Haze (Gelato x Wedding Cake x Crockets Haze - Male)
They Done a lot of Tests for a Nearly Perfect Stabilisation of this Genetic and Feminized them aswell .
This one is Professionell Created In Germany , Growed in Germany and presented To the World on Grow Diaries.
Here’s what I’m working with:
• 🌱 Tent: 120x60x80
• 🧑🌾 Breeder Company: GoodTimesGenetix
• 💧 Humidity Range: 60
• ⏳ Flowering Time: 8-9 Weeks
• Strain Info: 23%THC
• 🌡️ Temperature: 26
• 🍵 Pot Size: 0.1
• Nutrient Brand: Hy-Pro
• ⚡ Lights : 600W x 2
I would truly appreciate every bit of feedback, help, questions, or discussions – and of course, your likes and interactions mean the world to me as I try to stand out in this exciting competition!
Let’s grow together – and don’t forget to stop by again to see the latest updates!
Happy growing!
Stay lifted and stay curious!
Peace & Buds!
Likes
8
Share


@GarciasGarden
Follow
Week 7 flowaaa !! Let me just say I am soo in love with growing cannabis I don’t do it for anything but the love for it just watching something grow to become these huge pretty colorful smelly plants is amazing! The GMO PUNCH is coming along very well becoming more vigorous and bright green as the days go on. The plants are still stretching which I was dreading so I actually put in another Scrog net you will see on my next post to help keep them from stretching too high .

Likes
35
Share


@GODSGIFT_2005_JM
Follow
🍼Greenhouse Feeding BioGrow & Bio Bloom
⛺️MARSHYDRO
The ⛺️ has a small door 🚪 on the sides which is useful for mid section groom room work. 🤩
☀️ by VIPARSPECTRA (models: P2000 & XS 2000)


Likes
9
Share


@Colo420
Follow
Atrasados con el seguimiento debido a las vacaciones pero aquí regresamos!!
Proximamente 6 comienzan su flora en exterior y 2 en interior


Likes
35
Share


@XperencdGmanXG
Follow
nothing to do but watch this girl grow. She is really just about to start a beast mode growth spirt right now. When I FIMed her, it allowed the rest of the plant to catch up to the cola, also created 4 branches from the FIM. Lets see how fast I can make her grow.


Likes
9
Share


@MassEric
Follow
Another week down and we are getting some color on the right plant. I'm not sure I've caught it on timelapse before but if you look close around the 10 second mark in the video you can start to see the purple appear on the leaves in the center a bit. It's subtle in the video but it really shows up in the pictures. I do like it when they turn colors! Aside from the color it was a fairly uneventful week. Buds are filling in a bit more, fun fun. The smell of a strong pineapple is in the air around the plant and especially when you touch it.

Likes
19
Share


@GrowMo
Follow
This run came out even better than I expected! This beautiful bud has sweet sugar like undertones with powerful hints of lemon and a small hint of pine as well. I would highly recommend everyone to try this if they were to grow any autoflower out there it is by far the easiest auto I’ve ever had and the prettiest in the tent. I have also pressed some into wax since it dried and cured for a few weeks and it literally looks like peanut butter and jelly it’s a light creamy color with purple as well and taste so amazing it’s actually my favorite rosin I’ve ever pressed.
Harvested at day 53 Flower fed floraflex the whole run no cal-mag.
Likes
17
Share


Likes
10
Share

@eldruida_lamota
Follow
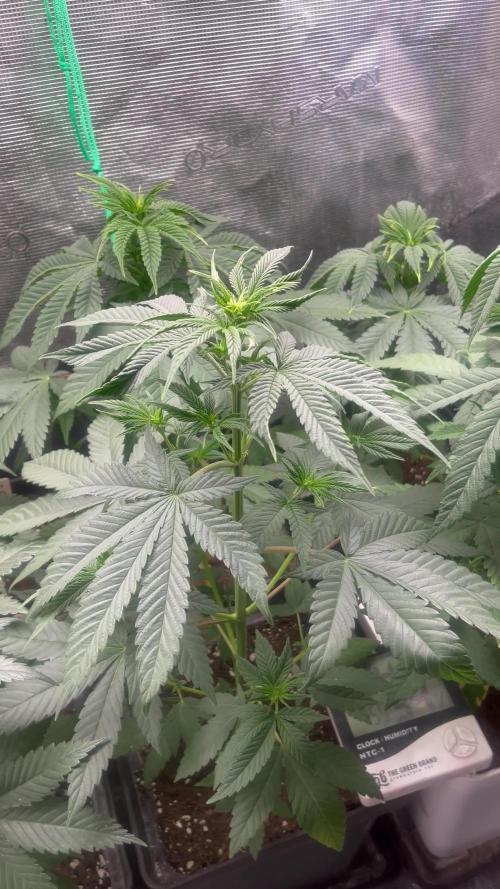
Que pasa familia, vamos con la primera semana de floración de estas Mental Rainbow F1 de Sweetseeds.
Vamos al lío, las plantas se trasplantaron a macetas de 7 litros.
El ph se controla en 6.5, la temperatura la tenemos entre 24/22 grados y la humedad ronda el 50%.
El ciclo de crecimiento puse 12h de luz, el foco está al 50% de potencia.
Me gustaría estar más encima este cultivo pero la salud me está impidiendo un poco este 100% con el proyecto. Con suerte la semana que viene andaré mejor.
- os dejo por aquí un CÓDIGO: Eldruida
Descuento para la tienda de MARS HYDRO.
https://www.mars-hydro.com
Hasta aquí todo, Buenos humos 💨💨💨
Likes
10
Share


@Geili_Seili_fireinfireout
Follow
Hatte leider 5 tage massive hitze probleme mit viiiel zuwenig luftfeuchte. Aber 2 tage mit richtige werte und sie schlagen zurück. Alles weeder gut und jetzt schick ich sie lieber mal in den 12/12 modus. Da sie sehr zum spargeln neigen.
Freu mich schon auf die reise mit diesen schönen ladys👌😇
Die besten und saubersten clone gibts wie immer bei ROOTS-FARMS. best in austria and maybe in europe!💚👌🌱

Processing
Likes
23
Share


@GrowGuy97
Follow
Wish the buds would have got a little bigger but feel like that’s particularly my fault for a short Veg but overall I am blow away by the outcome for all the seeds to just be random bag seeds! 2 of the plants are drying now 3rd one will be cut tomorrow & the other 2 got probably 2 more weeks! Will do a taste & smoke report and also give a weight as soon as they dry & cure a little bit but honestly couldn’t be happier with my first grow! Thanks for all the support & help along the way & happy growing friends!🤙🏼✌️🏼🌱
Update on 1st plant - dry weight 42g, still smelled pretty Earthy when I put it in the jar but the smell is definitely coming out now, extremely sticky & frosty buds❄️: 1:🏼🙏🏼
Update - plant 2 Dry weight was 40 grams! Extremely happy with the out come this is honestly some of the best bud I have ever smoked! Amazing to me this came from a random bag seed, it has a very citrusy flavor, smells & smokes amazing! Honestly a 10/10 in my book, wish I could knew what strain this was so I could grow it again!😫❄️✌️🏼🌱
Update - plant 3 Dry weight 34g, smells & look phenomenal, the buds are much smaller & had the smallest yield so far but this is by far the best smelling so far! Will have a smoke update on this one soon, stay tuned friends & happy growing!✌️🏼🌱
Update - plant 5 dry weight was 52g it dried a little faster than plant 4 which I will probably jar tomorrow! Will update again with a smoke report soon, this plant brought my total so far up to 168 off 4 plants👍🏼 Thanks for following friends & happy growing! Also the butter I made from the trim was 🔥🔥
Likes
92
Share


@Roberts
Follow
Sweet Zenzation or Zkittles grew great under the Unit Farm UF4000, and UF2000 lights. The UF2000 was added during flowering. She was part if a 5 plant grow. I will try to add a harvest video here once I cut it down. She has a nice color morph from the fade as well. Great frost, and smell. Thank you Sweet Seeds, and Unit Farm. 🍻❄️🌱
Thank you grow diaries community for the likes, follows, comments, and subscriptions on my YouTube channel. 🍻🌱👍 Happy Growing 🌱
https://youtube.com/channel/UCAhN7yRzWLpcaRHhMIQ7X4g