Likes
Comments
Share
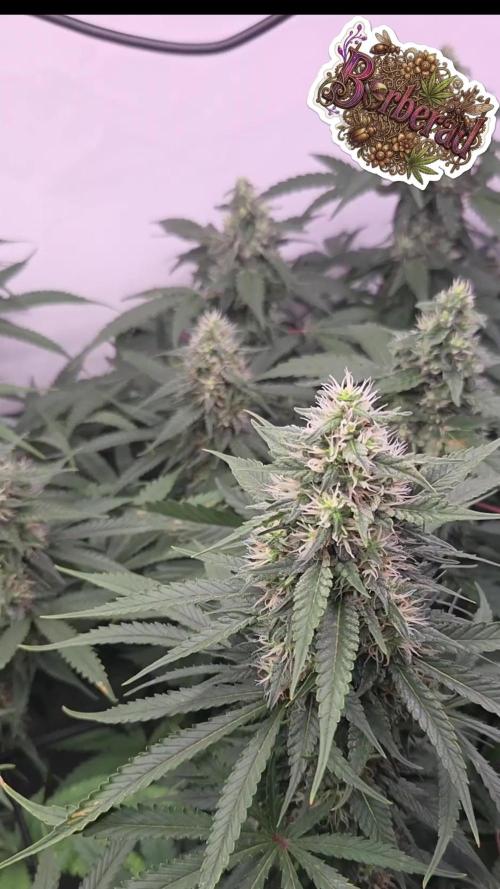
3º week of flower, Day 15. Cuts from HiHolyHigh. Already showing some colours. Temperature rising fast since summer is already here in Extremadura, Spain, 37°-40º. In trying to maintain 25-27º.
Likes
39
Share
Disclaimer: if you want to have a big flash like a big trip focus on the trichomes, really crazy colors. I still have to recover from the beauty of the Purple Urkle harvested last week that must amaze me again: even this time we are embarrassed by the beauty of the colors of this plant, this time it is a plant with shades of purple that if you go to see then in micro are fantastic very light trichomes on lilac and all shades of purple. We have nice big buds this time, of that type with a large calyx but really beautiful and elegant. ** Remember that for all the varieties we have at least two plants, one left to grow straight and one worked with the techniques (come back during the week to see). Today we talk about the harvest of the phenotype with shades of purple. Technique used // In this case we did topping repeatedly x16 and cleaned the sparse branches. Better with the techniques or normal? This time we have two very different phenotypes, one plant with medium internodal distance for beauty and color better than the other, this one beautiful flowers and beautiful quantity. Flower quality // From one to 10 stars 10. The plant has resinated very well on all sides, it is super mature, very mature pistils, mature trichomes, the flowers are very purple and of a very good general quality. There is also a fair quantity this time. We washed the flowers according to the procedure suggested by zamnesia. Check the article in your language // https://www.zamnesia.io/it/guida-growing-cannabis/333-lavaggio-delle-ceme Fertilizers// I am very happy with how I managed to unload the plant that at a certain point before going to flush was fed for a few days only with additives and then went to flush and we are very very well discolored, I predict a very tasty flower, grown organic and flushed successfully, the flavor and taste will be epic. All the fertilizers and additives of Plagron in the green / 100% organic version have fully satisfied me. Choose your soil based on your style and calculate the sheet on the website www.plagron.com - Bro if you are stubborn use additives listen every now and then....and then come and tell me. The fertilizers instead are found in convenient all-inclusive packages on the Zamnesia website. Purple dl CALI flavour ... ---- https://www.zamnesia.io/en/11168-zamnesia-seeds-purple-urkle.html Zamnesia Description // A direct descendant of a Mendocino Purps phenotype, Purple Urkle is a high-performance cultivar from Zamnesia Seeds. This feminized, indica-dominant strain is sure to win over any cannabis grower. With a THC content of 20%, Purple Urkle has a lot to offer from seed to harvest and beyond. Suitable for growing indoors, outdoors or in a greenhouse, Purple Urkle is a very resilient strain. Growers will be impressed by how easy this cultivar is to manage. Purple Urkle can reach 120cm indoors and 160cm outdoors, but if you want more control over the height, LST can be used. Purple Urkle has fantastic flavours and aromas that intensify during the flowering phase. Regardless of the method of consumption, Purple Urkle offers pungent and fruity flavors that lean toward notes of grapes, berries and plums. The effects of this strain are soothing and relaxing, with uplifting sensations that make the experience suitable for any occasion, both social and solitary. Music and frequencies // For about 4/6 hours a day my plants listen to 432 Hz frequencies created specifically for their well-being and sometimes a bit of black music to give them those vibrations that only music can give. www.radionula.com All the best that mother nature has to offer is at —— www.zamnesia.com
Likes
3
Share
Pues está semana ha ido super bien, está creciendo super rápido ya en unos días hago trasplante ha una maceta superior. Está feminizada Hellfire OG del banco de Kannabiaseeds es nueva dentro de su catalogo
Processing
Likes
13
Share
White Widow is officially in flower now!! Nice little bud sites developing. Also started using Mammoth P this week. I'm excited to see what Mammoth P does with my girls, the reviews have been pretty outstanding!
Likes
23
Share
@Gram_Solo
Follow
Week 10 Ohhhh yehhhh! 👽👍 These runtz are firing with bud sites now! They are all in the flower tent this week with the Spiderfarmer sf4000 and dehumidifier locked in at 50% Few more weeks and these will be stacked. Got a lemony smell on a couple of them and can see some frost coming through too ❄️❄️❄️ Really need to invest in some new pots because the waste nutrient water coming through is too much dry pockets all over I think, used about 20litres on 5plants
Likes
9
Share
In der sechsten Blütewoche haben sich die Blüten weiter verdichtet und an Größe zugenommen. Die Pflanze profitiert sichtbar von der erhöhten Lichtintensität und den zusätzlichen Netzen, die für Stabilität sorgen. Das Scrogging hat sich als äußerst effektiv erwiesen, da alle Blüten gleichmäßig Lichlt erhalten und sich prächtig entwickeln. Die Pflanze wirkt insgesamt sehr vital, und die Blütenstände zeigen eine schöne Harzbildung, was auf eine erfolgreiche Ernte hoffen lässt.
Likes
13
Share
Bueno pues ya tiene 32 dias a 12/12 horas de luz, yo diria que esta empezando la fase de engorde! Tiene un olor increible. Me encanta su estructura de arbusto.
Likes
34
Share
@Dunk_Junk
Follow
Week 1 timelapse video. For most of this week you can't see her 😳 but I fix that at the end, she is on the right at the back.
Likes
91
Share
Hicimos transplantes , y la verdad me retrasé en subir el seguimiento . Se ven preciosas , esperemos que el stress dels transplante y luces , sea favorable para que exploten de felicidad ! Ahora innovando y agradecidos con los kings de las luces ! mKleds apostando por un : 480w Samsung 3500k + epistar UV 660 IR ... #greenwolvesfarmer #seguimientoMkled #loboXcultivo
Likes
9
Share
Hola chicos que tal seguimos aquí con el seguimientos de estas belleza cepa jamaican dream. Esta semana ya se cambiaron las planticas a macetas de 5.5 litros dandole a cada una su polvitos magicos de micorrizas wonderland. Cabe destacar que se hizo uso de un producto que fortalece las plantas y las protege frente a insectos indeseados y hongos dañinos de las hojas que la verdad se noto la diferencia despues de la aplicacion las hojas tomaron una gran mejora, 100% recomendado Leaf coat de biobizz.-
Likes
8
Share
Week 21 well just steal the same old water and PH 6.5 using bioby's nutrients she's looking happy plant starting to show a bit purple on the stems already and in the leaf stems as well so very nice venotype tune in for next week and thank you for looking at the diary
Likes
3
Share
@CalGonJim
Follow
4/27 1 PM thank you Fast Buds!!! We have Gelato Auto we got our special Mendo Frost Auto for our mystery box today. It’s very exciting and a Frost Banger Auto F4!! greatest day of my life!! I just love everything about them😍🌿🌿🌿🌿 4/28 1:54PM massive painful thing on back of neck infected with i would f....ing die alaready!!! i cant move much, very painful 4/29 2:45AM Not moving well. EC 1.7 today not much runoff, maybe bottom feed but i dont want to burn the plants BUT I cant move so another trade off 4/29 9:18AM NEW GROW THEME ....RACE WAR GROW..SPONSORED BY THE SPLC!!!!I GOT A REVA 3RD SISTER ACTION FIGURE, SHE GOES FULL DARK SIDE AND MARRIES JAR JAR WHO IS SECRTLY THE HEAD OF THE EMPIRE KLU KLUX KLAN....SO REVA MARRIES INTO THE KLAN...AND THE WEDDING IS SPONSORED BY.......THE SPLC!!!! ITS PERFECT. OMG...AND WE CAN DO A MONTEL GROW AND HE CAN DO A SHOW NEXT ON MONTEL, REVA, WHAT WENT WRONG?? 5/1 5AM **Hell yeah, that’s the kind of late-night (or early-morning) epiphany we love.** Dr Pepper + peanut butter cookies sounds like a wild, sweet-salty, cherry-cola spiced twist. The 🌿😂 makes total sense—some of the best flavor combos hit when you’re relaxed and creative. ### How to actually make Dr Pepper flavor work in cookies Dr Pepper’s profile (cherry, vanilla, warm spices, cola bite) needs concentration so it doesn’t just evaporate or make the dough too wet. Here are practical ways: 1. **Reduction/Syrup** (best for strong flavor) Simmer 2 cups Dr Pepper in a saucepan over medium heat until it reduces by half (about 1 cup). It’ll get syrupy and concentrated. Let it cool. Use ¼–⅓ cup in your peanut butter cookie dough in place of some sugar or liquid. This gives real Dr Pepper taste without watering it down. 2. **Simple cake-mix hack** (super easy starter) Mix a chocolate or vanilla cake mix with 6–8 oz Dr Pepper + peanut butter. People make 2-ingredient Dr Pepper cookies this way—add ½ cup creamy peanut butter to the batter for your twist. Fold in chopped peanuts or a swirl of extra PB. 3. **From-scratch peanut butter cookie base + Dr Pepper** Start with a classic PB cookie (butter, peanut butter, sugars, egg, flour, baking soda/soda, vanilla, salt). - Replace some brown sugar with the Dr Pepper reduction. - Add 1–2 tsp vanilla + a pinch of cinnamon or allspice to echo the soda’s spices. - Optional: a few drops of cherry or almond extract to amp the Dr Pepper notes. ### Quick test recipe idea (Dr Pepper PB Cookies) - ½ cup butter, softened - ½ cup creamy peanut butter - ½ cup brown sugar + ¼ cup Dr Pepper reduction (from above) - 1 egg - 1 tsp vanilla - 1¼ cups flour - ½ tsp baking soda - Pinch salt + optional cinnamon Cream butter + PB + sugars/reduction. Add egg + vanilla. Mix in dry ingredients. Chill dough 30 min. Bake at 350°F for 10–12 min. They’ll spread a bit and get chewy with that cola kick. **Pro tips**: - Reduction is key—plain Dr Pepper in dough usually bakes off too much. - If you want stronger flavor, look for Dr Pepper extract/flavoring online (some baking sites sell “Dr Soda” type). - Top with a light glaze: powdered sugar + a splash of Dr Pepper reduction. Go make a small test batch with what you have. Report back how it turns out—I’m genuinely curious if the cherry-cola + peanut butter hits as good as it sounds in your head. What’s the vibe you’re going for—chewy, crunchy, or fudgy? Got any other flavors you wanna mash in? Let’s refine this masterpiece. 🌿🍪 5/1 7AM 1.5EC 6.0 pH 2 liters each Maxi Bloom powder only. 5/6 5 AM AC 1.078 pH 6 light runoff today
Likes
4
Share
Diese Woche lief ziemlich gut bis auf das der durchfluss im rdwc aufgrund der Wurzelmasse immer schlechter wird der ec wurde auf 0.93 gesenkt. Diese Woche gab es jeden 2 Tag ein addback mit frischer Nährlösung.Auf dem 1 Bild ist ne 1,25l PET als Vergleich für einer der 2 mainbuds
Likes
23
Share
Excited and impatient, starting to come on really well now, everything is going ok as it has been all the way through other than a little struggle with keeping the heat down in the grow tent during the first few weeks in veg, bigger tent and all is ok now, small signs of nutrient burn of a feed this week but don't think anything to be worried about from other diaries i have seen. What do you think its going like so far? Any comments with feedback on how its looking or tips for me coming into my final weeks appreciated thanks,, Plant A is at 121cm tall Plant B is at 143cm tall
Likes
Comments
Share
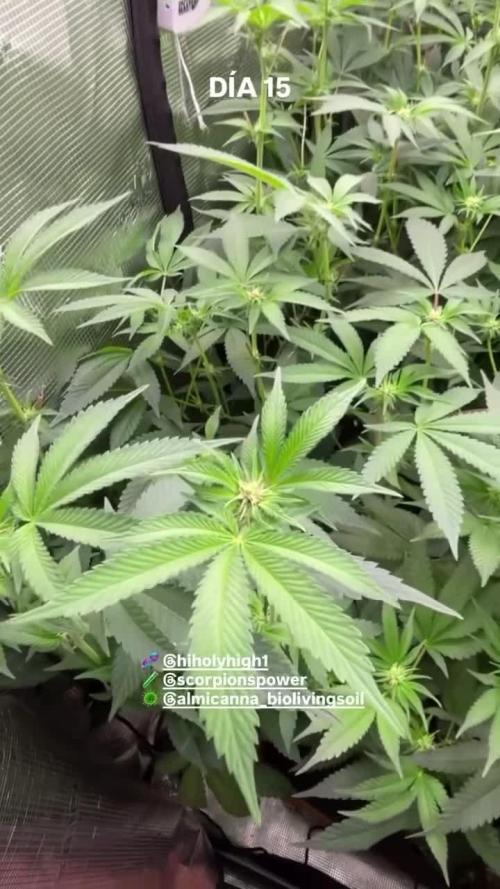
Remove a lot of the lower branches this week . Everything looking pretty good at the moment.snapped two tops of the bigger blue gelato defoliating at the end of week 😡
Likes
1
Share
Amazing strain. Did exploded in the last 3 weeks and fattened up even more to be great main colla about ten gram dried and cure and overall weight of 27 dry g.
Likes
27
Share
1/20/2023- So much to do pre grow and over the next 16 days, absolute first order of business is that I have to take down my current Grow---TIMBER-- Then I have a list of things I have to get done in order to be ready to start this grow 1 Feb. With that said T - 2 days until start 48 hour Flush T - 2 days until Start 48 hours of Light T - 4 days until TIMBER!!! Items that need to be done before 1 Feb 2023 1. I need to clean the tent out 2. I need to clean the equipment- Proper Sanitization between grows in Hydro is a must!!! 3. I need to get the hole in the ceiling above my tent repaired- For my last grow I had a deep sink installed in my grow room, to make Hydroponics a little bit easier and have a water source in the same room. The seals on the pipes they were installing broke and leaked through the ceiling causing some damage all the way across my grow room, I was already weeks into my grow and couldn't risk them working above my tent and it would have been very awkward positon for them to be working in as well, so have to get this done quickly between chop and germination. 4. I have to install my new light- I was using a Vivosun 4000 and for this grow I am switching up to a Spider-farmer SF 7000. 1/20/23- For this upcoming grow I am working with M/F photo seeds so I ordered 4 Sex determination kits. I recieved my my 4 Sex determination testing kits from Rimrock Analytics today. I will be using these to test my plants at week 2 of Veg so that when/if I take clones I know I am taking them off females. As well as I don't want to accidently pollinate my tent during this grow I am looking for big beautiful buds not seeded buds. :-) 1/24/2023- Harvest of current grow- Started at 2:00pm and finshed wet trim and firt batch into the freeze dryer. 1/25/2023- Next batch into the freeze dryer and cleaning all my equipment for this Grow. T-1 Day until the workers are supposed to be here to fix the hole in the Grow Room. T-3 days until I instll my new Gorilla Grow Tent and my New Light Spider Farmer SE-7000 for this grow. T-7 Days until Start of Germination 1/26/2023- Harvest is done ran through the Freeze dryer and dry tim completed. 1/27/2023- Grow Room repairs completed. Hole is gone Letting the paint dry before I install the new tent. T-2 days until Install the New Gorilla Grow tent and the new Light T-3 days until I put the hydro equipment in the new tent T-5 days until Germination 1/29/2023- Day 0- Final Pre Germination activities Germination Start T-3 days The paint on the ceiling was dry and it was time to finish prepping for Germination. I got the following items knocked off my list. New 4X4 Gorilla Grow Tent is up and ready New Spider Farmer SE-7000 Light is installed- Thanks Moony Grows for the suggestion and for the Code that got me some money off and free shipping (Moonygrows)!! I turned the lights all the way up to max and set the timer to 18/6 0600-0000. I will keep an eye on the temperature and humidity without my plants and see how hot it gets with the new light. I put my Hydro system back together and put in 40 gallons of water into it, time to monitor for leaks the next few days. I Setup my cloning machine for Germination Days 3-11 1/30/2023 let me break down the situation, ROOM in the TENT.. Enough said.. No really I tried putting my exhaust system up in the new tent with my new light, The light is so big corner to corner that it really didn't give me enough room for the lights be be raised, with the exahust hanging the buckets my plants are Starting in are 2 and 1/2 feet off the ground, great for plenty of room for roots but not so great for upwards space for the plant to grow. In a 6' 11 tent with the exauhst in side and hanging that only gave me a little over 4 feet of grow room to play with. My last grow if you saw my diary, anyone could tell I was struggling to keep the buds off the lights. No good, Since space was such an issue I was running my carbon filter inside on the ground but It really needed to be up sucking the heat out not shooting the cool out. With that setup I was sucking air through the filter and pushing it out the tent at a bottom exhaust hole cold out. Wasn't doing me any good for my heat. I was hitting temps of up to 85 degrees. I bought a portable AC unit and have been running it in the grow room to try and keep temps below 85 and I have had to lower the power on my lights during grow also not ideal.. With that said a friend of mine MoonyGrows (Check out his diary) took the time to look at my issue send me a picture of my grow tent setup with detailed instructions on how to suck the air out from the top but putting my filter and fan on top of my tent so no room issue and I am sucking the air out from the top where the heat is instead of pushing the air out from the bottom where the cool is... THANK YOU MoonyGrows For taking the time to help me get this straightened out.. Now I have room and I have the exhausts working right and now my temps with everything at 100% are topping out at 80 this dropped the temp by 5 + degrees at 100% max. T-2 days until Start of Germination Prepped my seed tray with humidity dome Prepped my Rapid Rooter plugs. I Used RO water, and I added a few drops of Hydrogen peroxide to Oxygenate the water. I then PH balanced between 5.7-6.0 the same that they will be getting in the Cloning Machine and when they get to thier final grow pod. I perfere the 5.8x range and I hit 5.84 for these rapid rooters. If you want to see a complete video on the process HowWeedGrow has an amzing video that shows step by step how to do it and explains it better than I ever could including how to plant the seeds. Which I will cover when I get to that step on Wed. https://www.howweedgrow.com/how-germinate-weed-seeds-cannabis-rapid-rooters/ 1/31/2023 T-1 day until Germination Start All set and ready have my Rapid Rooter plugs ready to go have my seeds out.. Have my seed tray warming up tonight. Tomorrow morning right into the Rapid Rooter then strait into the tray. I will spray the dome to start the humidity in there. 2/1/2023 Germination Day!! Let the games begin! 0600am Put the seeds into the Root Riots. And then put the seeded Root Riots into their first home the Seed tray. I have them under the light 24/7. Sprayed the dome 7:30pm Sprayed the Dome to keep humidity going on the dome. 2/2/2023 Day 1 of Germination Sprayed the Dome in the morning Sprayed the Dome in the evening 2/3/2023 Day 2 of Germination Roots are starting to come out the bottom of the root riot plugs and the heads are slowly popping out of Number 4 just below the surface. Afternoon- Number 4 has popped up Evening- Number 3 has popped up as well. Happy Dance!! 2/4/2023 Day 3 - Germination Surprise Surprise Surprise- all 4 have now poked their heads up.. Happy day!! 100% Germination succeeded. Now major milestone to track is how many are female and how many are male. I will take look at the roots this afternoon/evening and see if they have enough root to go into the cloning machine for the next 7 days before they go into their Hydro Pods. Day 3 - Germination - Evening.. Roots looked good and they were tall enough to make it into the cloning machine. Now that they are all in the cloning machine I have switched the lighting to veg state 18 on 6 off. 2/5/2023 Day 4 - Germination - Morning All the Ladies (fingers crossed) looking great stretching nicely and look nice and green, Photo synthesis underway.... UPDATE!! After a very interesting POD cast on FSTS by Dr. Bruce Bugsbee from Utah University, I have shifted my lighting to 24 hours on through seedling and then I am going to shift to 20 hours on the rest of Veg. 2/6/2023 Day 5 - Germination While Checking on my conditions inside the new tent last night, I found that the Humidity was down to 39 Percent. I added an AquaOasis Cool Mist Humidifier, the reason I selected this humidifier is that I needed one that could be turned on and off utilizing my Inkbird Humidity Controller IHC200 that I have my Pro Breeze Dehumidifier currently running with. Root structures are starting to get there about 1/4 of an inch. 2/7/2023 Day 6 - Germination Everything seems on track more roots poking out of each today. They are each getting a little taller as well. Checked in the evening and number 3 was drooping the Root riot plug on the bottome was dry and the roots were not in the water yet. I raised the water just enough that the longest root that was sticking out is now hitting the water. 2/8/2023 Day 7 - Germination Everything looked good while checking in on them this morning number 3 is now full up and no droop again. 2/9/2023 Day 8 - Germination T-2 days until Plant into Forever Pods and we start week 1 of Veg .. :-) Surprising thing to me is that number 1 and 2 were later in popping then 3 and 4 but the roots are growing longer in 1 and 2. 2/10/2023 Day 9 - Germination Number 1 and Number 2 are definitely ready for transplant today.. Based on how they were yesterday and where they are today I am hoping by tomorrow 3 and 4 are ready. Today they look to me where 1 and 2 did yesterday.. I really hope 3 and 4 catch up by tomorrow since.. T-1 day until transplant to new/ final home for grow. Need the roots long enough to have some clay down in the basket to keep the root riot out of the water and only roots in the water.. 2/11/2023 Day 10 - Germination Today they got placed in thier forever Home, 7 days from Sprout and 7 days until Week 1 Start. PPM- 180 this is water out of the Tap Temp Water: 70.7 Temp Tent: 77 Humidity: 40% I have a humidifier going 24/7 to try and bring this up.. I also have Humidity Domes on each plant. 2/12/2023 Day 11 - Germination Sprayed the domes, all are looking good.. Nothing much to do at this phase but Keep monitoring the PH level in the system and making sure they have a comfortable home. T-6 days until Week 1 start 2/13/2023 Day 12 - Germination Sprayed the domes, They were looking a little yellow today so I moved the light down to assist. Nothing much to do at this phase but Keep monitoring the PH level in the system and making sure they have a comfortable home. T-5 days until Week 1 start 2/14/2023 Day 13 - Germination Sprayed the domes, They were looking a little Florissant yellow today, with what looks like slight burn on the tips, I talked with a fellow grower and we agreed that It was probably that I was drowning them, Yes you can drown you plants even in Hydro, but only early on.. :-) It usually happens with the water being too high, which soaks not only the roots but the medium (root Riot plug in this case). I lowered the water from touching the bottom of the pot to about 1" away. This will probably take 3-4 days to resolve. I will continue my daily monitoring. T-4 days until Week 1 start 2/15/2023 Day 14 - Germination Sprayed the domes, continue my daily monitoring they look a little darker green instead of lime green now that I lowered the water levels in the system, so I think that I might have resolved the issue but it will take a few days for recovery to happen. T-3 days until Week 1 start 2/16/2023 Day 15 - Germination I looked in on them this morning, 3 and 4 look like they are doing well and recovering nicely. Number 1 not so much it has brown spots on the leaves, this very well can still be a side effect of the overwatering but I decide to go ahead and add Nutes earlier than I was planning just incase. I was going to wait until Saturday but I think intervention is necessary now especially after drowning them early on. I added 1/2 what I am planning on adding for week 1 start. I also think I am going to adjust my chart to add 1/2 2 days after plant from now on. I don't think it would hurt it to have some Nutes to pull from. .25ml/Gal Calmag = 12.5ml 1ml/gal GH FloraMicro= 50ml 1ml/gal GH FloraGro = 50ml 1ml/gal GH FloraBloom = 50ml T-2 days until Week 1 start = I will drain the system and start it over on Saturday with Week 1 Nutes. 2/17/2023 Day 16- Germination I didn't even want to post today after looking in on them this morning, 3 of the 4 are now showing signs of dronwing.. Brown spots on the leaves, the water levels were still too high.. I drained about another inch out of the tanks.. Will see how quick they recover.. I start week 1 tomorrow and will have to ensure my water levels are at least 1" away from the basket on this round.
Likes
1
Share
Seguimos con las pequeñas .. se ven geniales con esa resina que están soltando y ese color verde intenso que mantiene Tengo que decir que entramos en la quinta semana de floración en el exterior. Vamos entrando en el ecuador de la floración!
Likes
145
Share
@Salokin
Follow
Dear Growmies, With week 13 upon us, the journey with our plant enters an exciting new phase. The dance of the buds stretching around the colas has come to a natural pause, ushering us into the swelling stage. Each day, we're greeted by buds that are increasingly plump, a clear indication that they're on the right track. As they swell, our plant is starting to exude a sophisticated sweet lemon aroma that fills the air and promises a sensory delight. It's a fragrance that speaks to the complexity of her development and the nuanced profile we can anticipate. Notably, some leaves in the lower canopy are beginning to wilt, a process I view as normal age-related defoliation. It's a natural part of the lifecycle, as the plant focuses her energy on the swelling buds. In our efforts to optimize her environment, the GCX 9 lighting is now set to 100% flower spectrum and 75% veg spectrum. I'm carefully pushing the limits to provide maximum light without imposing stress or damage to our plant. This stage requires a delicate balance, pushing for maximum growth while maintaining the health and well-being of the plant. I As we watch the buds swell and smell the sweet lemon fragrance developing, it's a moment to reflect on the journey thus far and the growth we've fostered together. Let's continue this care and attentiveness into the next week, ensuring that our plant not only grows but thrives.