


Likes
Comments
Share

@Yamamoto420
Follow
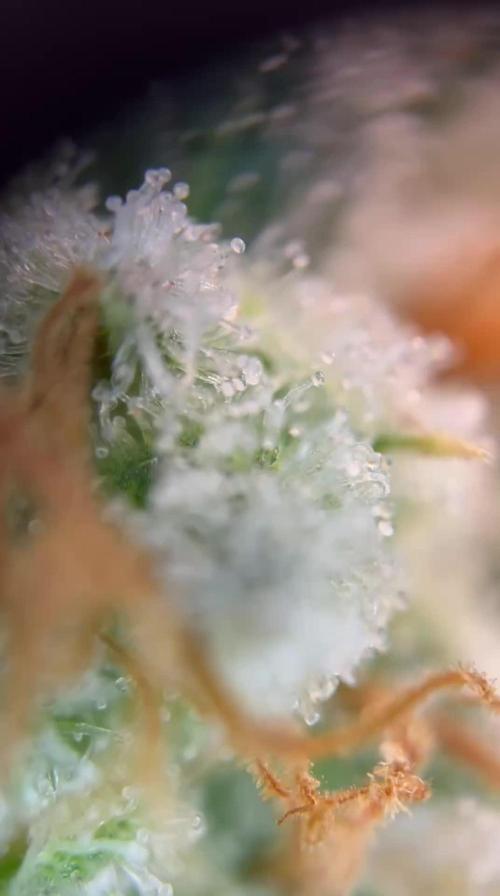
Week 9 flower day 60 begin to flush with only RO water with little bit of bio nova vitsol (molasses) and everyday i add fresh water till i reach 0 ec.. im not flushing with a lot of water i just cut the nutriants and let the plant to “eat itself “ from inside out, im checking tricoms everyday, there are mix cloudy and clear and some amber but most are clear.. ill give them few more days till i see more milky tricoms and some amber and they i harvest.

Likes
2
Share


@I_Identify_As_A_Dan
Follow
Day 21
Shes looking a little better as her new growth is much better but shes still lacking some colour hopefully soon she will full take off.
Turned the auto-pots + air-domes on to get water and oxygen directly to the roots 3 days ago.
Feeding Cropsalt at 5.8ph, really enjoying it atm just look at their colour😍


Likes
22
Share


@Basementganja
Follow
This Gelato autoflower is developing nicely!
She's ready for a defoliation. The defoliation will be done on next weeks watering day.
2.5 gallon dosage of the above listed nutes lasts her 5 days, becoming 90% dry, and ready for the next 2.5 gallon dosage!

Likes
5
Share


@Top_Banana
Follow
Week 10 - not long now.. She looks good, just a little concerned with the fan leaves but from what I've read this is normal and nothing to worry about at this stage. Hope that is true. 🤔
I've kept the nutrients lower this week as I am worried about over feeding. The soil I mixed with alot of Manure from goats, ducks and chicken so I dont think I need to add anything else. First time growing... better to be safe than sorry.
I got to the bottom of last weeks droopy leaves - Underwatering!
I had been keeping her out of the rain and had forgot to feed water. Lesson learnt.
I noticed the roots get compact on top in a fabric pot if you dont slowly water in, the water runs off the pot and not through it. Fixed this by bottom feeding until the soil was fully wet - I guess bottom feeding is the way to go when this happens.
10-20% of Pistils are brownish now and most of the trichomes are cloudy with a few still clear and the odd one amber. Still trying to get to grips with the x45 loupe. I dont have steady hands 😆
The lower branches that were LST'd are getting really big now so for sure I will be pulling all the branches back next time.
Removed potential bud rot and will closely monitor. Hopefully she will be ok for 10 more days 🙏🤞

Likes
44
Share


@XperencdGmanXG
Follow
lots of work went into moving these girls outside. They are in a nice sunny and protected spot now. Can't wait to see these girls grow up. Gave them the best start I could. Season is a bit late here this year too.
Likes
33
Share


@SkunkyDog
Follow
Hallo zusammen 🤙.
Habe ihr diese Woche nur Wasser gegeben. Werde sie diese Woche ernten.
Sie bekommen 20 % Rabatt bei Zamnesia und der Code lautet ZAMMIGD2023.

Likes
8
Share


@Chi_Dou1
Follow
The seedlings responded really well to Root Juice from Biobizz,. Potted them all on day 5, and kept them under a 600w.led vegging light (Cobb Cree 3000w Led by Philizon)
Days 1-6
Not much happening on the surface, miniature differences with each one, but been autos right now the seedlings will be rooting.
Environment.
Light cycle is now 19 on 5 off.
Using the Philizon cob Cree 3000w full spectrum veg light.
Light suspended 32" of the lip of the pot practically the top of the seedlings, I could have got it lower but I can't imagine much difference vegging.
Night Temperature were previously between 19.5c to 23c.
Temperature has been slightly altered to 22.4c to 25.6 following some guidance I read on;
https://www.royalqueenseeds.com/blog-indoor-cannabis-growing-relative-humidity-and-temperatures-n243.
Set up is currently been regulated by Inkbird climate remote heat n cooling.
1500w oil radiator ;) set at 900w 26/27c
22.02.20- Slight change to air exchange set for every 14 mins previously cycling every 40 to 43 mins( radiator was set too low, higher power temp, more responsive to temp changes.) This enables the radiator oil to reach its heat n switch off it's internal thermostat at the device, not the controller. I found I was able to continue radiating a couple of air cycles, before finally dropping below 25.7 which then triggers the radiator to kick in as it's been able to cool off for nearly 26mins)
Temp cycle
Set 27c
Fan activates 27.5 stops at 27 but temp drops 1.5
Heater (controlled by Inkbird climate controller) activates 26.c stops at 27.c takes a further 6 mins to climb
+.6c & then fans kicks in.
Take 14 mins for cycle.
Pot temp 22.4 c to 23.7c
Misting
Using Active Vera 1.5 ltr 3ml active vera, once a day, especially over the top soil I find helps raise the humidity (ranges 60 - 80%)
Week 3 - 03/03/20
Rapid growth, I topped five of the fastest strongest plant out of the 8.
Some moisture inch deep. No feed required.
Humidity 50 to 65
Temp 26c to 27c
Week 3 Day 3 - 5/3/20
Water feed.
pH. 5.9
Biobizz:
Bio.Grow 2ml/L (20ml)
Bio Bloom 1ml/L (10ml)
Top Max 1ml/L (10ml)
Bio Heaven 2ml/L (20ml)
Alg-A-Mic 2ml/L (20ml)
Acti-Vera 2ml/L (20ml)
Cal-Mag 1ml per gallon (2ml)
Water mister lightly mist the flowers following feed as leaves began to droop from lack of water.
2ltrs pH.5.9
2ml Acti Vera
2ml Alg-A-Mic
Used 200ml, will save n use rest over the next couple of days.
Humidity following feed 75%
Humidifier set at 60%
Humidity Range 50 to 60
Room temp 25 to 27c av 26c
Lights off temp 19.5c to 23c (pot)
Pot temp Day Time 25c to 26c
Plants responding really well to been topped, loads of new foliage in just 2 days.
Started 1st course in blooming feeds.
All have started pre flowering, with little white hairs appearing down the stem.
Step are as thick as the gavita kettle power cord.
Smell like fresh humid green, to the touch of the plant is exhibiting tangy fresh citrousy smells that have that widow rhino smell,.. mmm.
Week 4 10/3/20
Day 29 11/3/20
Water feed. 10 ltrs
1.25 Lt p p
pH. 5.9
Biobizz:
Bio.Grow 2ml/L (20ml)
Bio Bloom 2ml/L (20ml)
Top Max 2ml/L (10ml)
Bio Heaven 2ml/L (20ml)
Alg-A-Mic 2ml/L (20ml)
Acti-Vera 2ml/L (20ml)
CalMag 1ml p gallon (2ml)
Bat Guano Fert 2x scoops
Some light LST training.
Height 14.5 to 17" smallest to tallest.
17" is the CC that has not been topped
As shown below. In pic 1
Sat 14/03/20 D32
(Seems I wasn't putting enough water through, so no previous run offs.) I noticed the begining signs of Nitrogen toxicity as some leaf's where begining to claw.
I let the plants dry out a day further.
I filled a reservoir 80 ltrs tap water, n let sit overnight
pH to 6.3
Sunday W4 D33 15/03/20
Poured 8 litres into each pot gradually (2ltr bottle hand feed)
- water didn't run off untill the 6ltr (3rd bottle), the next 2ltrs that followed ran out quicker & less sluggish.
I checked in 6hrs later, plants appear to be well. I will keep you posted as we enter the beginning of week 5 (week6 on grow diaries as Day 1 was week 1,. Unable to amend)
#sweetseeds

Likes
54
Share


@TheWeedaltor
Follow
Tallest plants are yet 58 cm and start being lopsided, day 1 with flowering solution
Likes
27
Share


@valiotoro
Follow
Pheno 1 dark purple : On the nose, it reveals a sharp burst of fresh lemon, layered with a powerful eucalyptus aroma that’s both invigorating and camphorous. A truly refreshing and vibrant terpene profile😈🍋
Pheno 2 Green : this one is a real surprise! If I close my eyes, it’s like Nutella! It’s as if you’ve just walked into a kitchen where hazelnuts have been freshly roasted 🤤🌰
Pheno 3 light purple : It’s a mix of the first two with a hint of amarena cherry at the end🍒🍧


Likes
10
Share


@Tagadatek
Follow
Un peux de retard par rapport au temps annoncer. Je me demande si je ne devrais pas baissais la lampe .au risque de brûler les plans . Rinçage effectuer car début de brûlure due au pk13-14
Processing
Likes
41
Share


@FoxyLoxy
Follow
Ok, as i enter week 4 I'm a little nervous about the growth of these unknown strains. I'm a day away from week 4, one of the plants is very stunted, looks like its having an issue with a nitrogen deficiency? Otherwise I've topped the other two which seem to be doing moderately better, but one of them looks like its about to follow suit of the other plant.
UPDATE; I have replaced the previous pictures posted of the plants with these. As you can tell I have varying deficiency peaking through, especially #2 my wife's plant, if anyone can shed some light, please do so as it is progressing quickly. Right now they're just drinking ph'd water and that is all.

Likes
17
Share


@Mr_Pgrow
Follow
Another week down and we are getting close.
Fade is well on.
Slowed down on water uptake
Keeping a close eye on the trichomes.
So all going well, she be for the chop next week, fingers crossed🤞
Likes
30
Share


@BC_Green
Follow
It has been another amazing week of the plants growing. I have been watching as the Fruity Freak leaves become progressively more fern-like, and ornamental as a result!
Based on my Banizzle grows, I knew I needed to understand plant nutrients in a more meaningful way if I wanted these plants to thrive. So, I decided to get a soil test (see Ref. 1 below on how to perform a test) to understand what nutrients my plants needed. The report I received advised that I needed to add 200 lbs/acre of nitrogen, 150 lbs/acre of phosphorus, and 190 lbs/acre of potassium (see picture labeled Pic.1 (FYI you can't see these images unless you login to growdiaries)).
I then researched what to do with my results (Ref. 2 helped), and I figured out that my nutrient needs of 200-150-190 fall close to a 2-1-2 ratio. I then looked at different types of organic fertilizers (see Ref. 3 and Ref. 4) and considered that I already had a 3-10-5 fertilizer (Vermibloom) on hand. I discovered Dr Earth’s Alfalfa Meal is 2-1-2 and includes beneficial bacteria and mycorrhizae (to promote healthy plant growth and disease resistance). However, I knew I would be low on nitrogen if I only used those two fertilizers. Therefore, I decided to buy some blood meal (12-0-0). I also liked that blood meal is more fast acting while the other two are more moderate.
I hunted around for a solid fertilizer calculator and found an amazing tool from the University of Georgia Extension (Ref. 5). I entered all three fertilizers into the calculator, and it kicked out the exact amount of each fertilizer I needed to apply to 1 square foot (see Pic. 2). As I am using 10-gallon fabric pots (that can hold 1.5 cubic feet, but I put stone on the bottom and there’s space left at the top) I decided to use the one square foot application rate as I can always add more later, but I can’t take it away.
Not only did I want to understand the nutrients I needed, but I also wanted to understand the structure of the soil (as it was not included in my test results). North Dakota State University has a nice page that discusses this (Ref. 6), and I performed a soil ribbon test (see Video 1) based on this information. I determined my soil to be medium textured (which is great), but I have seen occasional water pooling on the surface, suggesting that it may be more of a medium-fine. This means adding peat moss, coco coir, or other amendments might improve drainage (and plant hydration) and allow for roots to grow more easily. In the long run, I plan to use compost to enhance the soil structure and nutrients.
I filled the bottom of my 10-gallon fabric pots with a ½” of pea stone to allow for drainage (Pic. 3). I then partially filled two 5-gallon buckets with topsoil from near where I will plant (but not in an area the roots will reach). I used a digital scale to measure the amount of fertilizers recommended by the calculator (Pic. 4, 5, and 6) and added it to one of the 5-gallon buckets (see Pic. 7). I mixed the fertilizers into the soil as evenly as possible (Pic. 8 and 9). I then poured a two-inch layer of non-fertilized soil, then peat moss, and then fertilized soil (in a roughly 2:1:1 ratio) and blended them together. I repeated this until the pot was full (getting additional soil as needed), and then I repeated the process for the other three pots.
I set the filled fabric pots in my garage (Pic. 10) for two days to allow any upset bugs to flee into my garage instead of my house. I then moved the pots (wrapping them in a contractor garbage bag to prevent making a mess) into the room with the grow light. I placed a board on top of the fabric pots to insulate the plants (in their smaller pots) from the cold soil (Pic. 11). Once the soil in the fabric pots reaches room temperature, I will transplant.
(Ref. 1) This video shows the method I used to take a soil sample. I didn’t have a field to test, so I took four samples from the area where I will eventually plant outdoors and blended them together. I then mailed my soil sample off to the lab, and about a week later, I received an email with a PDF of my results (included with my pictures this week).
https://www.youtube.com/watch?v=N9AwxmFxBwg&t=8s
(Ref. 2) This video from the University of Minnesota Extension (many universities have agriculture extensions that can assist you with soil testing and growing information for your area) discusses what to do with your soil testing results:
https://youtu.be/HYrkcfE62Pg
(Ref. 3) This is a nice article that discusses organic fertilizer solutions:
https://www.grow-it-organically.com/npk-fertilizer.html
(Ref. 4) This article lists the NPK values of many organic fertilizer solutions:
https://www.epicgardening.com/organic-fertilizers/
(Ref. 5) Many websites tout a fertilizer calculator…but this one is hands down the best I have found. If you scroll down to the bottom, you can enter any fertilizer type you want (and the cost, if you want). It will give you the exact blend of multiple fertilizers to solve your nutrient deficiencies (I included a snapshot of the solution I used in my pictures).
https://aesl.ces.uga.edu/soil/fertcalc/
(Ref. 6) This is an excellent article that discusses how to evaluate your soil:
https://www.ndsu.edu/agriculture/extension/publications/evaluating-preparing-and-amending-lawn-and-garden-soil
Likes
20
Share


@Alpha_Green
Follow
At the beginning of the second week, one of them started to completely freak out and mutated with all the impossible possible symptoms on the leaf pattern.
I think maybe the soil life, i.e. the microbiome, was still too busy in the process of conversion and metabolism. And experience has shown that the Trichoderma bacteria usually take different amounts of time to symbiotize with the seedling and substrate.
Also Myccorhiza.
Likes
2
Share

@420DeepGrow
Follow
📆 Semana 5
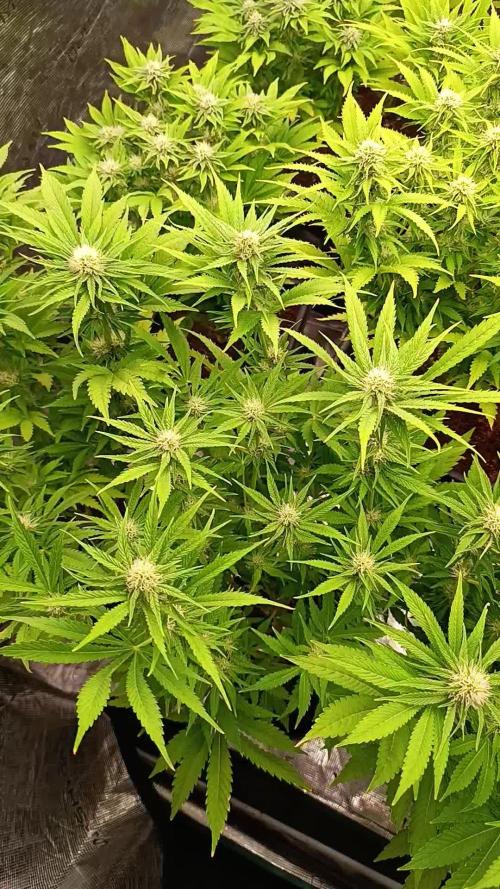
El estiramiento queda completamente atrás y los erizos ya están bien formados en cada punta, compactos y uniformes. Los cálices continúan apilándose con orden y empieza a notarse un aumento real de densidad, aún sin llegar al engorde máximo.
La resina comienza a cargarse con más presencia, cubriendo brácteas y hojas cercanas, anticipando la fase de volumen que está por venir. Los pistilos siguen activos y blancos, manteniendo el ritmo de construcción floral.
La estructura permanece equilibrada, bien expuesta y sin estrés, con la energía centrada en consolidar flores y potenciar la producción de tricomas.
Seguimos creciendo fuerte 💪!

Processing
Likes
13
Share


@Ghosttown
Follow
Day 42
Blooming nicely
Day 43
Water
Day 44
Bloom
Day 45
Water plus 2lm cal mag.
Day 46
Fert just lightly with Tiger Bloom 2ml in 2 litre water just to help stack buds. Pray it helps and enjoy my First Video. 08 May 20
Day 47
Bloom
Day 48
Bloom
Likes
1
Share


@M3_Growing
Follow
Started a new grow in a 60x60cm Diamond box; Spiderfarmer SF-1000 (100 W) LED and some seeds i bought on vacation in the netherlands. I believe and hope it said something like Cookies and Cream Auto…
Lets see xd
Germinated on. 18.8
Likes
3
Share


@Barcelona_Farmers710
Follow
Esta variedad suele ser poco productivas pero una pasada para fumar o hacer cualquier tipo de extracción. La Blue Gelato 41 todo fue para ice y la verdad que un sabor increible! Una buena genética farmers!🍁