


Likes
4
Share


@Dooskigrows
Follow
Day one of flowering. Might up my watering to half a gallon. Trying to let them dry out and not use any more water then needed.
Likes
29
Share


@Grow420pice
Follow
21.01.2022
Läuft sehr gut.
Was ein Dungel!!!
Futter erhöht.
Hier mal ein dickes fettes Lob an Biobizz.
Ich liebe die Produkte!!!
Ich werd nichts anderes mehr verwenden. Geschmacklich sowieso immer top, es kitzelt alle Terpene aus den Pflanzen heraus. Und man hat selten Probleme, die Pflanzen sehen immer sehr gesund aus...
BioHeaven 👍👍👍
Was denkt ihr, kann ich Ende Februar ernten???
22.01.2022
Einige haben kleine leichte rost braune Flecken auf den tops bekommen. Ich werd Phosphor und Kalium nochmal ein wenig erhöhen. Werd auch topmax erhöhen und etwas Alg a mic.
Bis dann growmies
🌱💪😎

Likes
4
Share


@ValtripOG
Follow
Muchas gracias espero que les guste este Harvest acá me estoy fumando un porro de Big Bud y la buena vibra ⚡️🤝💚


Likes
57
Share


@Kmikaz420
Follow
Voilà la fin d un grow super (super de part la recolte , super de par l odeur et le goût, super car ma plante n' à demander aucun entretien ou lst etc j adore cette strain et je pense la refaire très, très vite ;)
La plante m'a donné 542g (humide mais déjà trimer en très grande partie ;)
Et voilà après 2 semaine de séchage est venu le temp de la pesé qui m'a donné = 122gramme sec /d une plante je l attendait à plys que sa au vue de la taille de la plante (mais les bourgeons typé sativa ne sont généralement pas trop dense )
Mais la ou elle se rattrape c est au niveau de l odeur/du goût = sorbet à l orange/citron/citron vert très sucrée j adore vraiment !!!
Et l effet est quand à lui vraiment à mis chemin entre sativa et indica se qui en fais une herbe pour toute heure et toute situation (comme toute les herbes :)
Voilà on se revoit quand les 122g auront eu le temp de se bonifié 8 semaine à très vite les amis


Processing
Likes
4
Share


@ReelEyezEnt
Follow
Still have these ladies in there Solo cups will most likely pot these girls this week
Finally moved these ladies over to there pots looking good for now
Oh yea no nuts just yet still going with PH bal water


Likes
2
Share

@Colonel
Follow
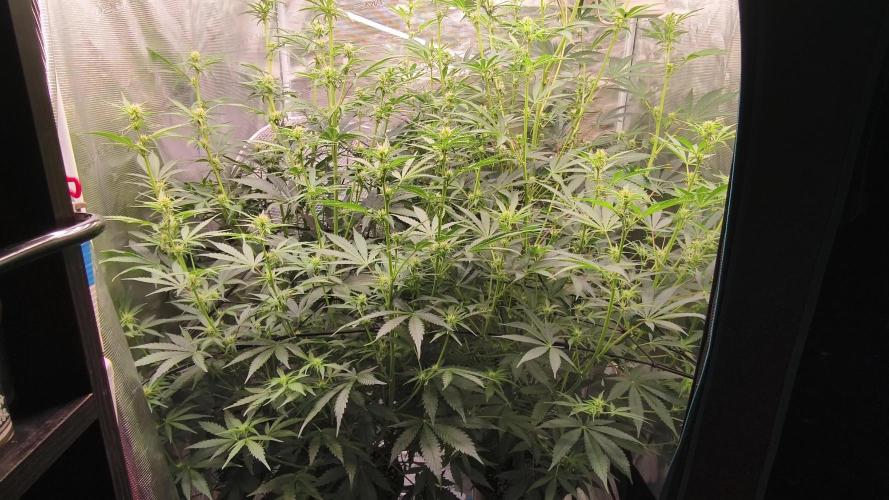
Week 7 flower update
I figured out what was going on with my plants. My tap water actually contains a lot of carbonates, which means there’s already plenty of calcium and magnesium in it. Because of that, I shouldn’t have been adding 0.5 ml of Plagron CalMag, since that product is really intended for soft water.
The extra calcium started pushing the root zone pH locally up to around 6.5. That made nitrogen more available, but at the same time it partially locked out phosphorus. Because of that the flower development slowed down, while cell elongation increased before proper bud growth resumed.
As soon as I realized what was happening, I started dropping the PPM pretty aggressively, step by step, and completely removed CalMag from the feed.
While the plants were recovering from the salt stress, I also cleaned up the lower weak branches (about 10% max) to help redistribute energy to the stronger tops.
Right now I’m focusing on stabilizing the root zone.
Current numbers:
Input: pH 5.5 / 575–600 ppm
Runoff: pH 6.38 / 730–760 ppm
Plants are slowly coming out of the stress. They’re drinking 3 times a day, about 15 liters total (7.5 L per plant).
The flowers have started growing again, after being stalled for about 3–4 days.
Because of the pH imbalance (too much nitrogen and calcium) the plants started stretching like crazy. The branches were growing so fast they were already hitting the lights and the top of the tent.
My tent is 180 cm tall and the pots are about 30 cm, so I basically ran out of vertical space.
I had to bend the branches almost 90 degrees, laying them over each other just to keep the canopy under control. Some of them are literally tucked under the carbon filter, and the rest are tied down with wire to keep them away from the lamps.
Not the prettiest canopy right now, but it keeps everything below the lights and still getting good exposure.

Likes
12
Share


Likes
30
Share


@Jamesg
Follow
Had defoliated a few times in the last half of the grow so not too much to do during harvest. Caught the bud rot early so it didn't trouble me through drying. Passed the 'snap test' in 11 days of hanging in 60% ending with 48% humidity in 19°C.


Likes
33
Share


@EeyoreTheHomie
Follow
DAY 65: Whelp, 8 weeks of shaming, abuse, experimentation, more shaming, and neglect-- the Lucky Charms plant is a f***ing female! Absolutely in-shock. I was so happy to learn she's a girl, but at the same moment was filled with so much regret, for how much better I could have treated this plant/how much larger I could have grown it. Just wow. So I took a clone cutting. It was a little small, but hopefully she takes because this plant is more resilient than a cockroach!!
The White Widow plant is steady bushin' in the veg area with the little ones. I really love how short and stocky I've managed to get this plant through all the LST. Its starting to feel. like a bonsai tree. It has certainly earned its adulthood after the catastrophe it endured in Week-5.
DAY 68: The re-potting of the Lucky Charms stunted its growth as expected, but its got a long way to stretch, so it should be able to utilize most of the new space. Itching to repot the White Widow. She's ready. Im just short on medium and space at the moment :/


Likes
2
Share

@The_Doctor_Green
Follow
Hola a todos!.
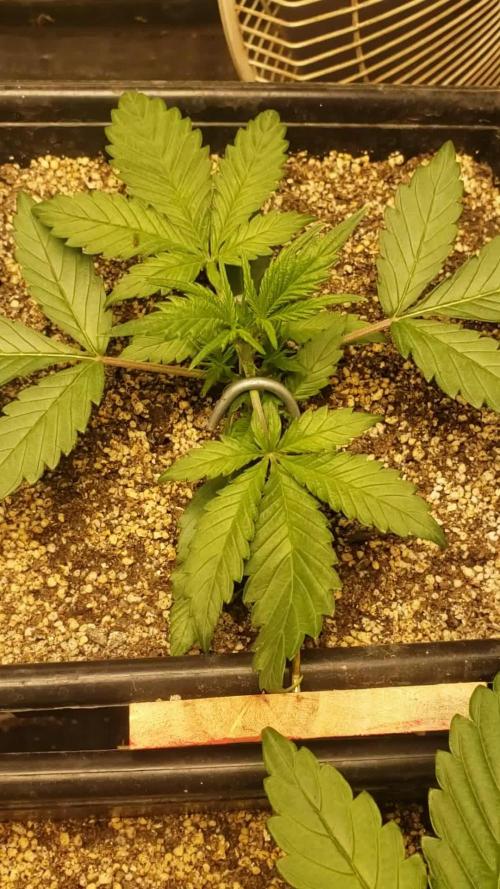
Las imágenes corresponden al periodo 28/08 al 03/09.
Esta semana he regado con agua 400ml ph 6.3
Y le agregue un poco de top crop (top veg) 100ml solamente.
La empecé a doblar en las ramas principales veremos que pasa.
Processing
Likes
52
Share


@mr_black32
Follow
Day 79 : last week of flush for the GSC#2 and Z.OG#2
Day80 : GSC#2 Harvest day


Likes
21
Share


@TechDCo
Follow
When i run i train with no breaks!
Nobody likes a train with-no breaks; coming at you on the tracks!
21/04/2025
TF n her clone 🙄 i have spread the branches out a little ready for flower next week!
22/04/2025
Midday!
I have officially switched to 12/12 it's flower time fan'dingos ⏲️
Actually scratch that WITH having a second look, they aren't ready to switch yet. The fan leaves need to be bigger! 3days hopefully from now!
23/04/2025
Midday!
TF I Defolled the last of the "half cut" fan leaves that she used during training process.
Shes looking upset!
Dimmed light back to 306watts
That's it!
Time to grow bigger leaves and adapt lighting as shes goes and she's in her final form for vegging!
Thanks guys for the advice 🙏
1-2weeeks should do it before the switch!
I’ve got a strong feeling this one’s goiing to blow up — wayy bigger than the last time I ran this strain. Just looking at where she’s at right now compared to my previous grow, it’s night and day. Last round, I flipped her into Flower at aboout the 5-week mark (265gram yeild i got) and she was noticeably smaller at this stage. This time, though? She’s reallly stavking up early.
I'm holdiing off on cranking the lights just yet — currently keeping things underpowered on purpose. As soon as her fan leaves hit that ideal span I’m watching for — nice and wide, signaling she’s ready to really photosynthesize efficiently — I’ll bump the light up to 500 watts. But right now, she’s showing a bit of stress. Doesn’t seem like she’s vibing with something in the environment, maybe a slight imbalance or just needing time to adjust. So I’m letting her settle in before I hit her with more intensity.
Thanks Guys for ya help!
"I do apologise in advance"
It never lets me choose the answers to the grow questions i flick at you guys.
But hey guys, ladies, and fellow growies—I'll be switching in a week! Appreciate all the replies and the support, honestly. I’m always torn on decisions and need to get the most out of my medicine yields.
In just 4 months, I’ve gone from barely making it up a hill to running a 6-minute mile—no joke. Big thanks to cannabis, and even more so to adding H2O2 into my routine. Every morning I take a tiny 0.005% dose of food-grade 12% hydrogen peroxide, then head out for a run with my dog.
I know I’ve been back and forth a lot, unsure of myself, stuck with anxiety and some self-hate I’m still working through. But hey, I’m human. I’ve been living with schizophrenia for 8 years now. All mental illnesses are caused by bacteria/parasites/fungi. But hey 👋 let's not hold grudges; againstthe mentalhealthgovernmentstystem being flawed.
But the last 2 years have been different—everything changed when I finally got my dog. She pulled me out of my own head. Looking after her means looking after myself too—no room for slipping. If I’m not well, she feels it, and that’s not fair to her. She's not just my companion—she’s my emotional rock and protector.
24/04/2025
Midday!
TF is alot happier after removing the training fan leaves.
Increased light: 340watts
25/04/2025
Midday!
They have enough food to last 3days to be untouched and undisturbed.
The Legend of the
6 Blind Men and the Elephant
There once were 6 blind men who, upon
encountering an elephant, gave their own indi-
vidual assessments of the elephant. The first one
happened to fall against the broad and sturdy side
of the elephant, and concluded that the elephant is
very much like a wall. The second one, feeling the
tusk, said the elephant was very much like a spear.
The third one happened to take the squirming
trunk in his hands, and said the elephant was very
much like a snake. The fourth one, reached out and
touched the elephant’s knee, and concluded that
the elephant is very much like a tree. The fifth one
happened to touch the ear, and insisted that the
elephant is very much like a fan. And the sixth one
seized the swinging tail, and said the elephant is
very much like a rope. Each of the blind men was
partly right based on his own subjective perception
—but at the same time, mostly wrong. The comical
part of it all is that their dispute stemmed from utter
ignorance because none had ever seen the elephant!
The field of medicine, with its compartmentalized
theories about what causes disease and how to eradicate it
from the human body, actually perceives only a small
snapshot of the larger picture, a localized subset of the larger
workings of the human body.
One would think that because the medical and
pharmaceutical industries have grown as large as they have,
that we would have less sick people in the world. But the
opposite is actually true. There are more sick people in the
U.S., for instance, than at any other time in history—not
just in actual numbers but as a percentage of the population.
This, in no way, is intended to discredit doctors,
medical practitioners and institutions that have genuinely
good intentions of helping to heal people and eradicate
disease. It simply points to an ineffective medical system
that is focused on illness rather than wellness, that promotes
expensive (i.e., profit-driven), invasive and potentially
dangerous (or even deadly) medical procedures, drugs or
treatments rather than simple, natural, inexpensive,
effective treatments or therapies that have no side effects.
There’s a Chinese proverb which says:
The superior doctor prevents illness.
The mediocre doctor attends to impending sickness.
The inferior doctor treats actual illness.
According to the above definition, traditional (allo-
pathic) doctors are either mediocre or inferior! However,
they are so, not necessarily because of their mediocre or
inferior dedication to the healing profession, but because all
126 medical schools that provide conventional medical
education and training focus on treating actual or
impending diseases rather than preventing them.
While the majority of drugs prescribed by doctors may
seem to provide relief (or so-called “cure”) for a disease, most
of them simply relieve symptoms or the pain associated
with the disease, but don’t cure the disease. For example,
the most popular asthma medications (consisting of inhaled
beta-agonists), which relax airway muscles, may help
asthma sufferers to breathe easier, but they do NOT cure the
condition nor reduce the inflammation in the airways. The
drugs that do claim to “cure” an illness by halting the spread
of invading germs, such as bacteria and viruses; and by
killing cells as they divide or preventing them from
multiplying; do so but not without harming the body to
some extent.
Practically all drugs have side effects: that is, they cause
effects (including adverse and serious effects) other than
those that are desired. Sometimes, drugs provide relief for
one health problem, but in the process, give rise to even
more serious health problems. So we take drugs that relieve
the symptoms of osteoporosis and in turn, acquire a high
risk of breast cancer; and we trade impotence for heart
disease; or depression for diabetes; and take a pill for arthritis
at the risk of getting a heart attack. There are even drugs that
are designed primarily to alleviate the side effects caused by
other drugs or medical treatments.
And that’s only touching on the side effects of drugs.
There are also side effects and serious health consequences
that come with medical treatments like surgery, radiation or
chemotherapy, for example. And even diagnostic procedures
like X-Rays, mammograms and MRIs have their own
attendant risks and side effects.
Case in Point: Ever since mammograms were introduced, the
incidence of ductal carcinoma in situ (DCIS), a type of
breast cancer, has increased by 328%! At least 200% of this
increase is attributed to the harmful radiation of mam-
mograms. Furthermore, mammograms are also thought to
help spread existing cancer cells due to the considerable
pressure placed on the breast during the procedure.
When you consider the prevailing conditions that exist
in the medical industry, you begin to see that your best
interests are not served by relinquishing total control of your
health to doctors, medical establishments or the pharma-
ceutical industry.
What this means to you is that you must not blindly
accept medical advice as the best course of action for your
health. Neither should you be deceived by the multi-million
dollar advertising campaigns of the pharmaceutical com-
panies that promote “medicines” that do not cure and
often harm.
The Most Essential Element in the Human Body
In order to dismantle the complex healing modalities
that the medical and pharmaceutical industries have created.
—and discover the path to true healing—one needs to take a
closer look at the core of human existence. The human body
is composed of 70%-80% water—and water is 89% oxygen
by weight. Therefore, oxygen comprises 62% to 71% of the
body, and is the body’s most abundant and essential
element.
Ninety (90%) percent of all our biological energy comes
from oxygen. It is the essential element that the human
body needs in order to not only survive, but also have
optimum levels of energy, function properly and become
more productive.
Consider, for instance, that humans can survive for
weeks and even months without food, and live for many
days without water. But we cannot survive more than a few
minutes without oxygen.
It is surprising, therefore, that people find it hard to
believe that the very element, which is required by all
humans in order to live is also the secret to keeping us
disease-free. Medical professionals, in particular, would find
the notion of curing virtually all diseases with oxygen rather
simplistic, or even lacking merit.
The curious thing is that oxygen is already used in
medicine. Oxygen supplementation has been used to ease
health conditions, such as emphysema and pneumonia that
impair the body’s ability to have a sufficient intake of
gaseous oxygen. Hyperbaric (high-pressure) oxygen has been
used to treat carbon monoxide poisoning, gas gangrene and
decompression sickness. Oxygen has also been used for life.
support situations and on patients who require mechanical
ventilation. Patients on their deathbed who are given extra
doses of oxygen are often kept alive long after they would
otherwise have died.
However, because oxygen has seldom been used in the
medical setting as a first line of defense for preventing, let
alone “curing” diseases, it has never been accorded its
rightful place as the cure for virtually all diseases.
The world of science and medicine has always known
that oxygen is the basis of human life, without which
humans die. This fundamental truth has become so overlaid
with centuries’ worth of extraneous matter that its essence
has become completely obscured by the ‘Tower of Babel’
created by the field of medicine.
This book will provide solid proof that the primary
physical cause of all diseases is linked in one way or
another to oxygen deficiency. In fact, many of the elaborate
(and expensive) therapies offered by organized medicine
take advantage of oxygen's effect on diseased cells. Most
conventional cancer therapies, for instance, including
chemotherapy and radiation therapy, produce oxygen-
activated events that kill cancer cells. Another new cancer
drug, verteporfin, increases the amount of oxygen within
cancerous tumors, and this kills tumors more effectively
than radiation alone. Interferon drugs, which are vastly
prescribed for the treatment of multiple sclerosis, owe their
efficacy to the fact that they raise the body’s oxygen level.
One could draw the conclusion that many drugs basically
work on the same principle of oxygenation described in this book, but those drugs cost tens of thousands times more
than the pennies-a-day self-administered therapy I present
herein. Furthermore, the therapy I present does not come
with any of the adverse effects typically associated with toxic
drugs and other radical medical therapies.
In the following chapters, you will discover …
• how dozens of AIDS patients have reversed their
death sentences and are now living normal lives as
a result of this little-known therapy involving
oxygen;
• how all disease-causing microorganisms, viruses,
bacteria, toxins and pathogens are eradicated in
the presence of sufficient amounts of oxygen in the
blood and cells;
• how a great number of diseases ranging from colds
and the common flu to malaria and cholera have
been cured as far back as 170 years ago in India
using this same therapy;
• why the handful of U.S. doctors who employ this
therapy to cure a wide variety of so-called
“incurable” diseases, or endorse the therapy in any
way, come under heavy attack by the medical
establishment and are threatened with the revo-
cation of their medical licenses; and
• how you can oxygenate your body using a
remarkably simple procedure without the aid of a
doctor—and duplicate the spectacular healing
results of institutional oxygen therapy at home in
one minute or less.
Although the fundamental concept behind the one-
minute oxygen therapy is based on a centuries-old truth, it
has just been rediscovered and repurposed for use in today’s
world. As with any newly discovered truth, it must neces-
sarily pass through 3 stages: First, it is ridiculed. Then, it is
violently opposed. Finally, it is accepted as self-evident.
The truth contained in this book is already self-evident
to people in many parts of the world. Many people have
awakened to the fact that a simple at-home procedure
involving an oxygenating substance represents the “cutting
edge” of a new healing paradigm. As more people discover
this safe, effective, natural and low cost healing modality for
treating both minor health problems as well as the most
devastating diseases facing mankind today, including AIDS,
cancer, heart disease, Alzheimer’s and Parkinson’s disease, it
may not only improve the quality of people’s lives but also
help to solve our national health care crisis.
I’ve written this book in hopes that this therapy will
become accepted by more doctors not only in the U.S. but
all over the world, and that it will become a valuable part of
mainstream medical practice. It is also my vision that more
people will take control of their own health and healing by
using this therapy, and that we will finally have a world free
of virtually all diseases.
Welcome H202 Hydrogen Peroxide Food Grade.
I'll continue later on!


Likes
2
Share


@cafer
Follow
My plants are growing healthily and have already entered the flowering period.