
Likes
Comments
Share


@GirlGoneWeed
Follow
So last summer a friend of mine grow a Dark Angel Fem seed from Crop King outdoors and turned out the harvest was full of seeds...so I saved 9 of these seeds and germinated to do an outdoor grow this season.
I know chances are I will get hermies just like my friend did but since I have these seeds laying around why not?
Germination: 13h on water cup and 24h later tap roots were screaming to be put on soil... impressive.
Once put n soil seedlings popped out the morning after, seedlings are under a 25w Sunblaster for now, I have been using tap water on a spray bottle to water them.
Thats all for now, stay lit folks!
Follow me on Instagram @GirlGoneWeed

Likes
43
Share


@Regenwurm
Follow
Ich habe rausgefunden was der Fehler in der Woche 1 war. Anfänger Fehler, zu nass…. Einfach zu viel gegossen, Töpfe zu schwer! Seitdem nur 1 mal gegossen mit 50% der angegeben Düngemenge von Advanced Nutrients Woche 2. gewechselt auf MH Lampe 250 Watt, Abstand der Lampe verringert auf ca. 40 cm. Ich habe noch keine aktive Zuluft aktiviert.
Die Pflanzen haben sich gut erholt, ich würde sagen das die Entwicklung jetzt normal läuft.
Die Klima Bedingungen wie RLF und Temperatur sind optimal.
Seit Woche 2 minimale Zugabe an Cal Mag. Da dies der letzte grow mit diesem Setup ist hoffe ich auf eine gute Ernte….. Peace

Likes
4
Share


@ROOPOO
Follow
BREED:
1 x Royal Moby (8 weeks)
1 x Critical (8 weeks)
1 x Amnesia Haze (8weeks)
1 x Green Gelato (7 weeks)
ACTIONS:
Cloning in 1 day
Adding 4 x 28W Full Spectrum LED Bulbs
Switching to 12/12 in 2 days time
Bio Bloom to commence
CONCERNS:
Overcrowding of plants (I plan to flower all 4 plans in the tent at the same time)
Nutrient deficiency (Only using Bio-Bloom onwards)
Insufficient light
INDOOR KIT:
0.8 x 0.8 x 1.8 indoor grow tent
2 x desk fan
1 x boost exhaust fan
4 x 20L fabric pots
Method 7 glasses
16L Garden Master Backpack High Pressure Sprayer
Earth Dance Growers Gold Soil
(https://gthydro.co.za/products/826-earth-dance-growers-gold-organic.html)
Nova LED 180W
(https://gthydro.co.za/products/417-nova-led-s4-180w.html?search_query=LED&results=102 x desk fans)


Likes
34
Share


@rhodes68
Follow
11/29 Start week 4 still solidly in veg
Tighten training daily . Still on same feed of 800ppm
Water filter be in Monday-ish and so I can drop the tap water TDS so to raise the nuet level.
12/1 Continuing to get hang of coco, the runoff in particular will be worked on. Happy with it
12/2 Seeing the first signs of flower so beginning the intro of bloom nuets. dropped the CT A&B Grow to 9ml/gal adding 1 ml/gal Bloom A&B. Will increase the bloom over the next week to full.
12/5 Into the flowering tent still on half grow half bloom nuets 800ppm for a while.
Changed feeding to once per day 1 qt(liter) with @ one cup runoff each (25%)
New camera learning how to use it


Likes
27
Share


@Dunk_Junk
Follow
20cm vertical growth this week.
Going well into flowering.
Pretty much on autopilot 😎
Likes
6
Share

@Chucky324
Follow
Hello. This is the end of week 4 and the beginning of week 5 of flowering.... I think.
I'm finally seeing flowering on all 5 plants now. A couple of them took their time showing their white pistils.
Looking very sativa-ish in here. The tallest plant is over 80 inches and might be growing through the roof vent before it's done.
Plant #3 is the keeper of this lot... but it has a strong, lemony, used laundry water, type of smell to it. Sleepy Joe has this type of smell too.
Been hot in here this week. I've had to water by hand each day to avoid wilting.
Haven't felt very well this week... Got a flu or something.... Feeling better today..
OK. Be Cool.
Chuck.


Likes
9
Share


@Green_Friends_Inc
Follow
Commencing week 3 - Day 15 on December 15th
Change has taken place. Switched out COBs for SolarStorm 440. Currently on VEG mode.
BS is a freak. Still has 4 cotyledons and now is displaying Tri-whorled mutation 🤔😄👍
Thanks for your time and attention!

Likes
18
Share


@potcommunication
Follow
Florganics is a living soil starting fertiliser
the earth is this time plagron light mix
the lamp is at the start at 25 watts and 20cm above canopy
i will start to remove water from the system by placeing a spongecloth on the waterslide
i think the earth is a bit on the wet side
Also want to add nutrients at some point and fresh nematodes to make sure i dont get the damn flies again
i move the controller to the other side to make sure the sensor for temp and humidity is close to the plants
I had to change the soil mid week as it was too hot. It was made from last year's FLO Florganics and too bad...
It switched to biotabs NL
And put ZK 1 and ZK 2 in the fridgegrow system. I removed ZK 3...
WHATEVER
FLO Florganics is actually a great product and as soon as it is available again we will use it again...
There was trouble with the factory and Flo learnt a lot. Now the fertilizer gets tested in and independent lab....
END of week all looks great the plants are growing the one that had too many nutirents for a while is now ... bigger of course

Likes
16
Share


Likes
35
Share


@Njaak
Follow
Added 2 videos on preparing a nutrient solution and pH balancing the solution.
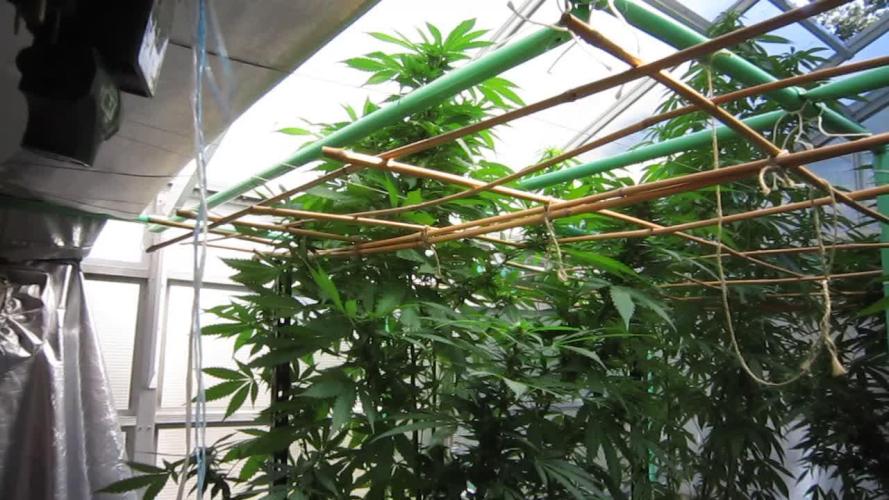
This week saw aggressive topping (mid week 4) and some serious leaf damage. Not sure if the leaf damage is from the topping, nutrients, etc. I did a flush and solution swap, cleaned the air stone and inside of the jar etc. Built the trellis and started training. I'll cut away whatever trellis doesn't end up getting used once flowering starts.
Creepy Don Santa is watching this grow closely. That cat of his is trouble.

Likes
31
Share


@Untergrownd
Follow
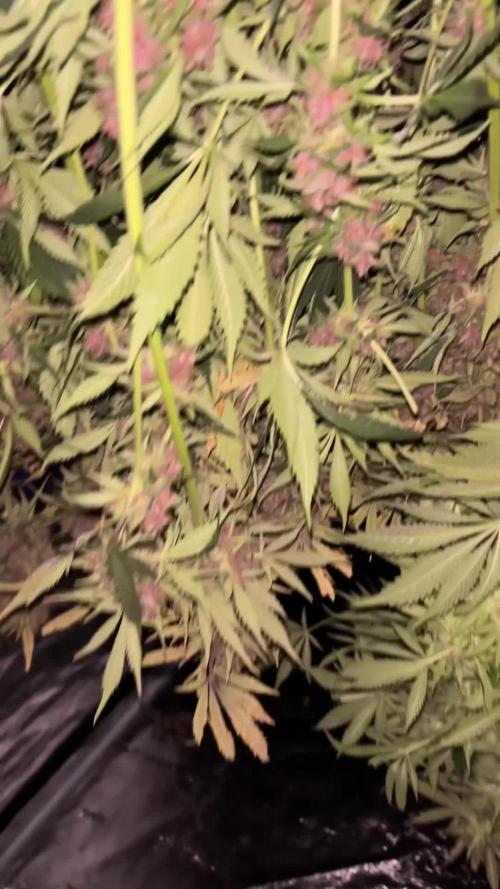
Week Twelve
Flower Week 6 and so far so okay. I got worried about nanas on the sfv, but it turned out it was just new growth. The fungus gnats came back, stronger than before, so I covert the soil with sand to prevent them from laying more eggs.
Alle the plants looking fine, on some days I had to fight high humidity and temps. This will bite me a week later, check week 13 ;)


Likes
Comments
Share


@richsanfarmorganic
Follow
Premium cannabis organic Thailand
By RICHSANFARMORGANIC100%


Likes
Comments
Share

@Enki_Weed
Follow
🌿 Grow Log: AK-47 (Pharaoh Seeds) – DWC Hydro
Phase: Frühe Blüte (Woche 1 nach Umstellung)
Update: 19. März 2026
Aktueller Status & Setup
Die AK-47 hat die Umstellung auf die Blüte am 12. März hervorragend gemeistert. Die Pflanze zeigt eine enorme Stoffwechselaktivität, was sich in den letzten 24 Stunden durch einen massiven pH-Abfall von 6,5 auf 5,6 bemerkbar machte. Da die Blätter weich blieben, aber leichte helle Verfärbungen zwischen den Adern zeigten, wurde heute ein kompletter Wasserwechsel durchgeführt, um die Nährstoffbalance perfekt neu zu justieren.
Nährstoffe & Wasserwerte
Das Reservoir wurde frisch mit 30 Litern angesetzt. Dabei wurde das komplette Hesi Hydro-Schema verwendet. Um dem Magnesiumhunger der Pflanze gerecht zu werden, wurden zusätzlich ca. 6g Bittersalz hinzugefügt. Der pH-Wert wurde präzise auf 6,1 eingestellt, um einen Puffer für die hohe Kationen-Aufnahme zu haben. Der EC-Wert liegt bei stabilen 1,8, was für die aktuelle Größe der Pflanze ideal ist. Die Wassertemperatur wird konstant bei optimalen 20°C gehalten.
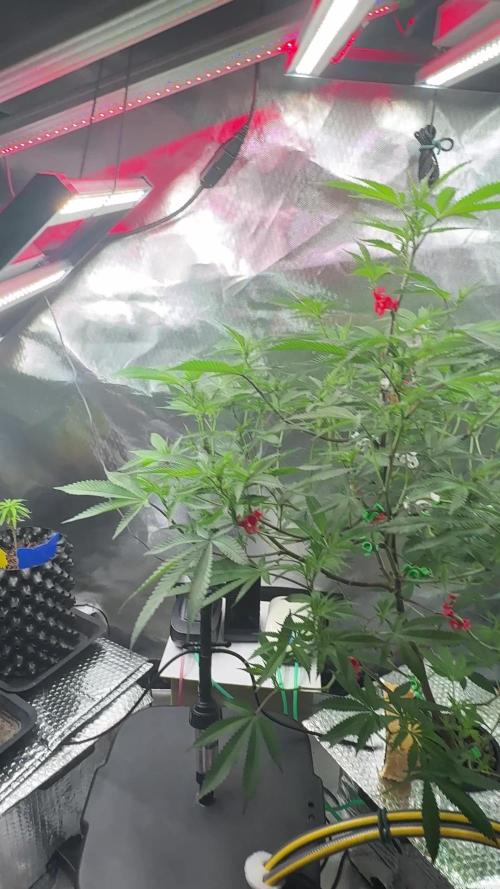
Beleuchtung & Klima
Das Lichtsetup wurde für die Blütephase optimiert. Neben dem Hauptspektrum kommen jetzt verstärkt Rotlicht zur Förderung der Blütenbildung sowie UV-Licht in stündlichen Intervallen zum Einsatz. Letzteres soll die Harzproduktion und die generelle Widerstandsfähigkeit stärken. Die Luftfeuchtigkeit ist mit 47% im idealen Bereich, um die Transpiration zu fördern und späterem Schimmel vorzubeugen.
Training & Beobachtung
Das Low Stress Training (LST) wird konsequent mit farbigen Clips fortgesetzt. Ziel ist es, das Blätterdach flach zu halten und den massiven Stretch der AK-47 zu bändigen, damit auch die unteren Seitentriebe optimal vom Licht profitieren. Die Pflanze füllt das Zelt mittlerweile fast vollständig aus. In der kommenden Woche wird mit dem Erscheinen der ersten deutlichen weißen Blütenhärchen gerechnet

Likes
3
Share


@gottagrowsometime
Follow
Week 5, days 35-38
Ztrawberry 1 pheno & Damn Sour 2 phenos
Both strains are on a very different path. Ztrawberry has been in a bigger pot since the start and after been put in an 11L pot. Wow, she has thrived. She's gotten so big. I've actually decided to flip her. Her nodes are grown and she is fully ready to flip and the process of waiting will be short. I gave her the last grow feed a few days ago. Already still having grow mix as she was moved into a solo pot of grow/light/pebbles 40-40-20 from plagron. She's pushing so hard. There is a few ph issues and a few other stuff. No nutrient defs so nothing that would stop her moving to the next phase. Ztrawberry has been put in 12/12.
More pics coming soon from week 4
Damn Sour
Both phenos have been stuck in a 2L pot and was only transplanted into each 2L pot. Been giving master root and Enzymes + silica for stress. They've only been put in 2L pots a few days ago. 1 was very stressful as I practically had to pull her up with as much of the roots as possible. They are the sane age as Ztrawberry but they had no space. I will uppot them to 9L pots in a few weeks once the root zone has recovered. I really should have left them and uppoted to a bigger pot. But been so long in that pot. They wouldn't have reached out which is what's happened to my 2 lemon photos I kept too long in a 20L hydro pot. Was really as waste of time by the looks of it.
More pics coming soon
Have had to PH to 6.7 and I used - on the silica feed which have been all on since they were transplanted. Ztrawberry 2 weeks ago & Damn Sours 2 dags ago..
Discount codes from sponsors for you
20% off Xpert Nutrients/KANNABIA with code:ggst
20% Zamnesias entire catalogue with code; ZAMMIGROW2024


