


Likes
Comments
Share


@buzbun
Follow
smoke is really good.strong taste and effect that you feel imideately.some times i catch a good paranoia with this strain.good psy effect. maybe it cause 11/13 light cycle. few hours after smoke good to sleep or eat smth good.not for day smoking.somy buds i stored in vacuum bags they very dense after this

Likes
17
Share


@reirrac1
Follow
This lady may just be the best looking plant I’ve ever grown by far. The smell is incredible, and so pungent it fills a room within minutes. It’s like pungent rotten grape scented cologne with notes of skunk and meat. The trichome coverage is unreal, I’m super excited to press some of this once it’s cured. Waiting for a few more amber trichs then chopping in about a week.

Likes
14
Share

@DogDoctorOfficial
Follow
GMO Cookies Served with Extra Curiosity ?🍪
Drying & Trimming Report | Garlic, Gold & Preservation
And once again… yes 😄
We are dividing the reports.
At this point it almost became tradition.
But honestly, there is simply no realistic way to fit:
* harvest,
* drying,
* trimming,
* curing,
* smoke review,
* fresh frozen,
* washing,
* strain review,
* extraction plans,
* terpene analysis,
* and all the small details we love documenting…
into one single update without turning everything into chaos.
So first of all:
thank you for the patience.
Everything from seed until harvest was already documented in the previous reports, but for the people arriving only now, let’s quickly recap how we got here.
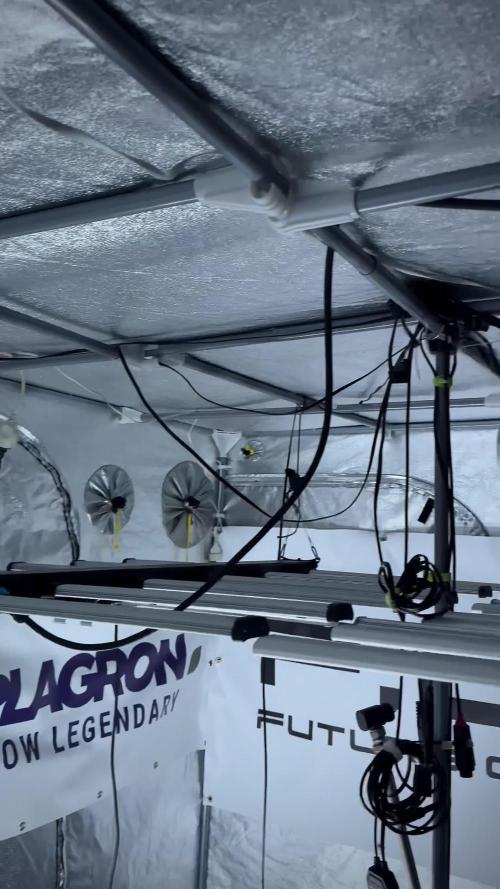
This GMO Cookies run was grown under a 12/12 from seed cycle using the F.O.G. LED setup, with environmental management focused on healthy plant development, airflow, structure, and resin production. Throughout flower the girls received selective defoliation, LST, continuous observation, and careful feeding while expressing one of the loudest terpene profiles we have had in the room in a while.
And now?
Now the plants have moved beyond harvest and entered one of the most important phases of all:
preservation.
Because growing beautiful flowers means very little if drying and trimming are rushed afterward.
So this report belongs to:
* drying,
* trimming,
* handling,
* preserving terpenes,
* collecting resin,
* and slowly preparing the medicine for cure.
The branches that were selected for drying spent approximately:
* 10 days drying,
* around 60% humidity,
* temperatures between 18–20°C,
with the first couple of days running slightly drier in order to help remove excess surface moisture before stabilizing the environment more carefully.
And honestly?
The aromas coming from these flowers during drying were absolutely ridiculous.
Now, to be completely honest and transparent:
these were not the densest flowers from the tent.
Visually they actually looked denser while still wet than they ended up feeling after drying.
But what they lacked slightly in density…
they completely compensated for in aroma, terpene expression, flavor potential, resin behavior, and overall personality.
And honestly, that trade-off is something many growers happily accept.
Because this GMO profile is LOUD.
Like…
walk-into-a-kitchen loud.
Real GMO lovers will understand this instantly.
Every trimming session felt like sitting next to a chef smashing fresh garlic cloves directly beside us.
Savory.
Greasy.
Funky.
Sharp.
Warm.
Almost oily-smelling.
And hidden underneath all that madness:
sweetness,
cookie notes,
earthiness,
and weird creamy undertones slowly revealing themselves as the flowers cured further.
This is not a shy cultivar.
Not even close.
Once the drying process finished, it was finally time to trim.
So:
gloves on.
Trim station ready.
Trim bin prepared.
Scissors cleaned.
Glass jars nearby.
Grove Bags prepared.
And of course…
little self-medication beforehand 😄
Because trimming sessions and cannabis culture somehow always belonged together naturally.
The branches were broken down carefully by hand, one by one, and every flower was trimmed individually with patience instead of speed.
As always, we used pointed curved trimming scissors.
And honestly, they are fantastic for this type of flower structure.
Especially with fluffier or more open flowers, curved pointed scissors allow you to:
* enter tighter spaces,
* remove excess leaf material precisely,
* preserve flower structure,
* avoid crushing calyxes,
* and maintain a more natural-looking final product.
Straight scissors work perfectly fine too of course, but for this type of trimming, curved points genuinely feel more comfortable and surgical.
And with GMO?
You quickly realize precision matters.
Because these flowers become sticky almost immediately.
The scissors start collecting resin.
The gloves become greasy.
Finger hash starts forming naturally.
And suddenly trimming stops being just “work” and starts becoming part of the experience itself.
The first dried branches gave us:
137.1 grams.
After trimming and weighing, the flowers were carefully transferred into Grove Bags, with smaller amounts also resting inside glass jars for comparison and monitoring during cure.
Then we moved onto the flowers dried on the drying rack.
Again:
not the densest plant from the tent.
And honestly, we believe temperatures played a role there.
This cultivar appeared slightly more sensitive to higher temperatures than some of the others around her. Our personal feeling is that she continued pulling significant water during flower development, which likely contributed to the final structure remaining slightly more open once dry weight settled.
But despite that?
The quality remained absolutely beautiful.
Sometimes growers become overly obsessed with density alone.
But density is not everything.
Aromatic expression,
resin quality,
effect,
smoothness,
flavor,
and terpene complexity matter just as much — sometimes even more.
And this GMO absolutely shines there.
The second drying batch landed at:
224.2 grams.
Again carefully bagged for preservation.
And speaking of preservation:
we decided to use Grove Bags for most of the flower storage.
Why?
Because preserving terpenes matters deeply to us.
Especially with a cultivar this expressive.
The idea behind Grove Bags is maintaining stable curing conditions while reducing the constant need to burp jars manually. They help regulate humidity exchange while still allowing the flowers to continue stabilizing naturally over time.
Of course, glass jars still remain legendary and we still use them too.
Honestly?
Both methods have their place.
And later during cure and smoke review, we will probably compare the differences more deeply.
But for now, the priority is simple:
protect the terpenes.
Protect the medicine.
Protect the work.
Now let’s talk about something we personally love a lot:
the “gold.”
Or what many people simply call:
kief.
During trimming, tiny trichome heads naturally separated and fell through the trim bin screen.
And honestly… watching that happen never gets old.
At one point we jokingly started “playing the drums” Moroccan style across the trim bin while working, moving material gently across the screen and collecting the resin heads gathering underneath.
And the result?
Beautiful golden powder.
Tiny greasy trichome heads.
Pure aromatic dust from the plant itself.
Eventually we pressed part of it together gently using finger warmth and pressure, creating a tiny mini temple ball.
Small.
Dark.
Sticky.
Greasy.
Beautiful.
The type of resin that already tells you:
“This plant is going to wash beautifully later.”
And yes…
that curiosity is still alive and stronger than ever.
Because despite everything already documented here, we still have:
more than 700 grams of fresh frozen flower material waiting patiently inside the freezer.
That future report is still coming.
And honestly?
We are incredibly excited for it.
But there is no rush.
That material is preserved safely and waiting for the right moment to become:
* ice water hash,
* solventless resin,
* or whatever expression this GMO decides to offer us later.
For now, this chapter belongs to drying, trimming, preservation, and preparation.
Before ending this report, one more important thing:
cleaning.
Once trimming was finished and the room slowly emptied, it was time to clean everything thoroughly and prepare the environment for future runs.
And honestly, this part matters far more than many growers realize.
Between runs we strongly believe in:
* deep cleaning,
* sanitizing surfaces,
* cleaning fans,
* sterilizing tools,
* removing plant residue,
* using UVC if available,
* using ionizers or environmental tools carefully,
* and resetting the room properly.
Because prevention is always easier than fighting problems later.
A clean room protects future harvests.
And after a run like this?
The room deserved a respectful reset.
Now next week?
Next week we finally move deeper into:
* curing,
* smoke review,
* terpene evolution,
* flavor,
* effects,
* smoothness,
* strain review,
* and our true thoughts about GMO Cookies after spending months with this cultivar from seed until cure.
And honestly…
we cannot wait.
Before ending, as always:
Thank you.
To Zamnesia.
To F.O.G.
To Plagron.
To Lumiflora.
To Grove Bags.
To the platform.
To the community.
To the growers sharing knowledge.
To the hash makers.
To the flower lovers.
To the silent supporters.
To the curious people following this strange garlic-filled adventure 😄
To everyone spending even a few moments here with us.
This GMO Cookies run truly was served with extra curiosity.
And honestly?
That curiosity still hasn’t disappeared yet. 🌱
📲 Don’t forget to Subscribe and follow me on Instagram and YouTube @DogDoctorOfficial for exclusive content, real-time updates, and behind-the-scenes magic.
GrowDiaries Journal: https://growdiaries.com/grower/dogdoctorofficial
Instagram: https://www.instagram.com/dogdoctorofficial/
YouTube: https://www.youtube.com/@dogdoctorofficial Deleted by Youtube - https://www.youtube.com/@TheDogDoctorOfficial NEW
Vimeo : https://vimeo.com/dogdoctorofficial Under construction stay tuned ⸻
Explore the Gear that Powers My Grow
If you’re curious about the tech I’m using, check out these links:
🔆 Lighting & Environmental Control
• Future of Grow — Advanced LED lighting technology
https://www.futureofgrow.com/
DISCOUNT CODE: DOG20
• Lumiflora — Under-canopy LED lighting
https://lumiflorade.com/
• TrollMaster — Environmental controllers and automation gear (past collaboration)
⸻
Genetics
• Zamnesia Seeds — Genetics used in this project
https://www.zamnesia.com/
⸻
🌱 Soil, Substrates, Boosters & Root Support
• Plagron — Substrates, bio mixes, and supportive products
https://plagron.com/en/
⸻
🎒 Storage, Curing & Preservation
• Grove Bags — Curing and storage solutions
https://grovebags.com/
⸻
📸 Photography Equipment & Tools
(Not sponsors, but part of my creative toolkit)
• Sony A6700
• Sony full-frame macro lens + few more
• Stacking photography workflow - learning
• iPhone (for behind-the-scenes shots)
As always, this is shared for educational purposes, aiming to spread understanding and appreciation for this plant. Let’s celebrate it responsibly and continue to learn and grow together.
With true love comes happiness. Always believe in yourself, and always do things expecting nothing and with an open heart. Be a giver, and the universe will give back in ways you could never imagine.
💚 Growers love to all 💚
📸 P.S. – The Eye Behind the Lens
All photos in this diary (for now — except for the ones showing the camera, which I took with an iPhone) are taken with a Sony A6700 paired with a Sony full-frame macro lens and a few more.
Photography is part of the story — it’s how we share the fine textures, the glow, and the quiet details that words can’t always capture.
I’ve also started experimenting with photo stacking — a technique where multiple images, each taken at a slightly different focus point, are layered together to create one perfectly sharp image from front to back.
It’s not digital enhancement or AI; it’s pure photography — a way to reveal the plant’s beauty in microscopic depth, from trichome to petal.
You’ll even see a few shots of "ghost me" capturing the shots — camera, lens, setup — because every grow deserves not just to be cultivated, but documented like art.
FOR DISCOUNT CODES AND MORE JUST FOLLOW THE LINK https://website.beacons.ai/dogdoctorofficial
NEW DISCORD - Official Server Invite Link : https://discord.gg/ksjAkA5T74

Likes
10
Share


@CanarianGrow92
Follow
End of week 6 for the Green Papaya from super sativa seeds club.
We are almost done, some trichomes are starting to get brown, but just a small portion, i guess we will be reviewing day by day and maybe extended another week, lets see 🙈
Likes
19
Share


@RDWCGrowing
Follow
7/27/2023- Prep
Tent and system are cleaned and ready to go from my last grow. I have submitted my Journa for the Diary of the Month Competition here is to hopeing for good resutls.
7/28/2023- Germination Day 0- Seed initiation
Well lets get this new Grow started.. So My Dad Sent me a custom Landrace Strain that he wanted me to grow out and Breed for him. The Strain is Called Black African Magic:
Black African Magic, Alson known as BAM, is a Sativa pure land race strain, It's classified under the Cannabis Sative species and its genetics come from Africa-the Ituri Forest in the Dmocratic Repoublic of Congo. The Effects are said to be Very Psychedelic, used for Stress managment and for better sleep and rest. This is my frist Land Race so we, will see how this goes together..
RO Water Used
Added Hydrogen Peroxided
8/1/2023- Germination Achieved G-Day1
Popped her head above the root riot today to say hello.. Woot first challenge when dealing with an unknown seed and a new Strain is getting the seed to pop and the lady to show life.
8/2/2023- Germination Day 2
Took the root riot out today and it was soaked not good plant drowing again. I am still having a hard time finding the right blance for where the water should be to keep the root riot moist and not soaked. I had to drain some of the water out of the root riot plug to help give a little oxygen. I also removed some of the water.
8/3/2023- Germination Day 3
Looking good stretching her leaves out to let in the lights
8/4/2023- Germination Day 4
Looking good a few days until I put them into the RDWC System and get this thing rocking and rolling.
8/5/2023- Germinaiton Day 5
Looking good will probably plant tomorrow if the roots are still looking good.
8/6/2023- Plant Day- Germination Day 6
Planted into the RDWC System today. Joy when they go into the system as long as we dial that in right this will now be a great grow.. Survived the hard part..
8/7/2023- Germination Day 7
Everything looks like it is going good, she is showing some damage on the lower leaves from the over watering in the cloning machine but right now I don't see any new damage.
8/8/2023- Germination Day 8
Added the first Nutes today, to help support root growth and to help give there first jump to growth.
TPS SILICA GOLD-.5mil/Gal
Root Drip- 1mil/Gal
GH FLoraMicro-1mil/Gal
GH FlroaGro-1mil/Gal
GH FLroaBloom-1Mil/Gal
ORCA-.5mil/Gal
8/9/2023 - Germination Day 9
Everything is looking good new growth looks like it is praying and they are looking happy. I will take off the damage leaves probably tomorrow.
8/10/2023- Germination Day 10
She looks like she is on track the roots are starting to come out of the basket very small but starting.
8/11/2023- Germination Day 11
Cleaned up the dead leaves... Day 1 VEG tomorrow.. Water Change Day and first real meal...
Likes
4
Share


@rickgrimes
Follow
ya se ven las flores, riego cada tres días , y corto las hojas que están caídas solo .último día de la semana 9 ya se aprecian las flores


Likes
70
Share


@FoTwenny
Follow
••••••••••••••••••••••••••
Oct 1 - Oct. 7
Week 5 of 12/12
••••••••••••••••••••••••••
WEEKLY SUMMARY:
••••••••••••••••••••••••••••••••••••••••••••••••••••••••••••••
🙋♀️Fo' Twenny here!🙋♀️
We're back with another update on our 🍌🍌 FAT BANANA AUTO cultivar bred by ROYAL QUEEN SEEDS! It's week 5 and she is already looking and smelling amazing! She just seems to get frostier ❄️ by the day and her aroma just keeps getting stronger. I love the terps this girl is throwing out! This week we will lighten up the feeds substantially and get her moving towards harvest. Let's growwww!
📝 Side Note 📝
Irealized my BlueLab Conductivity Meter has the option to switch to EC. Since EC is the most accurate way to measure the nutrient concentration in a solution, I will now be measuring and reporting EC readings rather than PPM.
Any advice, suggestions, or constructive criticisms are always welcome.
Now, for the weekly break down!
••••••••••••••••••••••••••••••••••••••••••••••••••••••••••••••
THIS WEEK'S BREAK DOWN
••••••••••••••••••••••••••••••••••••••••••••••••••••••••••••••
9/30 - Day 52 & Day 28 of BLOOM
°°°°°°°°°°°°°°°°°°°°°°°°°°°°°°°°°°°°°°°°°°°°°
📸 PHOTOSHOOT! 📸
🎥 FILMING! 🎥
••••••••••••••••••••••••••••••••••••••••••••••••••••••••••••••
10/2 - Day 54 & Day 30 of BLOOM
°°°°°°°°°°°°°°°°°°°°°°°°°°°°°°°°°°°°°°°°°°°°°
🚿FEED DAY!🚿
- She received approximately 12 oz of nutrient solution. I mixed 6 gallons of solution for all the plants I have running in this SOG. 12 oz of that was then measured and fed to this cultivar. This week I used some gallon bottles filled with water and frozen to lower temps in the reservoir. She was followed up with another 12 oz of water ph adjusted to 6.4
👩🔬NUTRIENT SOLUTION👩🔬
⬇️Mixing Rundown⬇️
- The solution starts with 6 gal tap H2O through two kdf filters mixed in a 36 gallon reservoir. The solution is applied via wand sprayer powered by a submersible pump attached to a garden hose. Nutrients and additives are added to the reservoir in the order listed below and thoroughly mixed using a plastic stir spoon. The reservoir is oxygenated by four 4 inch air stones.
Start pH: 7.8
Start EC 1.0
TEMP: 69°F
.75 tsp/gal - Fox Farm BIG Bloom
.5 Tsp/gal - Fox Farm Tiger Bloom
.75 tsp/gal - Fox Farm BEMBÉ
.0625 tsp/gal - Fox Farm Cha-Ching
Our target pH is in the range of 6.0- 6.6 prior to adding any microbial innocclants. pH already in range, no adjustments needed.
pH: 6.5 (No adjustments needed)
EC: 1.5
TEMP: 60 °F
Mammoth P.
.6 ML/gal
••••••••••••••••••••••••••••••••••••••••••••••••••••••••••••••
10/6 - Day 58 & Day 34 of BLOOM
°°°°°°°°°°°°°°°°°°°°°°°°°°°°°°°°°°°°°°°°°°°°°
- She received approximately 36 oz of nutrient solution. I mixed 15 gallons of solution. 36 oz of that was then measured and fed to this cultivar. This week I used bottles filled with water and frozen to lower temps in the reservoir.
👩🔬NUTRIENT SOLUTION👩🔬
⬇️Mixing Rundown⬇️
- The solution starts with 15 gallons of tap H2O run through two kdf filters and mixed in a 36 gallon reservoir. The solution is applied via wand sprayer powered by a submersible pump attached to a garden hose. Nutrients and additives are added to the reservoir in the order listed below and thoroughly mixed using a plastic stir spoon. The reservoir is oxygenated by four 4 inch air stones.
🚿FEED DAY!🚿
Start pH: 7.7
Start EC 1.0
TEMP: 67°F
2 tsp/gal - BudSwell
Our target pH is in the range of 6.0- 6.6 prior to adding any microbial innocclants.
Adjusted pH to 6.3 using General Hydroponics pH Down
.75 tsp/gal - Mycos WP
1 tsp/gal - Recharge
.6 ml/gal - Mammoth P
pH: 6.2
EC: 1.4
Temp: 67° F
••••••••••••••••••••••••••••••••••••••••••••••••••••••••••••••
SUPPLIES & EQUIPMENT
CURRENTLY IN USE:
••••••••••••••••••••••••••••••••••••••••••••••••••••••••••••••
• A/C: Whynter ARC-14S 14,000 BTU Dual Hose Portable Air Conditioner
• TENT: VIVOSUN 48"x24"x60" Mylar Hydroponic Grow Tent with Observation Window & Floor Tray
• POTS: Black 8"tall Active Aqua brand 6" x 6" one gallon square pots/Black 12" tall Active Aqua brand12" x 12" 3.4 gallon square pots
• VEG/AUTOFLOWER INTAKE FAN: None (PASSIVE)
VEG/AUTOFLOWER EXHAUST FAN : VIVOSUN 6 Inch 390 CFM Inline Duct Fan with Variable Speed Controller
• BLOOM INTAKE FAN: VIVOSUN 6 Inch 390 CFM Inline Duct Fan with Variable Speed Controller
• VEG/AUTOFLOWER EXHAUST FAN : VIVOSUN 6 Inch 390 CFM Inline Duct Fan with Variable Speed Controller
• BLOOM EXHAUST FAN: AC Infinity CLOUDLINE T8, Quiet 8” Inline Duct Fan with Temperature Humidity Controller - Ventilation Exhaust Fan
• VEG/AUTOFLOWER AIR MOVEMENT: 6-Inch Lasko FBA 2004W 2-Speed Clip Fan
• BLOOM AIR MOVEMENT: One Honeywell TurboForce Air Circulator Fan Black, HT-900 and Three 6-Inch Lasko FBA 2004W 2-Speed Clip Fans
• Bluelab PENPH pH Pen Fully Waterproof Pocket Tester
• Bluelab PENCON Conductivity Pen Fully Waterproof Pocket Tester
• Kolder Multi-Purpose Liquid and Dry Measuring Cup, 16-Ounce
• Fox Farm Measuring Spoons
• WATER TREATMENT: Tap H2O run through two AQUACREST Garden Hose Water Filters to remove chlorine and chloramine.
– COMING SOON: Hydro-Logic 31023 1000-GPD Evolution RO1000 High Flow RO System, White (HL31023).
• WATER APPLICATION: I use 2 different watering systems. The pump sprayer is typically used in early veg, between feeds, or for lighter feeds. Most feeds are usually run through the pump and reservoir because it's faster and easier when dealing with larger volume feeds.
– 2 GALLON LAWN & GARDEN PUMP PRESURE SPRAYER. * I removed the spray head due to clogs and it's just faster.
– Superior Pump 91250 Utility Pump, 1/4 HP in a heavy duty 27 gallon Tote attatched to a 10 foot garden hose to an Orbit Underground 56246 Green Thumb 9-Pattern Telescoping Wand.
– Aeration of the reservoir is accomplished using a General Hydroponics HGC728040 Dual Diaphragm Air Pump 320 GPH 4 Outlet attached with standard aquarium air hose to four 4-Inch Air Stone Disc Bubble Diffusers.
• VEG/AUTOFLOWER LIGHTING: 320w MosterBoard V4-PLUS powered by a MEANWELL 320H-48AB DRIVER. There are three V4-PLUS boards prewired and mounted on a 935x195x10mm black heatsink. Dimmer, UV Switch, and IR Switch included. Each board contains two hundred fifty two 3000k lm301h diodes + twelve Osram 660nm diodes plus 4 separately switchable LG UV 395nm diodes and 4 separately switchable Osram IR 730nm diodes.
• BLOOM LIGHTING: Two custom mounted lighting units: Each mount has one 480w MEANWELL 480H-48B driver and one 240w MEANWELL 240H-48AB powering 6 KingBright Quantum Boards. Each board contains two hundred fifty two 3500k lm301h diodes + twelve CREE XP-E2 660nm diodes plus four separately switchable CREE XP-E2 730nm diodes and four LG UV 395nm diodes. Hanging between the two mounts are two additional quantum boards with two hundred fifty two 3000k lm301h diodes + twelve 660nm diodes plus four constant power 730nm IR diodes and four 395nm UV diodes. That's a total of 1680w of quantum board power in our 96" x 48" bloom tent.
⚠️ ALL DRIVERS MOUNTED REMOTELY IN AN AIR COOLED BOX INSTALLED BETWEEN THE FILTER AND EXHAUST FAN ⚠️
• SLMOTO Universal Oil Drain Pan, 2 Gallon (8 Liter) Capacity ABS Low Profile Oil Drain Pan w/Spout Fit for Motorcycles
• Modified Botanicare Low Tide LT Black Tray - 4' x 4' - Modification: Cutaway at corners and used flex-seal tape to create a new edge that will be soft to fit between tent supports. She is supported by 6 Standard Cored Concrete Blocks (Common: 4-in x 8-in x 16-in; Actual: 3.625-in x 7.625-in x 15.625-in). ⚠️THIS TRAY WILL NOT FIT BETWEEN SUPPORTS IN A 48" x 48" or 48" x 96" TENT WITHOUT MAKING MODIFICATIONS TO THE TRAY!⚠️
• Blue Sticky Pads
• Yellow Sticky Pads
••••••••••••••••••••••••••••••••••••••••••••••••••••••••••••••
SOIL MIX DETAILS:
••••••••••••••••••••••••••••••••••••••••••••••••••••••••••••••
All components were mixed into a 50 gallon tote that is kept in a warm environment to help innocculate to promote a vast and diverse microbial life in the rhizosphere. Once mixed, add 32-64oz water once every 7-14 days as needed. The goal is to keep the soil moisten without oversaturating.
2 Part - Royal Gold Tupur
INGREDIENTS: Coco fiber, aged forest materials, perlite, and basalt
1 Part - Fox Farms Ocean Forest
INGREDIENTS: Aged forest products, sphagnum peat moss, earthworm castings, bat guano, fish emulsion, and crab meal.
1 Part - Roots Organics
INGREDIENTS: Perlite, Coco Fiber, Peat Moss, Composted Forest Material, Pumice, Worm Castings, Bat Guano, Soybean Meal, Alfalfa Meal, Fishbone Meal, Kelp Meal, and Greensand. Also contains beneficial mycorrhizal fungi: Funneliformis mosseae, Rhizophagus intraradices, Septoglomus desertícola
.5 Part - Wiggle Worm Soil Builder Pure Earthworm Castings
.5 Part - Ancient Forest Humus
.5 Part - Coarse Grade Perlite
Inocculated by mixing 1 cup of Extreme Gardening Mycos
Watered with pH 6.5 h2O
1 Tsp/gal - Real Grower's Recharge
1 tsp/gal - Hi-Brix Molasses
2 tsp/gal - Fox Farms Kangaroots
••••••••••••••••••••••••••••••••••••••••••••••••••••••••••••••
Want to see more cultivars I have growing❓
Please, be sure to check out my other diaries & give me a follow! 👍👍
🙏Thank you for stopping by my garden!🙏
Peace, ☮️✌️
Love, 💚🤟
& Frosty Nugs! ❄️🌲
Happy farmin' my friends! ☺️🌱
- Fo' Twenny 👩🌾🏻

Processing
Likes
4
Share


@gothboiclique
Follow
Buenas, hoy subo mi primera semana con las Juan Herer! Me siento muy emocionado, este es mi primer cultivo de exterior. El cultivo lo empiezo en interior y para fin de septiembre lo trasplanto afuera directamente en la tierra. A ambas plantas le puse un nombre particular, #1 Gina Herer, #2 Juana Herer.


Processing
Likes
30
Share


@HydroGrowLED
Follow
The last girls buds just keep growing even thou they look dead and wiltered and every leaf is hanging on by a thread, I love these ladies maybe that’s why I’m keeping them going 🌱💪😂
Another 2 down 😜😜

Likes
1
Share


@LokalGrenz
Follow
6/7 flipped to flower leafs lil droopy due to over watering a lil bit but it’ll bounce back and everything else looking good tho I think the flowering stretch is going be wild haven’t grown one this tall before going have to move the light up some more soon
Likes
2
Share

@DivineBuds420
Follow
Not much has changed this week. Both plants are growing steadily, although the previously injured plant is slightly behind the other one. I expect this difference to balance out over time.
You can clearly see where the leaves were damaged earlier, and they are now growing a bit twisted and deformed as a result. The larger plant is already showing strong indica traits with big leaves and thick fingers.
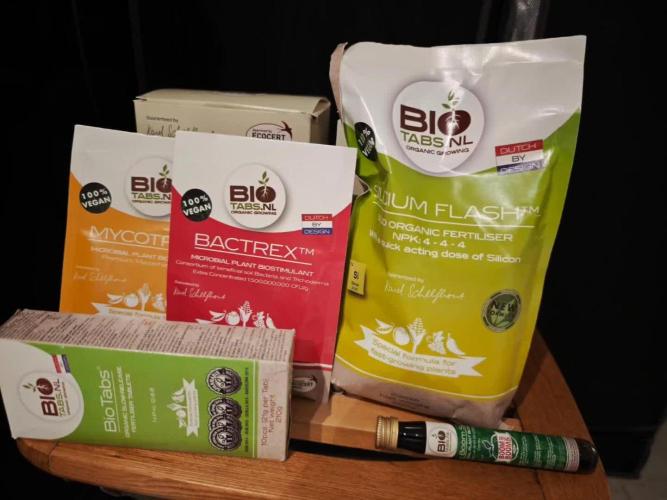
During the week, the plants will most likely be transplanted into a larger pot and will receive their BioTabs treatment – including nutrients and beneficial microorganisms. Basically the whole organic setup. I’m confident they’re going to love it.
I’ll be away on vacation for a few weeks after this update, so some diary entries may be posted with a slight delay. The plants will be taken care of and watered during that time, and progress will still be documented.
Both plants were successfully transplanted into 3.5 liter pots and received the full BioTabs treatment, including microorganisms and nutrients.
The substrate is based on reused and reconditioned soil with roughly 50% perlite mixed in. The base soil is BioBizz Light Mix.
Since watering is done exclusively with osmosis water, about 7 g of dolomite lime per liter of soil was added to provide proper calcium and magnesium buffering.
This run marks the first time following the BioTabs “just add water” strategy.
The substrate was prepared accordingly and amended with Startrex and Silicium Flash.
Before placing the plants into their new pots, Mycotrex was sprinkled directly into the planting hole and one BioTab was added to each pot.
After transplanting, the leaves were lightly sprayed with Boom Boom Spray.
The substrate was then watered with osmosis water mixed with Bactrex.
Everything went smoothly and the plants handled the transplant very well.
From here on, it’s all about letting the biology do the work.

Likes
1
Share


@DTHGenetics
Follow
The funky one has the biggest new growths coming out of the nodes this is week 6 some ph damage from acccaidental un Ph neem mix that I use I forgot to ph but that was about right after the begging of week 5 doing good now looking less ph burned and the new growths are getting big . Garlic fusion on the left of setup

Likes
20
Share


@Wackytabacky_420
Follow
Hey fellow growers! Here again with week 5 update!! All photos are of my Northern lights at 35 days old!! This lady is beginning her 2nd week of flower. This is her feed schedule 4 the past week...
1/19/2022
.5ml calmag
2.5 ml micro
2.5ml gro
1ml bloom
Ph 6.42
630ppm
Solution temp 73.1°F
1/23/2022
2ml micro
1ml gro
2ml bloom
3/4ml ph down
Ph 6.40
440 Ppm
Solution temp 73.2°F
This girl is really starting to stretch out!! In preparation for all the good good she is about to stack on!! All thanks to the Marshydro Tsw2000!! Since I installed this light this lady has doubled in size!!
💡light sponsor💡
@marshydro_amazonled
@marshydro12
#marshydro
#TSW2000
Well as of now this lady is doing her thang and loving her environment. She is happy and chugging along. Completely different from my first run of Northern lights. Well till next week stay zooted growmie's!!😎🙏🏻🤟🏻👊🏼🌱💚💪🏻💪🏻💨💨🔥🔥🔥

Likes
9
Share


@Gdubgrows
Follow
Building the RDWC set up was quite the process. A couple minor leaks, but I was able to take care of them. I'm now 11/11 in rapid rooters so I won't suggest anything else. No pre germination. I prepared the rooters, put the seeds in, and 3 days later they came up. This is my 3rd run using the same batch of 50 rapid rooters. I freeze the extras and pull them out a day before use.
Thanks for stopping by! 😎

Likes
112
Share


@PEAKYPLANTERS
Follow
hi to all, masters and beginners!
welcome to a new week of cultivation with the peaky queen
let's cook these flowers a little more to make sure they have more powerful effects and to make the lower part develop well
stay up to date!!
we will begin by removing some of the excess nutrients in the soil and then giving only water on the next round 😎👽


Processing
Likes
15
Share


Likes
11
Share


@Localbudz
Follow
What a run!!!! my first grow was a massive success a wet weight of 3696 Grams. 16 colas in total from the V-8 manifolding technique i used on my two ladies. The average weight wet of each cola was 81.2 grams! I have this haul back in my tent ⛺. Excellent air flow not directly at the buds. I have the humidity at 50%. I expect a 10 to 12 day drying period with a 3 week minimum cure. I am taking a short break and starting a new crop of 4. Will be switching to either dwc or autopots. Have sour jack from crop king seeds still looking for an Indica. Will be running two sativa two indica under my twin TSL 2000. Check back for dry weight and pics of this first of many grows from Localbudz.

Likes
10
Share


Likes
6
Share


