


Likes
Comments
Share



Likes
6
Share


@GoldenWeedGrower
Follow
Legend
Timestamp: 📅
EC - pH: ⚗️
Temp - Hum: 🌡️
Water: 🌊
Food: 🍗
pH Correction: 💧
Actions: 💼
Thoughts: 🧠
Events: 🚀
Media: 🎬
D: DAY, G: GERMINATION, V: VEGETATIVE, B: BLOOMING, R: RIPENING, D: DRYING, C: CURING
______________
📅 D36/V32 - 21/05/24
⚗️ EC: 1.0 pH: 6.0
🌡️ T: 20°C H: 70%
🌊
🍗
💧
💼 LST
🧠
🚀
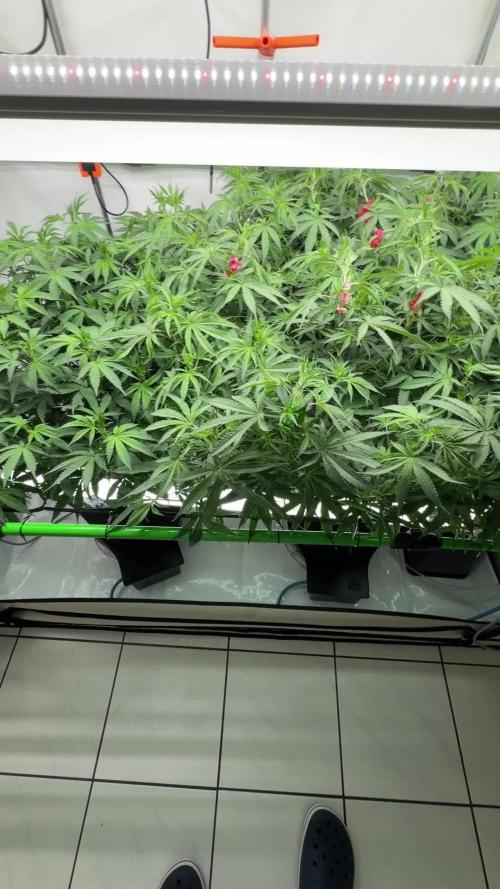
🎬 1 TL in her new home and one TL of LST job
______________
📅 D37/V33 - 22/05/24
⚗️ EC: 1.0 pH: 5.4
🌡️ T: 20°C H: 70%
🌊
🍗
💧
💼 LST
🧠
🚀
🎬 1 TL video and one TL of LST job
______________
📅 D38/B01 - 23/05/24
⚗️ EC: 1.0 pH: 5.3
🌡️ T: 20°C H: 70%
🌊 2L
🍗
💧
💼
🧠 As I saw clear signs of blooming, I need to pass to bloom phase so I put B01, in the header.
🚀 Clearly she's starting flowering
🎬 1 TL video and 1 LST video
______________
📅 D39/B02 - 24/05/24
⚗️ EC: 1.1 pH: 5.3
🌡️ T: 20°C H: 70%
🌊
🍗
💧
💼
🧠
🚀
🎬 1 TL video and 1 LST video
______________
📅 D40/B03 - 25/05/24
⚗️ EC: 0.2 pH: 5.3
🌡️ T: 20°C H: 70%
🌊 15L
🍗
💧
💼 Flush for two days and then flowering nutes
🧠 I think no more LST, she's now full blooming
🚀
🎬 1 TL video
______________
📅 D41/B04 - 26/05/24
⚗️ EC: 0.2 pH: 5.3
🌡️ T: 20°C H: 70%
🌊
🍗
💧
💼 Flush for two days and then flowering nutes
🧠 I think no more LST, she's now full blooming
🚀
🎬 1 TL video
______________
📅 D42/B05- 27/05/24
⚗️ EC: 1.1 pH: 6
🌡️ T: 20°C H: 60%
🌊 15L
🍗 Calmag - Bloom A-B - Bud Candy - B52 - Big Bud - Seaweed
💧
💼 👉👉👉 Changed res and added nutes
🧠 I think no more LST, she's now full blooming
🚀
🎬 1 TL video

Likes
15
Share


@CraigGrowsOK
Follow
This plant was a dream to grow, responded like a champ to topping and LST, I had 4 main colas, each 45-55g wet, one was 70g wet. My total wet weight is 719g!! Holy cow.
The bud its self is dense and tightly packed, while it's not absolutely covered in trichomes ot has a nice even layer that gives it a nice sparkle in the light.
I'm curious to see what the final weight will be as well as a full smoke report when it is fully dry, until then enjoy a handful of pictures.

Processing
Likes
15
Share


@CanadianFillmore
Follow
Start of week 4, the blueberry is using up nutes quicker then the other strain's, but she rebounded quickly after being fed. The OG Kush is very compact and tight node spacing, lots of bud sites.

Likes
4
Share


@handsammich
Follow
Definitely would’ve been better had I not moved but nonetheless it was a great run overall, super frosty and sticky with not very dense buds which made for a difficult trim but I didn’t mind.

Likes
Comments
Share


@qhartman
Follow
Video is not that great, getting cramped in there and alittle hot at 29 as the high for a few hours a day

Processing
Likes
10
Share


@O_ABSOLUTELY
Follow
Once again not much of an update as Iv been busy just a few poorly taken photos a few days into week 2 flower, bud sites are forming nicely, also give her a little trim after I took the photo to get better light penitration.... Took some more pics today (week 2 day 6) flower, not the best of pics but can only work with what I have unfortunatel. Give this girl a drink yesterday an think I over done it as she was looking sad few hours after watering, she seems to have bounced back nicely tho:) she looks light green almost yellow in colour around the flowers any idea what it could be? Always open to tips :)
Processing
Likes
10
Share


@Fibro_Witch
Follow
This girl is looking great! Noticeably frostier than last year so I am excited! She smells really strong right now, lotta sweet and slightly skunky. I spend most of my video talking about how my plan for a tomato roof using stuff I already had didn't work out so looks like I'm going to Lowe's on Wednesday. Gotta get it up before the cold and rain starts in so I don't get moldy buds.

Likes
28
Share


@OGgrows
Follow
very good development during this week. buds start to crystallize and gain volume. slight increase in feeds.some more HST and defoliation this week.good week everyone 🙏💚🌱

Likes
41
Share


@TerpTurtle
Follow
_Eyeing up trichomes clusters and buds as they ripen to determine a harvest day
-Plant still drinking heavy..
-Bud flops, any motion and the branches are ready to lay. Heavy buds
-Flipping Slurricane #7
-Day 69 harvest on BCS seed
Likes
15
Share

@TrickzGrowz
Follow
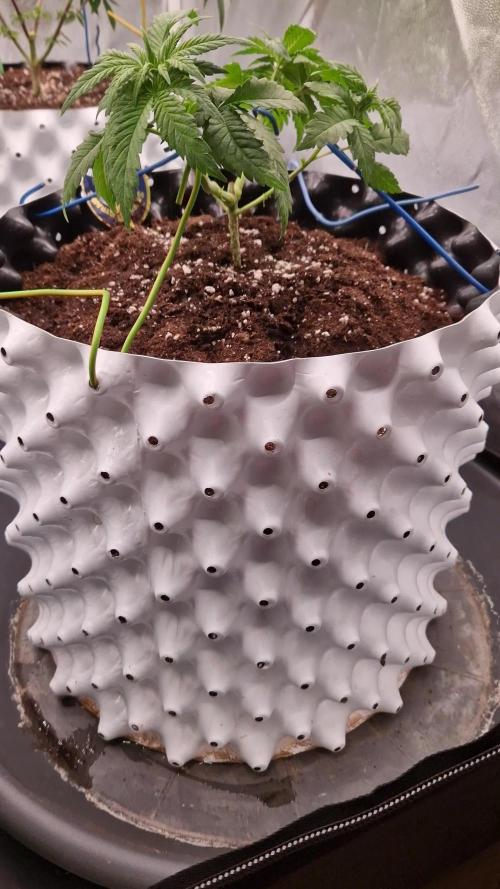
Heute wurde umgetopft. Leider hängt sie von der größe ein wenig hinterher. Ich hoffe sie wird jetzt aber mit den großen Topf aufblühen.

Likes
8
Share


@eldruida_lamota
Follow
Pfff, explicaros que estas green ak xL son una variedad bastante difícil de cultivar, los cambios ambientales le sientan fatal, y hay que tener cuidado con la alimentación ya que se Sobrefertiliza fácilmente así que ojo, eso por un lado.
Por otro si eres un cultivador con varios años de experiencia y todo te sale bien, es probarla, porque el sabor de esta cepa compensa la dificultad de su cultivo.
Thc hasta 18% , sativa predominante.
Genéticas: Afghan x Colombian x Mexican x Thai Landrades.

Likes
16
Share

@CanadianFillmore
Follow
Week 7! Blue Dream'in is what I am doing! I'm loving this strain and round 2 of this grow in particular. She's got amazing smell, starts with a pine then fades into a berry/fruity smell. She has shown signs of heat stress and a bit of extra feeding was provided last week. Of all 4, she's the one I'm most excited about!
July 31 - added some close ups.
Likes
12
Share


@Mr_BFL
Follow
Flush!Flush!Flush!
Fantastic smell. Moby dick like Red Grape o like that & shiskaberry like cherry jam!


Likes
Comments
Share


@Marbanya
Follow
2024-11-27 to 2024-12-02
The first time I grew Chernobyl, the plant was dense and unruly with thick, lush vegetation. In fact, the plant took up so much room in my tent that I have it to a friend to finish outdoor. It showed signs of bud rot early in the flowering period and luckily, most of it was saved from itself. In addition, the stems of this strain are more hollow and brittle, gaining thickness quickly and making Low Stress Training a difficult task that requires patience when working the branches around the LST clips. I have broken many branches on a Chernobyl plant even when applying care and caution. It requires getting the plant to the shape and size you need early, so that silica can be added to strengthen the branches in prep for those killer nugs.
They are taking about .5 gallons of feed every other day.

Likes
8
Share


@Bdizzle
Follow
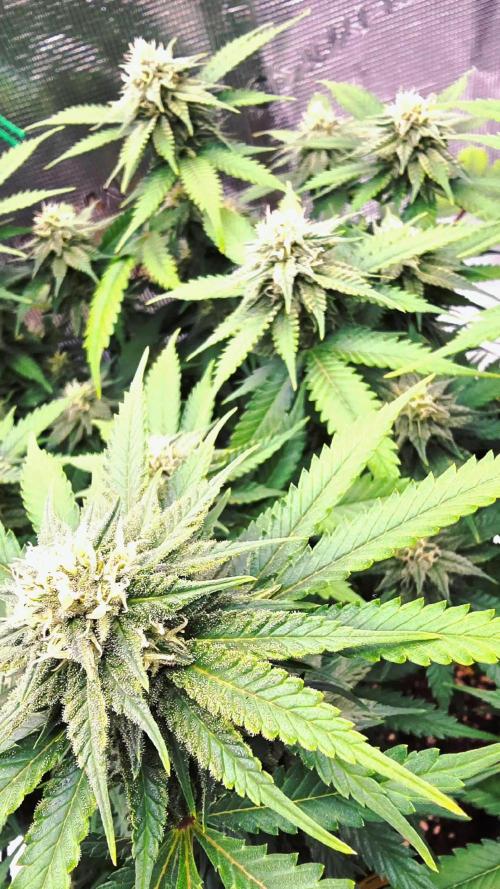
Growing strong and healthy!! Baby buds are coming in all over :) Can’t wait to watch them grow!! She has doubled in size over the past few weeks & has started to slow down to focus on flowering. Stems/stalks are growing strong & thick ready to support some good bud growth :)

Likes
13
Share


@gr3g4l
Follow
No me pude estar de hacer una nueva poda de bajos, tercer y cuarto nudo a todas.
Sigo batallando contra la araña roja :-( No hay manera de deshacerme de ella al 100% y cuando me sube un poco las temperaturas vuelven a salir. También podria haber ayudado porque programé mal el temporizador del ventilador hace un par de dias y estubo parado por la noche y coincidió también durante unas horitas mientras aun estaba encendido el ATS. , esas horas la temp habria subido hasta los 29 -30ªC.
Volví a aplicarles otra con Solabiol por segunda vez, por arriba y por el en envés de las hojas , todo bién mojado.
Como se puede ver en alguna fofto del seguimiento, en la semana 7 por ejemplo, antes tenia un tablón de madera con muchos abujeros para facilitar que suba el calorcito de los calefactores pero no las tenia todas al ser madera, me temo que al ser madera era más difícil de desinfectar bién el armario y obté por poner unos soportes elevadores metálicos con sus abujeritos.
Creo que empiezo a estar enamorado del ATSPro , deberia esperar a que termine la flora para no tirar cohetes si pero por lo que voy viendo me está ganado mucho. Llevaba tiempo cultivando con COBs , anteriormente con LEC y anteriormente al LEC con PHS y esto es en diferencia lo más cómodo y que mejor reparte la luz y por lo que voy observando una mejor o mayor penetración lumíca , creo que esta iluminaria me permitirá que los cogollos arranquen de más abajo. toquemos madera.
Esta semana empecé con el Delta 9 en el riego, las veces anteriores habian sido via foliar.
terminada la semana creo que ya podemos asegurar que variedad es más vigorosa y cual predomina más el feno índico. Como puede observarse las Animal cokies ganan en altura con una distancia internudal mayor. Las OgKush todo al contrario, bajitas y una distancia internudal menor.
Por lo que hace a la altura de las plantas las OGK rondarian entre los 70 ctms y las más altas que vendrian a ser la Animal C unos 90ctms. áprox.

Likes
47
Share


@Ultraviolet
Follow
Apple Pie. mmmmmm
👋Top is a clean cut, no confusion for the plant, road ahead is clear, by completely removing the main growth tip, the auxin source is eliminated. The plant permanently halts vertical growth from that main stem and immediately sends its energy and hormones to the two new, evenly spaced branches just below the cut.
Fimming slightly different because a small tuft of the top growth is left behind, the auxin disruption is temporary and less severe. The plant recovers more quickly and sends its energy to multiple surrounding growth points, often creating four or more new shoots from the same spot. It will eventually regain some vertical dominance after a few weeks if left to its own devices, but with a little more LST, bending the apex to the same height as the rest of the internodes, this shatters dominance, hopefully creating around 8-9 main shoots growing at equal height once recovered and grown out.
Reduced environmental intensity for now and let her focus on dealing with this new stress for a week or two.
When H+ ions are added to soil, the first nutrient displaced from exchange sites is typically aluminum (Al3+), if it's present, followed by calcium (Ca2+), magnesium (Mg2+), and potassium (K+), because aluminum and these base cations have different binding strengths. The order of displacement depends on the lyotropic series, where ions with a higher positive charge and those with weaker binding strengths are displaced first.
The specific order of nutrient displacement is determined by the lyotropic series, which ranks the strength with which cations are adsorbed by soil particles:
Al3+: Most strongly adsorbed, so if present, it will be displaced by H+ ions, leading to increased solubility of aluminum and potential plant toxicity.
Ca2+: Displaced next, as it is more strongly bound than Mg2+ or K+ but less than Al3+.
Mg2+ and K+: Displaced after Ca2+.
The displaced nutrients can be lost from the root zone through leaching, becoming unavailable to plants.
As H+ ions increase, the proportion of acid cations (H+ and Al3+) on the exchange sites increases, while base cations (Ca2+, Mg2+, K+) decrease, resulting in a lower soil pH.
The amount of photosynthesis (water splitting) directly determines the availability of H+ ions (protons) in a plant.
90% of water is for cooling of photosynthetic apparatus the other 10% is split for its H+ among others things.
Carbon sugars, like glucose, do oxidize in soil through a process primarily driven by microorganisms, which break down these sugars for energy. This oxidation converts the sugars into carbon dioxide (CO2) through cellular respiration, a key part of the soil carbon cycle, though some carbon may also be incorporated into soil organic matter. The rate and extent of sugar oxidation depend on factors like oxygen availability, the presence of Fe oxides, and soil redox conditions, which can all influence the process.
My understanding of why we flush.
Just plain water, what does it do?
Strips the medium of salts and nutrients making it empty.
What does that do?
Triggers nutrient recycling within the plant.
What's nutrient recycling?
It is a natural part of plant senescence, which can be triggered once you know the switches. A 24:1 carbon-to-nitrogen ratio will also trigger.
Why won't it trigger autophagy for me?
Nitrogen needs to be gone, gone, gone almost. Ammoniacal (organic) nitrogen takes 4-5 times more water to separate it from soil particles than nitrates so what happens is most people jist flush the nitrates, leave all the ammoniacal in there and this prevents autophagy initiating.
Nitrogen decays differently depending on its form during the dry.
Ammoniacal nitrogen will oxidize in the air, leaving no trace. But nitrates do no decay and turn volatile and smelly and remain trapped until smoked, no matter how long you cure it does not oxidize. This is why you need to trigger it and begin the denitrification process prior to harvest to get rid of all the nitrates. Otherwise, you will smoke it.
Flush till autophagy begins, just make sure you add no nitrogen afterwards. Micronutrients for trichomes. Don't leave the medium empty for 2 weeks, that does nothing but reduce yield 10%ish. Trichomes are another thing. Trichomes themselves are not directly affected by flushing; rather, flushing affects the plant's nutrient uptake, which influences the development and final state of the trichomes. Trichomes are filled with antioxidants in the last weeks, which is what makes them cloudy. A lot of the processing of antioxidants requires energy and nutrients (mostly micronutrients ), so you don't want that soil empty for 2 weeks, you just want the carbon nitrogen ratio 24:1and no higher. She still wants what she needs to ripen.
Processing antioxidants is energy-intensive; heat and light accelerate the rate at which THC converts to CBN. This is why you lower DLI, lower temps. By doing so, you reduce the oxidative workload caused by photosynthesis, which opens up the oxidative capacity for the production of antioxidants. THC is mostly processed at night when the plant's oxidative capacity is generally moreso "free and available" for work
Likes
64
Share


@Hologram
Follow
My bubatz has finally got some sunshine the last few days and she is loving it! 💪😎
She drinks a bit more too (she is busy feeding the hedgehogs..)
i removed the lower branch and leaves bc they are useless
In this stage there is not much to say, i just enjoy how she is enjoying the sunshine
en let the hedgehogs get FAT!😍
Happy growing for all✊
***KISS! growtechnique: KeepItSimple, Stupid!😍
