
Likes
Comments
Share


@THcHunteR23
Follow
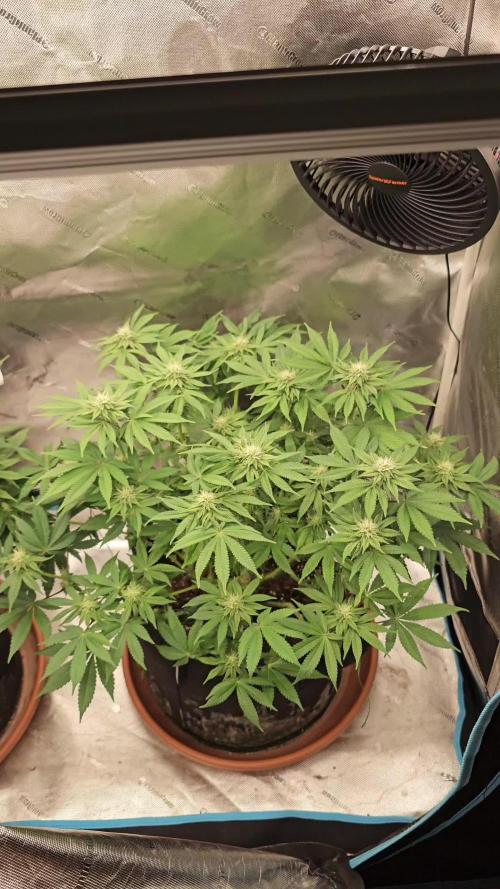
Elle grandit bien mais j’ai de la difficulté à m’ajuster avec se qu’elle demande en
Nutriments et en eau
Légère brûlure de lumière à quelques endroits.

Likes
12
Share


@RookieGrowerTH
Follow
They are on week 7 of Flowering. From weeks 7 - 8 will give them only plain water with ph 6.2-7.
They are almost ready to harvest. As I checked on the Trichome's color 80% are milky, some turning to amber and a bit clear head. I think next week they will be good to go.


Likes
40
Share


@Kitties_and_Colas
Follow
While we're not huge on autoflower plants, this one turned out really nice, not a huge yield, maybe just over an Oz dry but her bag appeal can't be beat.. we may actually grow this strain again but probably outdoors, our autos always seem to preform better in the garden. Thanks for reading and happy growing everyone

Likes
8
Share


@GrownwithLED
Follow
Both plants have almost stopped growing in heigth now and are in full flowering mode now. Barbarian (=AK-47 x Barbara Bud) Plant #1 is 15 cm shorter than plant #2, but a little bushier. Both have grown very well and are strong and healthy. They get more and more flower clusters now and start to fill up all branches. Trichomes start to appear all over...the plants start to get sticky and develop a weak sweet aroma now. Its time to take off the biggest fan leaves now for defoliation, I took a round of pics before and after.
Likes
Comments
Share

@SirNutalot
Follow
She looks good after the high stress
But sadly there was one hermie
He or she have to go ...

Likes
21
Share


@NoProbation4Weed
Follow
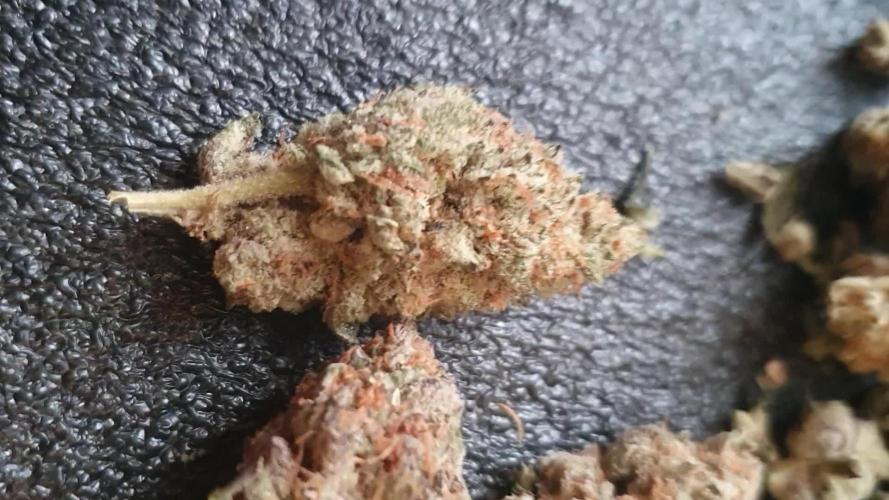
The beautiful Lady comes close to its end.
I removed some crumbly leaves.
It was an absolute pleasure growing this plant. She took the stress like a champ and seems to bring the best Bud from Autoflower yet.
The Smell is absolutely amazing and strong. Fruit-Berry Mix combined with Gelato 😍.
Buds seem to be pretty dense.
last 3-4 days she wont get any water.
Cant wait to harvest 😇

Likes
109
Share


@MadeInGermany
Follow
Hey Guys :-) .
A few days ago, the seeds were sprouted.
I will put one for the GHSC Cup and two in an extra diary.
The reason why I planted 3 seeds right away is because the Wonder Pie is a very interesting strain.
And I'll take cuttings from all of them, and hope to have a beautiful mother 🙏 🏻 🌱.
The seed was planted in Canna Bio. This contains enough food for the first 1-2 weeks before repotting that I only have to mix with Bio Grow Feeding and Enhancer when repotting ፦)
I wish everyone a nice week 👍 👌 🌱.
Green House Seeds Company Cup 🏆
Type:
Wonder Pie
☝️🏼
Genetics:
Wedding Cake x OG Kush
👍😍
Vega lamp: 2 x Todogrow Led
Quantum Board 100 W
💡
Flower Lamp : 2 x Todogrow Led
Cxb 3590 COB 3500 K 220 W
💡💡☝️🏼
Earth: Canna Bio
☝️🏼
Fertilizer: Bio Grow Feeding ( GHSC ) , Enhancer ( GHSC ) , Bio Bloom ( GHSC)
☝️🏼🌱
Water: Osmosis water mixed with normal water (24 hours stale that the chlorine evaporates) to 0.2 EC. Add Cal / Mag to 0.4 Ec Ph with Organic Ph - to 6.0

Likes
36
Share


@OGTrauma
Follow
Im coming closer to the ✂️ time, i tried some pics without the lights on to show a more realistic approach of how plants are evolving besides al the self inflicted plages and nutrients burn , i can wait to the plants mature while im searching for the 🕵️♂️to check if thricome ratio should be mostly amber ... Because fuck im such a sedative whore, big gaz leaks homies!!!!

Likes
11
Share

@Gram_Solo
Follow
Smells amazing!
Survived some mad heat towards the end of flowering. still looking so frosty!
4 plants Harvested and we got 9oz plus an Oz n half of shake n small buds.
update in few weeks once its cured out for abit!
Thanks for following!
👽👽
Likes
4
Share


@Mr_nugs_lover_David
Follow
She is such a beautiful strain to grow,her aroma it's just so amazing like pure mango,it's just like fruit,can't wait to try her,I'm in love with her Aroma and this feno particularly it's purple so I'm very excited,let's see how she keeps developing on her 4th week

Likes
18
Share


@eldruida_lamota
Follow
Que pasa familia, vamos con la cosecha de estas Tropicana Cookies Fast Flowering, de FastBuds.
Por dónde empezar, las flores son bien compactas , y van repletas de resina, tienen tonos rosados por dentro muy bonitos, y tiene un aroma súper dulce aunque engañar engaña porque saber sabe más tropical y cítrica.
Es muy sencilla de cultivar, es de ciclo bastante corto aunque también si le dais una semana más no pasa nada agradecer se agradece al final.
Mars hydro:
Code discount: EL420
https://www.mars-hydro.com/
Agrobeta:
https://www.agrobeta.com/agrobetatiendaonline/36-abonos-canamo
Hasta aquí todo, Buenos humos 💨💨💨

Likes
87
Share


@Wicked_Stix
Follow
Day 33 Gave her a flush and fresh nutrients. Added a little maxibloom. Switched lights to 12/12. Added a 3rd set of 3000k quantum boards for a total of 860 watts.
Nutrients per gallon
.5 tsp maxigro
.25 tsp maxibloom
.25 tsp armor si
.5 tsp calimagic
.1 tsp 90/10 humic/fulvic acid
Ph to 6.0

Likes
49
Share

@MadeInGermany
Follow
Hey everyone 😀.
We arrived the week before last :-).
Since I already know the pheno and had it in my diary, I know how delicious it will be 😍.
Meanwhile every Bud is so heavy that it falls over without support ützen.
Otherwise, there is only adapted Ec water until the move to the darkroom.
I wish Have fun with the update, and let it grow 👍
Strain : Sour Diesel
☝️🏼😍
Genetic:
Diesel x Northern Lights
👍
Vega Lights : 2 x Todogrow Led
Quantum Board 100 W
💡
Flower Lights : 2 x Todogrow Led
Cxb 3590 COB 3500 K 205 W
💡 ☝️
Soil : Canna Terra Professional +
☝️
Nutrients : Canna Terra Vega, Canna Terra Flores, Rizotonic, Cannazym, CANNA Boost, Pk 13/14,
Canna Cal/Mag, Canna Ph - Grow,
Canna Ph - Flores
☝️ 🌱
Water:
Osmosis water mixed with normal water (24 hours stale that the chlorine evaporates) to 0.2 EG. Add Cal / Mag to 0.4 Ec Ph with Organic Ph - to 6.0
💦 💧


Likes
2
Share


@Greenbean420
Follow
One of the plants grew massive! However the smoke wasn’t the best until a good 4 weeks cure. Very hairy buds too which was interesting 😂 Still a nice smoke


Likes
11
Share


@Rwein93
Follow
Ciao ragazzi e bentornati qui con me e il diario della colazione! 🥐🥛☕
Ultima settima di vegetativa questa, domani porterò il programma a 12/12.
Non vedo l ora di vedere la stanza riempirsi di buds.😋
Ho lasciato riposare loro per una settimana intera dallo stress che potevano aver risentito.
Poi nel giorno 35 ho eseguito ancora l allenamento per riempire, più o meno, tutta la superficie del vaso.💪
Mentre le piegavo ho eseguito anche una massiccia defogliazione eliminando foglie e germogli inutili.🤙
Ho bagnato loro nel giorno 32 e 35 con 1 litro soltanto di acqua, dato che il clima è molto umido questa settimana e ha influenzato i valori nella stanza, alzandoli intorno al 70/75%👍
Nel complesso molto bene, sono le ragazze più belle nella stanza e mi sono innamorato della loro struttura solida e veloce😍
Grazie a tutti per aver guardato e restate sintonizzati per nuovi aggiornamenti golosi🙏
Buona settimana e felice crescita🌱🌱🌱

Likes
4
Share


@Rko41
Follow
Les pompons blanc grandissent bien , c’est bizarre elle stretch en s’étirant sans faire beaucoup de feuille en tous cas c’est sympa vraiment différent des autres

Likes
10
Share


@CL_fito
Follow
Buenas.
Se han controlado los parámetros de cultivo, se ajusto la altura de la luz y esto generó un cambio positivo en el cultivo, se realizó el riego con delta 8, eso sí le voy a dar una semana más de vegeta para luego pasar a flora y cambiar el periodo de luz.
Saludos desde chile.
Likes
9
Share


@Exotixchasing
Follow
Day 32, I deleafed a couple days ago once I first seen flowering starting.