


Likes
Comments
Share

@Rare_Terps_5280
Follow
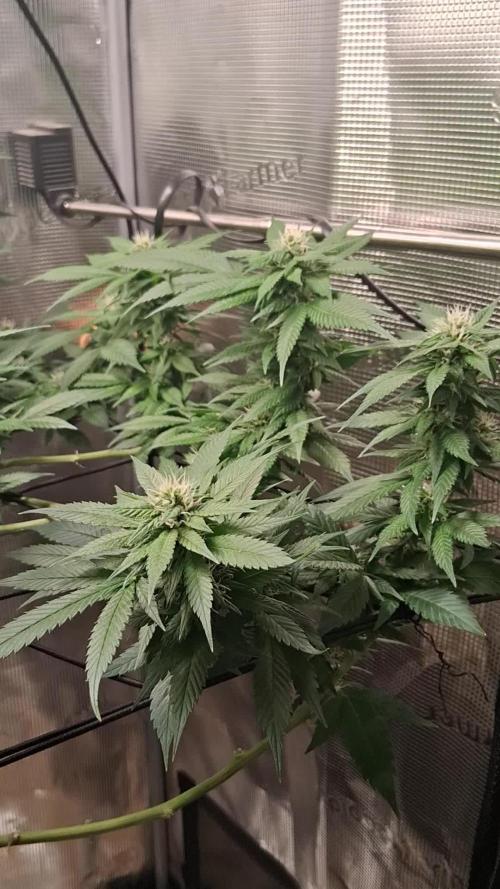
She's really packing on the weight now, lots of tricomes developing, and getting that great earthy aroma goin, got her on bud candy and overdrive, let's she how fat she can get!

Likes
167
Share


@DeepWaterGrower
Follow
🗓️ 7° WEEK FLO // DAY 43-49 (from switch) // DAY 120-126 (from dry seed)
⚡- Light: 30 cm / 250 watt;
⌛- Schedule: 12/12;
🌡️- 22° C - 65% RH average;
📑- PH 6 - EC 2.3;
🌱- During this week the difference between the two phenotypes became even more evident, despite the environmental and nutritional conditions being the same. Pheno #1 is continuing to swell its buds and it's starting to slowly fade. Pheno #2, on the other hand, is getting darker and darker and its buds are not as big as the other one;
🌸- According to the trichomes stage they still need 2 weeks.
🆕- On week 15 I got the TrolMaster TCS-1 by @TrolMaster_Europe and I started to track my grow box data. I will add these info once I harvest!

Likes
38
Share


@IbeBryBry
Follow
Throwing out those tones of purple like there is no tomorrow. I'm impressed as this is my first fastbuds grow, already ordered 2 more 3 packs from them. Definitely excited!!!!
Both are seeming to love the lst and trellis!!!
✌️ ❤️ 🌳

Likes
70
Share


@Insaniac_0
Follow
All feeds with nutes use either a whole ratio, or combination, of "Veg Mix" and "Bloom Mix"concentrates. These are/will be DILUTED in water until a total ppm of add-in is reached using a (Total Dissolved Solids) TDS Meter measured in PPM (parts per million). The "Veg Mix" concentrate will eventually be added-in larger, then smaller, ratios while the "Bloom Mix" concentrate will eventually replace the "Veg Mix" concentrate entirely. The ppm and ratios will be listed when I feed. Veg mix recipe is on week 3. Bloom Mix recipe is on week 5.
Day 91/21
Replaced the small modified tomato ring with a full size 3 ring tomato support ring so I could support every branch. I made this decision on seeing a lot of my 90 degree breaks from yesterday as still mostly 90 degrees.
I also removed the tape from around the split and placed a wire tie under that trunk to ensure it was secure. After that I also placed a tie on each cola split just past my breaks and another higher up as an upper support.
VPD was great aagain today. 74F/55%RH/ Auto ILV but raised the fan setting from 4 to 5 so it didnt have run as long to get it back into range.
PPFD was a bit off yesterday and today from all of the sudden changes, But I raised my lights today and returned the settings to 750 max and 550 lowest.
This meant that I needed to move my fans as well. They are now on medium setting and all were checked for movement to as many branches as they can hit.
Day 92/22
Watered for salt flush today. Used 3 gallons of purified water at 7.1ph water no additives. PPM was about 70 after ph'd. Ended up with ~ 1.25 gallons of runoff that showed 5.95 and 5.98ph on two meters. Top soil tested at 6.44, 6.63, 6.36, and 6.47ph for an avg of 6.475. Runoff also showed 1540 ppm
VPD was controlled with having the door open for a few hours. Temps and humidity are 72F and about 50%RH with the door open, and about 75F and 55%RH with it closed. ILV still on auto fan setting 5.
PPFD was adjusted to 820 max and 600 lowest - I used 1 hour total of IR at mainlight on/off with 15 minutes before and after switch. She got another 45 minutes of UV today as well. I plan to increase to 1 hour tomorrow.
Day 93/23
Week 3 of flower and most all is well. I did however find some light burn. I say light burn because the only conditions that changed was 15 minutes more UVA today and the spots are on the leaves closest to the light. Feed yesterday was plain ph water and it improved both the topsoil and bottom runoff ph so I dont think it's a nute issue. My solution is to take control pics and reduce UVA back to 45 for another day or two to see if the condition persists or advances. Otherwise PPFD was about 820 down to 600. I used 1 hour of UV and 1 hour of IR at lights on/off
Other than that it was a lazy football day while I just leave her alone. VPD was normal with humidity easy to control at 55%RH or less and temps ranging from 74-76F during the day and down to 66-68F at night.
Day 94/24
Checked in on "light burn" control leaves and took pictures. My analysis is to reduce lights a little more so now max is 795ish. Went ahead with 45 minutes of UV light at mid day and 1 hr IR on the same standard I have been using.
Fans still on medium and since I dont believe the spots are related, I plan to leave them on that setting. Overall I dont see much need to change anything at the moment with the spots not getting much worse or at least not that noticeable other than what has happened already and I already reduced the lights a little. If I can identify any more new spots today or tomorrow I will reduce by another 25ppfd. And if not, then the next day I will try 1 hour of UVA again.
Temps and Humidity are controlled at the same 74-76F and 55%RH or lower. My plan is to keep RH that level throughout and possibly try to reduce again to as close to 45% as I can get. (edited)
Day 95/25
Reviewed suspected light burn and didnt see any progression either yesterday or today against my control pics from the day before. So I went with running UVA for 1 hr at mid day again today. Still using 1 hr IR on the same standard I have been using.
VPD was good today with same settings of 73-76F and 55% or lower RH.
Day 96/26
No issues to report today. She still has what looks like light burn on the older upper leaves, but doesnt really look to be getting worse and the lights are not getting brighter by growth anymore so I plan to leave them where they are and back them down if I see it get more progressive.
Conditions in the tent are the same as yesterday... like little to no vertical growth in two 2 days and no need to change anything. I 'do' adjust the ties daily to ensure they are not creating a pressure point. Most aren't even supporting anything and some are just pushing the cola back or out from others.
PPFD is 800 max and lowest is about 580. I ran 1 hr UVA midday with the same 1 hr IR at 30/30 with main light schedule that I have been running.
Temps steady. 73-76F in the day and 66-68F after lights out. RH% is 55 or less with the fan on auto.
97/27
Watering day. Started by testing /calibrating meters. Used 2.5 gallons of de-chlorinated tap water with starting ppm of 227, added ~700ppm of 100% Bloom Mix concentrate (actually 686ppm added) and ph balanced feed to ~7.0 tested on two meters. Fed until bottom drip began and got ~7cups in runoff after about 10 minutes of drain. Runoff produced 2 meter tests of 5.8ph with 1520ppm. Top soil was tested 4 times for an avg of 6.3752. Next feed will be sooner, thinking like in 4 days instead of 5 and I can adjust if she seems to dry out again. I'll be looking for ~1/2 gallon of runoff to estimate next feed from.
Light burn doesnt seem to be getting any worse. UV lights are doing 1 hr a day, midday, for the rest of the week and then I will increase a little per day each week until harvest. IR is still doing the same settings until harvest as well. 1 hour with 15/15 before and after main light schedule and 1 hr total.
VPD is controlled with no issues of temps or RH exceeding set limits. 73-76F and 65-68F overnight with no more than 55%RH while the ILV is set to auto.

Likes
4
Share


@GLOrganics
Follow
At this point i was a bit worries because despite trying to match indoor hours to outdoors gradually, and not going below 14, plants started to show signs of flowering. After some conversations i dicided to wait for it to reverse. First time this happened to me. If somebody has a protocol please let me know.

Likes
70
Share


@Roberts
Follow
Big Fat Wedding Cake grew well under the Spider Farmer G5000/UVR40 lights. Nice frosty colas with a spicy kush smell. Looks very potent and tasty. I did burn her in flowering when the nutrition got too strong for her. My bad. She still turned out great. Thank you Spider Farmer, Athena, and DutchFem Seeds. 🤜🏻🤛🏻🌱❄️🌱
Thank you grow diaries community for the 👇likes👇, follows, comments, and subscriptions on my YouTube channel👇. ❄️🌱🍻
Happy Growing 🌱🌱🌱
https://youtube.com/channel/UCAhN7yRzWLpcaRHhMIQ7X4g
Spider Farmer Official Website Links:
US&Worldwide: https://www.spider-farmer.com
CA: https://spiderfarmer.ca
UK: https://spiderfarmer.co.uk
EU: https://spiderfarmer.eu
AU: https://spiderfarmer.com.au
G5000 Light Amazon Link:
amzn.to/4643esa
UVR 40:
https://www.amazon.com/dp/B0BR7SGTHS
Discount code: saveurcash (Stackable)

Likes
32
Share


@KootsFullAuto
Follow
Mephisto forum stomper, have grown a couple before and I must say this is my best looking one. Seems like I should have some really good smoke coming up


Likes
5
Share


@DivineBuds420
Follow
Zweite Woche im Oktober, das Wetter wird immer unbeständiger, die trychome sehen gut aus - Zeit für die Ernte.
Ich habe erstmal einige Fächerblätter ohne Harzbesatz entfernt und den Rest zum trocknen aufgehängt.
Aufgrund von Platzmangel teils in Umzugskartons und teils im Netz.
Nach einer Weile habe ich die Blüten dann vom Stengel getrennt, Manikürt und ins Glas verfrachtet.
Aufgrund der Menge war ich bei der Maniküre nicht all zu penibel und habe auch einiges zur späteren Weiberverarbeitung im Eisfach gelagert.


Likes
46
Share


@Visions
Follow
Week 5 is here.
11 days till day 40. We should see some nice dense frosty as FUCK buds. Slight I mean SLIGHT burn. Thats okay I'm figuring out what she can take. Absolute Monster.
Another strip on day 32 then we are done fucking with her until harvest. Enjoy the madness and fuckery 😈
Going to cut back on grow now to 1/8th tsp and keep using just bloom and flower fuel with some raw sweet soon. Trying new methods. One last strip tomorrow morning friday.
Likes
87
Share

@Roberts
Follow
Banana kush autoflower was a okay grow. She was very hungry and threw my ph off several times. So she had some leaf damage through flowering. She had more potential then I got out of her. Still a good grow and lots of sweet flower. Thank you Medic Grow, and Athena nutrition. 🤜🏻🤛🏻🌱🌱🌱
Thank you grow diaries community for the 👇likes👇, follows, comments, and subscriptions on my YouTube channel👇. ❄️🌱🍻
Happy Growing 🌱🌱🌱
https://youtube.com/channel/UCAhN7yRzWLpcaRHhMIQ7X4g

Likes
34
Share


@Canna96
Follow
Hey now, hope everyone is having a great week. This week went well for the Glueberry Auto OG. She started stretching and grew from 15 to 26 inches this week. I did start to transition her to flower nutrients today, and I am now feeding her silica, cal mag, and half veg and half flower nutrients. I will switch to 75% flower and 25% vegetative nutes next week and then to all flower the following week. I do not wish to totally cut off the veg nutrients yet, as I am fine with her growing another 12 inches or so, but not much more as this light is extremely powerful.
I am running the Medic Grow Spectrum X in V1 (blue veg spectrum) and have cranked it up to 100% this week. I am running the UV/IR bars for approximately 75 minutes each day at the end of light cycle just prior to lights off. I will be transitioning to the F1 (red flower spectrum) as well as increasing the amount of UV/IR the ladies are exposed to.
After approximately a week of feeding fully Flower Nutrients, I will also utilize a bloom booster (PK Booster) for the final couple of weeks before flushing her for approximately 5 days before harvest. Not much to do this week except keep the reservoir clean, full, and in the proper PH range. If any colas get crazy higher than the others I will correct, but other than that she can do her thing from here on out.
Thanks for stopping by, Stay Safe and Blaze On!!! 💪
Website: https://medicgrow.com/
https://growdiaries.com/grower/medicgrowled

Likes
9
Share


@Piorkeed
Follow
Week 10 (27/03 - 02/04)
During the past week the blue cheese started to change the colors of pistils into brown. All plants seem to be healthy and next to the end. During the past week I bought an iHub power strip in order to change my self-made control system, but at this time the iHub app is far useless; it often loses the settings and it randomly turns off/on the outlets. I hope that Mars Hydro will fix these bugs soon, it is annoying considering that the power strip is sturdy and well built as the rest of their products but the app that should control everything it isn't.
During this week I'll change the nutrients to plants and I'll check the trichomes.
27/03 D64: -
28/03 D65: one liter of tap water each @ pH 6.3. Trichomes check: majority are cloudy, especially on two fat bananas, few amber
29/03 D66: one liter of tap water each @ pH 6.2
30/03 D67: one liter of tap water each @ pH 6.0
31/03 D68: one liter of tap water each @ pH 6.2. Trichomes check: Fat banana #2 has almost all trichomes cloudy and few amber; Fat banana #1 has majority cloudy, very few amber; Blue cheese has cloudy and few crystal
01/04 D69: one liter of tap water each @ pH 6.3
02/04 D70: -
Likes
27
Share


@2Byte
Follow
2 months of veg in the books and easily the best looking DWC veg run I've had yet! She's on 12/12 as of tonight and I can not wait!
Likes
7
Share

@Thomas86
Follow
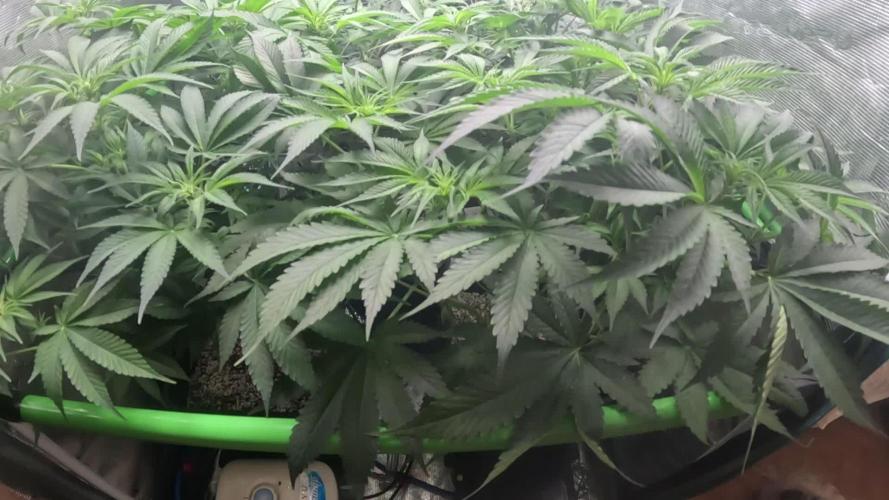
Raised Ec to 1.7, the banana punch is further along than the Cherry and has some trichs on the leaves already despite the buds being in a early stage, the Cherry Cola continues to grow in height and overtook the other this week, I recalibrated my Ph/Ec Pen to ensure accuracy. humidity is quite high at the moment but I expect it to drop where I live in the next few weeks hopefully! 3 plants in the 80x80cm tent has the humidity higher than id like but the plants seem happy enough for now. The 3 are guzzling the water, Not sure exactly how much but I topped up the reservoir by at least 30 liters this week.
Likes
3
Share

@CBDLord
Follow
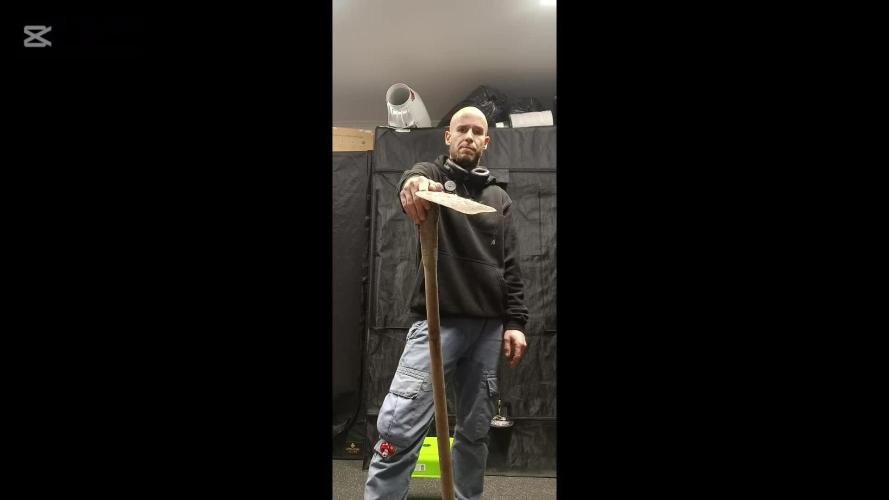
Levágtuk az alsó hajtásokat. Átrendeztük a növényeket, hogy egyenletesen kapják a fényt.

Likes
4
Share


@ShambhalaGardens
Follow
Everything is looking good. Gave these girls a shot of recharge and fish shit. Prepping there new homes and getting ready to transplant.

Likes
11
Share


@StickyFingah420
Follow
91 días y el ciclo de vida de esta gran planta ya está completado.
La verdad me pasé un poco en el tiempo de cosecha, porque maduró antes de lo previsto y es importante cosechar no sin antes hacer un buen lavado de raíces para que así la cosecha no tenga sabor a químicos y sales que acumula el sustrato durante el proceso.
Estoy conforme con los resultados, las flores no son tan grandes como esperaba pero si son bastante rocosas, compactas y salpicadas de olorosa resina dulce que cubre todos sus brotes.
Gracias a la gente de Sweet Seeds por la confianza y enviarme estas semillas de tan buena calidad.
Continuaré con el reporte luego de haber secado y curado y así dar un informe de humo y sabores/olores más completo.
Hasta entonces, Buenos Humos! 👽

Likes
28
Share


Likes
79
Share

@Roberts
Follow
Mega Power plant auto grew great. I ran her a bit long and she foxtailed on me. I was aiming for more of a good night kinda smoke. Hopefully with the relaxing qualities of this strain, plus the extra ripeness I may have a winner. I won't find out likely for about 2 months. Between dry time, and others ahead of her with my schedule I am getting them done as fast as I can. Very frosty flowers. Has a sweet earthy fruity smell. I have a harvest video that would not upload. The video can be found on my YouTube channel. The Viparspectra P4000 light worked great, and is of excellent quality from my experience. Thank you Viparspectra, and Spliff Seeds.
Thank you grow diaries community for the 👇likes👇, follows, comments, and subscriptions on my YouTube channel👇. ❄️🌱🍻 Happy Growing 🌱🌱🌱
https://youtube.com/channel/UCAhN7yRzWLpcaRHhMIQ7X4g
