
Likes
Comments
Share


Likes
9
Share


@SanderG
Follow
Bought clones that were vegged for four weeks and are now in day five of flowering. I suspect one of the plants is a different strain and not Pineapple Express but we'll see.


Likes
15
Share

@MaryJaneJo
Follow
Apple Strudel week summary can be closed in one sentence__she loves to be fed.
I have her drip set to run every 8h, but when I am around I always give her a few extra minutes. It makes her happy. My human form is too small to deal with __this magnificent monster of a plant__ getting her in and out of the wardrobe gets harder every time. So I do all maintenance ASAP to avoid unnecessary mishaps: topped her up with coco coir, cleaned the pipe, sorted the fans & calibrated & cleaned the pH meter.
The second plant is parked under the drying space, under the far-red Sylvania lamp. It is only a temporary solution __when the arctic weather eases, she goes outside.
Peace.👽
P_S_ I just watched an Al Jazeera full programme on UFOs. They got so many things right. Scary.
Likes
3
Share

@Lvnsource
Follow
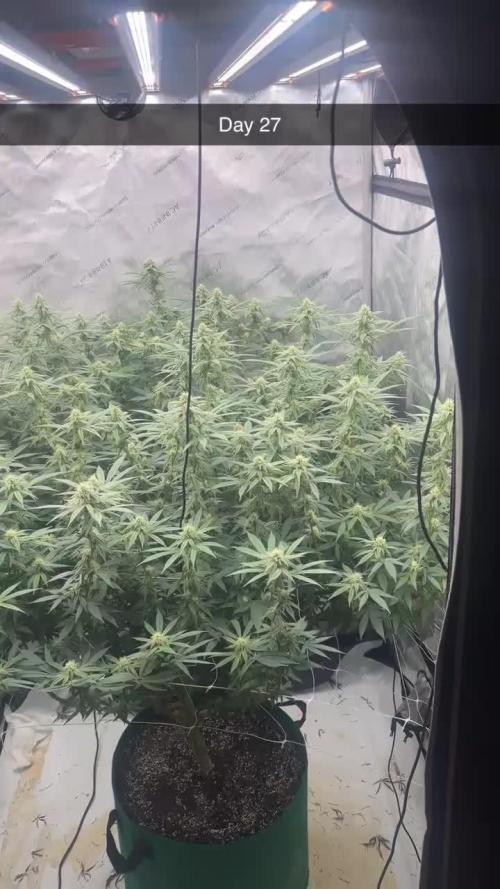
Feed Log:
D: 86 - 10L - [ph 6.1] SI[0ml] ,Vega[0ml] , Flores[20ml],Ca/Mg[2.5g & 1.5g ] INPUT; [1.02 EC] OUTPUT; 4.7L ,6.3 pH , 1.7 EC Previous irrigation: D:83
She’s doing much better now: the lower EC and exclusion of vega should stop the fox-tailing. The buds are also starting to get dense which is nice
Likes
14
Share


@Thinkingreen_420
Follow
La semana se nos complicó con algunos excesos en 4 de ellas que no aceptaron la misma cantidad de nutrientes y ya estamos regando solo con agua en su ph adecuado. Saludos!


Likes
69
Share


@Hempy_The_Kid
Follow
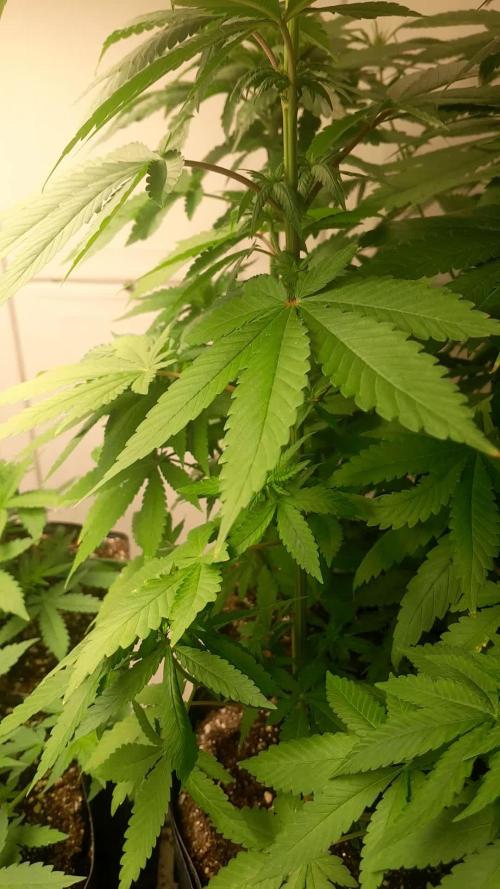
Holy crap its big!! Will be back with a harvest update.
By the way I'm 6 foot 4 inch tall


Likes
13
Share


@Popothamio
Follow
Pues esta es la última semana el sábado 12 corte las red mandarine y hoy martes le toca a la 8 ball

Likes
3
Share


@kissrubb
Follow
continuamos la semana apunto ya del final del ciclo de estas maravillosas geneticas, ya hemos cortado una fruit gum y esperamos a que se seque para hacer una cata

Processing
Likes
16
Share


@fvckinginfamous
Follow
First day of second week, its been 8 days since this babies sprouted, and from my newbie eyes, they seem to be growing quite happy and healthy
Starting to add Bio/Grow since yesterday, going for 1ml/l for at least 2 or 3 more days, then doubling the dosage to see how they handle
Day Number 11 Update>
Plant 2 in the center seems to have much wider leaves than 1 and 3, obviosly because its recieving more light than the others
Upping just a tiny bit of the Bio/Grow since today
Likes
6
Share

@Stonerapaisana
Follow
22/08/2025 - Apenas tenho regado cerca de 1L de agua de 2 em 2 dias por vaso.

Likes
6
Share


@HowtoBubatz
Follow
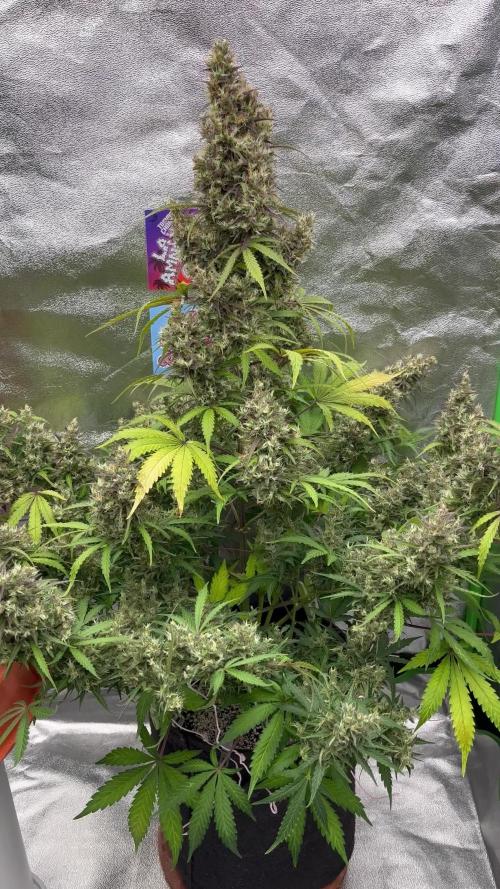
We’re officially in the final week for my Strawberry Gorilla Automatic from Fast Buds! 🌟
This beautiful girl has had a very quick flowering phase, but looking at the trichomes, they’re right where they need to be so no complaints!
She will be flushed throughout this week and then harvested and hung up to dry next week.
I’m super happy with how she’s developed!😋


Likes
5
Share

@Jardineiro_Br
Follow
Voltamos para a estufa, as plantas estão bonitas mas ainda não mostraram as características do sexo. Acredito que mais essa semana e teremos uma definição, pois será a segunda semana no 12 /12.
Likes
6
Share


@midnitrtoker
Follow
Everything seems to be going slow still. Did one last heavy defoliation to get good airflow going. I added the Ts1000w from Mars Hydro. I’m still feeding the usual 3.0EC from Floraflex. Smell is more on a minty side I can’t really describe it. Other than that nothing else. See you all next week.
Likes
9
Share


@TrialAndErrorGrows
Follow
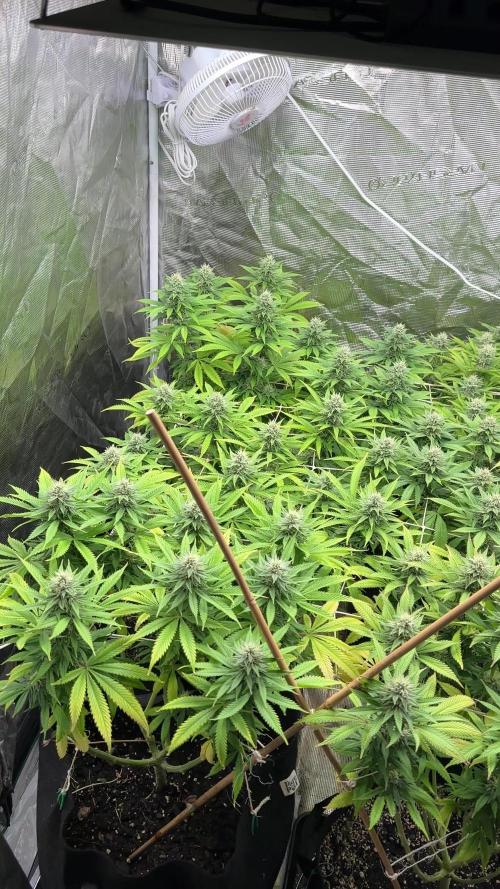
Ok week 5 veg. I usually just let the plants grow through the trellis net.
This time I tried a little bit of everything. I did a fairly big trim on leaves. I tied down branches with twist ties and then lowered the trellis net overtop. I may have gone a little overboard. But looking at other peoples diary’s I am seeing a lot of techniques being used so I will giver a shot. Trial and error.
**Update**
Plants growing up through trellis nicely. After tie down and trim.

Likes
12
Share


@Hydronaut
Follow
Dropped temperatures to 55-60F, added 2 hrs of darkness, and adding only water from 250 ppm - through finish.
I guess I have to make them purple?
Most trichomes are cloudy, so there isn’t time to freeze them to color. Going to chop in two days and call it a grow!
Dumped half the res and dropped ppm to 0 and added FloraKleen. Will chop in a day or two.
The bells toll…
Likes
31
Share


@BudXs
Follow
This week i kept doing what i do. Also i germed some mothers for the big show


Processing
Likes
6
Share


@rockbo47
Follow
SUMMARY: The OG has bounced back from the pH issues now after giving all watering/irrigation at a pH of 6.5. I continued with the updated GWE mid bloom nutes for the OG and Sensi Garden peak bloom nutes for the Amnesia.
I also continued with some light defoliation this week removing the odd lower leaf and some fan leaves covering bud sites that I couldn't tuck.
DAY 78
--------
Thursday 19/11/2020
I fed the plants. GWE 2020 updated Mid-bloom nutes for the OG and Sensi Garden Peak Flower nutes for the Amnesia. Although I only mixed these nutes and pH'd to 6.4 on Monday I always check again before and the readings had changed - I don't think my pH pen is the best (yes I keep the tip moist). I didn't have time to pH again and tbh after spending 30mins doing this the other day it can get to fuck and stay as is.
OG (in) = 5L pH 6.4
OG (out) = 1.05L (21%) pH 5.7 [0.7 drop]
Amnesia (in) = 4L pH 6.2
Amnesia (out) = 1.4L (35%) pH 5.9 [0.3 drop]
The plants look healthy still with no signs of issues and are both a great colour so I think they're doing just fine. The OG has bounced back from the pH issues now and is really blooming fast, much faster that the Amnesia which makes me sad as I will inevitably cut her down early...I think she has the potential to be a beast judging on bud development so far. The Amnesia on the other hand...I'm starting to become a little disenchanted with her due to the very slow progression of the buds - I was expecting bigger buds but I don't think the genetics are the best (freebies from Seedsman).
DAY 80
--------
Saturday 21/11/2020
I fed the plants. GWE 2020 updated Mid-bloom nutes for the OG and Sensi Garden Peak Flower nutes for the Amnesia. Although I only mixed these nutes and pH'd to 6.4 on Monday I always check again before and the readings had changed - I don't think my pH pen is the best (yes I keep the tip moist). I didn't have time to pH again and tbh after spending 30mins doing this the other day it can get to fuck and stay as is.
OG (in) = 5L pH 6.4
OG (out) = 0.9L (18%) pH 5.8 [0.6 drop]
Amnesia (in) = 4L pH 6.4
Amnesia (out) = 1.55L (39%) pH 6.0 [0.4 drop]
The humidity has been between 43-55% the last week which is good. I turned the heat up to 25°C a week ago which seems to have helped bring the RH down.
DAY 82
--------
Monday 23/11/2020
I fed the plants. GWE 2020 updated Mid-bloom nutes for the OG and Sensi Garden Peak Flower nutes for the Amnesia.
OG (in) = 5L pH 6.4
OG (out) = 1.1L (22%) pH 6.0 [0.4 drop]
Amnesia (in) = 4L pH 6.3
Amnesia (out) = 1.25L (31%) pH 6.1 [0.2 drop]
The RH has been lower the last week or so and it seems to be due to the defoliation I've been doing every time I water/irrigate (removing a few obstructing/pointless leaves). I think because its such a small space the removal of the leaves has allowed for a constant 15-20% drop and so its right where I want it now at 40-50%.
DAY 84
--------
Wednesday 25/11/2020
I watered the plants with pH'd tap water as my rainwater supply has dried up a little.
OG (in) = 5.5L pH 6.3
OG (out) = 1.17L (23%) pH 5.4 [0.9 drop]
Amnesia (in) = 4L pH 6.3
Amnesia (out) = 1.2L (30%) pH 5.4 [0.9 drop]
No idea why there is a drop in pH of 0.9 for both when there has been a steady trend of it getting closer to the input value. But its expected to vary and 0.5 either side is standard I believe. The Amnesia is taking forever to fatten up, if it ever will now at this point. I know theyre only getting 12 hours of light but this is SLOW!


Likes
50
Share


@Igrowneil
Follow
Well these girls are ready to be harvested week 9 day 0 - total growing seed to harvest 63 days for sid frosty purple buds that are definitely packing weigh for such small plants ,
Growing these girls have been really super easy and as simple as watering , I did stress these girls out definitely, resulting in my stress creating the biggest plant at around week 4 a hermi and had to be removed this wasn't anything related to the strain or seedbank I do take full responsibility for the hermi .
Colours around the top buds have lovely purples are green hues frosted in white resin , these are frosty 👌 ,
Okay these plants have grown that good I've ordered more for the next run to try these girls again as they amazing,
Girls scout cookie's from @zamnesia have become my top 3 strains grown if this girl wins any awards it would become the second best in my growing time for convenience of growing for results of these type of dense indica nugs are bigger than golf balls and look amazing 👏
Using ripen and will harvest on day 63 , normally I grow my plants untill I think harvest time is due thoe I never chop early as I made this mistake once so bud devolpment is what I watch most the bottom buds must be firm and ripe not just the top buds as this is what leaves the popcorn crap , underdeveloped buds and absolutely a waste of time
Moving to LED was harder than I though 😪
Watering mistakes and light intensity stunning growth of plant without question I lost alot of yeild but still gained enough to make it affordable and quite enjoyable. Will only start fading plants in there last week now I've done some of the girls way to early but learning is everything . Please like and follow I've 20 new plants starting this week
One plant is super small but stacked some of the biggest nugs in the room with purples and greens frosted in white its grew fantastic
The other grew naturally and would be great in a SOG 10 liters , big frosted nugs , literally waiting on the bottom finishing up and the buds becoming somewhat firmer and more ripened , no point cutting early at this point