


Likes
Comments
Share

@DogDoctorOfficial
Follow
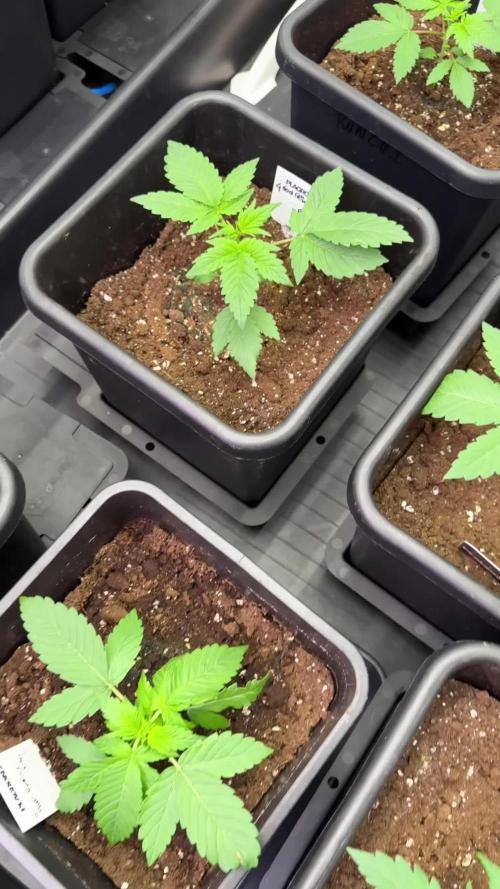
🌱 Week 3 | Purple Haze Photo | Folder 6A | Building the Foundation
Every phenotype tells its own story, and this Purple Haze is beginning to reveal exactly the kind of structure I was hoping to see. Looking back at the photographs from the beginning of the week and comparing them to where she stands today, the progress has been remarkable. The increase in leaf size, stem thickness, and lateral branch development shows that the plant has settled comfortably into her environment and is now entering a period of rapid vegetative growth.
This diary is part of my Project Blue series, where every plant receives its own individual journal. Although they all share the same environment, nutrition, and cultivation method, documenting each phenotype separately allows me to observe the subtle differences that make every plant unique. Two seeds from the same pack can behave very differently, and that’s exactly what makes growing from seed so fascinating.
Like every plant in this project, Purple Haze is being grown using the 12/12 From Seed method. Instead of giving the traditional vegetative light schedule, the plants receive a flowering photoperiod from the moment they emerge. This technique keeps the plants compact while still allowing them enough time to develop a strong structure before flowering naturally takes over. It’s an approach I enjoy because it produces efficient, manageable plants while still allowing each phenotype to express its personality.
Throughout the week the environment remained extremely stable, providing the consistency young plants need to thrive.
Environmental Conditions
• Day temperature: 27°C
• Night temperature: 25°C
• Relative Humidity: 55%
• Root Zone Temperature: 21°C
• Nutrient Solution Temperature: 20°C
• pH: 6.0
• EC: 1.3
• CO₂: approximately 666 ppm
• Light Schedule: 12/12
• Average PPFD: 600–700
Maintaining these parameters allows the plants to dedicate their energy to healthy growth rather than constantly adapting to environmental fluctuations.
Feeding Schedule
This week the nutrition remained focused on root establishment and balanced vegetative growth using the Plagron Terra line:
• Terra Grow — 1.8 ml/L
• Power Roots — 1 ml/L
• Pure Zym — 1 ml/L
• Sugar Royal — 1 ml/L
The goal isn’t to push maximum growth as quickly as possible but to encourage strong, healthy development while building a vigorous root system capable of supporting heavy flowering later in the cycle.
A Beautiful Structural Evolution
The difference between the first photographs of the week and the last ones is immediately noticeable.
The stem has thickened considerably, becoming sturdy enough to support future flower production without any assistance. Internodal spacing remains tight, creating a compact plant with multiple future flowering sites already beginning to establish themselves.
The leaves are broad, flat and richly coloured, showing no signs of nutrient deficiencies or environmental stress. New growth emerges with a healthy lighter green before maturing into the darker foliage characteristic of vigorous vegetative development.
Perhaps the most exciting change is the development of the secondary branches. Each node is now pushing strong lateral shoots, giving the plant a naturally symmetrical structure that should translate into an even canopy during flowering.
Why I’m Using Leaf Tucking Instead of Defoliation
One of the techniques I’ve been using throughout the week is leaf tucking.
Rather than removing healthy fan leaves, I simply tuck them underneath neighboring branches to expose the developing shoots hidden beneath the canopy.
This offers several advantages:
* More light reaches the lower branches.
* Airflow improves naturally.
* The plant keeps all of its solar panels, allowing maximum photosynthesis.
* No recovery time is required because nothing is removed.
Young plants need every healthy leaf they can keep. Fan leaves are the engines that drive growth, so whenever possible I prefer repositioning them instead of cutting them away. Defoliation can always come later if it becomes necessary, but at this stage gentle canopy management is more than enough.
Looking Ahead
Purple Haze is quickly becoming one of the strongest structured plants in the room. She has responded beautifully to the stable environment, balanced nutrition and simple canopy management. Every day she’s producing more side branches, larger leaves and a noticeably thicker main stem.
If she continues at this pace over the coming weeks, she should enter flowering with an excellent framework capable of producing an even canopy and plenty of well-positioned bud sites.
Sometimes the best training isn’t about bending, topping or cutting—it’s simply about giving the plant everything it needs and then getting out of its way.
A huge thank you to Plagron, Zamnesia, GrowDiaries, and everyone following this Project Blue adventure. Mr. Baggy made his usual inspection this week and left with a big smile. According to him, Purple Haze has officially entered her “future forest” phase, and judging by the way she’s growing, it’s hard to disagree.
Growers Love 🌱🛍️

Likes
50
Share


@Igrowneil
Follow
Hey so the girls finished the end of week 6 looking super happy again 😊 this hasn't been easy this run watering I've had quite a few mistakes on my part overwatering though giving the girls an extra day between watering seriously helped under LEDs .
The girls are growing amazing and some girls are in the ending stages of there flowering cycle putting on weight and growing dense buds , at the moment the girls scout cookie's is gonna be finished for week 8 dead on and is ultra dense , something I've noticed with these girls , thicker stems , more support , denser flowers and overall general health seems really improved moving away from the HPS , going to start some on Terra aquatica RIPEN for thoes colours coming to the end of flower 🌼
This week I'm able to describe weather they taken there indica hybird or sativa genetics also weather growth is going well or bad depending on specific strains . All girls are now in flower so there colours are starting to show in one of the dosidos having nice purple buds 💜
Girl scout cookie's
Amazing growth from the smallest plant is nearly at harvest with massive dense nugs its truly a little freak of a plant displaying the purple leaves underneath
The other girl scout cookie's is doing amazing and was left to grow normally the other in LST went hermi on me 2 weeks previously which was a sure disappointment being my biggest plant at that time but growth seems great on this strain for harvest times although plants are smaller than I normally get the yeild might surprise us at the end 😀
Gorilla glue
Sporting a solid structure and vigour like I've only ever seen on anything containing gorilla glue genetics and going into late flower now , one plant is seriously feeding a high level of nutes , greedy beware and make sure to keep plenty of everything at hand for max growth . Some leaves are starting to show slight defenices alothough im not worried as towards end of flower this plant is ģonna look seriously cool
Runtz 🚫
Girls are gonna be the biggest yeilders thanks to thoes skittles and hybird gentics coming from this strain donating its sativa high yeilds to this plant , two are late flower one is still stretching and is the biggest girl in the room by number of leaves and size , these strains end LST to provide enough space and light for these girl to promote there best traits . Feeding these girls are modest and not overall big feeders so it's not bad growing for beginners these girls will need to get a good few of there fan leaves removed to promote airflow and heat exchange
Dosidos
Girls are starting to pick up now , one has even rewarded us with out of this world purple buds 💜 I love my purple 💜
Growing well under LST although they has a slow start they seem to be picking up so heigh and I do reckon I'll get at least 28 grams a plant
Lemon haze
I've always misjudge the sativa strains as uncontrollable for a small room but I've been mistaken as these are looking to be good yeilder
Blueberry
Very tempermental, this is such a hard strain to keep happy in general it's been a pain in the arse ,
Headlight kush auto
These are the same very tempermental and a decent strain but doesn't have great vigour like the ZAMNESIA seeds seem to be looking great and growing amazing these girls would need another run but at the moment I'm not happy about overall growth

Processing
Likes
16
Share


@TheWeedPimp
Follow
Ready to harvest soon! Those colors are amazing! Never seen that in this color

Likes
17
Share


@eldruida_lamota
Follow
Venga familia que ya viene la cosecha de estas finta F1 de ZamnesiaSeeds, que ganas que tenia ya de darles machetazo, me estaban dando muchos quebraderos de cabeza.
Las flores no son para nada llamativas, una variedad más cruzada con rudelaris, que para mi gusto es perder el tiempo y el dinero invertido en cultivar cosas así… no merece la pena en interior, el ratio de gramo watio se me quedó en 0.5 , de los no peores resultados que tuve en los últimos 5 años.
a sido una genética con la que no disfruté nada cultivarla, es complicada, es bastante sensible.
Las plantas en sí se quedaron enanas y para nada fue lo que esperaba, me recordaron a las autos que plantaba en el 2012…
Agrobeta:
https://www.agrobeta.com/agrobetatiendaonline/36-abonos-canamo
Mars hydro:
Code discount: EL420
https://www.mars-hydro.com/
Hasta aquí es todo , espero que lo disfrutéis, buenos humos 💨💨.



Likes
2
Share

@DevilsBud
Follow
Start of week 2
There growing like clock work taking the first nutrients like a champ and now we have improved there invoirment they going to take off.
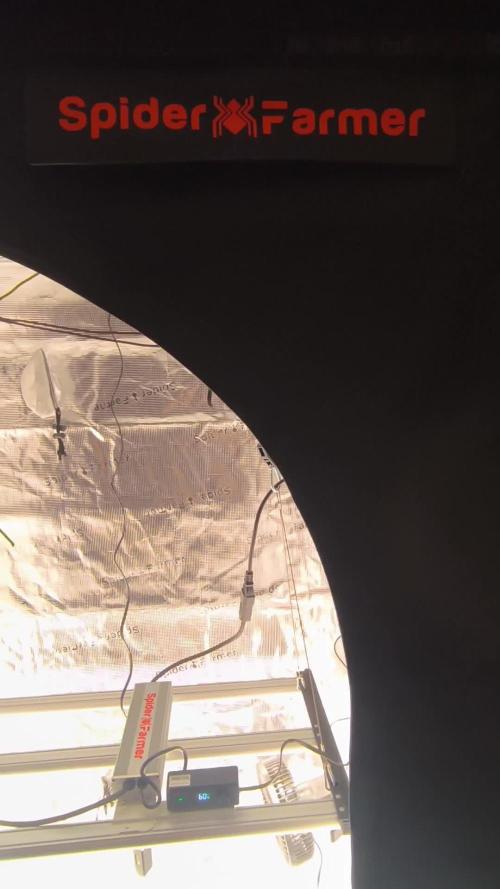
Finally have put up the new setup from spider farmer together and I am very pleased with a modern version more control and can watch from distance what's going on .
More info and picture Tru the week

Likes
5
Share


@ChiloteAnonimo
Follow
- Día 1 de la segunda semana de flora con riego foliar de calmag
- Videos tomados día 2 de la segunda semana

Likes
71
Share


@Nor_Cal_Kannabliss
Follow
So these Cream Cookies were really easy to grow! Almost too easy that I neglected them for a week or so and then found two of them covered in Aphids. We tried everything we could to save #1 & #2 but It was a battle that we eventual lost. They are in a bag in the freezer getting ready to be bubble hash. #3 to my awe and surprise has survived through thick and thin. Good and Bad. And will be my only smokeable "flower" from this run. That said I will run these again but inside in a controlled environment as it seems my FastBud Girls were prone to the aphids and caterpillars.
Reguardless I'm super impressed with the structure and just look of the plant overall. Can't wait to smoke #3!!!
The frozen bag of hash weighs in at 203g and includes the mutant #3 smoothie auto from my other diary which also was overrun with aphids. *Will update with dry numbers*

Likes
52
Share


@GuerrillaNo_4
Follow
OVERALL:
~ Very happy with the grow, I really dialled everything in well this run.
~ She grew super fast, I put it down to the constant oxygenation of the rootzone along with consistent and constantly optimized light DLI and leaf to air temp variance. The extra Co2 helped push the plant to its limit in terms of heat, allowing it to push its hardest.
~ The lack of HST and Defoliation I feel let it finish faster due to lack of stress and stunting. The faster finishing time along with the big yield and efficient MarsHydro light, it hugely reduced my electricity costs per gram and freed up space much sooner for the next plant.
~ Turned into a very dense bush of buds, there is even smokable dense buds at the base of the plant due to the under canopy lighting (Not as dense as top canopy buds but still decent)
~ Ran a thin line between stressing the plant and letting it flourish. The buds came out big and very dense, also it's hard to see on camera but they're very frosty too (Prob from UVB)
YIELD:
~ 145g (dry) in just 9 weeks from seed.
~ 753g (Wet)
~ 0.91g/watt
GENETICS:
~ MSNL - Gorilla Glue Auto ~ my favorite strain, as you can tell by my username!
STRAIN REVIEW:
~ Heavy hitter, like an indica but has some of that "feel it in your face" sensation of a strong sativa. Not as heavy or as strong as other GG#4's I have smoked, which would make me question the genetics used to produce the auto version. I will wait till after a cure and judge it again.
TRAINING:
~ No defoliation or HST (Bar last week for pics)
~ A little LST and leaf tucking but largely just left the plant alone to do its thing. I felt chopping healthy parts off the plant would slow the plant down and leave it with less chlorophyll to photosynthesize the light.
~ I did prune by lightly plucking dead leaves away, when the plant was ready to let them go easily.
DRYING
~ 20/21'C 50% RH with air circulation.
~ Homemade Drybox made using: 2 x Bankers Boxes ~ 2 x USB Desk Fans ~ 1 x Carbon Filter ~ 6 x Clothes Hangers
UPDATE: Day 5 after Harvest:
~ Fast dried some small batches, as we couldn't wait to sample.
~ Chopped off branches as some are down to 12% moisture whilst bigger buds are up at 18%. Moving to paper bag for couple of days to even moisture out then transferring to jars
CURING:
~Curing in jars 3/4 full.
~ Dark closet/18'C/50% RH
~ Jars burped once Hygro passes 65% and sealed when it drops to 58%.
~ Stabilised it at 62% and after 2 weeks I'll drop it some more and stabilise it at 58% to bring out more of the flavour.
~Sitting in jars with Boveda 62% at this stage.
~ Already tastes and feels great.
WATER:
~ Condensed (Starting at 40ppm)
~ Disinfected prior to adding nutrients etc. (Using COOSPIDER UVC - 253nm & 187nm bulb)
CLIMATE:
~ Ambient Air Temp = 29'C ~ 28'C LST ~ Leaf to air temp variance of between 1'C
~ Night Temp = 22/23'C ~ Day/Night temp differential 6-7'C
~ Under Canopy Temp: 26'C (Day) ~ 21'C (Night)
~ Relative Humidity = 50-60%RH (Avg. 55%RH)
~ VPD = 1.45kPa (Avg.)
~ Co2 ranges from 900ppm to 1500ppm (Avg. 1200ppm)
AIR PRESSURE:
~ Ambient Air Pressure (outside tent) = Mean Avg. 1010 mbars (101 Kilopascals)
~ Actual Air Pressure (inside tent) = Mean Avg. 1005 mbars (100.5 Kilopascals)
~ Air Pressure Differential = up to 0.5 kPa range between inside & outside
LIGHT:
~ UVB (High intensity @ 45cm) ~ 2 hours daily mid light cycle.
~ Warm White 3000K/White 5000k/Far Red (660nm)
~ At plant canopy = PPFD 900-1000umols/s/m2 ~ Lux 45,000-55,000 ~ Daily Light Integral 55-65
~ Under canopy lighting ~ Blue (460nm)/ Red (630nm)
NUTRIENTS:
~ Mostly Advanced Nutrients (For base nutrients and most additives, as only company I could find scientific data on)
~ Canna (For Calmag Agent and Cannazym)
~ Plant Success (Great White Mycorrhizae)
ADDITIONAL GROW TECHNIQUES:
INFECTION PREVENTION & CONTROL:
Infection control practices i.e
~ PPE, Alcohol Hand wash
~ Gray room outside tent,
~ Carbon filter
~ HEPA filter
~ Plasma Ionizer
~ Inline UV-C germicidal bulb
~ Also using an additional higher powered COOSPIDER (UVC) 253nm & 187nm bulb, to disinfect the gray room outside of the tent once a week for 30 mins.
~ Ozone (o3) gas that is produced using the COOSPIDER, is then directed into the tent to further control any unwanted pathogens.
~ Ed Rosenthal (Zero Tolerance organic pesticide), sprayed once a week as preventative measure. On hand for heavier use (Once every 3 days before lights out for 15 days) in the case of an outbreak
(No outbreaks yet, due to aforementioned preventative measures)


Likes
11
Share


@gsimd
Follow
I'm going away for 30 days about a week into this grow. I'm going to automate weeks 1 through 5 by using the Blumat watering system along with the automated fan from AC Infinity. Hopefully, these will keep things going while I'm gone. I've never used the Blumat products before and I'm excited to see their potential. If I succeed, I'll return to happy 5-week old plants. If not, I'll have to start a new grow...which is what I was going to do anyway. I have nothing to lose but a couple of seeds. Let's get this automated grow started.
Day 1 - I placed the seeds directly in a fist-sized clump of Coast of Maine Seed Starter soil that was then placed in a 3-gallon pot full of Coast of Maine Stonington Blend. This will ensure the seedling doesn't get exposed to the nutrient-rich soil too soon. I set the light 2 feet above the top of the pots so they have room to grow into the 18" to 12" range. I also set the light strength to 60% during germination. The temperature in the tent remained 75 degrees and humidity was 70%. I also covered the soil over the germinating seeds with mason jars to act as humidity domes.
Day 4 - Both pots sprouted this morning. I immediately removed the mason jar humidity domes. I also increased the light to 70% strength and installed the Blumat watering system to help me keep things growing while I'm gone.

Likes
6
Share


@Fyno_TH
Follow
🌸 Flowering Week 4 (Oct 23–29) — From Stretch to Stack!
Week 4 hit different 🌿🔥 — the early-flower stretch is done, and now the girls are putting all their energy into stacking dense buds. Each cola is forming shape, pistils bright and fresh, and the first layer of trichomes starting to glisten under the Spider Farmer G3000 💡.
The air inside the tent feels balanced now — clean after the PM fight, RH stable at 45–50 %, temps steady around 26–28 °C. The dehumidifier and airflow combo are working perfectly 🌬️💧.
Feed mix (per L):
• Corex 1 ml
• Mira 0.5 ml (pH adjust)
• Florex 2 ml
• Aurora 1 ml
• Bud Candy 2 ml
• Terpinator 5 ml/gal (~1.3 ml/L)
• Oxyroot 1.5 ml
• Athena IPM (foliar every 3–4 days)
💧 15–18 L each with 10–20 % runoff
⚗️ PPM 1760 | EC 3.5+ | pH 6.0
🌸 Flowering Week 4 (Oct 23–29) — From Stretch to Stack!
Week 4 hit different 🌿🔥 — the early-flower stretch is done, and now the girls are putting all their energy into stacking dense buds. Each cola is forming shape, pistils bright and fresh, and the first layer of trichomes starting to glisten under the Spider Farmer G3000 💡.
The air inside the tent feels balanced now — clean after the PM fight, RH stable at 45–50 %, temps steady around 26–28 °C. The dehumidifier and airflow combo are working perfectly 🌬️💧.
Feed mix (per L):
• Corex 1 ml
• Mira 0.5 ml (pH adjust)
• Florex 2 ml
• Aurora 1 ml
• Bud Candy 2 ml
• Terpinator 5 ml/gal (~1.3 ml/L)
• Oxyroot 1.5 ml
• Athena IPM (foliar every 3–4 days)
💧 15–18 L each with 10–20 % runoff
⚗️ PPM 1760 | EC 3.5+ | pH 6.0


Likes
12
Share


Likes
32
Share


@MadeInGermany
Follow
Info:
Unfortunately, I had to find out that my account is used for fake pages in social media.
I am only active here on growdiaries.
I am not on facebook instagram twitter etc All accounts except this one are fake.
Flowering day 8
since time change
to 12/12 h.
The lady is doing very slowly this time. It's been like this since the veggie phase.
I'll watch her for another week now and if she doesn't accelerate she'll be kicked out.
But since it is so small, I can also let it run on the side of the tent as an experiment.
Next week we'll see if it's still there 😅.
until then have a lot of fun and stay healthy 🙏🏻
You can buy this Strain at :
https://www.zamnesia.com/de/5165-zamnesia-seeds-kalini-asia-feminisiert.html
Type:
Kalini Asia
☝️🏼
Genetics:
Black Domina x Purple Kush
👍
Vega lamp:
2 x Todogrow Led
Quantum Board 100 W
💡
Bloom Lamp :
2 x Todogrow Led
Cxb 3590 COB 3500 K 205W
💡💡☝️🏼
Soil :
Canna Coco Professional +
☝️🏼
Fertilizer:
Green House Powder Feeding
☝️🏼🌱
Water:
Osmosis water mixed with normal water (24 hours stale that the chlorine evaporates) to 0.2 EC. Add Cal / Mag to 0.4 Ec Ph with Organic Ph - to 5.5 - 5.8 .
Likes
4
Share

@direx
Follow
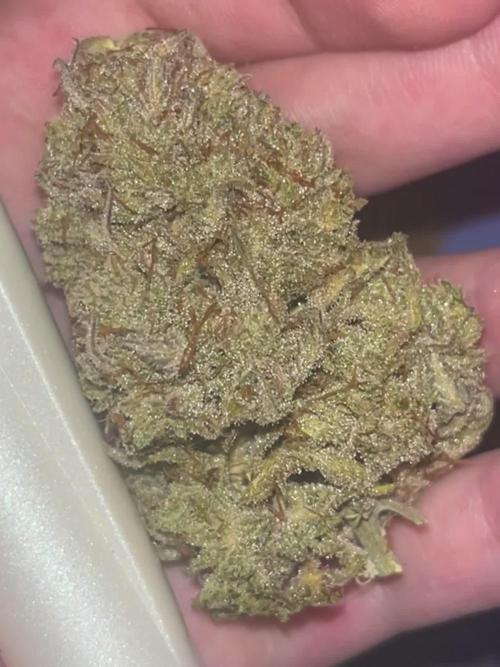
Die Drizl Pickl Auto War unser Favorit in dem Grow. Geruch, Geschmack und Wirkung einfach nur geil.. wird direkt wieder angebaut.

Likes
21
Share


@MG2009
Follow
01/09/2022
Finally time to flower, and all girls went into flower room at lights out.The males will be next week, don't want to put them in to early so I will carefully check every day and separate before they open their flowers. I'm guessing week 3-4
I Will select two branches on each female to selectively pollinate.
01/11/2022
Blue Matter #5 (update #5 culled male) repotted with lemon og seed
Will continue in her own evolving diary. My hope is to eventually graft different cuts for a multiple variety mom plant, I can have 6 total plants
And would be nice to be able to maintain only one mom.
Likes
151
Share


@PapaNugs
Follow
After topping last week we've just been watching them grow. Bending down the branches to help them spread out. Over this next week I'll start my lst ties to help pull them down and out.

Likes
8
Share


@CortezKush
Follow
Following med-teks feed chart. Feeding heaviest nutrients (2.7 EC) runoff currently just over 3.0. Going to need to do a small flush to and start reducing ec prior to actual flushing phase.
Advised by my local hydro shop to reduce EC down to 1 before hitting the plants with the heavier nutrients. Only started applying this method 2 weeks ago. Seems to be ok. Would appreciate some opinions but!
Likes
46
Share


@GanjaReaper
Follow
Day 39:
Things are going well. Did add some sticks to support some plants.
Because I put many plants per m2, stems and branches are weaker as when only having a few plants per m2. Those will have a nicer expose from the airfans.
Because of a compact cantopy,with lots of plants per m2, mine are''lazy'' and don't get much wind. So they didn't invest much in growing thick and having strong branches.
There will be no problem with that since they will support each other and I will be using many sticks.
- I have to adjust my fans again, they have to be putted higher.
- Some plants that I didn't top, stretched alot lol. Might have to find a spot for them together under the same lamp.
Might update again at the end of this week if I feel like too.
See y'all next week.

Likes
8
Share


@DonPerion1983
Follow
So it’s 33 days since germination! I’ve still got massive fan leafs in the space pot! All seem to be growing well! Is it time to switch to flowering mode now? What ph level do I need for flowering? Do I need to move my light closer than 2 feet away? Been looking online at canna coco nutrients and there seems to be so many! My babies as I call them now have come this far and I want to hopefully get the best results I can get!! Am I over feeding as giving them around 600/800 ml of water with canna coco a and b also cal mag! But unsure on when to feed during flowering mode any help is welcome cheers
