


Likes
Comments
Share

@PavementPunk
Follow
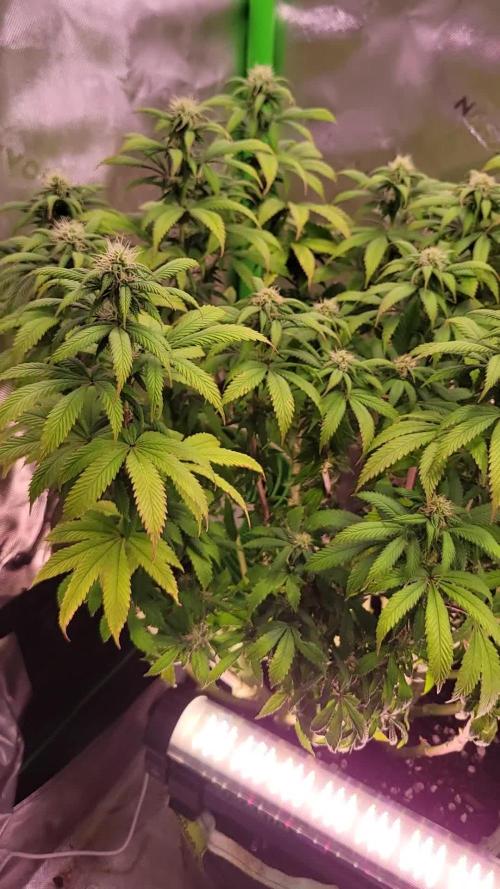
6/30/26 50% strength Strive ph 6.3 tds 600 ec 1100 water temperature 69 degrees Fahrenheit. The indoor tent seems to be doing generally good. Split my z42 down the middle and duct taped it back together. I expect a full recovery. Started runningbthe small dehumidifier in the tent again. It makes it warmer but it also gets the vpd kpa cranking. 1.9 was the high yesterday. Thats high. Easing them into the strive w a half strength dose to start. Happy growing friends ✌️


Likes
20
Share


@French__flair
Follow
Since I am in DWC and the fertilizers are organic, I take care to add them slowly..
Como estoy en DWC y los fertilizantes son orgánicos, me ocupo de añadirlos lentamente...
Por el momento no controlo la atmósfera, sólo tengo un extractor ajustado a 400m3/h para los 2 lumatek al 75%.
Planeo controlar la atmósfera a partir de la inyección de CO2 en la semana 2 o 3 para ver más.
Mientras tanto tengo algunos picos de temperatura por encima de los 28 pero son realmente específicos.
Estoy tratando de mantener la humedad lo suficientemente alta para tener un buen VPD.
For the moment I don't control the atmosphere, I just have an extractor set at 400m3/h for the 2 lumatek at 75%.
I plan to control the atmosphere from the CO2 injection in week 2 or 3 to be seen again.
In the meantime I have a few temperature peaks over 28 but they are really specific.
I am trying to keep the humidity high enough to have a good VPD.
Subí un poco la ec este fin de semana 4 de 0.9 a 1
I turned up the ec a bit this weekend 4 from 0.9 to 1

Likes
18
Share


@Wrongholn519
Follow
A note on last weeks goals:
- Continuing LST has been very easy with this girl. Following a VPD chart and keeping a good environment has been key to establishing a successful low stress training regiment. In the last week I decided to use stainless steel nuts and bolts as weights. I tie them to the end of the side branches rather than tieing them down to the side of the pot. This makes it easier to water.. I will use this technique again, I really like it. I also pull my plants out of the tent and place them in a tote to water them and inspect them.
- I've been playing with my CO2 generators .. adding more yeast, less sugar etc.. the highest CO2 concentration I've been able to achieve is 1050 ppm. With that in mind i will probably purchase a rotometer and a CO2 tank for future runs. Furthermore I think that the yeast and sugar combo could lead to an infestation if in not carefull (bugs are attracted to sugar and yeast). I have noticed my plants are praying for 15 hours a day though and I think the CO2 has been a game changer through vegetation.
A note on my environment:
I decided to add photos of some of my gear for my garden. This grow I decided to swap my intake and exhaust fan placement. With putting my exhaust on the FLOOR, the air in my tent is drawn from upwards towards the floor. This gives my plants proper contact time with the CO2. It also takes the heat from the top of my tent and pulls it downwards acting as a heat source for my crop... In my pictures you will notice my 4 inch inline fan and my 6 inch inline fan are attached to a secondary room. This helps me draw fresh air while releasing my exhaust away from my tent room.
WHEN GOING INTO FLOWER I turn up my intake fan to get cool air to the top of my tent. The exhaust draws it down cooling my tent when the lights are turned up in the last stage of flower. As a new grower this has been the step to changing my entire grow. Everything is much healthier and I owe it all to my environment, and Fastbuds genetics.
One more thing: I almost burnt my house down and electrocuted my ass with a cheap water heater... careful while playing with electricity and water 🤣🔥🔥⚡️
Next week's goals:
- Turn up lights slowly
- Continue to play with CO2 generators to try and achieve 1200+ ppm concentration
- Continue training and defoliation
- keep up pest management.. these fungus gnats keep trying to regroup and they're starting to hurt my feelings.. I get rid of them in my tent but they keep coming back!
The bud sites are stacking nicely, I'm getting excited she starting to remind me of the Fastbuds Forbidden Runtz auto when she went into flower...and that was the best plant I've ever grown 🔥🔥🔥🔥🔥
Happy growing everyone!


Likes
Comments
Share

@AlpenZilla
Follow
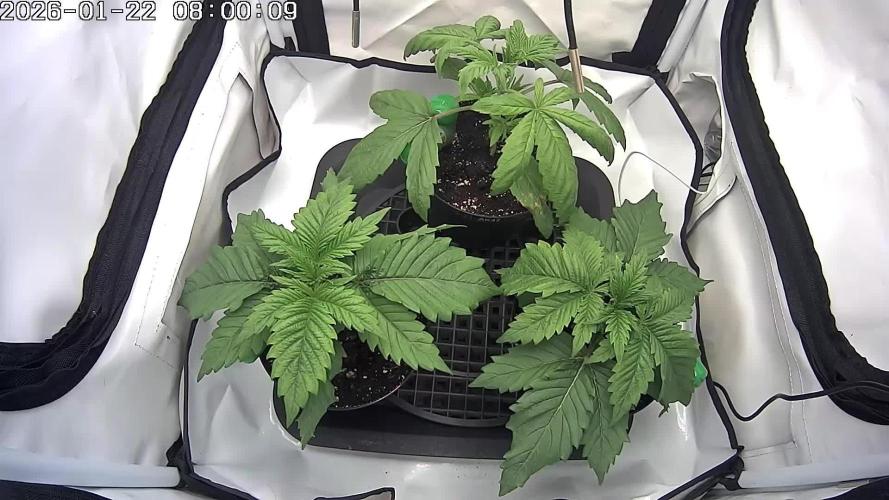
🌸 Flowering – Week 2 | Day 10 (Day 47 overall)
Strawberry AK – Current Status
The plant is currently at flowering week 2, day 10, which marks 47 days since germination.
Height is approximately 33 cm. A significant stretch has not started yet, but it is expected to begin soon.
🌿 Early Issue – Resolved
The initial concern observed earlier was not a genetic failure but rather a CalMag deficiency combined with slightly underpowered feeding.
After applying CalMag as a foliar spray and slightly increasing the nutrient strength, the leaf condition stabilized within a few days. Since then, the plant has shown healthy progression.
💧 Feeding & EC
This run clearly shows that the Strawberry AK has a relatively high nutrient demand compared to previous grows.
Current EC: ~1.5
A few leaf tips are slightly lightened.
This is not classic nutrient burn, but rather an indication that the plant is being pushed close to its optimal limit.
At this stage, increasing EC further would not be advisable.
🌸 Structure & Development
The canopy is dense, overall color is healthy and rich, and flower sites are forming cleanly.
The upcoming stretch phase will be an important indicator of how the plant continues to respond to the current feeding level.

Processing
Likes
12
Share


@Tazard
Follow
I supercropped the tall Enemy of the State branches that were in the light. As you can see In the video there was no light burn! We also have about 30” of light penetration even though I’ve not performed any defoliation! Loving these lights.



Likes
144
Share


@1Right_Angle
Follow
Aug 22
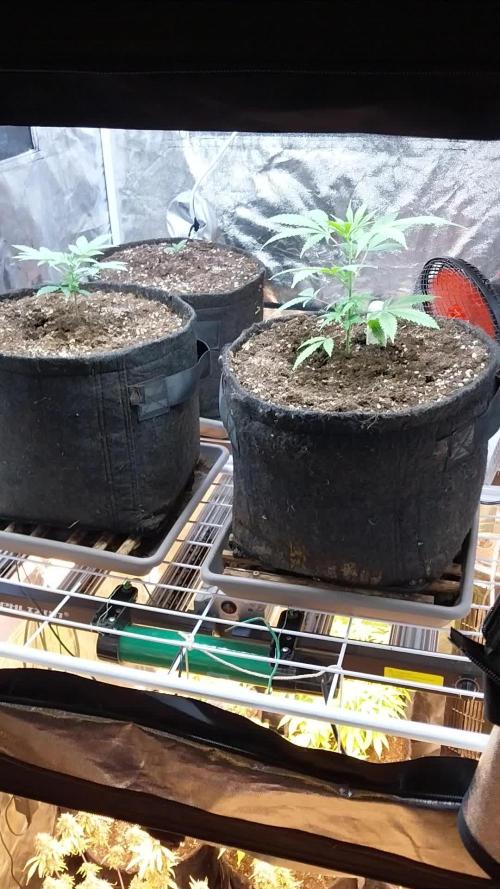
- plant fed yesterday a.m., then got rained-on ALL NIGHT
- “week 2 Flower”, end of the week will see a Defoliation of sorts. Plant was Schwazzed re: 70% removal of Fan Leaves on day 1 of Flower. Targeting day 20 (we’re at 15)
23rd
- plant grew 6cm, basically over-nite!!! Wow
25th
- Microbe Tea brewing for tomorrow
- Pistils are appearing…
26th
- rain overnite, plant is “still”Dry-side of Medium, breakfast time; 1 gal. Posted above.
- !!! Cali Crasher finally exceeded expectations and has surpassed the One Metre tall mark. Measured from the orig height, of the original soil via green wire for LST poking through the side of Fabric pot. Its a beaUtiful plant
*** tested the run-off from the Feed this morning, its been a while. Run-off = < 3000ppm, so the plant was flushed till ppm dropped below 1500. Yep, it took 5 gal of pH’d water. The Last gallon (5th one) included the bloom nutes, a 2nd time, due to the Flush. That final gallon equaled 1000ppm
- next week sees a Large-leaf schwazze on 31st (20days since orig schwazze). Any key, medium-sized shadow-maker gets yanked as well. Still gonna call it a 70% schwazze
28th
- last day of week 2 in Flower
- Nutes for Breakfast 1gal
- really happy this beast climbed over the Metre-mark this week

Likes
6
Share

@Draken91
Follow
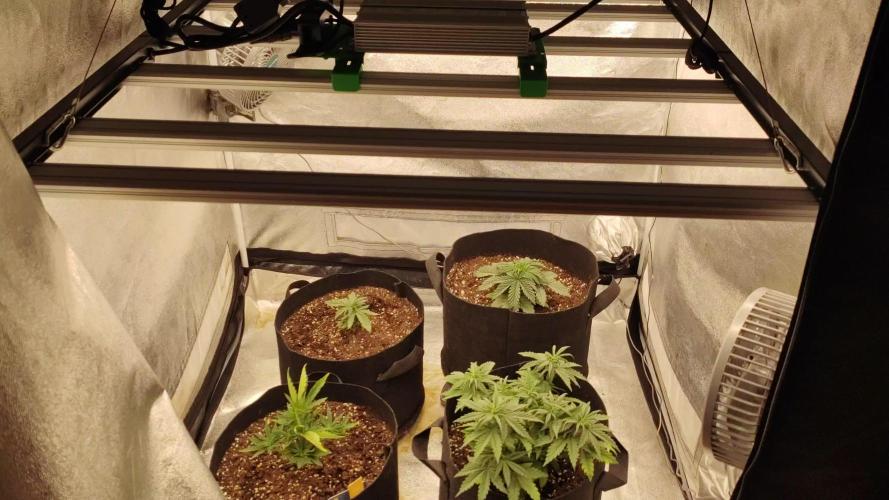
Hey Leute, diesemal etwas früher damit die Wochen wieder richtig sind dafür gibt es heute auch stattdessen ein video in besserer Quali :)


Likes
17
Share


@NearlyDeadGrows
Follow
Soon you will see my first run in a DWC^^
And a run for this Competition ;-)
Added a short Clip from the open box
Likes
16
Share


@Lazuli
Follow
They eat but dont drink a lot, so pots stay heavy but every 2-3 days i pour a full bucket trough the soil with 950ppm so the EC stays in good range, the flowers are way smaller then what im used to with my other blue dreams, because these here stand in soil and in colder conditions, no problem we just give them 2 weeks longer to fatten up
Likes
5
Share


@dauntless
Follow
Week 5 started July 24, 2022
Growth is still strong into week five, I see no pre flowering, I think that is because she started really slowly due to me getting used to this new light, etc.
July 27, 2022
Smells like lime sherbet up in here. LST, light defoliation to get some light on the lower colas. Really watered in today for the first time soaking the media, she is stretching and I see maybe some hairs for pre-flower - hope not too too soon though, I'd like more height than nine inches before she fully stretched
Likes
10
Share


@KingJayTk
Follow
Day 15: I removed both branches, in the second node position on the trunk, and LST'd her down in the direction of the removed-downward-node. Also, I noticed the lime green discoloration on the lower leaves which means a beginning of a nitrogen deficiency. I lightly top dressed her pot the first week because it's the first time I grow using these dry amendments. I top dressed her again yesterday and watered her today. It will take a week for the nutrients to break down so I think I will be brewing a terp tea grow to treat the deficiency while the dry ingredients break down.
Day 18: continued to lst her down. I top dressed the soil with 3 tsp of nitro bat guano, 2 tsp of terp tea grow, and 2 tsp of uprising bloom.
Day 20: She started showing sex so I'll be only lst'ing from now on.
Likes
21
Share


@m0use
Follow
***Sponsored Grow*** = Medic || https://medicgrow.com || Grow = ***Sponsored Grow***
Everything is looking good on this plant this week, it has a different growth pattern then the others in the tent, its way more bendy and lengthy. When I place the steel forks on the stems to keep them from growing up this strain will go all noodle like and bend more fluidly then all the other plants. its like spaghetti or some other pasta related wet noddle thing. Still giving them a 2:1 or 2.5:1 grow vs bloom nutrient. Its helping with some of the pink stems from last week. Feeding strength is up .2 point to reach 900ppm or aorund 1.8EC will leave it here fro the remainder of Veg. Prob will do for 2 more weeks then flip to flower as I just topped them and want to give them some time to recover.
NPK ratio of 7-7-14 1:1 equal parts grow/bloom.
Grow=8-4-15
Bloom=6-10-14
Boost=1-15-30 "not yet used it yet"
Also took some clones from the plants as well, took two main cuttings from each plant, forgot to do the one so its not shown in the first video up the updated clone pics later in the week. If any of these impress me then the clones will go outside and grow there all year for a extra special harvest. Or I'll give them out to some friends and family maybe a little gorilla gardening project, but I will wait before getting ride of them all as I'm still kicking my self in the ass over the Blue Cindy loss. really liked that plant and wish its clones I gave out where still aorund.
Lights doing well. The V1 spectrum is good on the medic grow mini sun-2's 240w. No issues so far, dimmed at 80% till flower is initiated then up to 100%, Will test out 13/11 I think as the schedule to give them some more photons for an extra hour vs 12/12
.
Till next week.
***Sponsored Grow***
Official Website: https://medicgrow.com/
Facebook:
https://www.facebook.com/medicgrowled
Twitter:
https://twitter.com/medicgrow
Instagram:
https://www.instagram.com/medicgrow420/
YouTube:
https://www.youtube.com/channel/UCNmiY4F9z94u-8eGj7R1CSQ
Growdiaries:
https://growdiaries.com/grower/medicgrowled
https://growdiaries.com/grow-lights/medic-grow

Likes
47
Share


@Smithsgrow420
Follow
Look at this girl!!!
She is fucking amazing or what??????????????
How many weeks to go!!????????????????
Going to start flush!??????????????
Going to harvested!?????????????
Everyone who follows this girl or just want to let me know!!!!!!
Drop me a message!!! give me some dates!!!!
9/10 went to see her today, no signs of any stress or mould!! Humidity very low still.
Processing
Likes
42
Share


@MadeInGermany
Follow
Hey everyone 🙂.
Flowering day 1
Today the time was changed to 12/12 hours.
Actually, I only count the flowering days from the correct flowering, for the sake of simplicity I will count the days from the position :-).
Flowering day 2
Today both were poured with 1 L each and checked for their health.
Flowering day 3
Today the humidifier was filled and both plants were sprayed with Canna Cure.
They were also checked for their health as they did every day.
Flowering day 4
Today the whole tent was cleaned.
Flowering day 5
The humidifier was filled again and the plants were sprayed.
Flowering day 6
Today both were poured with 0.6 L and checked for health.
Flowering day 7
End of the week 😄. Both were checked for health. I hope you have a lot of fun with the update, stay healthy and let it grow 🙏🏻🌿
You can buy this Strain at :
https://sweetseeds.es/de/cream-caramel/
Type:
Cream Caramel
☝️🏼
Genetics:
Blue Black
x
Maple Leaf Indica
x
White Rhino
👍
Vega lamp:
2 x Todogrow Led
Quantum Board 100 W
💡
Bloom Lamp :
2 x Todogrow Led
Cxb 3590 COB 3500 K 205W
💡💡☝️🏼
Soil :
Canna Coco Professional +
☝️🏼
Fertilizer:
Green House Powder Feeding
☝️🏼🌱
Water:
Osmosis water mixed with normal water (24 hours stale that the chlorine evaporates) to 0.2 EC. Add Cal / Mag to 0.4 Ec Ph with Organic Ph - to 5.5 - 5.8 .

Likes
169
Share


@SlowpokeFuegobud
Follow
🍊 🐶 💜 🍊 🐶 💜 🍊 🐶 💜 🍊 🐶 💜🍊 🐶 💜 🍊 🐶 💜 🍊 🐶 💜 🍊 🐶 💜
Welcome to week 5, my fellow growmies!! 💚 💚 💚
The dice have been thrown into the cannabis field... 😜 We have one girl, just as I wished. 🙏 Thanks, Pacha Mama! 😚
Number 4 has revealed herself, she is the most prettiest Tangie ever! ❤️
The others were juiced. Delicious! 😋
DAY 29
Potted into 12L container. 💩
DAY 32
Pre-flowering of number 4 who iiiiis...... A GIRL!!!!11 🎉 💄 Wiiiiiiiiiiiiiiiiiiii, so happy!! 😍
DAY 34
Watered with 3ml grow 4ml more roots 3ml growz + humics 5ml fastbuds 💧
LST
Thanks for stopping by, it's a true pleasure to have you as visitors!! 💚 💚 💚 😘
💜 🐘
______________________________________________________________
About Sour Tangie Dawg cannabis seeds
Sour Tangie Dawg is a sativa dominant cross between the famous Tangie and Chemdawg. Expect a combination of sweet & fruity mixed with a gassy, jet-fuel flavour. The amazing mix of citrus, tangerine, pine and gasoline produces uniquely rich, dank buds. The powerful sativa high is strong, uplifting and long lasting, great for creativity and socialising.
Chemdawg is the parent of OG Kush, all Diesel strain originate from Chemdawg. The Tangie is originally a Skunk hybrid strain but extremely fruity with the trademark Tangerine flavour. This strain is potent with THC-levels over 20% alongside very generous yields of top quality weed, very suited for hash and rosin producers. If you’re looking for a strain to produce the best tasting concentrates this Sour Tangie Dawg is a proven winner! She easy to grow and the perfect choice for SCROG growing due to her growth speed and stretch. We advise switching to 12/12 light when 75% of the net is filled. For outdoor growers the harvest period is early October. Indoors she’s finished after 9 weeks of flower - fast for a sativa dominant strain. We recommend growing in soil with organic nutrients for the best tasting weed.
Get some fantastic genetics here: https://supersativaseedclub.com/ 💜 🐘
___________________________________________________________________________
SETUP:
80x80x180 cm Zelsius
240W Full Spectrum LED IR UV dimmable
DW240H-A6-HS
Heatsink color red
LED Chips:
512pcs SAMSUNG LM301H + 24pcs Osram 660nm + 8pcs Osram IR 730nm + 8pcs UV 385nm
Color mix: 2700K + 4000K
2,8umol/J
Driver HLG-240H-C2100B
Coverage: veg 5x3ft / flower 4x2ft
Product size: 628x205x68mm
Green Buzz Nutrients
Shouts go out to my sponsors @GreenBuzzNutrients, thanks so much for your support! ❤️
If anyone would like to try their amazing organic products, use code GD42025 for generous 25% discount (for orders of minimum 75€) ✨
https://greenbuzznutrients.com/
Biobizz Lightmix
custom exhaust fan 320/270cm³/h
Carbon Active Granulate 240cm³/h
tab water pH 8 - EC 0,25 with Calmag to 0,5
Advanced Hydroponics pH minus Grow + Bloom to pH 6.2
🍊 🐶 💜 🍊 🐶 💜 🍊 🐶 💜 🍊 🐶 💜🍊 🐶 💜 🍊 🐶 💜 🍊 🐶 💜 🍊 🐶 💜


Likes
38
Share


@Wicked_Stix
Follow
I am excited to try out this new gorilla cookies from fastbuds.
I originally started this setup to compete in the solo cup challenge, but I needed something that will be minimal maintainence and doesn't require hand watering. So this is what I ended up with. I will not be entering since I know it will bring controversy, but I am going to follow the rules and treat this grow as if I am competing.
I didn't want to use regular solo cups because last time I had a lot of algae growing in the root zone when I harvested. I opted to use a black light proof cup. These cups were 27 oz originally so I filled them with 16 oz of water, marked the level, then cut them down to 16 oz. I set the drain pipes about an inch from the bottom so they have a little reserve if I have pump or power issues. I know people will see the drains as a way for roots to grow out of the cup but in reality I have to keep the entire pipe free of roots or it will clog and overflow. So I am actually losing a little volume due to this.
I filled the bottom inch or so of the cups with river gravel to stop the perlite from washing into the reservoir.
I am running a 5 gallon reservoir with a small air pump and the plants will be getting irritated 24 hours a day from an aquarium power head pump. I set the system up to be totally self contained and easily portable. It was all built from things I had laying around other than 97¢ for the cups. I will be keeping the feed simple as always feeding maxigro and maxibloom with a couple flower boosters.