


Likes
Comments
Share
@Wierie
Follow
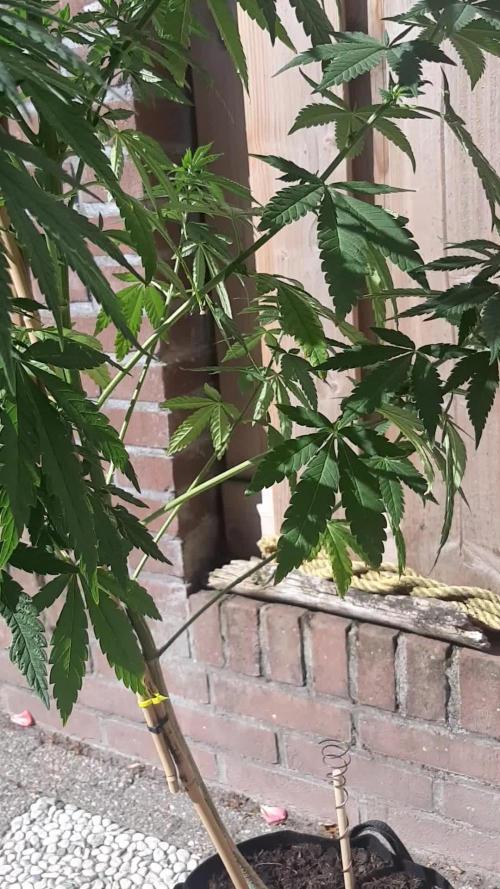
Day 72 of flowering...
Its been 10 weeks goin in week 11 now...
So last week i started to give her some nutes again cause she stil had a lot of clear trichomes...
And figured she could use some nutrition ...
Still i dont see any amber trichomes on the buds...
Leaves startin to degrade will stop feeding her i think this week...
(**Outdoor plant**)
i took some small branches of from the lower part that were growing slow
Also did a micro lolypop so she will send more energy to the main buds on each branch..
We dont want small fluffy buds ey...
Hot weather this week ... she is lovin it
She drinks about 1 liter with nutrition (pokon bio) 6.5 ph)
evry day or evry 2 days...
See u guys next week 🌴👍

Likes
7
Share


@CanarianGrow92
Follow
Another week of flowering, this week we started with some ultra PK and also some sugars, the buds are already starting to get bigger so lets see next week! We will continue to give some ultra PK next week!

Likes
49
Share


@masterofsmeagol
Follow
8/22 Defoliated what needed it.with all the rain I had to remove some yellow leaves. The container plants are affected the most as the wind drys those bags out in like a day. I'll have to check twice a day. Watered a gallon a plant yesterday before going to the hospital, then went back over after and gave everything at least another half gallon. I'm pretty sure everything got their 10%. Yesterday I upped the feeding regimen to 2.5 pints a plant. A little more on the ones that looked like they needed it most. I took some pretty good pictures. I hope that's not septoria on the leaf that I took a picture of in the fire pit. Glad I sprayed that BT. I'll have to keep up with it. I'm also considering an application of plant doctor just in case. I don't SEE anything fungal bur that would suck. Flowers arecexploding in growth. Just got a text from my father telling me how my plants are "budding big time" lol. I have the bamboo I need but there are still a few individual HUGE branches that will soon need more support.
Update: Wife felt A LITTLE better so I went to check the girls around 6pm. I found my canary starting to droop. I'm not sure If I gave a full two gallons to everything yesterday. One or two may have only gotten one and a half. I compared the weight with the weight of a 22 gallon bag of dry soil and realized it was definately time to water even though only one plant was drooping they were all dry. It may have been okay to leave it but i've let them dry out far too often already so I made sure EVERY PLANT got it's 10% of water (except containers) and I watered slower. I don't see any negative effects from the B.T. but i'm noticing some older leaves turning yellow on a couple plants as this explosive flowering continues. I"m just going to continue monitoring it. I hope I did the right thing and watered. If it was going to rain tonight I might have held off but they were super light. I also took a video and some pictures but my wife is using my phone to listen to music and calm down so i'll need to upload those pictures and videos tomorrow. I finished my defoliation right before dark. Good night guys. I took a nice 3 minute te video this morning but it won't upload or send to anyone.
UPDATE: BAGS HELD THERE WEIGHT!!! YES!! WE'LL GET A TINY BIT OF RAIN IF ANYTHING TONIGHT AND NOTHING TOMMOROW UNTIL THE NIGHT AND RAIN THE NEXT DAY SO ITS LOOKING PRETTY GOOD FOR MY WATERING. ID PREFER TO WATER IN MORNINGS BUT IVE HAD TO KINDA PLAY IT BY EAR. PLANTS LOOK AWESOME. IM SUPER EXCITED. SOME LEAVES ARE DROPPING BUT THAT'S TO BE EXPECTED. IT SEEMS LIKE BUDS DOUBLE IN SIZE ALMOST EVERYDAY!!!
8/23 Noticed damage on a lower branch that looks like earwig damage. I put sluggo plus pellets on the ground between the pallets but I don't think that will help much if they're in the soil. If they are there their aren't many. Or it could be some other pest. It's the very bottom branch that should've been pruned already anyway. Didn't water today as we are supposed to get an inch of rain between tonight and tomorrow. My canary was sagging but it was wet? The soil was definately heavier than the 22gallon bag I use to compare. It just dries out so fast in those bags. I'll check them throughout the day. Oh and I forgot that I only have the 3 10th planet's. I kept referring to another as a "different phenome" so i dug down and found the tag and it was a blueberry cheese. Since the light dep went bad almost half the garden is blueberry cheese. The flowers look much more saliva dominant then the tenth planet or the purple punch. The BIG CHEESE in the 50 in the back had really long saliva looking leaves which is much different than some of her sisters. Anyway things are still doing good. I hope the girls csn make it the day without water. I don't want to water a day before we get an inch of rain. It is sunny and 80 though so I'll play it by ear.
UPDATE: STOPPED AT THE GROW AROUND ONE. MY CANARY LOOKED DROOPING. I BROUGHT THE VIDEO AND PICTURES TO MY COMMERCIAL BUDDY. I DIDN'T WANT TO WATER BECAUSE WE ARE GETTING A HALF IN OF RAIN TOMM AND ANOTHER HALF IN THAT NIGHT. WE WERE ON THE SAME PAGE AND FIGURED TO SPLIT THE DIFFERENCE AS TWO PLANTS WERE SUBSTANTIALLY LIGHTER THAN THE REST. THE CANARY GOT A GALLON. I USED ABOUT 8 GALLONS OF WATER. THE 50 GOT ABOUT A GALLON AS IT WAS DRY AND DROOPING. PROBABLY SHOULDVE GAVE IT MORE. I USED A SMALL WATER CAN TO WATER THIS TIME. THE BAGS WEREN'T SUPER LIGHT BUT THE BREEZE IS PICKING UP AND NOW IT SAYS NO RAIN UNTIL 6AM. I HOPE THIS WAS THE RIGHT DECISION. THEY PROBABLY WOULD'VE MADE IT. A COUPLE MIGHT'VE TOTALLY DRIED OUT AND DROOPY. I WANT TO AVOID THAT AS I DONT WANT TO STRESS THE PLANTS. THE BUDS ARE REALLY EXPLODING! IM LOVING THIS LIQUID KOOL BLOOM! OH, I FOUND ANOTHER APHID AN AND ANTS ON MY PLANTS. FOUND "WHAT LOOKS LIKE EARWIG DAMAGE" ON SMALL LOWER BRANCHES THAT SHOULD'VE BEEN PRUNED ALREADY. IM PLANNING TO GO AT NIGHT WITH A SPRAY BOTTLE AND ALCOHOL AND SEE IF THAT'S THE DEAL. IF NOT THE PILLARS JUST ATE A BUNCH OF BT.
8/24 It was pouring this morning so I just ran down and shook off my plants. Didnt take any pictures or do a video as it was raining pretty hard. IT is now 11am and the rain has stopped. I did not go at night to check for earwigs due to my wife needing me do to her medical illness. I've been through a lot this week. That's why I asked my buddy before I DID ANYTHING. It's a GOOD thing my bags dry out so tast but it means I REALLY need to keep on top of it. I'll make sure I get sleep and a decent meal and I'll check things out later on today. If I see cause for alarm I'll come back at night. I'll go over to shake things off anyway.
UPDATE: Went over after the rain slowed and shook things off. The wind came up and I remembered I had a few plants that were only supported on the main stem. Those plants are strong as hell and have branches the diameter bigger than the main stalk of an indoor plant. Still, I used the fence and the stake that was securing the main stalk and made like a triangle of string attached to the fence and the garden stake. Essentially it just makes a large triangle of string (loose) around this strong compact plant so if the wind blows to hard during the storm it will give it some more support. That was my big purple punch. I added another stake to a blueberry cheese that I FIMed with those huge colas and made sure all the nail branches were tied up. I SHOULD go check for earwigs to tonight but I need sleep. If they're there, there aren't many. I think I used the correct "their's" lol I didn't mean to. I'm losing leaves that are turning yellow and falling off. I think a few may be hungry. I'll check the diary and feed again. I'll try my ph meter as well but I really don't trust it. Everything going in is good and when I phed the rainwater it was much lower.
8/25 RAINED ALL DAY OR MOST OF IT. FOR SOME REASON MY COMMENT IS GONE.
8/26 FED 3 GALLONS TO GARDEN EVERYBODY GOT 1.75 PINTS AT LEAST. Defoliated what needed it after the storm and fed three gallons to the garden of nutrient mix. Each plant got at least a powerade bottle (1.75 pints), the big cheese in the fifty got over two as did the two other 30s. I spread around what was left after and ended up with one powerade bottle of mix left. I should've just gave it to them but hindsight is 20/20. Some plants are yellowing up a little bit and it's climbing the plant. Sunny out today. Plants are exploding in flower and we've experienced some rain but it still concerns me. I'm also concerned about earwigs. Haven't seen any and actually (happily) found a couple aphids and ants. If the earwigs were bad there wouldn't be a single aphid around. I've seen ants on the plants so I'm sure there are some more aphids. The tiny branches that should've been pruned have damage that looks like previous years from earwigs. On one branch it looks like they chewed the stem of a secondary branch and it was just hanging there. I thought I killed all those bastards but if a couple got IN the grow bags it will be much harder to catch them. The damage isn't severe and it's on a branch I was going to prune anyway. It's just the point. They seem to love any plant with "blueberry" in it. They also seem to stay totally away from any thick indica buds though and prefer longer less dense buds. That's my take from dealing with earwigs for several seasons in a row. Even if present in small numbers I think I did enough so they won't have much of an impact even if they are there but I'm going to go check anyway. Boy things are looking good!
UPDATE: Went back over and it seems like a bunch of leaves yellowed on my "big cheese." I hope it's not leaf septoria. I also found one piece of bedroom on the very bottom of a plant. Just shit I shouldve pruned but still. I noticed some ants and a few aphids as well. I'm going to have to watch the yellowing and consider using plant doctor preventatively in case of fungal.
8/27 After that increased feeding I defoliated a shit ton of yellow leaves. The big cheese has lost quite a few fan leaves. It's not just fan leaves though. It seems some newer growth yellows on that plant too. I have a couple blueberry cheese that may have septoria. Or it could be overwater with all this rain. Considering a treatment of plant doctor. Buds are EXPLODING in growth.
UPDATE: Super sunny day spent in the E.R. Went back and checked the girls and they looked even BIGGER!!! I'm super stoked for this fall. Wondering if the leaves dropping from my big cheese is normal. I hope it's not fungal. If it is I have several products to treat it. I might throw a question up and see what ppl think. I've tried to upload this video three times!!! I hope it gets through this time. Won't go past 14% amd I've tried four times. It's a good video too! I'll upload tomorrow when I have better service. FINALLY!
8/28 Bags were wet and heavy as hell. It should be easy to tell when its time to water but my anxiety still fucks around with me. Showed my buddy a bunch of pictures and videos and addressed all my concerns. Mainly septoria. He doesn't think I've got it. He looked through everything and made me feel a lot better. Just senescence and maybe a little over watered from the rain. He said many growers cut the nitrogen right off at the stage of flower where some of my plants are at. That made me feel much better. The sun is out and it's upper 70s at 11. Plants are exploding in growth. Lighting was good this'll morning g so I took numerous photos and videos. I uploaded one but then I deleted all my large files which apparently included tge ones I did today. During my evening check up I'll take a couple more and upload them. Boy things are looking good. Knock on wood but this is looking like my best year ever!
UPDATE: WENT OVER ROGHT BEDORE DARK TO CHECK THE GIRPS. DEFOLIATED A SHIT TON OF LEAVES. IT WAS LIKE 80 TODAY. BAGS ARE STILL HEAVY HAS HELL. BUDS ARE REALLY EXPLODING. THEY LOOK BIGGER TONIGHT THEN THEY DID THIS MORNING AND IM GETTING A REALLY NICE SWEEET SKUNKY SMELL. FOUND A COUOLE APHIDS AMD I COULD DUE TO CLEAN OUT THE INTERIOR OF SOME OF TGE PLANTS. I SHOULD ALSO DO ANOTHER APP OF BT. IVE NOTICED THAT I HAVE SOME PEST ISSUES. NOT BAD ONES BUT STILL.


Likes
14
Share


@Snickelfritters
Follow
10/28 - First week in the books. I figured now would be as good a time as any to use a sprouted seed tea because the plants seem to be starting to fully stretch. Pistils are coming slowly but surely. Canopy isn't full but it's still the best I've ever done and I'll take that knowledge into future grows. Exciting weeks ahead. Crazy to think in two weeks it will look more like the finished product than the plants you see before you.
I'll take them out for a photo shoot this weekend. The amount times I will be taking them out of the tent will be limited from here-on-out. These plants are getting cumbersome.

Likes
31
Share


@Cultivate
Follow
Well... What a very very stressful week this has been, A few pistils started browning. I went over each girl no Nana’s definitely all female, started panicking thinking I maybe had bugs, root rot e.t.c.
Flushed for two days and all new growth showed healthy signs kicking out some serious trichomes! Smells beautiful and PH for the run off was exact.
Gave 1/2 Nutrients/Feed today for the first time just to ease the girls back in but fingers crossed I have either had some PH issues or wind burn possibly.
Had to Defoliate again today as the foliage was ridiculous😂 I hope next week isn’t so stressful 🙏🏻 Wish me luck man please I need it 🤦♂️🏻😅
Likes
11
Share


@russrahl
Follow
First week of flowering went good, had some trouble with my ph meter again, so I ordered a bunch of ph equipment and I’m gonna start fresh with everything new. Lol sick of second guessing my crappy pens. Plants are staying pretty compact so far, they have started to stretch a little bit but we have only done a few tucks on them. They are either gonna stay short or haven’t started there main stretch yet, but we are 10 days into flip so they should be stretching by now. Time will tell I guess. Lol I removed a few of the larger guard leaves up top to open up the middle of the plants more to the light. I have around 40000 lux at the top of the netting and they seem to be taking it fairly well. I’m yet to get my water chiller installed as I’ve been very busy this month and haven’t had time to finish my DIY video for it. Lol hopefully this week we will get it installed and get our water temps down a little lower. I got some more H2O2 coming soon too so can’t wait to get using that again, plants just haven’t been the same without it, but I haven’t been able to find it reasonably priced anywhere near me in a long time. I am using UC Roots now in its place to keep my res/water clean, but it’s not as good. H2O2 has extra oxygen on top of keeping things clean, so can’t wait! Well that’s it for this week, Cheers💨

Likes
19
Share

@Flavors
Follow
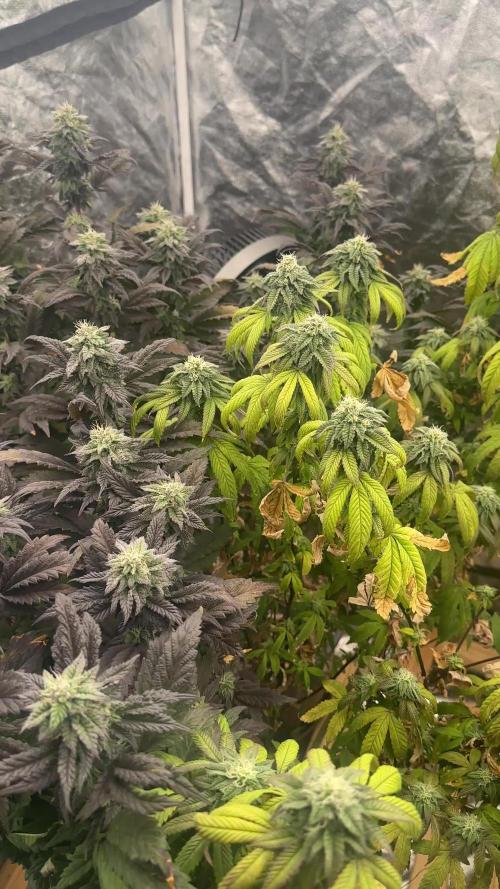
🌱 Week 23 Update (Late Veg / Pre-Flower Excitement)
Red Hot Violet is really starting to stack up now — node spacing tightening, branches thickening, and that pre-flip energy is kicking in 💪💜🌱. She’s shaping into a gorgeous structure that’s ready to explode once flower hits.Meanwhile, Amaretto Sour is doing her own thing and honestly stealing the show with that lemon-blueberry aroma 🍋

Likes
74
Share


@ThrashedTV_BakedByGlaze
Follow
Week 1 - 01/01 to 01/08 2021
HUGE THANKS TO @MARSHYDROLED and @VIPARSPECTRALED!
New surge protectors/heavy duty timers/the good cords.
The LSD-25 itself looks similar to my first run with a very slow growth compared to the other 3 strains i have going now. It is from the same tester kit so I am expecting a small plant overall but the new lights will definitely give me more overall bud.
I have all my seedlings under the P1500 from Vipar as my veg light for the first few weeks to a month. It's SO nice to not have a blurple anymore, the light is way better in my room and on the eyes. The new diodes had every single seedling grow more in 6 hours than it did in the first 7 days under the blurp LED, EVEN the LSD-25. It had no hight to it before the Vipar went in.
While the other 3 are doing better, the LSD is still going to be one of my favourites. I can't wait to smell that earthy/varnish/citrus.
I noticed a bit of spotting on the Dark Devil in my other diary so I added some Hydrogen Peroxide to the spray bottle and it cleared up. All four have been getting constant spritzing from the spray bottle to keep humidity up.
Have no doubt the new lights will make the plant/overall yield.
Thanks for stopping in! Throw down a like and/or follow so i can return the favour 🙌
--
Check out my Diary of the Year 2020 entry 🙏
https://growdiaries.com/diaries/54258-fastbuds-original-auto-sour-diesel-grow-journal-by-glazedgrow
IG: @GlazedGrow
CannaBuzz: @GlazedGrow

Processing
Likes
4
Share


@Thechefgrower
Follow
It's very hot today, It's clover must be covered not microbes die by sunlight.

Likes
12
Share


@Wilstang
Follow
Shout-out to the award winning Spliff Seeds for the amazing opportunity to test there phenomenal strains. This one of a kind company has so much to offer from great customer service to unique one of a kind strains. They have many top notch new and classic seeds to choose from. It's an honor to grow this seed 🌱💪

Likes
5
Share


@Drtomb
Follow
Plants are looking awesome. Skullcap is extremely frosty, the whole tent reeks and no hiccups. I've noticed that the (14) pineapple express #2 seems to be less dense of a bud cola, its looking like the (15) Pineapple express #2 is the better version. If it doesn't tighten up this one's out of the running. I already got rid of the skullcap mom, great quality, but not the quantity I wanted to see.


Processing
Likes
6
Share


Likes
6
Share

@sedygrows
Follow
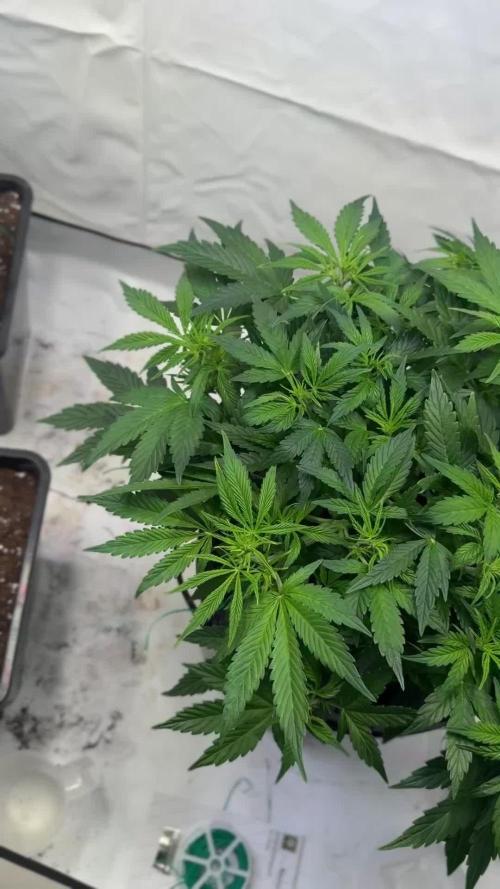
The scrog was no good idea. Had to remove it today. Problems: unable to change water properly and can‘t clean the tank during the process. So.. scrog is gone and the LST is back 😂 and i switched to 12/12 because of my other plants in the tent.

Likes
1
Share

@alex93
Follow
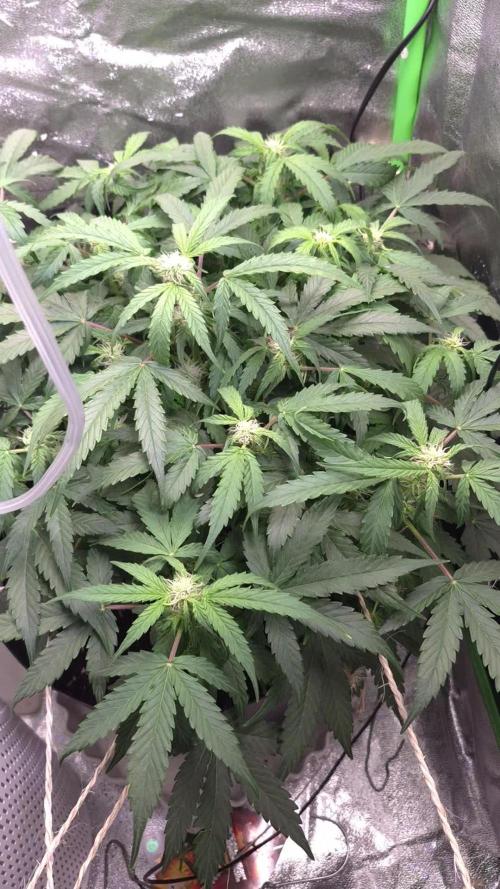
Great week overall. Slight water stress is to be reported, with the substrate slightly lacking retention. This requires increased vigilance, but the canopy has homogenized well. Always a rather massive plant, I would say indica/ruderalis. I'm also going to have a trunk cleaning. I'll see during the week if I defoliate the plant. I have to admit that it's frustrating not to see here a plant with the same structure as mine. I'm going a bit blind, but then it's still a serious first experience!

Likes
1
Share

@GrowOpsAnonymous
Follow
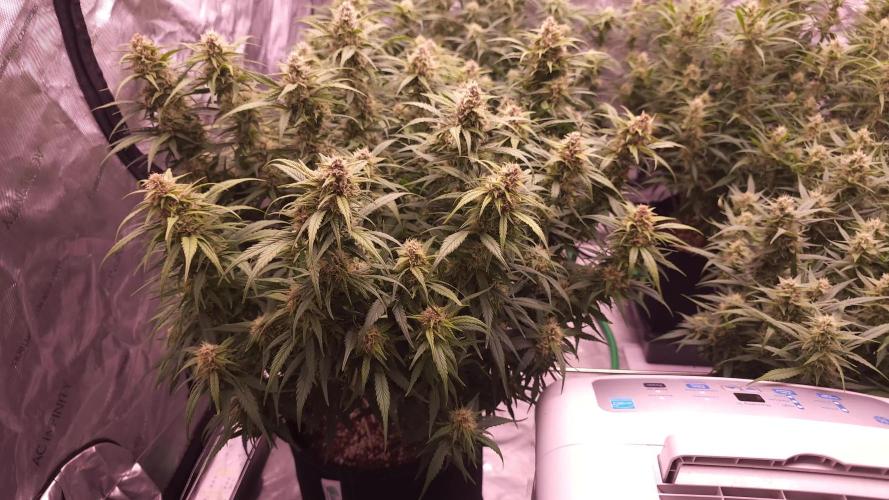
Day 56
Not a lot to update on. Plants are looking good. The EZ Feed settings are still dialed.
I've noticed that the front two plants seem to have fatter buds. #1AP (rear left) has mostly orange pistils while the others have either none or very few.
#4AP (front left) is purple. I was unaware of the possibility for purple.
Still getting a much stronger candy rub from #4AP and #2EZF.
I started feeding Fade and PK @1.6 EC today
Likes
22
Share


@Chucky324
Follow
Hello. This is the end of week 5 and the beginning of week 6 of flowering.
Things are going good in here. The resin production has really kicked in now.
Smells just wonderful in here. Like a sweet orange flavored chalky candy. Delicious.
Big snow fall last night. Big for here on the west coast of Canada. 30 to 40 cm fell here and I was worried about my little humming birds. It's been -4*c here the last 2 nights. The weather says -8*c tonight with wind. I don't know how they do it, they are just so small to sit on a branch and make it through the freezing night. Such amazing little birds.
It took me 2.5 hours to dig out this morning.
Have fun. Chuck.


Likes
228
Share


@StarLorr
Follow
Welcome to my Pablø Ęscøbar diary.
In this diary:
Seeds: sponsored by Ðivine Șeeds
Media: Promix HP
Nutrients: Advanced Nutrients, Diablo Nutrients.
Light and Weather: Şun☀️and Mother Earth.🌎
___________________________
Feeding:
Wed 17Jul: 6L nutrients pH'd 6.5
Thu 18Jul: 8L water not pH'd
Fri 19Jul: 8L water not pH'd
Sat 20Jul: 4L nutrients pH'd 6.5 and 4L water not pH'd
Sun 21Jul: 7L water not pH'd
Mon 22Jul: 8L water not pH'd
*please note that most water only feedings are 2L at the time throughout the day in bottom saucer*
___________________________
What a beautiful summer that we're having, my Ðivine Ladies are just about to start flowering and i am having a hard time to keep up with their feedings and i might need to sprinkle some Gaia Green Bloom on them to keep up with the water only feedings🤔
______________________________
Pablo Escobar is such a beautiful plant to grow outdoor, sturdy and so much greenery in it😍
______________________________
Thanks for stopping by, likes and comments are appreciated!👊🏻😎
Keep on growin!
Keep on tokin!!!
😙💨💨💨💨💨

Likes
112
Share


@Tropicannibis_Todd
Follow
ALRIGHTY THEN
REMINDER I DO 2 UPDATES PER WEEK 👉WEEKLYROUNDUP👈👉MIDWEEKLY UPDATE👈
We just hit week 9 and all is well , have to admit shes just killing it on the resin development 😃 ......the frost is insane 👹......
👉 her baby Sister and it's coming along very well , I did little defolation last week 😏 shes is about 7 weeks now at 49 days from seed ...👈 she's also killing it 💀
Lights being readjusted and chart updated .........👍
I GOT MULTIPLE DIARIES ON THE GO 😱 please check them out 😎
CHECKOUT MY GROWMIE Green_fiend 👈 AS HES JUST A WEEK OR TWO FROM HARVEST ON HIS AFGHAN KUSH DIARY 👈
👉IF ANYONE IS LOOKING FOR A PLACE TO HANGOUT VIA GROWDIARIES AND TALK GROWING AND JUST CHILL AND WHATEVER .....👈
👉I CREATED GROWDIARIES DISCORD SERVER !!!!!!!!!!!👈
LINK IS 👉
https://discord.gg/zQmTHkbejs
AND SEE HOW IT PLAYS OUT !!!!!!!
Likes
2
Share

@AsNoriu
Follow
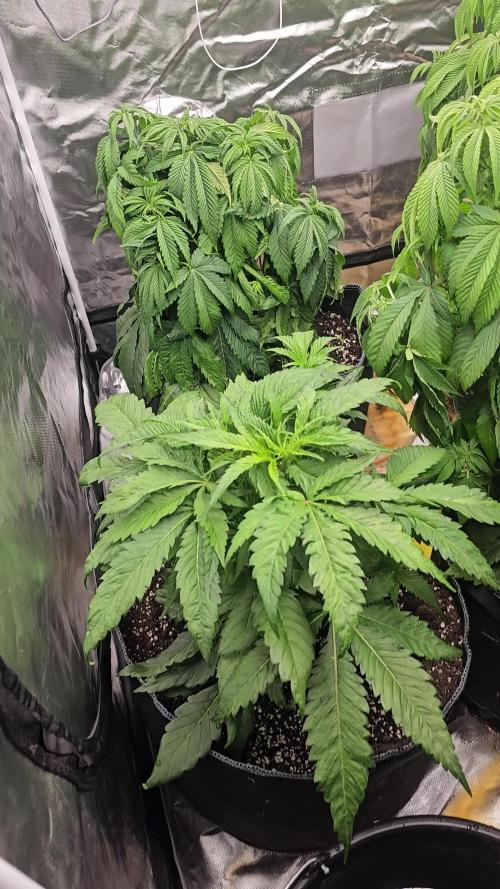
Day 54 since seed touched soil. Huge disaster !!!!! ussually i water them every 4-5 days, but i got stucked in my summer time house on the lake and was with the girls after 7 days !!! some took heavy damage, some leaves were dry as paper and brittle, at this point i was heavily thinking to chop all and stop that nonsense, worst grow in my life with so many troubles ... Girl is second tallest in the video.
Happy Growing !!!

Likes
6
Share


@CeGrow
Follow
begining week 7
day 44: flowers more, but bad wheather :(
end of week 7
still bad wheather :(
flower turned a little bit bigger, but not much
and I have some fleas now :( (see video)
I picked them manually
hope they dont increase
day 48 nutrition: 0,4 litre water+ 0,8 ml Mairol Blütenwunder
day 49: nutrition 0,5 litre water + 1,5 ml Mairol Blütenwunder
