


Likes
Comments
Share


@Oyziphar
Follow
We had very sunny day this week 🌞🌞🌞, with very hot temperatures 🌶️🌶️🌶️
Fifth week of Light Deprivation
👉👉👉👉Every morning at 8:30 am I move the plants to the greenhouse.
👉👉👉👉Every evening at 8:30 pm I move the plants (together with some other strains) inside the growroom (which I don't use in the summer)
➡️ I defoliated the plants
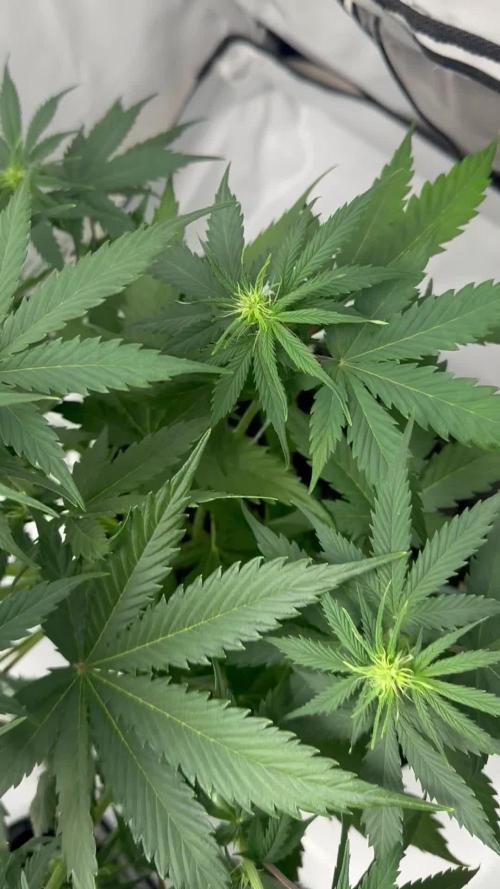
➡️ The plants are making new flowers everyday 🌻🌻🌻, trichomes are appearing, and every day they start to smell stronger 👃👃👃
👉Two times a week I boost the plants with gift of water enriched with OPF 7:2:3 ; Fulvic 25 ; Yuccah ; Biovin liquid ; Earthworm compost extract
⭐Big Thanks to Luc from Plant Health Solutions / Bioplantenvoeding dot nl ⭐

Likes
32
Share

@yan402
Follow
⚗️ FERMAKOR – Neutralisation & Filtering (Final Stage)
🧠 “From reactor to bottle — the first real batch.”
---
13.10.25 — Pulled about 1L of the finished FERMAKOR extract into a 5L bucket and added roughly 2L of clean water. Let it sit for a bit to calm down and cool off before touching the pH.
Sample came back around pH 6.8–7, totally non-caustic — exactly what I wanted before acidifying for storage.
Started adding phosphoric acid (59%) slow and steady, stirring between each pour.
Ended up using about 50ml total before the colour flipped red on the GHE drops, landing the mix right around pH 3–3.5.
No foam, no violent reaction, just smooth. Smell turned clean and metallic-sweet — the kind of smell that tells you it’s done reacting.
---
Filtering setup
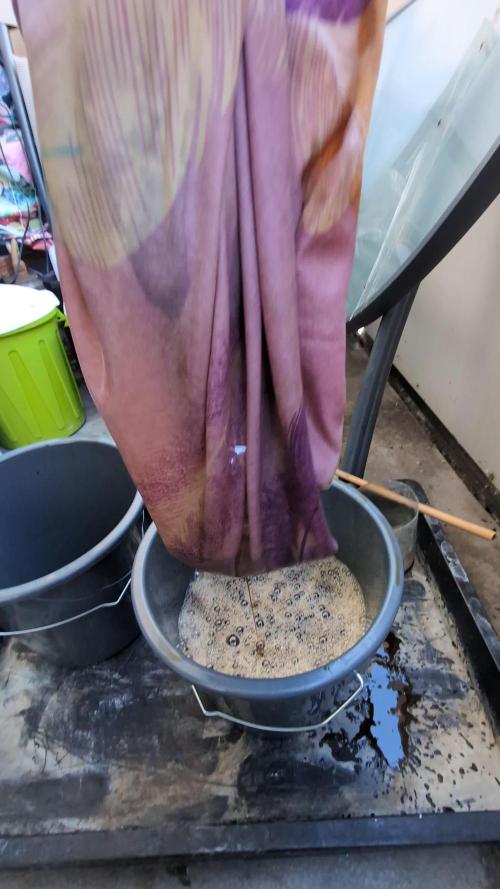
Used a pillowcase and cheesecloth layered together as the filter stack.
The pillowcase handled all the heavy junk, the cheesecloth grabbed the fine silt.
It came out thick, dark amber, glossy — zero grit.
I’ll leave it to rest overnight, open, just to let any tiny bubbles or gases clear out before bottling.
---
Final note
This batch is officially FERMAKOR B Concentrate V1.0 (1:4).
Storage pH locked between 3.3–3.8, ready to bottle and shake before use.
This one’s rich in P, K, Mg, and micros, while Calcium Nitrate will handle the N and Ca on the A-part side.
---
🌱 Closing the diary
That’s it for this round — extraction phase complete.
I’ll be closing this diary here and opening a new one called “FERMAKOR A+B Test Grow – V1.”
Testing starts Monday, 20.10.2025 on a single plant.
Time to see if this brew actually works in the tent.
📸 All images videos to be added later — filter setup, pH colour, and final concentrate.


Likes
65
Share


@ASCBOOGS
Follow
Day 58 1 of the critical jack got bud rot so had to remove infected buds and discard of them now left her in the 48hr dark period before chop
The rest of the plants are still ripening


Likes
47
Share


@Hydro_Hiebs
Follow
🌱Welcome to my 2 x 4 ft autoflower tent. Here we Fast Buds tester 2210. We just finished the 1st week of flower with only a 3 week veg this should be a speedy grow. This week we top dressed with the first feedings of the grow.. I'm hoping they announce the name of this one as I get closer to harvest 😌💨
💧She has been receiving water every other day about 0.50 L of pH adjusted to 6.5.
✂️ TRAINING: N/A.
💡⚡Check Mars Hydro out on Instagram! @marshydro_aliexpress2 💡⚡

Likes
7
Share

@L8bloomr1008
Follow
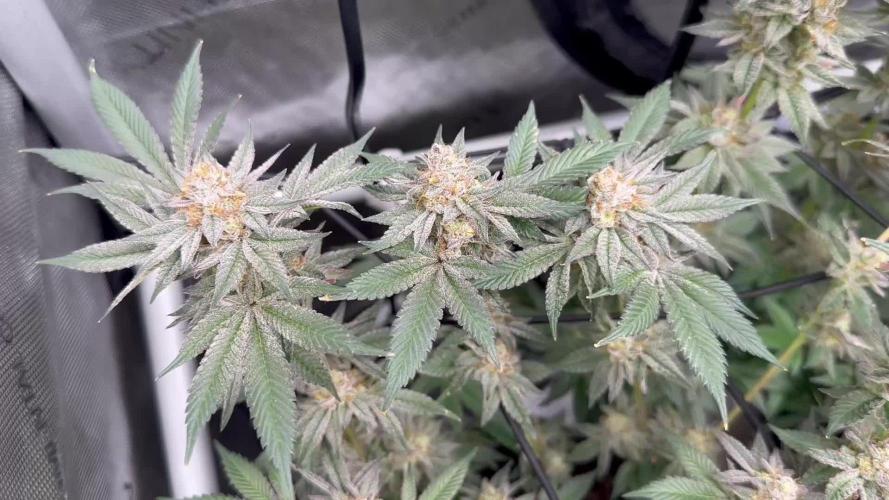
Just water to bring em on home. I think I’m really gonna like this lung buster. No fruit.
But the MM smells all the sweet and gas

Likes
4
Share


@J_Law
Follow
this is my first time transplanting from hydro to soil due to room/spacing issues, and let me tell you, this is NOT an easy task, and should be avoided at all costs, especially the bigger the plant. it almost seems impossible to remove all the clay pebbles without damaging some of those 2-3week old baby roots around those pebbles. i gently picked out as many clay pebbles as i could with my hand and then had to cut the plastic net pot to completely free up those roots without shocking the plant too much. the transplant was a success into soil 5gal, although I expected worse, and am expecting to be a few weeks behind to let her system reset/build. to make matters worse, its been VERY HOT in the midwest (90-100f). and here we go, later that same week, i accidentally left her overnight, and into the morning sun on a 100f day. as you can see from her burn marks, she clearly wasn’t able to defend herself against that type of extreme heat yet, and i was blessed to catch her before the afternoon heat, otherwise she’d be toast, lol. just a few of the upper leaves turned crispy. i know she wasn’t happy so i put her under more gentle conditions, now let’s see how she comes back

Likes
1
Share


@hidemefromevil
Follow
21.08 - First leaves appear and start consuming light.
Watering - 0.2 ml per plant - pH 6.30
Lamp distance - 50cm
Humidity - 75% - 95%
Temperature - 23 - 27 C
Light - 18/6h - Dim - 50%
22.08
Watering - 0.25 ml per plant - pH 6.50
Lamp distance - 50cm
Humidity - 75% - 90%
Temperature - 22 - 27 C
Light - 20/4h - Dim - 50%
23.08
Watering - 0.50ml per plant - pH 6.30
Lamp distance - 50cm
Humidity - 70% - 90%
Temperature - 22 - 27 C
Light - 18/6h - Dim - 50%
24.08
Watering - 0.80ml per plant + Root Juice + Acti Vera- pH 6.30
Total 250ml water with 1ml Root Juice and Acti Vera - 0.5ml
Lamp distance - 50cm
Humidity - 62% - 79%
Temperature - 25 - 28 C
Light - 20/4h - Dim - 50%
25.08
I skip watering, the soil is wet
Lamp distance - 50cm
Humidity - 70% - 85%
Temperature - 22 - 27 C
Light - 22/2h - Dim - 55%
26.08
I skip watering, the soil is wet
Lamp distance - 50cm
Humidity - 55% - 85%
Temperature - 22 - 27 C
Light - 22/2h - Dim - 55%
27.08
Skip watering
Lamp distance - 50cm
Humidity - 70% - 85%
Temperature - 22 - 27 C
Light - 22/2h - Dim - 55%
28.08
Watering - The big one get 450ml water - pH - 6.3
The other 2 get 250ml per plant - pH - 6.3
Total 1L water with 2ml Root Juice
Sprayed leaves with Acti vera
Lamp distance - 40cm
Humidity - 70% - 85%
Temperature - 22 - 27 C
Light - 20/4h - Dim - 80%
Also at the end of the day I gave to the biggest one cal mag biobizz 2,3 pippet drops with 200ml water.
Until September 2nd, I use one lamp. From the 2nd there are already two
Likes
5
Share

@Oldwied
Follow
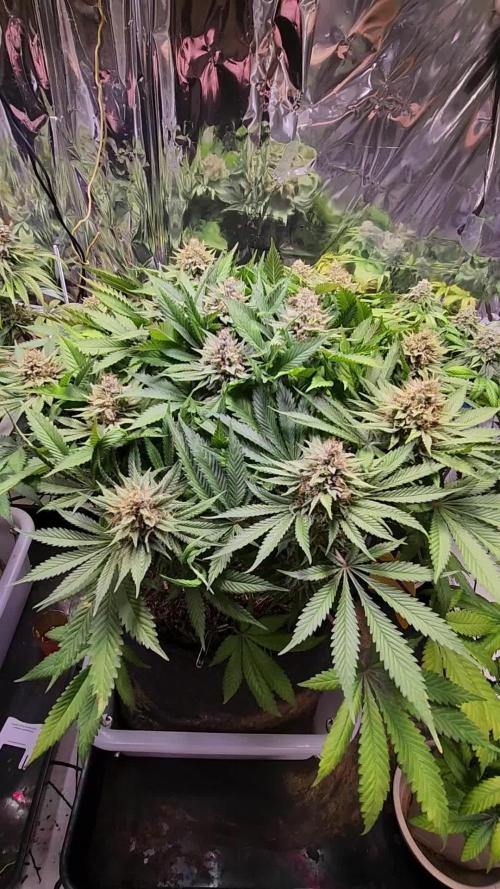
Last one or two weeks before harvest.
Trichomes are mostly milky and a few heads turn to amper.
Light Power: 100%
Day 102
Flower day 55
Photoshooting

Likes
20
Share


@DrGanj
Follow
Still swelling nice. Nice even spread between buds which is allowing all bud sites to grow nicely.

Likes
25
Share

@BlaKX
Follow
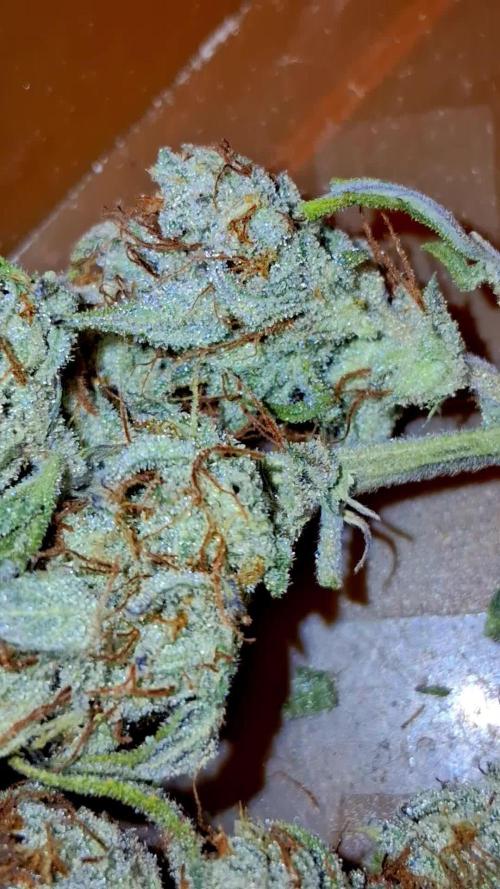
Hi Growmies es vergingen noch 7 Tage bis ich Ernten konnte ich ließ die Pflanze komplett austrocknen nachdem ich sie ein letztes Mal gegossen habe mit klaren Wasser.
Leider ging es mir gesundheitlich nicht gut weshalb ich kaum Bilder gemacht habe und nicht richtig trimming. Werde noch Bilder den Blüten und Rauch bericht machen.



Likes
14
Share


@Mr_Dior21
Follow
Man this week has been taking forever, my theory is it will only get slower relative to harvest just because my excitement.
I top dressed with about 2 inches of worm castings with an eyeballed mix of 2tbps of bone meal (3-14-0, bloom fert.), 1.5-2tbps of Gaia green all purp.(4-4-4, I don’t have an actual potassium fert. Like leingbenite So I use this), 3tbps of dr earth kelp meal (1-.05-2 has many different vitamins, amino acids, carbohydrates) and 2tbps of mykos (for microbiology inoculation and nutrient uptake/upkeep).
So I every time I water I have this old 2gallon water tin that I usually fill up about a quarter to half way full. Using this amount of water and the 5 gallon bucket of my soil mix makes my watering schedule once every 3 days (on average). I do use bottle nutrients but it’s mainly for the supplementing. For feeding I use 2-3ml to half a gallon for all bottle nutrients, I have never gone over, and I have never had deficiency’s that can hinder plant development.
Deficiency's: PSA: Now if anyone happens to read and actually look at my plants please do look closely and maybe let me know if you see something that I have missed since I’m still very new. I noticed my plant was having a cal mag issue so that’s why I top dressed with worm castings, I also top dressed with about 3tbps of azomite (I feel using azomite it may help with all those unnoticeable deficiency’s that a new grower might miss). I’ve been noticing on some of the leaves the very tips are showing discoloring, since the color is still so vibrant mostly I can rule out nitrogen, phosphorus, Iron, manganese, and sulphuric. It’s still very early stage so I did an extremely light foliage feeding (in the dark to prevent UV damage) of 2ml of big bud, big bloom, and tiger bloom, mixed into half a liter of water, I then emptied the spray bottle and sprayed with tap water just to make sure there’s no nute burning. Today I fed the plant through water amendments with 3ml of big bud, 3ml of bud candy, 3ml of big bloom, and 2ml of tiger bloom;(my theory is hopefully the nutrient deficiency’s will go away)
My soil mix is pretty basic. 40% coco, 10% perlite, 10% well composted chicken manure, 20% black gold compost, 20% worm castings. I’m not going to put the fertilizer amendment percentage to be honest I eye ball it but there’s a rough general measurements that I do.

Likes
39
Share


@DjDaveAtHome
Follow
Doubled Airflow using two Marina 200 (28 gal/h x 2 = 54 gal/h) with four air stones per bucket. Liking what I see. Roots are better than they've ever been. Adjusted air space between basket bottom and surface of reservoir as there is more moist air now because of the increased bubbles (splashes).
Just turn the 18/6 lights off for 36 hours before bring back online at 12/12. Forty eight hours earlier they had a defoliation which filled in so quickly. Will compare tomorrow when the lights go back on.
Dinamed Plus from Dinafem Seeds (1) and Blueberry Headband (1)from Humboldt Seeds.
https://www.dinafem.org/en/dinamed-cbd-plus/
https://www.humboldtseeds.net/en/blueberry-headband/
Lighting
https://www.horticulturelightinggroup.ca/products/260w-qb-v2-led-kit
DWC Nutients
https://generalhydroponics.com/floraseries
FloraGro 1 ml/l
FloraBloom .5 ml/l
FloraMicro 1 ml/l
Diamond Nectar: N/A
https://generalhydroponics.com/diamond-nectar
Cal Mag: 2 ml/l
https://generalhydroponics.com/calimagic
SuperThrive: .5 ml/l
https://superthrive.com/
https://hylineproducts.com/products/hygrozyme/#one
Grozyme: 2.5 ml/ltr
Tarantula
https://www.advancednutrients.com/products/tarantula/
Epsom salts
Root Rot Tea
8 liters RO water
5 ml (1 tsp) organic sulphur free molasses
5 ml Alaskan Organic grow fertilizer (or something comparable)
5 ml Alaskan bloom fertilizer (or something comparable)
5 ml Seaweed or kelp fertilizer
Handful of composted horse pucky
(Worm castings, sea soil, Gaia General Purpose and Bat Guano Phosphate optional)
* add after brewing
1 ml Advanced Nutrients Tarantula




Likes
30
Share


@WeWantItToGrow
Follow
So far these plants have shown nothing but resilience and a will to grow I have put quite a bit of effort in but I’m sure I’m lacking in one or two spots but you would never be able to tell by the Look at the plants they seem quite happy and they are relatively patient with a new grower lol

Likes
10
Share


@ValleoGrow
Follow
My grow space Got Takes Down, sorry for the lack of photos in the ending in the last few diaries


Likes
98
Share


@OrganicNature420
Follow
So impressed with Solfire Gardens. You have a new customer %100 no problems start to finish with all 3 of these girls. Reds, purple, orange and green. I've never had Buds with so many colours 🌱💚