


Likes
Comments
Share




Likes
170
Share


@Master_weeda
Follow
Bonjour à tous les padawans et les maîtres jedis
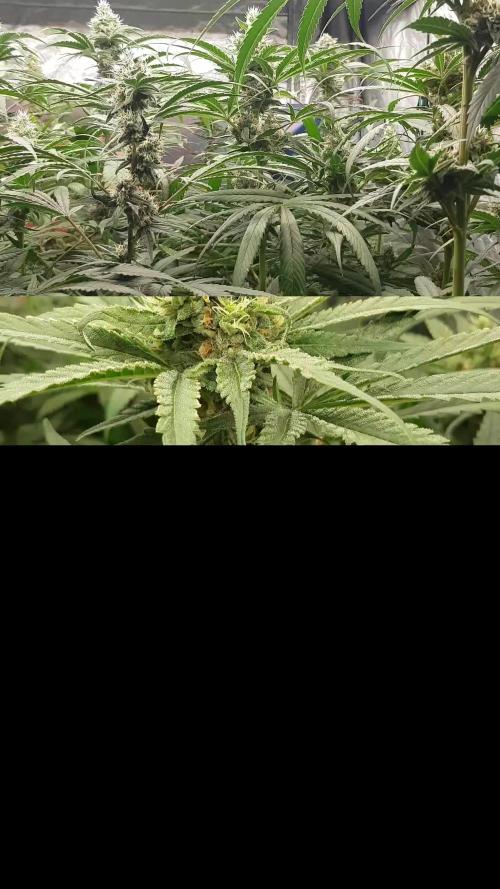
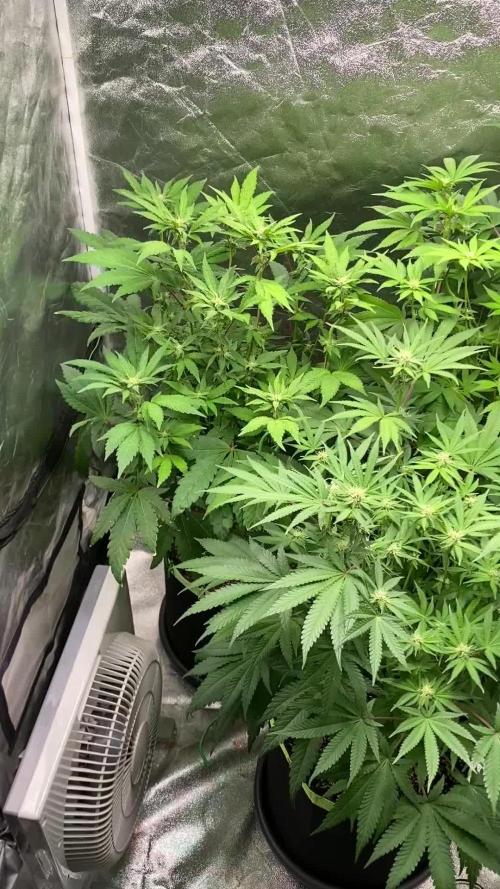
Jour42 ma plante entre bien en floraison je pratique sur elle une defolliation pour permettre aux têtes de prendre la lumière
La floraison des plantes de cannabis
La plante de cannabis passe par différentes étapes de vie avant de parvenir à la récolte. Ces étapes sont : la germination, la pré-croissance, la croissance et la floraison.
Pour les autofloraisons il n'est pas nécessaire d'avoir de changer le cycle de lumière elle entre en floraison automatiquement voilà d'où elle tient son nom "d'autofloraison"
L'origine de l'auto-floraison vient de la sous-espèce "cannabis sativa ruderalis" , qui à l'origine produit de très faibles niveaux de THC. C'est en croisant cette variété de marijuana avec d'autres qui produisent des niveaux de THC plus élevés qu'à vu le jour ce magnifique compromis que sont les variétés auto-fleurissantes avec des taux de THC très satisfaisants. En parallèle, cela a permis d'améliorer la production de ces variétés, qui initialement étaient exceptionnellement basse.
Pour des résultats optimaux, en culture Outdoor (extérieur), je recommande que la germination des graines de marijuanaAuto-flo se fasse entre avril et août.
En culture Indoor(intérieur), la photopériode idéale que ce soit pour la croissance comme pour la floraison est de 20h de lumière. N'oubliez pas que ces graines ne sont pas tributaires de la photopériode pour passer en floraison.
Il est préférable d'utiliser des pots d'une capacité de 10 à 20L dès le début, étant donné que leur cycle de vie est réduit, les auto-flo n'ent pas besoin de plus de volume pour se développer. Vu sa petite taille (et la discrétion) elle fait l'objet d'un bon choix pour la culture de cannabis sur balcons.
La première variété de Lowryder auto-floraison a été créé à partir de cannabis indica sativa croisé avec des génétiques de cannabis sativa rudelaris par la banque de graines de marijuana "The Joint Doctor". Puis vinrent la White Dwarf de "Buddha Seeds", la Roadrunnerde "Dinafem", l' Auto Stoned d' "Autofem", la Speed Devil de "Sweet Seeds" , la Maxi Gom de "Grassomatic", la Flash, la Gnomo de Kannabiaet bien d'autres.
Jour42 defolliation (video)
Avant toute chose n'oublions pas de bien désinfecter ses outils et bien ce laver les mains.
Quesque la defolliation ?
LES CULTIVATEURS AMATEURS, PRENEZ GARDE, MAIS NE PRENEZ PAS PEUR
La défoliation consiste à retirer les feuilles des plants de cannabis en intérieur afin d'accroître le rendementfinal. Le cultivateur amateur doit faire preuve de vigilance lorsqu'il commence à appliquer cette technique de taille. Malgré le débat sans fin entre ceux qui prônent cette technique et ceux qui la dénigre, il n'y aucune raison pour qu'un amateur ne s'y essaie pas afin de voir si ça lui convient ou non.
COMMENT DÉFOLIER
Que vous tailliez les feuilles ou les branches des plants de cannabis, il vaut mieux utiliser un sécateur stérile qui est confortable en main. Arracher des feuilles à la main manque de finesse et engendre souvent par accident, l'arrachement des couches d'une tige en plus de la feuille. L'objectif principal de la défoliation est de permettre une meilleure pénétration de la lumière et de promouvoir la production de plus grosses têtes. Les feuilles éventails qui font de l'ombre doivent être retirées. Tailler la tige principale et/ou les pousses secondaires n'est pas de la défoliation.
La règle d'or lorsque vous donnez à vos plantes un rafraîchissement est de commencer avec les feuilles nourricières les plus grandes et les plus larges, en taillant du bas vers le haut. Il est important de retirer les feuilles stratégiquement et non pas au hasard. Pensez également qu'il vous faut limiter votre rafraîchissement à approximativement 10 à 20 % des feuilles totales de votre pied. Il est très facile de s'emporter durant la taille et de se retrouver avec des plantes chauves. Un excès de taille de feuilles empêchera la photosynthèse et paralysera vos plants.
QUAND FAUT-IL DÉFOLIER
Il est assez rare d'appliquer la défoliation comme seule technique pour obtenir un fort rendement. La taille des feuilles est généralement associée à d'autres méthodes de tailles et de palissage pour un meilleur rendement telles que le topping ou étêtage, le FIMming, le LST, le manifolding, le supercropping et le ScrOG. Les cultivateurs utilisant la méthode ScrOG auront besoin de retirer toutes les croissances inférieures ainsi que les feuilles et les tiges se trouvant sous le filet.
Les plants de cannabis peuvent être défoliés dès lors qu'ils sont passés de la phase de plantule vers la phase de croissance végétative. Cependant, il est recommandé aux cultivateurs amateurs de laisser aux plantes 1 à 2 semaines de croissance végétative avant de s'attaquer à la défoliation de celles-ci. De plus, certaines variétés sont plus sensibles à la taille que d'autres et de ce fait, seront plus stressées par la taille des feuilles. Surveillez minutieusement le comportement de vos plants après la taille. Une période de convalescence de minimum 3 à 7 jours avant de recommencer la défoliation est fortement recommandée pour éviter trop de stress aux plants. Les cultivateurs peuvent également défolier pendant la phase de floraison, ce qui permettra à l'énergie de la plante d'être concentrée vers la production de têtes tout en limitant l'ombre et l'excès d'humidité. Néanmoins, il est important de ne pas défolier trop tard sous peine de simplement blesser ses plants inutilement.
LES AVANTAGES DE LA DÉFOLIATION
Évidemment, l'avantage numéro un de la défoliation, c'est l'augmentation du potentiel de rendement de cette technique de taille pour tous types de cannabis allant de la photopériode aux variétés autofloraison. Ce n'est pas un secret que les fleurs qui reçoivent plus de lumières deviennent plus grandes et larges que celles dissimulées dans l'ombre des feuilles. De plus, retirer les feuilles intérieures des plants touffus aide à prévenir toutes menaces de moisissure. Les plants très feuillus avec un feuillage intérieur dense produiront une quantité importante de têtes pop-corn. Dans le pire des cas, les branches de têtes et les têtes qui sont denses succomberont au pourrissement.
Si vous observez des gouttes d'eau se former sur la surface des feuilles, il est grand temps de penser à faire de la défoliation. Libérer la zone inférieure et médiane des feuilles est un excellent moyen d'améliorer la circulation de l'air.
LES DÉSAVANTAGES DE LA DÉFOLIATION
Les plants de cannabis en intérieur bénéficient de la défoliation pour deux raisons. La première est parce qu'ils reçoivent la lumière d'une source stationnaire au-dessus d'eux, et la deuxième est parce que les conditions environnementales sont contrôlées par le cultivateur et non Mère Nature. Les plants d'extérieurs eux, n'y gagnent pas beaucoup, car les cas échéants se vérifient pour eux. Le soleil traverse le ciel, illuminant sur sa route, différentes portions de la plante de son lever à son coucher.
Les cultivateurs en extérieur n'ont pas besoin de manipuler les plantes afin qu'elles se développent en adoptant une structure plate puisque le soleil est infiniment plus puissant que n'importe quelle lampe de culture et qui plus est, il est toujours en mouvement. Tailler les feuilles des plants extérieurs les rend également plus vulnérables aux conditions humides et brise leurs barrières naturelles contres les nuisibles.
De nombreux cultivateurs d'intérieur peuvent, et malheureusement, c'est souvent le cas, réduire le rendement final à cause d'une défoliation faite au mauvais moment et/ou excessive. Tailler les plantules n'est pas conseillé et engendre souvent des plants nains. Scalper les plants matures est encore pire, et au lieu d'obtenir de longues branches de têtes, vous obtiendrez probablement encore moins de fleurs. De même, tailler des plants malades ou en mauvaise santé à n'importe quelle période de la croissance risque de paralyser la croissance plutôt que d'encourager la formation de fleurs denses.
Jour44 Arrosage une fois sur 2 topmax de biobizz
Jour46 arrosage avec de l'eau ph6.3 à laquelle j'ajoute 0.8g par litre d'eau de feeding enhancer greenhouse.
Jour47 léger arrosage.
Jour48 léger arrosage


Processing
Likes
6
Share


@ganjaman24
Follow
Everything is looking pretty good gonna flower soon just letting the structure develop a bit more..probably going to let Somango veg longest


Likes
Comments
Share


@Opulent_Amber_69
Follow
This Is Going To Be Massive!
I mixed Ocean Forest and cow shit in 4 gallons, then I added Dr. Earth 2-2-2 Fertilizer, and then the other 3 gallons of Scotts Organic. I mixed all that up and I put 2 dozen nightcrawlers in it, and planted it Straight Into It.
After it grew some I topped it.
Then I topped that one, and again and again lol
I don't think I'm going to top it anymore though...
I e Got a Tennis Net for My ScrOG net, Cause I Cant Afford Nothing (Tennis Net I Found For .75) I'm Not Feeding It Nothing But Rain Water And I Go Out When It's Been Dry And Water It In The Mornings...
Tell me what you think of this jank setup lol
Likes
1
Share


@PalmaGrow
Follow
12 - 18 noviembre
Se realiza poda apical en el nodo 6 y poda de bajos y hojas

Likes
Comments
Share


Likes
10
Share


@Colectivegrow
Follow
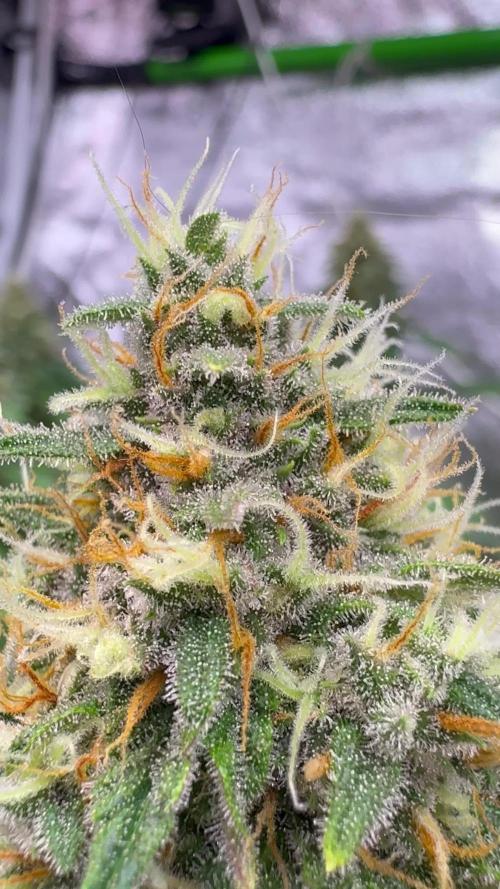
como ya habia mencionado anteriormente estoy esperando que esten listos los cogollos para poder hacer las pruebas de rigor.
pero es una cepa, rapida, fuerte y versatil. apta para cualquier cultivador.

Likes
10
Share

@DogDoctorOfficial
Follow
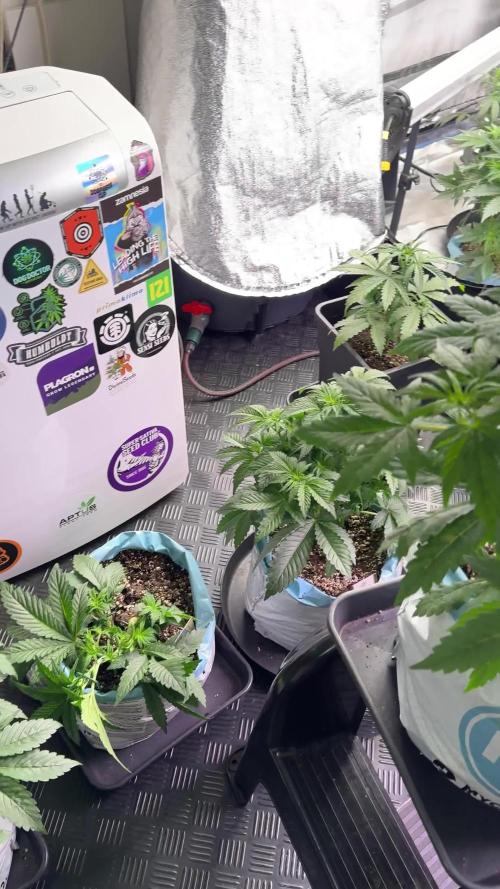
🌱 Ghost Train Haze — Week 5 From Seed (Late Veg / Pre-Transition)
This week nature reminded us who’s in charge.
Outside temps dropped to 4–5°C with 90–95% humidity, and instead of fighting it, we adapted — and so did the girls.
🌡️ Environment
• Tent temperature: ~21.8°C
• RH: ~58%
Considering the outside conditions, this is a very comfortable and stable environment, and the plants are showing zero stress signs. Leaf posture is relaxed, growth is steady, and overall vitality is excellent.
We’re embracing seasonal changes rather than forcing extremes — and the plants are responding beautifully.
⸻
Nutrition & Watering Strategy
Hand-Watered Plants
• pH: 5.9
• EC: 1.43
• New addition this week: CalMag Pro — 1 ml/L
This is not a reaction to deficiencies.
Calcium and magnesium become increasingly important during this phase due to:
• accelerating cell division
• structural development
• increasing transpiration as light intensity rises
Introducing CalMag before problems appear helps maintain:
• stronger cell walls
• stable nutrient uptake
• smoother transition toward flowering
This is prevention, not correction.
⸻
Autopot Zone
• EC: 2.29
• pH: 6.0
• Solution temperature: ~22.8°C
In the Autopots we’re running minerals only.
Organic inputs don’t behave consistently in passive systems and can lead to:
• biofilm buildup
• line blockages
• unstable nutrient availability
Keeping this zone clean, mineral-based, and predictable ensures long-term stability.
⸻
💡 Light & PPFD
• PPFD range: ~700–850 (depending on plant size)
• Top light: 100%, unchanged
• Plants are praying constantly and clearly growing toward the light — no pushing, no forcing.
Under-Canopy & Inner-Canopy Lighting
• Beginning of week: OFF
• End of week: ON (very gently)
This is not to increase total PPFD yet.
The goal right now is education, not intensity.
By introducing photons:
• from below
• from inside the canopy
• from multiple angles
…we’re teaching the plant early that light is everywhere, preparing structure and bud sites for later stages. Intensity will increase only as the plants evolve.
⸻
🌿 Training & Structure
• No heavy training
• No aggressive defoliation
• Only:
• leaf tucking
• gentle branch bending
• very light LST
These plants are naturally compact, with:
• beautiful branching
• large, healthy leaves
• lush green color
• excellent vigor in the Autopots
Growth is slower compared to other plants in the room, which may be linked to the sativa-leaning genetics. In my experience, sativas often:
• develop more slowly early
• take longer to finish
• but reward patience later
We’ll let the plant tell the story.
⸻
🌸 Veg or Flower?
This is a 12/12 from seed run.
Some plants in the room are already showing pre-flower.
Ghost Train Haze is not — and that’s completely fine.
She is still in vegetative growth, building structure.
Delayed transition can often mean:
• more stretch later
• potentially larger final size
But we don’t guess — we observe.
The plant flips when she’s ready, not when the calendar says so.
⸻
🔁 Quick Recap for Newcomers
• Week 5 from seed
• Still vegetative
• 12/12 light cycle
• Stable environment despite harsh weather outside
• Preventive CalMag introduced
• Clean mineral strategy in Autopots
• Multi-angle lighting slowly being introduced
• Minimal intervention, maximum observation
⸻
🔮 What to Expect (and What Not To)
Expect:
• continued structural development
• slow, steady growth
• eventual self-triggered transition
Do NOT expect:
• forced flowering
• rushed development
• aggressive training
This run is about letting the plant express herself naturally.
⸻
🙏 Thanks
Big thank you to everyone following along, supporting, and sharing knowledge.
Appreciation as always to the sponsors — including Lumiflora for the under-canopy lighting — and to the community that makes these shared journals meaningful.
Growers love
Onward, calmly and patiently.
👽 New team member
Meet Mr. Baggy
Our new fluffy alien/beaver/whatever-he-is friend, won through a Grow Diaries contest.
Expect to see him around — he’s officially part of the grow now.
Week 5 Veg/pre-flower | 8×8 Tent | Master Conditions
🌍 External Environment (Context) • Outside temperature: ~5 °C
• Outside RH: 92–96% (very high humidity)
• Strong seasonal pressure influencing internal stability
⸻
🌡️ Internal Tent Conditions
• Tent temperature: ~21.8 °C
(noted drop due to cold external temps)
• Tent RH: ~58%
→ Very good considering outside conditions
⸻
💨 Airflow & Circulation
• Primary airflow: Bottom → top → wall return
• Pattern: Full-room vortex circulation
• Additional fans: Central airflow to break blind spots and mix layers
• Goal: No stagnant pockets, uniform VPD across canopy
⸻
💧 Water Source & Rationale
• Water: Dehumidifier water + rainwater
• Base EC: force
• Systems designed to support plant intelligence, not override it
FOR DISCOUNT CODES AND MORE JUST FOLLOW THE LINK https://website.beacons.ai/dogdoctorofficial
📲 Don’t forget to Subscribe and follow me on Instagram and YouTube @DogDoctorOfficial for exclusive content, real-time updates, and behind-the-scenes magic. We’ve got so much more coming, including transplanting and all the amazing techniques that go along with it. You won’t want to miss it.GrowDiaries Journal: https://growdiaries.com/grower/dogdoctorofficial
Instagram: https://www.instagram.com/dogdoctorofficial/
YouTube: https://www.youtube.com/@dogdoctorofficial
⸻
Explore the Gear that Powers My Grow
If you’re curious about the tech I’m using, check out these links:
🔆 Lighting & Environmental Control
• Future of Grow — Advanced LED lighting technology
https://www.futureofgrow.com/
DISCOUNT CODE: DOG20
• Lumiflora — Under-canopy LED lighting
https://lumiflorade.com/
• TrollMaster — Environmental controllers and automation gear (past collaboration)
⸻
Genetics
• Zamnesia Seeds — Genetics used in this project
https://www.zamnesia.com/
⸻
🌱 Soil, Substrates, Boosters & Root Support
• Plagron — Substrates, bio mixes, and supportive products
https://plagron.com/en/
⸻
🎒 Storage, Curing & Preservation
• Grove Bags — Curing and storage solutions
https://grovebags.com/
⸻
📸 Photography Equipment & Tools
(Not sponsors, but part of my creative toolkit)
• Sony A6700
• Sony full-frame macro lens + few more
• Stacking photography workflow - learning
• iPhone (for behind-the-scenes shots)
We’ve got much more coming as we move through the grow cycles. Trust me, you won’t want to miss the next steps, let’s push the boundaries of indoor horticulture together!
As always, this is shared for educational purposes, aiming to spread understanding and appreciation for this plant. Let’s celebrate it responsibly and continue to learn and grow together.
With true love comes happiness. Always believe in yourself, and always do things expecting nothing and with an open heart. Be a giver, and the universe will give back in ways you could never imagine.
💚 Growers love to all 💚
📸 P.S. – The Eye Behind the Lens
All photos in this diary (for now — except for the ones showing the camera, which I took with an iPhone) are taken with a Sony A6700 paired with a Sony full-frame macro lens and a few more.
Photography is part of the story — it’s how we share the fine textures, the glow, and the quiet details that words can’t always capture.
I’ve also started experimenting with photo stacking — a technique where multiple images, each taken at a slightly different focus point, are layered together to create one perfectly sharp image from front to back.
It’s not digital enhancement or AI; it’s pure photography — a way to reveal the plant’s beauty in microscopic depth, from trichome to petal.
You’ll even see a few shots of "ghost me" capturing the shots — camera, lens, setup — because every grow deserves not just to be cultivated, but documented like art.
FOR DISCOUNT CODES AND MORE JUST FOLLOW THE LINK https://website.beacons.ai/dogdoctorofficial
NEW DISCORD - Official Server Invite Link : https://discord.gg/ksjAkA5T74
Likes
14
Share


@Momgrowsthechronic
Follow
Welcome to Week 1 of the Sweet Seeds Gorilla Girl XL Autoflowering grow courtesy of the fine folks at Sweet Seeds! This is the second of three consecutive grows/diaries that I am doing to showcase the tried and tested genetics from this reputable seed breeder. My last grow was a smashing success so I have high hopes for this grow as well. Nothing much to report for Week #1 although I will mention that the first watering was only 0.7 of a litre per plant (0.18 of a litre per plant per day) and the second was 1.4 litres per plant (0.35 of a litre per plant per day). I am watering on my usual schedule of every fourth day as this seems to be the sweet spot throughout past grows. I am using the usual- air bubbled tap water that is PH’d to around 6.0 and if need be (over the winter months in Canada) warmed to 68-70 degrees prior to hand watering with a small watering can. The seedling that lost one of it’s cotyledon leaves is fine but still a little smaller than her sisters. So now on to Mom’s tip of the week…
Mom’s Tip for Week #1 is- YOU GET WHAT YOU PAY FOR- QUALITY IS KEY!… When considering growing Cannabis, even on a small scale, quality is an important factor in all aspects from the seeds to set up to the supplies used throughout the grow. Starting with seeds from a established breeder will raise the odds considerably in your favour for a successful outcome. Many seed companies are more than willing to ship out freebies while building up their brands which seems attractive to new growers- but use at your own risk! There’s nothing worse than being halfway through a grow and discovering male flowers tucked in amongst the lowest branches or realizing that your beautiful buds have been mysteriously pollinated just weeks before harvest. I know that seeds from a reputable seed breeder are usually more expensive and can be hard to access in certain parts of the world. But purchasing quality seeds from a reputable seed company is the first step towards homegrown Cannabis success. An area that new growers often overlook due to the high price is the quality of crucial components in their set up- including tent, lights, and intake/exhaust fans. Anyone can get away with cheaper pots, oscillating corner fans, water pumps for dechlorination, etc but it’s worth every penny investing into the workhorses of your entire operation. An initial investment of around two thousand dollars will provide serious growers with the longevity and hassle free basics needed. If done right, quality components will pay for themselves within the first 6-12 months of use and continue to serve your needs for 3-5 years to come. Supplies used throughout the grow are the final area where quality is important but somewhat subjective too. Although I’ve already stated that I don’t feel the need to spend big dollars on all the extras (pots, oscillating fans, water pumps for dechlorination, PH/moisture meters, etc- I do believe in doing my homework to make sure that I’m getting the best bang for my buck. I thoroughly research every item purchased and used in my grows by reading customer reviews, speaking with other growers and sometimes even trial and error at my own expense. Making quality an important factor in all aspects of Cannabis cultivation will benefit you, your grows and the planet we live on. 🌳🌎🌳


Likes
8
Share

@ThatsmyGrow
Follow
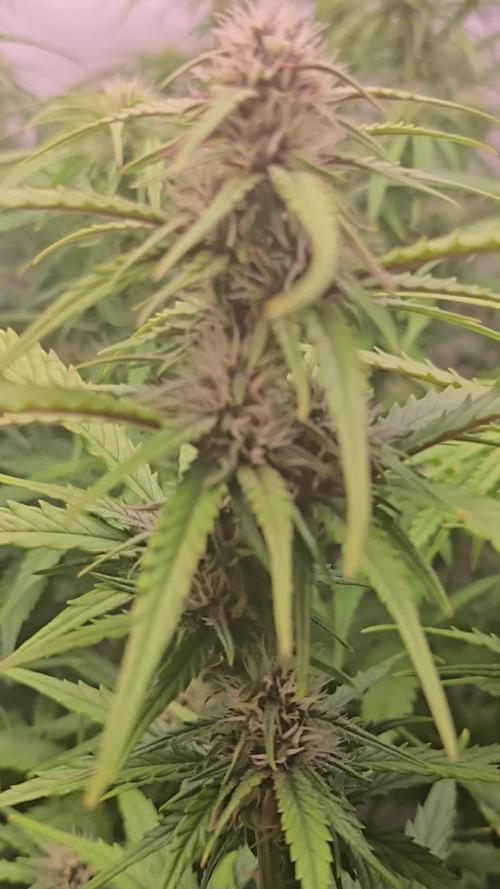
The cookies strain from fastbuds are sooo amazing. This pheno looks again so yummi, love it.
Likes
Comments
Share

@shwable
Follow
Welcome to week 9!
Everything looking good, I removed the net and let them grow for themselves from now on.
Only using some LST clips.
Have a great week guys, see yall at Mary Jane!
Likes
3
Share


@SelfCultivationGrower
Follow
My long vegging. Pheno of Fat Banana Auto is finally ready for harvest. Top Buds got nice purple leaf tips. Smell and bud structure is 10/10. I did wet trimming because of high humidity levels.
Likes
8
Share


@Jays_Not_Here_Man
Follow
Week 6-Day 42 ❤️🇨🇦🌱😎💨
Ladies have been coasting along, haven’t had to do much other than water every 3rd day. I’ve decreased most of N ratio, there is still some in the Cal Mag and Big Bud, and upped the P and K along with the Big Bud. PH has been bang on, I’ve been varying the PH at feeds, and testing the runoff and slurry mix, been a very healthy 6.1-6.4 on the higher end !
Things are getting thicker and hairier in the garden, and with slightly higher RH this week, I’ve been giving them a lot of air flow, seems like the frost on all of them have kicked it up a notch!
They’ve got some incredible terps coming off them, I clearly need a secondary carbon filter when growing these types of potent strains, cause my whole house stinks! It seems that whenever the fan is not running, the wafts of skunk and pine are escaping 🤤 it will be another 2-3 weeks, but I’m getting excited 🤗🌲💥
Happy Growing 🇨🇦❤️👊

Likes
22
Share


@ZinosBest
Follow
Week III. First Half
After starting the LST I was patiently waited for some issues or just simply the short-term changes, results.
They definetly reacting perfect well to the training so they will have a long journey to get bigger and widther with a condition everyday training, bending, strerching down and wide.
For first timer LST user after 1 week ...
I am very very interested and upliftid by it.
I love this technique at the moment. But later ScrOG always on my mind to get even better results for the width...

Likes
7
Share


@Karl_Heinz420
Follow
Original Sensible Seeds - Frosted Guava 🍈
Enjoy - Week 8 👨🏻🌾❄️
- 25-28 grad Celsius
- 55-60% humidity level
- 20l Air-Pot
(75% BioBizz All-Mix, 25 % BioBizz Worm Humus)
- RO-water (PH 6,25)
Day 50 👨🏻🌾 Frosted Guava
- LST
Sanlight Evo 3-60 40%: about 400 PPFD
Spider Farmer Glow30 6h/18h on

Likes
6
Share


@TheSurfBud
Follow
Getting some fade, might be the cold weather, finding it hard to keep this area heated right at night..
All in all, buds are swelling with sweet smells arising
Following High Powered Organics Gro-dirt Gro-Guide with all the nutrients and soils.
@highpoweredorganics or
www.highpoweredorganics.com

Likes
18
Share


@berlinbeginner
Follow
High temperatures and nutrient burn. At this point i have no idea what i am doing. Every now and then SD2 and SD3 release typical weed smell but apart from that no other smell. The stems upon rubbing and touching smell like cinammon,cloves and orange zest.It reminds me of fanta drink.


