Likes
Comments
Share
@CalGonJim
Follow
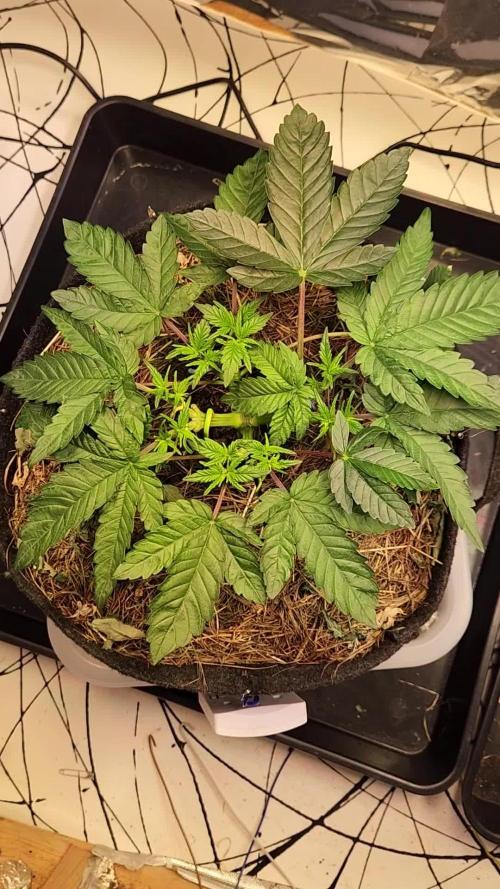
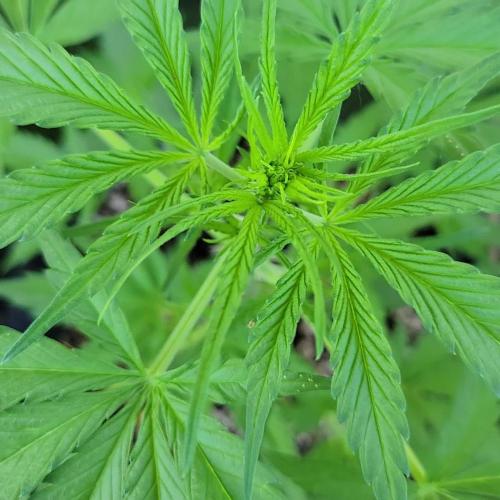
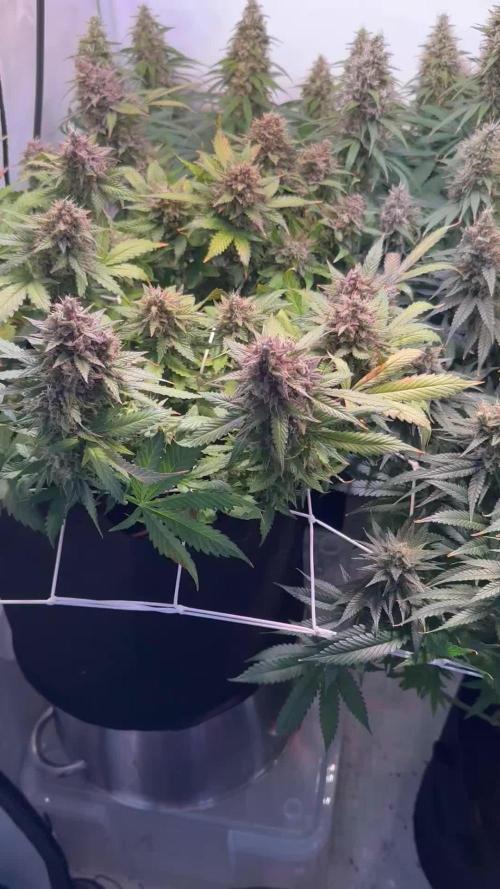
8/3 12:36AM MONDAY FULL RETARD MODE ACTIVATED 8/3 10AM " They look solid for where they are. **Quick visual read:** - **Right plant (front)** — strongest of the three. Good color, solid node spacing, leaves are filling out nicely, no obvious stress. This one is handling the current feed best. - **Back plant (Mendo Frost)** — clean and upright, healthy light-to-medium green. Looking very consistent. - **Left plant (front)** — a bit behind the other two in size and leaf development. Color is still good, but it’s the lagging phenotype of the three. Common with mixed RF3 packs — you’ll often get one that starts slower. None of them are showing tip burn, clawing, or dark “overfed” green, which means your decision to keep the EC at 0.93 while adding the light amino dose was correct. They’re not hungry yet either (no pale yellowing or slow growth signs), so jumping straight to 1.1 without aminos today is a clean next step. At this stage (early veg, still small pots/coco), staying in the 0.9–1.2 range is ideal for RF3s and Mendo Frost. They’re still building structure and roots more than bulk. Once the stronger two start putting on more rapid growth and the internodes begin tightening a bit, you can ease toward the higher end of that range. One small observation: the left plant’s lower leaves look a touch softer/less turgid than the others. Keep an eye on whether that improves after the next watering. If it stays lagging while the other two take off, you can always give it a slightly lighter feed or just let it catch up at its own pace — mixed packs almost always have one slower starter. Overall they look healthy and on track. The amino experiment didn’t push them over. You’re dialed in right now."" 8/5 12:16AM. 8/3 Grandpa from the Lost Boys Mode activated 8/7 3:41am 👍 Yes, 400 mg each of L-proline and L-phenylalanine in a gallon of water is a low, one-time dose that should have only a minor effect on EC. Rough concentration 1 US gallon ≈ 3.785 L ~400 mg of each → roughly 105–106 mg/L per amino acid (total ~210–212 mg/L). Proline molecular weight is ~115 g/mol, so this is about 0.9 mM. Phenylalanine is higher MW (~165 g/mol), so closer to 0.6 mM. These are in the range commonly discussed for plant use (often 0.5–2 mM or a few hundred mg per gallon for proline as a stress aid). Effect on EC Amino acids do contribute some conductivity because they can ionize (especially depending on pH), but far less than mineral fertilizer salts at the same mass. At this low concentration the rise is usually modest—often in the 0.1–0.3 mS/cm ballpark or less, depending on your starting water, existing nutrients, and meter. In practice, many growers add pure L-amino acids at similar or higher rates without big EC swings. The big EC jumps seen in some studies come from much higher doses of mixed commercial amino products. Measure your solution EC (and pH) before and after dissolving them so you know exactly what happened in your mix. If you’re already running a target EC for the autos, you can simply account for the small bump or dilute slightly if needed. Will it help / any downside? L-Proline: Plants accumulate it under stress (heat, drought, salinity, osmotic stress). Exogenous proline is often used to support osmotic adjustment and stress tolerance. A single modest dose is unlikely to hurt and may give a small buffer if the plants are dealing with any environmental stress. L-Phenylalanine: Precursor in the phenylpropanoid pathway (leads toward flavonoids, lignin precursors, and various secondary metabolites). Some research and grower use explores it for supporting secondary metabolism; effects are more variable and usually not dramatic from one application. Because this is a one-time introduction at a conservative rate, risk of imbalance or toxicity is low for autoflowers and your other plants. Amino acids are generally well-tolerated when kept moderate; the main caveats with higher or repeated doses are possible effects on nitrogen metabolism or nutrient uptake patterns, and the fact that they can feed microbes if the solution sits too long. Practical notes These are pure L-forms from the labels (BulkSupplements and Nutricost), which is what you want. Dissolve fully, check pH/EC, and use reasonably soon. For coco or other soilless media, just include it in a normal feed or water event. No need to change your overall regimen for a single application. Keep an eye on the plants for a few days after (normal advice with any new input). If everything looks happy, you’re good. You’re not wrong for trying a light one-off addition of these two. It’s a reasonable, low-risk experiment at the dose you used. Measuring the actual EC change will give you the clearest answer for your specific water and nutrient base..👍 8/7 11:54 PM Classic Stock Car Race Replays by My Journey 4K.... distracted by classic cars again
Likes
6
Share
@nonick123
Follow
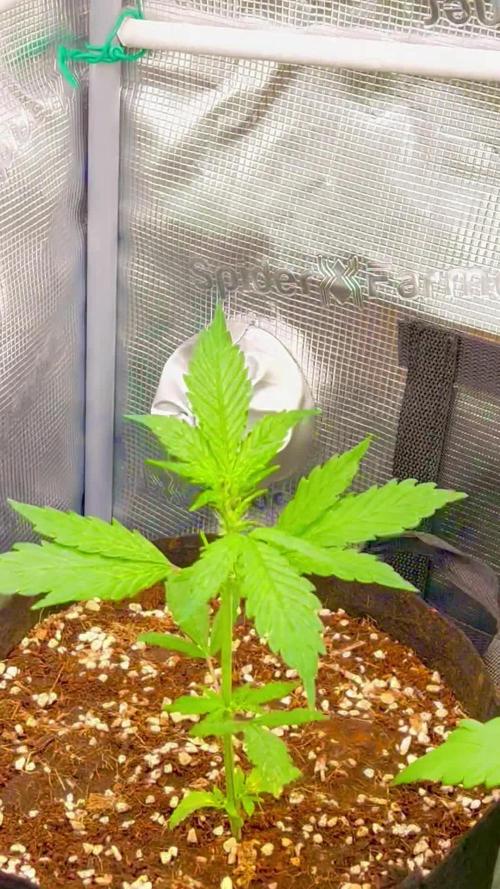
Bienvenidos al diario de Gorilla Zkittlez Auto por FastBuds Día -4 (02/05): Se coloca la semilla en tubo de ensayo con 15 ml de agua (EC 0,5) + 3 gotas agua oxigenada (H2O2) en un lugar oscuro a 25 ºC durante 48 horas Día -2 (04/05): Se prepara una maceta (11L) con 8,8 Litros (80%) de sustrato PRO-MIX HP BACILLUS+MYCORRHIZAE + 2,2 Litros de Insect Frass (20%) + 110 gramos de Earth Vibes Super Soil (10 g/L substrato) Se mezcla con el agua del 1er riego (EC 0,4) la parte proporcional de la probeta de microorganismos y se riega muy lentamente hasta percolación profunda Se hace un agujero de 1 cm de profundidad, se coloca la semilla al azar en el agujero, se tapa con un poco de sustrato y se humedece ligeramente con agua en spray Se coloca parte superior botella en la zona de germinación para mantener humedad relativa alta Se introduce en el armario con la lampara ENCENDIDA para mantener la temperatura 20-21 ºC en las horas nocturnas Día -1 (05/05): Se intuye que la semilla empieza a romper el top del sustrato! NO LA TOQUES! 😡🤣 💦Nutrients by Lurpe Solutions - www.lurpenaturalsolutions.com 🌱Substrate PRO-MIX HP BACILLUS + MYCORRHIZAE - www.pthorticulture.com/en/products/pro-mix-hp-biostimulant-plus-mycorrhizae
Likes
5
Share
@yamyam
Follow
Less is more Plant stretched into light, had to ziptie light to the top
Likes
25
Share
🍁💐 Runtz: La Runtz de Zamnesia 🌱🔥 es una variedad de cannabis de alta calidad, resultado del cruce entre las legendarias Zkittlez 🍬 y Gelato 🍦. Este híbrido perfectamente equilibrado, con un 50% índica 🛋️ y un 50% sativa 🌞, combina lo mejor de ambas genéticas para ofrecer una experiencia intensa 💥, sabrosa 😋 y completa. Su nivel de THC puede alcanzar el 27%. El TS1000 de Mars Hydro es una lámpara LED increíble para el cultivo interior 🌱💡. Ofrece una excelente combinación de potencia y eficiencia, perfecta para espacios pequeños y medianos. Su espectro completo simula la luz solar 🌞, ideal para todas las etapas del cultivo, desde la germinación hasta la floración. Además, el consumo energético es súper bajo ⚡, pero la producción es impresionante 🌿🔥. La distribución uniforme de la luz asegura plantas sanas y cosechas abundantes. Definitivamente es una gran inversión. Para este Concurso usaré la gama de fertilizantes de Plagron tal como mandan las reglas. 📆 Semana 1: He cambiado el horario 12/12 para seguir la tabla de fertilizantes, también he aplicado tierra de diatomeas para evitar plagas indeseadas. Ha sido una semana explosiva, las hojas son grandes, anchas y ya empieza a desprender olor.
Processing
Likes
17
Share
@Fergie
Follow
Hey guys so here are my c.a ladies I'm loving the smell off these is defo a strong cherry aroma 😀sorry for poor pics my tent is full and not easy to move around . Will be another few weeks I think to get that amber tricomes I am looking for .
Likes
9
Share
Die 6 Blütewoche hat angefangen. Ab jetzt werde ich anfangen die Pflanzen zu spülen, die Trichomköpfe sind schon sehr weit vorgeschritten was den Reife grad angeht. Deshalb muss ich das besondere Aufmerksamkeit schenken. Bis nächste Woche.
Likes
3
Share
@ElCapo420
Follow
Ich habe mich doch dazu entschieden meine Ladys umzutopfen weil sie alle gespargelt sind, obwohl alle gegen das umtopfen von autoflowers sind. Diese Woche habe ich angefangen sie langsam an die Sonne zu gewöhnen am Balkon damit sie nach den Eisheiligen raus in den Garten können. Wie ihr seht wachsen sie alle relativ gut aber sehr unterschiedlich. Wir haben auch mit dem BioBizz Fish-Mix angefangen und sie hab es geliebt. Pflanze #3 ist ein bischen hinterher aber das wird hoffentlich noch.
Likes
3
Share
Clementine Slush #3: Another stalwart of the tent and candidate for topping this week! Clementine Slush #3 is growing well into week 4 and we gave her head a good ol' chop on day 27. She had a bit of discoloration on some lower fan leaves, but I chop that up to transplant stress and adjusting to the coco moisture. She better get ready... the transplant to 5 gallons is coming! Tent-wide update: This week was very relaxing in the tent, as we prepare for the major transplant into their final 5-gallon autopot home! I did a major water to runoff, which they absolutely loved! The recipe was, for 2 gallons of water: 2 Gallons RO Water 1 ml Ventana Plant Science Structure 4 ml Ventana Plant Science Grow 12 ml Ventana Plant Science Support ec .89 ph 5.7 Additionally, on day 25, I moved to 300 PPFD since the plants looked ready for an increase in light. The responded great, and the rest of week 4 has been devoted to topping plants when ready, and preparing for that big transplant. I also realized I've been a bit slack on my mixing order for Ventana Plant Science, which could be a reason for some of my cloudy reservoir issues when my autopots are on, so I will be very diligent about the proper and recommended order moving forward: Liquid Line Mixing Order Structure (first) FlaVUH Grow / Flower Expand Support (last) It's going well thus far, though I think this may be my longest grow yet!
Likes
42
Share
my Jungle looking great and smells strong
Likes
3
Share
Ya estamos casi listos para cosechar. Estamos regando con agua y solo lo estrictamente necesario para mantener hidratadas nuestras plantas. Tambien hemos reducido al 50% la potencia de nuestras luminarias LazerLite Pro 720w.
Likes
16
Share
@Ensign420
Follow
Introduction - Week 14|07 Summary - Ensign's log, stardate 9437.65, Great week of growing! Wow what a good week! Growth in the main tent has all around been incredible! Submitted my first submission to the Global Grow Cup! Filmed a video of the solo cup container (marked with the ticket/order number) that will be used for the competition. Also had to fill and prove the solo cup holds 2 cups of soil. Now I need to root a clone (for the first time), transplant her into this cup, and submit my 2nd entry before the 30th of this month. As far as my first attempt at cloning, have already begun the rooting process! Managed to take cuttings from 3 out of the 6 phenos in the main tent (the first cutting was also my first time topping). Soaked the cuttings for two days before planting them into Coco Coins. So far everything has gone surprisingly well! The clones are now rooting under the propagation dome with the vents fully closed. Will check for roots soon! At the end of the week, growth was just raging! Was planning on flipping to flower in a week, but decided to begin the first week of flower next week! Thus this is the last week of veg. Plan to flip to 12/12 next Monday! Onwards to next week! [START OF WEEK 14|07] ========================================================== Garlic Budder #1 - WEEK 14|07 - Full Veg Wk5 Garlic Budder #2 - WEEK 14|07 - Full Veg Wk2 Garlic Budder #3 - WEEK 07 - Full Veg Wk5 Garlic Budder #4 - WEEK 06 - Full Veg Wk4 06/03/24 → 06/09/24 This Week's Estimated Goals ---------------------------------------------------------------------------------------------- DLI: ~26 mol/m²/d PPFD: ~400 μmol/m²/s VPD: ~1.0 kPa This Week's Meter Readings & Averages [Lights On: 16:00 - 10:00] ---------------------------------------------------------------------------------------------- DLI: 24.56 mol/m²/d PPFD: 379 μmol/m²/s VPD: 0.91 kPa Soil %: [32.7, 37.6, 37.9, 34.1] ========================================================== Day 01 - Monday - 06/03/24 - Total Days: 098 ----------------------------------- Daily Averages [~23:00] - Temps: 80.7°F [27.1°C] - Humidity: 74.4% - VPD: 0.90 kPa - Soil %: [31, 34, 39, 35] ----------------------------------- - [09:57]: Quick morning check! --- #1 is looking a bit droopy, but almost lights off (at 10:00) so not concerned. --- Nice! Mainly wanted to check on #4 and she is looking great! She’s perked back up and looking good! - [23:08]: Evening check. --- Wow! It’s a jungle in here! --- #1 has gotten too big? Nah!? Keep on growing girl! --- #2 is growing and definitely getting bigger! Growth just looking really weird. --- #3 has continued to get larger and is looking quite uniform in growth! --- #4 is growing and looking perky again! --- Even the original #1 and #2 phenos (in the back) are looking good! --- Wow! #4 is really getting close to the light. - [23:14]: Checked down both fill tubes. --- Both reservoirs were completely dry! - [23:27]: Checked the Ecowitt soil moisture sensor data: --- 30% - [CH01 EB1 - Garlic Budder #1] --- 34% - [CH02 EB2 - Garlic Budder #2] --- 39% - [CH03 GFP - Garlic Budder #3] --- 32% - [CH04 FPT - Garlic Budder #4] - [23:32]: Poured 4 cups of distilled water down EB1’s fill tube. --- Poured 2 cups of distilled water down EB2’s fill tube. - [23:38]: Checked the humidifiers. --- Refilled the 4X4’s humidifier with distilled water. --- Tomorrow, plan to defoliate and start cloning for the first time! --- Going to take multiple cuttings from both #1 and #4 for sure, but still deciding on the rest. --- Getting hyped! Day 02 - Tuesday - 06/04/24 - Total Days: 099 ----------------------------------- Daily Averages [~23:00] - Temps: 81.4°F [27.4°C] - Humidity: 74.3% - VPD: 0.93 kPa - Soil %: [29, 35, 38, 32] ----------------------------------- - [11:59]: Time to film the first entry for the Global Grow Cup! --- Going to be using BuildASoil 3.0 potting soil. --- Filming the video using a stand and my phone. --- This video is mainly to establish the container that the plant will be grown in. Also to prove that the container is a 16oz container and that it can hold 2 cups of soil. --- The ticket (order) number also had to be written on the cup. - [12:36]: Done! --- The video had to be done in one continuous shot with no edits (my original submission does not have the logo). --- There was also a photo that needed to be shot which shows the cup filled with 2 cups of soil (just like the video, the original image submission did not have the logo). --- I think I did everything correctly, but also sent an email for verification of submission and validation. --- Getting hyped! --- [*smokes a bowl] --- Going to defoliate today along with for the first-time, going to take cuttings for clones! --- After a bit of online research, decided to split the cloning process into two days. --- Today going to take cuttings and will soak them in a solution of aloe for 24hrs. Afterwards will change the water out and use straight distilled water. --- Then in a couple days, plan to transplant into coco plugs (Coco Coins) for rooting. --- For optimal results, also be using a rooting hormone (Clonex). --- Well.. Here goes nothing! - [17:01]: Evening check. --- Wow! #1 is looking huge! Her main top is stretching above the lower canopy which is continuing to bush out. --- #2 is growing along. Growth is gnarly and a bit droopy, but she’s getting taller! --- #3 is looking great! Still a bit small, but she is continuing to get larger. --- #4 looks like she needs a watering. --- Both plants in the back are also looking surprisingly great as well! - [17:05]: Checked down both fill tubes. --- Both reservoirs were completely dry! --- As far as today's defoliation, going to leave #2 and #3 alone and will focus my defoliation and cloning on the rest of the plants. --- This will be my first attempt at cloning, also going to try topping for the first time today. --- No pressure Ensign. What can possibly go wrong right? - [17:27]: Time to start the cloning and defoliation process! --- Filled a measuring cup with 3 cups of distilled water. ------ Added 3/4tsp of Horticultural Aloe ------ Added 1 more cup of distilled water --- Mixed the solution and poured an even amount into three separate solo cups. --- Made sure to mark two of the cups (#1 and #4). The unmarked one will be for any other clones from amongst the 6 phenos (if any at all). - [17:43]: Time to top and defoliate #1! --- Using a pair of brand new trimmers (AC Infinity), --- Gently cut the main stalk to even out the canopy. --- Then trimmed and cleaned most of the nodes leaving the top node or two. --- Also trimmed the leaf fingers a bit before placing the top cutting into the cup of aloe solution. --- Now for the rest of the cuttings! --- [~45 minutes later] - [18:32]: Managed to finish defoliating and cutting the rest of the clones. --- Took two more lower cuttings from #1 (3 clones total). --- Took 3 lower cuttings from #4 --- While defoliating, decided to try and clone the original #2 pheno as well. Took 4 small cuttings. --- Similar to the top cutting, trimmed and cleaned each lower node for each cutting before placing them into the cups. --- Before finishing up the 2nd cutting, I noticed the first cutting (the top cut that was also trimmed) was drooping. --- So I did not trim and the leaf fingers for the other cuttings. --- In total there were 10 cuttings taken for potential clones. --- My main focus was to take cuttings and to clean up all the lower growth from both #1 and #4. --- Defoliated and cleaned up the back original phenos as well (also trimmed back the cover crop). - [18:35]: Temporarily placed the cuttings onto the floor of the 4x4 tent. --- Took the trimmings (about 3 cups) and spread them onto the top mulch of #1 and #2. --- Time to set the environmental controls for the 3x3 veg tent. - [18:43]: Within the AC Infinity App, --- For the Veg Tent [3x3] controller, --- Adjusted the 'Vegetative [18/6]' Schedule for the grow light. ------ Set the Mode to ‘On Mode’ ------ Set the START/END times to 04:00PM/10:00AM ------ Set the MAX to 1 --- The IonBoard S33 is now utilizing around 60.8W (at intensity 1 out of 10). --- Adjusted the 'Vegetative [18/6]' Schedule for the exhaust fan. ------ Increased the Humidity’s HIGH trigger value from 81% to 87% --- Adjusted the 'Vegetative [18/6]' Schedule for the humidifier. ------ Decreased the VPD target value from 1.5kPa to 0.8kPa - [18:52]: Moved the cuttings into the 3x3 veg tent. --- It begins! I think. --- Going to let these cutting drink some aloe for a day before switching to straight distilled water. --- Hmm. Could be the white floor of the 3x3 veg tent, but have noticed the S33 has a whiter spectrum whereas the FC-6500 seems to be warmer in color. --- Anyways, - [18:58]: Poured 4 cups of distilled water down EB1’s fill tube. --- Poured 2 cups of distilled water down EB2’s fill tube. - [19:06]: Filled a pump sprayer with 5 cups of distilled water. --- Focused mainly on the straw mulch of #4. --- But also misted the straw mulch for the rest of the plants a bit. - [19:12]: Checked the humidifiers. --- Refilled the humidifiers with distilled water. - [19:44]: Going to be using Clonex rooting gel before planting the cuttings into Coco Coins (pre-soaked with microbes and aloe). But before that begins, going to transfer the Clonex gel into a squeeze bottle. --- Gently peeled back the seal on the original Clonex bottle. Just enough make a tiny opening, --- Then slowly and carefully poured the gel into an empty squeeze bottle. --- Also removed the sticker from the original bottle and placed it onto the new one. - [19:54]: Perfect! --- Instead of applying the gel to the cutting, going to be applying the gel to the Coco Coin. --- This squeeze bottle will make applying the gel a lot easier. --- Will take PPFD readings tomorrow. --- Also will change out the aloe solution to distilled water. --- I really hope I didn’t screw things up before they could even begin. --- Don’t die on me ladies! --- Please. Day 03 - Wednesday - 06/05/24 - Total Days: 100 ----------------------------------- Daily Averages [~23:00] - Temps: 81.9°F [27.7°C] - Humidity: 75.5% - VPD: 0.90 kPa - Soil %: [29, 36, 38, 36] ----------------------------------- - [09:40]: Quick morning check! --- #1 is looking a bit droopy, but looking okay. Topping is a high stress technique so going to take some time to recover. Don’t plan on flipping the main 4x4 tent to flower for a good week or so which should be enough time. --- #4 looks great! The defoliation seems to have no effect on growth. Nice! - [09:41]: Also quickly checked on the 3x3 veg tent, --- Nice! The cuttings are looking great! --- No yellowing and they all seemed to have turned up towards the light. --- So far so good! - [22:53]: Evening check. --- #1 is continuing to dominate this grow! She has spread wide and looking incredible! --- #2 is looking gnarly, but getting there. --- #3 is getting larger! But still a runt. By far, her leaves are the darkest of the bunch, but she is still growing! --- #4 looks happy and growing along beautifully! Wow! - [22:55]: Checked down both fill tubes. --- Both reservoirs were completely dry! - [22:59]: Poured 5 cups of distilled water down EB1’s fill tube. --- Poured 2 cups of distilled water down EB2’s fill tube. - [23:05]: Checked on the 3x3 veg tent. --- Ooo yea! The cuttings are still green! Nice! - [23:07]: Took PPFD readings. --- The cuttings were around 121 μmol/m²/s which gives a DLI of 7.84 mol/m²/d --- Nice! These levels are on the lower range for seedlings (~100-300), perfect! I think. - [23:14]: Swapped the aloe water out to straight distilled water. --- Going to let these cuttings soak for one more day before planting. --- Please don’t die girls! - [23:15]: Checked the humidifiers. --- Refilled the humidifiers with distilled water. --- Ooo yea! --- Tomorrow is the big rooting day! Day 04 - Thursday - 06/06/24 - Total Days: 101 ----------------------------------- Daily Averages [~23:00] - Temps: 81.9°F [27.7°C] - Humidity: 75.2% - VPD: 0.91 kPa - Soil %: [32, 38, 38, 34] ----------------------------------- - [16:20]: Evening check. --- #1 is a bit droopy, but growth is looking green and healthy. --- #2 is looking bigger! She’s also looking sort of droopy. --- #3 is growing along nicely! Looking good girl! --- #4 is looking great! A bit droopy but plan to water today. - [16:23]: Checked down both fill tubes. --- EB1's reservoir still has some water. --- EB2's reservoir was completely dry! - [16:23]: Checked the Ecowitt soil moisture sensor data: --- 28% - [CH01 EB1 - Garlic Budder #1] --- 36% - [CH02 EB2 - Garlic Budder #2] --- 37% - [CH03 GFP - Garlic Budder #3] --- 30% - [CH04 FPT - Garlic Budder #4] - [16:30]: Using a pump sprayer, --- Misted the straw mulch of #4 with 6 cups of distilled water. --- Focused mainly on the straw mulch. --- Also misted the straw mulch of #3 (in the grassroots fabric pot) a bit. - [16:43]: Poured 5 cups of distilled water down EB1’s fill tube. --- Poured 3 cups of distilled water down EB2’s fill tube. - [16:52]: Checked the Ecowitt soil moisture sensor data: --- 56% - [CH01 EB1 - Garlic Budder #1] --- 44% - [CH02 EB2 - Garlic Budder #2] --- 40% - [CH03 GFP - Garlic Budder #3] --- 45% - [CH04 FPT - Garlic Budder #4] - [17:01]: Took general PPFD readings. --- #1 was around 379 μmol/m²/s which gives a DLI of 24.56 mol/m²/d --- #2 was around 333 μmol/m²/s which gives a DLI of 21.58 mol/m²/d --- #3 was around 293 μmol/m²/s which gives a DLI of 18.99 mol/m²/d --- #4 was around 378 μmol/m²/s which gives a DLI of 24.49 mol/m²/d - [17:09]: Took the weekly height and light distance measurements. --- #1 was about 21" tall. --- #2 was about 13.5" tall. --- #3 was about 9.5" tall. --- #4 was about 19.25" tall. --- Hmm.. - [17:19]: Adjusted the right oscillating fan a bit. --- Re-angled the CloudRay S6 oscillating fan upwards. Been noticing that the air has been hitting the tops of the plants so easing off a bit (#1 is still getting hit, but she’s huge so not too worried). - [17:23]: Back to the measurements! --- #1 was about 9.5" away from the grow light. --- #2 was about 17" away from the grow light. --- #3 was about 17.5" away from the grow light. --- #4 was about 11.5" away from the grow light. - [17:46]: Checked on the 3x3 veg tent. --- Cuttings are still green! They do look a bit droopy but no signs of yellowing. --- Okay! - [17:55]: Time to begin the rooting process! --- For my first attempt at rooting, going to be using Coco Coins pre-soaked in saponins, microbes and aloe. --- To further help with rooting, going to also be using Clonex rooting gel. --- Filled a measuring cup with 4 cups of distilled water. ------ Added half of 1/64tsp of Quillaja Saponaria Extract [60] ------ Added 1/16tsp of Horticultural Aloe ------ Added 1/8tsp of Mycrobe Complete --- Mixed the solution thoroughly. --- Time for the Coco Coins! --- 10 cuttings means 10 Coco Coins. - [18:09]: Dropped 10 Coco Coins into the measuring cup. --- The coins immediately started to expand. --- A bit too much.. Oops! --- Poured the solution and Coco Coins into a pitcher. --- Added 2 cups of distilled water to the solution (now at 6 cups). --- Great! The coins are pretty much fully expanded, but going to wait a bit longer to fully saturate each coin. --- [~20-30 minutes later] - [18:42]: Great! --- Took the seedling and flood tray from the AC Infinity propagation dome and placed all 10 Coco Coins into the slots. --- Gave each Coco Coin a quick shake to remove excess solution. The coins were not dripping with solution but still pretty saturated. --- Arranged them into 3 groups with the cuttings in mind. --- Also tried to keep the pre-made holes intact. --- Time to inoculate the Coco Coins! - [18:54]: Using a squeeze bottle, --- While keeping the nozzle from making contact with the coco, gently filled each pre-made hole with Clonex rooting gel. Just enough gel to fully cover the hole of each coco coin. - [19:00]: Time to plant the cuttings! --- Gave each cup a misting of distilled water. Focused on wetting the top growth with water. --- Okay! --- To avoid mixing cuttings up. - [19:01]: Starting with the original #2 pheno cup, --- For each cutting, --- Using a pair of clean trimmers, made a final 45° cut about 1/2" from a bottom node. --- Then stripped away and scared the protective membrane below the node before planting. --- Made sure the node was about 1/2" below the surface of the coco. --- To help with planting, while inserting each cutting, gave the Coco Coin a gentle squeeze to loosen the coco. This also helped to ensure the coco and gel was in good contact with the cutting. --- Once the cutting was planted into the Coco Coin, made sure to place back in the same spot (made sure to keep the cuttings in their groupings). --- Once a cup was complete, made sure to keep the label with the group. --- Re-misted the top growth as needed to keep it wet. --- Also wiped the trimmers with isopropyl alcohol in between cuttings (plan to use 10% bleach solution for next time). --- Repeated this process until all 10 cuttings were cut, planted, and in the tray. --- The coco coins fit perfectly into the tray and don’t reach the bottom. Nice! --- The bottom air gap is important. --- Poured a bit of distilled water through one of the empty slots into the bottom of the tray. Just enough to fill the bottom of the tray, but not enough to reach any of the Coco Coins (~1/4cup). - [19:35]: Placed the propagation tray with cuttings into the 3x3 veg tent. --- Placed the first layer of the propagation dome on before giving the sides a misting of distilled water. --- Also sprayed the top of the propagation dome before covering the cuttings. --- Vents are all fully closed. - [19:40]: Placed the bar lights onto the top of the dome before configuring the controller. ------ Set the START/END times to 04:00PM/10:00AM ------ Set the bar light’s intensity to 2 (out of 10). --- Also made sure the propagation light controller’s time was in sync with the Controller 69 Pro. - [19:47]: Took PPFD readings. --- The cuttings were around 136 μmol/m²/s which gives a DLI of 8.81 mol/m²/d --- The PPFD levels are similar to the floor. --- Perfect! --- Going leave the IonBoard S33 on during this rooting process. --- Will check back tomorrow to cycle the air under the dome. - [19:56]: Checked the humidifiers. --- Refilled the humidifiers with distilled water. - [20:17]: Quick night check! --- Ooo yea! Growth is raging and looking perky! --- Mainly checked on #1 and #4 which were looking incredible! --- Keep on growing ladies! Day 05 - Friday - 06/07/24 - Total Days: 102 ----------------------------------- Daily Averages [~23:00] - Temps: 82.7°F [28.2°C] - Humidity: 76.2% - VPD: 0.89 kPa - Soil %: [37, 40, 38, 35] ----------------------------------- - [10:03]: Decided to increase the ambient temp in the 3x3 veg tent. --- Within the AC Infinity App, --- For the Veg Tent [3x3] controller, --- Adjusted the 'Vegetative [18/6]' Schedule for the heater. ------ Increased the Temp target value from 78°F to 82°F --- Hopefully this will help to keep the veg tent at a more consistent temp. - [22:26]: Evening check. --- Ooo yea! The garden is looking incredible! --- #1 is looking perky and just bushing out! Wow! --- #2 is getting big! Growth is weird and leaf fingers are huge! Just going to let her grow. --- #4 is looking happy and growing along like a champ! Nodes are starting branch out and she is turning into a bush! - [10:28]: Checked down both fill tubes. --- Both reservoirs were completely dry! - [22:33]: Poured 5 cups of distilled water down EB1’s fill tube. --- Poured 3 cups of distilled water down EB2’s fill tube. - [22:40]: Checked on the propagation dome (inside the 3x3). --- Ah yea! Looking great ladies! --- Lifted the top of the dome to let some fresh air in for a bit. --- Wow! --- Leaves still look nice and green! --- So far everything looks great! --- Just going to continue on! - [22:53]: Checked the humidifiers. --- Refilled the humidifiers with distilled water. - [11:01]: Decided to adjust the humidifier for the 3x3. --- Within the AC Infinity App, --- For the Veg Tent [3x3] controller, --- Adjusted the 'Vegetative [18/6]' Schedule for the humidifier. ------ Increased the VPD target value from 0.8kPa to 1.5kPa --- The higher VPD level will essentially turn the humidifier off. --- I won’t be needing the humidifier for a good week so might as well save the water. Day 06 - Saturday - 06/08/24 - Total Days: 103 ----------------------------------- Daily Averages [~23:00] - Temps: 81.6°F [27.6°C] - Humidity: 74.9% - VPD: 0.91 kPa - Soil %: [35, 40, 37, 31] ----------------------------------- - [07:40]: Quick morning check! --- #1 and #4 are looking perky and happy! --- Also checked on the propagation dome, --- All cutting still look green! Hyped! - [20:02]: Evening check. --- Wow the garden is raging with growth! --- #1 has blown up! She has clearly recovered and growth is ramping up again! --- #2 is stretching upwards! --- #3 is now the smallest of the 4, but still getting larger! --- #4 is looking incredible! Wow! Growth looks perky and happy! - [20:05]: Checked down both fill tubes. --- Both reservoirs were completely dry! - [20:10]: Poured 6 cups of distilled water down EB1’s fill tube. --- Poured 2 cups of distilled water down EB2’s fill tube. - [20:16]: Checked the Ecowitt soil moisture sensor data: --- 35% - [CH01 EB1 - Garlic Budder #1] --- 40% - [CH02 EB2 - Garlic Budder #2] --- 36% - [CH03 GFP - Garlic Budder #3] --- 27% - [CH04 FPT - Garlic Budder #4] - [20:19]: Using a pump sprayer, --- Misted the straw mulch of #4 with 5 cups of distilled water. --- Focused mainly on the straw mulch. --- Also misted the mulch of #3 a bit (in the fabric pot). - [20:27]: Checked propagation dome (in the 3x3), --- To cycle the air under the dome, lifted the top off for a bit. --- Ooo yea! Everything is still green and looking great! --- Keep on rooting ladies! --- Oops! - [21:45]: Checked the humidifiers. --- Refilled the humidifiers with distilled water. Day 07 - Sunday - 06/09/24 - Total Days: 104 ----------------------------------- Daily Averages [~23:00] - Temps: 81.5°F [27.5°C] - Humidity: 74.8% - VPD: 0.91 kPa - Soil %: [36, 40, 37, 36] ----------------------------------- - [08:18]: Quick morning check! --- Nice! The main tent is looking great! #1 and #4 are both raging with growth! --- Checked on the propagation dome (inside the 3x3) and the clones are still looking green! --- Wow! Everything is going almost too well! Just keep on growing! - [19:08]: Evening check. --- Garden is just exploding with growth! Seems everyone has fully recovered from the defoliation and topping! --- Wow #1 is bushed out and looking incredible! --- #2 is growing really starting to get large! Growth still is funky, but stoked none-the-less. --- #3 is starting to fill in the pot! Getting larger! --- Wow! #4 is getting taller and looks healthy and green! - [19:12]: Checked down both fill tubes. --- Both reservoirs were completely dry! --- Wow the canopy is really starting to get taller and closer to the light. May need to raise it up soon. --- Absolutely surprised how low the light levels have been throughout this entire cycle. Barely moved the light and have not increased the intensity past 2 (out of 10). Less is really more. --- Anyways! - [19:18]: Checked the Ecowitt soil moisture sensor data: --- 36% - [CH01 EB1 - Garlic Budder #1] --- 41% - [CH02 EB2 - Garlic Budder #2] --- 37% - [CH03 GFP - Garlic Budder #3] --- 34% - [CH04 FPT - Garlic Budder #4] - [19:19]: Poured 6 cups of distilled water down EB1’s fill tube. --- Poured 3 cups of distilled water down EB2’s fill tube. - [19:24]: Checked propagation dome (in the 3x3), --- To refresh the air, lifted the top off for a bit. --- Sweet! Still green! Wow! --- Using a spray bottle, misted the top growth with distilled water. - [20:35]: Checked the humidifiers. --- Refilled the humidifiers with distilled water. --- Wow what a week! --- Growth has been just insane in the 4x4 tent! All plants have fully recovered and have just exploded with growth. --- I think it’s time to flip to flower! --- Also, I’m absolutely baffled about how well the cloning process has been going. --- So far no issues! --- Not complaining, but just surprised. Keep on growing ladies! --- If all goes well, should have fully rooted clones soon ready for transplanting (into solo cups of course). --- Absolutely hyped for next week! --- Maximum warp Ensign, Engage! [END OF WEEK 14|07]
Likes
13
Share
Girl Scout Cookies Auto was suddenly ready to get chopped - I would've like to see a few more amber trichomes, but the fan leaves started yellowing faster, and more sugar leaves got crispy tips. Also, the smell got pretty strong over the last week or so. It was a very nice grow, and I'm curious on the yield and effect after drying and curing. Yuhbar Auto still needs a little more time, and will enjoy a few more days or weeks under the (artificial) sun, giving the trichomes more time to ripen.
Likes
4
Share
Just been feeding them this week, not much else to do.
Likes
9
Share
Flush flush Bigger buds buds Let’s prepare harvest :) Did the full cycle from the advanced nutrients feeding chart , know I flush and prepare the harvest , planing a late harvest for more cbn and relaxing high - and little bit other terps Today 16.02.2025 - blooming starts at 20.12.2024 - D59
Likes
29
Share
Flowering continues thru week 13 and the buds are growing well on all plants. The trichome production is in full swing now as well, therefore my Fruity-Terp ladies start to exude a delicious fruity aroma in the tent. The Purps from BC-BUD-Depot has a nice grape-candy smell while the Strawberry Sour Diesel from DevilHarvestOriginal had a strong lemony aroma with a little fuel mixed in. The BADAZZ fro Ripper Seeds smells DANK, very gassy and fuelly. The Super Lemon haze from Greenhouse Seeds has a nice and strong Haze aroma, unfortunately without any lemon smell. The MAC from Tropical Trees Seeds has a lso a strong Haze aroma, reminding me of Amnesia Haze. The Kritikal-K has more of a peachy aroma, while the Pineapple Dream and Zkit Kandy Dream from Kannabia Seeds have a very sweet aroma reminding me of pineapple. The nice healthy green color shows that the plants LOVE their BIO NOVA nutrients as well as the light-spectrum and intensity of the SANlight EVO4-120 LEDs. The fixtures are still running on 100% (=not dimmed) to have full flower production. This round is continuing to go VERTY WELL, I literally can see my buds grow every day...😉
Likes
13
Share
@Selkot
Follow
. Hey all 👋 Here we go for a second diary I received several seeds as gifts (thanks FB), and I still have some room left in my tent, so I'm adding 1 Banana Purple Punch in an 8L pot. The germination week went wonderfully! The baby girl has joined her big sisters; we'll see how she does in a pot that's half the size 😉 more vids ? 👉 https://www.youtube.com/channel/UCtAGX0oCBY92aj3VJCG5q-Q
Likes
7
Share
Guys had some hard weeks imagine all cookies seeds becomes ladyboys chopped all. Lost about 9 weeks. My whole hope finish him perfectly only 3 weeks left 💀💀
Likes
11
Share
Great week for growth may be in flower next update we will see
Likes
17
Share
@Chevywood
Follow
Could anyone estimate when they will be done .