The Grow Awards 2026 🏆 


Likes
Comments
Share
@Easygrower
Follow
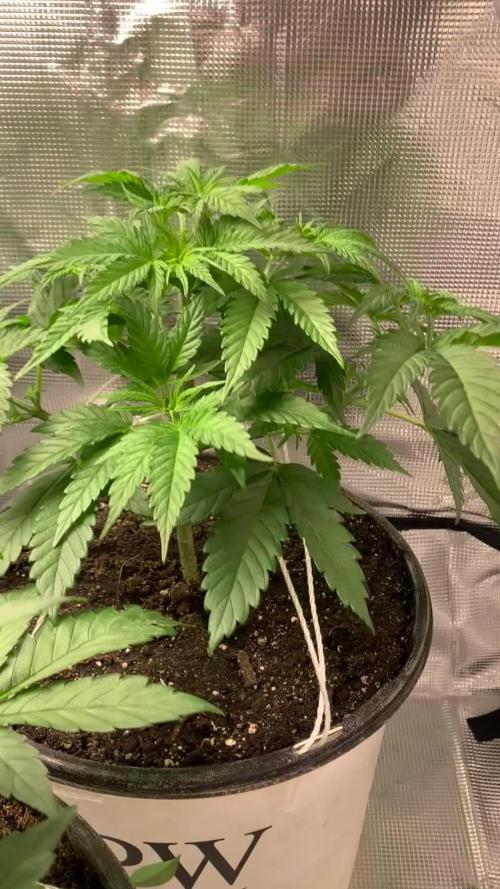
Hello growers welcome to harvest day 82 I did cut her down at day 75 so very quick plant indeed for the first 10 days I gave her water from my tap not ph at all from there she got bio grow/bloom until I see her first pistols from there I gave her bio grow/bloom/top max/bio heaven up to day 61 I then flushed for two weeks then cut her down I had her in a 20/4 light cycle from start to finish she was very easy to grow and has give me some very nice buds smelling like pear drops bang bang that’s it for now happy growing and be safe ✌️


Likes
44
Share
@XperencdGmanXG
Follow
first week of full flower, plant is looking good. 2nd last foliar spray of the year yay! We are getting there. Should be 7 to 9 weeks from now depending on weather. I'd LOVE to see some rain.
Processing
Likes
8
Share
@Max1973
Follow
Day 28 - lookin good.... checkin everything daily, adjusting as nessec. ....
might start lookin at a top/trim/bend/flower plan.....
Day 32 - post some ... watch the vid.. pretty sure u know whats about to happen here... lol
i'm a pretty good grower... :)
check out the base on both those super silver haze... that last video... shows u the perfect base and stalks and stems .....
those stalks are each going to be for a beautiful long bud... lol
didn't really start with a clean glow solution.... so just kinda been winging it.....
in the next week or 2 i'll think about flush both out completely, start with fresh new flower solutions,
and switch to 12hr lights.......
getting some awesome growth out of the 60 W on each plant..... thats 6 x 10w household led light globes..... 👍😎


Processing
Likes
5
Share
@OzarksCannabis
Follow
Just finishing up week 2. Looking for growth to really start. Then comes LST. Topping is a maybe.
Likes
410
Share
@Rock_n_Roll_Randy
Follow
This grow with the TSW2000, FC4800 and 8x8 Grow Tent has come to an end🤘🤘. I'm so happy with the results mars hydro has done👍. Best lights you can get in my opinion and TONS of other people agree with me on this too👍. I always say mars hydro gets em frosty and their lights DID get em nice and frosty and the buds are so tasty and smell awesome🤘. Not a huge haul per plant but I'm still very happy with it because the quality is amazing. I will never want to use anything but MARS HYDRO. Extremely satisfied with the entire grow with mars. The weed quality is very good and controlling the heat was simple because they don't get that hot. The lights were very easy to setup and so was the tent. I STONGLY recommend any products from Mars Hydro. You will not be disappointed 👍
Thanks for following my grow and good luck to all my friends and remember to have fun with your grows🤘🤘 rock n roll a joint everyone🤘🥁🎸
FOR EVERYTHING MARS HYDRO VISIT:
www.mars-hydro.com
PROMO CODE: rocknroll
VISIT THE ALIEXPRESS STORE:
@marshydro_aliexpress2
Instagram: @marshydropenny
https://youtube.com/channel/UChU5ZWwNi-DvnO3oWVU3ceA
Thanks for taking the time to read and check out my shit🤜🤛
GET THE MAX FROM MARS👍: Welcome one of the newest members of the Mars Hydro family🤜🤛🤘. The Mars Hydro FC 4800 480W LED Grow Light can accommodate up to a 4' x 4' area for flowering. It has OVER 2000 LED chips consisting of the best selling Samsung LM301B diodes which has a Luminous Efficacy of: 220 lm/W
0.2 W, 3 V mid power,
Osram 660nm Diodes, Infrared light and UV LIGHT👍. It boasts the incredible efficiency of 2.8 µmol/J, maximum 2.5gram yield per watt with 30% higher Average PPFD. This High-intensity spectrum is beneficial for plants at all stages - from veg to bloom, and creates Big dense Buds👍. achieve 50% higher yields & quality compared with the old lights! Only consumes 480W for 4x4ft personal grows, and 3x3ft for commerical grow. It comes with a dimmer and daisy chain function with a maximum of up to 15 lights, the master light controls the rest👍. Wide 6-bar design offers even & wide canopy coverage and can maximizes your grow space. slim 180° FOLDABLE DESIGN... YES I SAID FOLDABLE🤘🤣 , making it compact and easy to install, it's IP65 WATERPROOF and will give you no worries while growing in a humid environment and makes it a flexible high performance commercial grow light for enormous SUPER FROSTY yields.😛😛😛. MARS GETS EM FROSTY BOYS👍
AWESOME HEAT DISSIPATION: The Low energy consumption FC4800 growing light has 6 passive-cooled bars and an aluminum heat-sink a removable driver you can upgrade later or have it outside your tent. with zero noise you can save up to 50% in your electricity bill compared to HID's or HPS lights!
It also has a removable driver so you can upgrade it in the future or have it outside your grow space for better heat control in your growroom👍
UPGRADED FULL SPECTRUM: Yield Max Spectrum with enhanced red (Top-Bin Samsung 3000k-5000knm, Osram 660nm Deep Red), speed up blooming & fruiting, perfectly suited for full-cycle growing. The FC4800 LED grow lamp was born for Big Buds, perfect for commercial, grow tent, grow room, hydroponics, and all soil grows.👍
THE BEST SAMSUNG DIODES: THE FC4800 has Top Bin genuine Samsung Osram Diodes, combined with remarkable 2.8 µmol/J Efficacy, 30% higher Average PPFD, 50% less energy consumption, to maximize your yields. They give you a TRUSTED 3 years warranty 100% Satisfactory guaranteed!!!
The MARS HYDRO 8x8 Grow Tent interior is made of a unique diamond design mylar which is highly reflective. (Other companies mylar and reflective rate is as low as 50%, and it won't provide efficient light. They use thick 1680D oxford canvas, and being double stitched, it is tear proof and perfect for locking in the light. Their grow tent keeps 100% of the light inside the tent and helps your plants absorb more light. EXTRA-THICK material means No light leaks or rips at all.👍
Strong Stable metal corner adapters and poles are the trustful supporters of the tent. It's very sturdy, neither rusting or paint flaking off. quick and easy tool-free setup. They use heavy-duty metal zippers, with double layer black lining, by far the best on the market which creates a light-proof seal.
The Easy observation windows are made by double layers of cloth. Observe the growing conditions of your plants without opening the tent and avoid disturbing your plants. The observation windows also serves to dissipate heat and ventilate the air.
The tent includes 2 removable waterproof floor trays to hold soil and water. The removable tray can be taken out to wash easily.
They guarantee the grow tents are easy to install even if you've never done something like this before. Clear Instructions and no tools needed! They also offer 30-day unconditional refunds for quality problems. Just contact their friendly 24 hours customer service 👍
Likes
285
Share
@Tropicannibis_Todd
Follow
👉Alrighty Then👈
So we are at DAY 35 with the Sugar Larry 👈 And she's doing fantastic 👍 It's now time to flip To Flower 👌
😀 decided to showcase pheno #2 , definitely has different traits then #1 very interesting 😀 thoe both are killing it 👈
Day 39 and all is well 👈
Except for some slight watering , ive been doing some defolation as well as some LST manipulation to pull branches to the side 👌
👉I had to Top her during the middle of 4th week 👍 she gonna be a tall girl with long legs 😛
👉WeeklyRoundup Video is finally posted 😕 😒 😪 😢 Happy Growing
👉Soil Provided by ProMix.ca
👉Nutrients Provided by Agrogardens
👉Lighting Provided by MarsHydro.ca
Thanks my friends for the great support over the years 🙏 Happy Growing


Processing
Likes
54
Share
@SAC87
Follow
Day 42-49: I had some growth this week primarily on the R3 and some on the CbDream. Very slow on the R2. I’m wondering if it’s just sub par phenotypes. Idk anymore haha. Just waiting to see what happens here. Don’t think I’ll pack it right full next time. And try to concentrate more on 8-12 tops on a manifold rather than 30 smaller ones. Live and learn. I bought an Inkbird heat and cooling controller, seems to be holding my temps and 77 in the day and 69 at night. I decided to go back to week 4 ratios to see if that helps, they aren’t overly different so we’ll see.
Runoff for Cali Kush and R2 which are closer to the heater is 5.75 1000 and R3 and CbDream is 6.05-1.2 1400, so plain water for the next couple waterings.


Likes
2
Share
@Devonc
Follow
Topped the last 2 plants at the start of the week. And by the end did a bit lst with string.
Topped dressed all with 3 tsp of gaia green 4-4-4.
Not too many photos from this week for the most part just a recovery week.
This veg stage has been a 10/10 barley had anything come up and they just bounced back from anything i dis too them (low humidity etc)

Likes
3
Share
@Rock_n_Roll_Randy
Follow
This strain is soo delicious and it is exactaly what they say about it. Strawberries and pears. It doesnt even smell like weed lol. The taste is like the smell except it has a slight kushy dank skunkiness on the exhale. Highly recommended strain. Smells like real fresh fruit. It's very potent weed but it doesn't make me feel burnt out later so I smoke it all day.
Likes
30
Share
@BudXs
Follow
Oh it was a special week. Day 21 of flower marks the Silver Back Guerilla defoliation day!!!!
I left one be. For him. To prove me wrong. BUT!!! That one had some dead leaves at the bottom that needed removal, not the defoliated plants!!
Time will tell as to if what Im doing is right. I stick to my guns that this works for my room. Even though I read differently, removal of foliage has lowered my rh. Could very well be outside environment, however.
By day 21F the room was a bush again. In my opinion, it needed the heavy defo to breathe. As for light penetration, I am extremely happy with the amount of heads receiving direct light. Im a pig in shit
Thanks for looking, I dont want to hear your opinion on defo or schawazze, unless youre SBG

Likes
3
Share
@Nookandplant42o
Follow
visual, coming nice visible granules great smell, resistant plant size small stature and probably will arrive soon I intend to go further with it.

Likes
31
Share
@TheItalianGrower
Follow
This week I had some problems with the electricity .. Now everything is fine, and the plants are fine .. They have resumed their normal growth .. Another 4 days and I will switch to flowering

Likes
27
Share
@Smokepurple137
Follow
All doing perfect not alot to say, defoliated on 18/1/21 and tied a few branches where I could to make a little more room. Maybe 3weeks then ripen +flush Daily updates

Likes
7
Share
@Double_AAs_Garden1
Follow
Northern lights looking beautiful! Really resilient! Smells like citrus and pine.

Likes
9
Share
@maxpain
Follow
Week 12 everything looking good ...still no fade in the leaves been flushing for like 12 13 days now ...I think I put too much dry amendment's in my soil ...but it cool just ran like 20 liters or more off water tru my 5 gallon pot untill I seen the ppm get real low ..so should be good now ..gonna leave in dark for 24 to 72 hours when they dry up a bit.....as I said this was my first grow I learned alot from it ...can wait for the rest ..I'll keep u updated on the weight the smoke everything...once chopped..
Likes
29
Share
@DeaneR
Follow
VEG WEEK 10
My Base Nutrient Inputs: See VEG WEEK 6 for details of stock solutions A & B.
My grow weeks run from Monday to Sunday.
This week the goal was to let the girls grow, space the tops around the trellis, and attach each stem to the outside of this structure.
Tuesday - Watering Day - 1 gallon each as described above.
Friday - Watering Day - The pots are very light. Laverne is quite thirsty in pic # 10 - 2 gallons each as described above.
Friday - Pruning Day - Pinched out all the new grow at each fan leaf. The goal is a single stalk with no side branching. Also removed some lower Fan leaves and a few select others.
Unfortunately, Laverne lost a top. Not sure how, but I snapped it😡, and it dangled by a little of the outer stem tissue. I quickly reached for some tape to administer first-aid, which has worked for me in the past. Sadly, a few days later, it was evident (pic # 16), she wasn't going to make it.
Sunday - Training and Trim Day - Laverne is now down to 11 tops and my plants symmetry is shattered. I pushed the broken limb aside, to make room to realign the neighboring branches. I'm leaving this broken branch on the plant for now (pic #17), in an attempt to keep the other branch, on the same main stalk from dominating the plant. The remaining branch (pic #18&19) is already growing much faster and needed some serious twisting to bring it to the level of the rest of the plant. I managed to get Laverne symmetrical again, and leveled out the tops with some wire work. Shirley was also wired down to a symmetrical, level canopy, without any drama.
Laverne is now 10 inches tall, and Shirley is 12 inches. It seems I named them backwards, lol. Laverne received a 2 inch booster seat under her pot to bring her canopy level with her buddy. Their canopy tops are 30 inches from the Electric Sky ES 300 V1 light.
Shirley has shown herself to be a female (pic #24), while Laverne has not shown sex (no concern, as these seeds I made should be feminized). I see some tip burn, and need to dial back my nutrients a tad. I also am working on eliminating the purple on the top side of the petioles (not too worried about it as the plant is growing and appears healthy otherwise). My base nutrients contain calcium and magnesium, plus I add Cal-Mag +, so not sure why. It is funny that the purple is only on the top side of the petioles, and makes me wonder if this is caused somehow by LED lighting. If anyone knows, please share😀.
I plan on another week, maybe two, of vegetative growth. The mother(s), that I made these seeds from only stretched about 12-14 inches. I'll flip to 12/12 light schedule when the stems reach the height of the top of the trellis. With the stems supported, and some luck, these girls, will be set-up for smooth flowering.
The video was taken Sunday morning, before training and trimming.
Thanks for Viewing,
Peace,
DeaneR😎
Likes
24
Share
@Greensoul920
Follow
Week 5! All those pic are from the same day. First pic is before transplanted in 11 liter pot ( I took off the weakest plant cause just 10 fit in my box) the soil is made of light mix and warm casting but I top dress with:
70/30 of 444 and 284
- 1 Tbsp per gallon
Rock dust -1Tbsp per gallon
I sprinkle the root ball with mycorrhiza and water with compost the of warm casting and molasses brew for 24 hours.
Then I put the scrog net and bend all the plant under it, I use the cropping technique cause most of the plant were quite strong as u can see from the pic.
Ps: don’t mind about the sound of the first video I’ve just been unlucky cause they pass in front of my house while I was make the video😂


Likes
38
Share
@PremiumBudsEU
Follow
Sie haben alles gut überstanden,
Gott sei Dank!!!❣️
Es geht Richtung Ernte und es riecht tropisch 😁
Jetzt noch 2 wochen Flush mit Wasser (Ph 6.5) und Trichome beobachten 👌
Ich hoffe es Schmeckt wie es riecht
😁😁
