Likes
11
Share
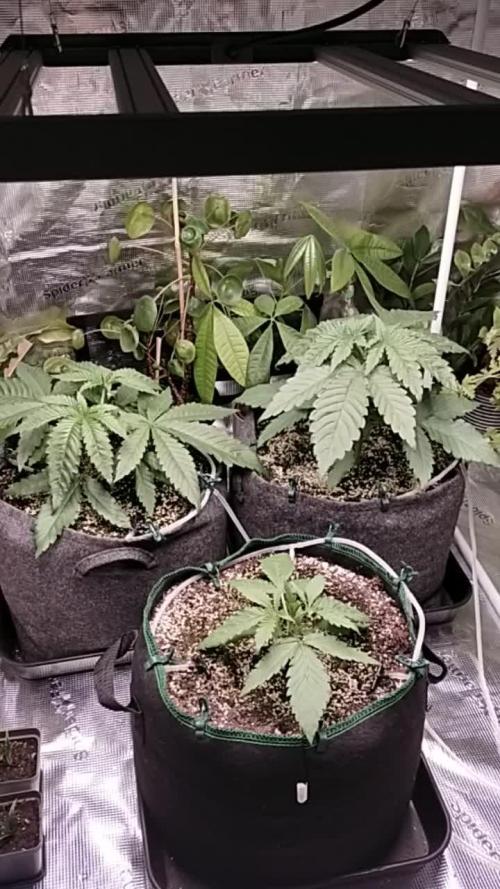
This cultivar was an absolute dream to grow it was so easy so beautiful smelt so good. It was definitely the star of the show on this run
Likes
8
Share
@Wasoh
Follow
Crecen fuertes. Detecte una mosca blanca :c
Likes
35
Share
First flowers appeared! :) The dehumidifier is still always ON to get +/-50% humidity. Weather is pretty wet outside, it doesn't help. I poor +/- 2l in each pot during each watering (a little bit more for the 26l pots). Second week with 12h of light and the stretch continues! Next week I will do a second big defoliation. Plants heights at the end of the week: Honey Melon Haze : 88cm (+18) O.G. Kush : 60cm (+12) Mandarin Punch #1 : 104cm (+28) Mandarin Punch #2 : 95cm (+24)
Likes
5
Share
Grow Diary – Week 7, Day 2 of Flowering Buds are stacking thick and frosty, and the tent is getting louder by the day. Trichomes are popping and the top colas are starting to bulk up nicely. Noticed she’s looking a little heavy on the nitrogen — darker leaves and slight clawing — so I’m dialing my A & B down a bit on the next feed. Still holding pH at 5.8 and PPMs just under 1000. Lower sites are getting more light now after daily tucking and some selective leaf removal. Airflow’s solid, RH around 60%. No signs of mold, just sticky, stanky progress. Finish line’s coming. Let’s ride.
Likes
33
Share
@Growbody
Follow
Meine lieben Freunde und Freundinnen, Brüder und Schwestern im Geistigen und Tatkräftigen, herzlich Willkommen zum Greenhouse Summer Outdoor Grow 2026. Der erste Strain des Outdoor Grows den ich Euch vorstellen werde ist die Purple Lemonade FF von 2Fast4Buds, eine 60% Sativa die laut FastBuds etwas nebulös als eine Kreuzung aus purple und citrus Cali Genetik beschrieben wird. Egal, sie soll sehr fruchtig und zitronig schmecken und könnte schöne Farben bekommen. Außerdem soll Sie eine kurze Blütezeit haben. Hier ist die URL: https://2fast4buds.com/de/seeds/purple-lemonade-fast-flowering#description Der zweite Strain der im Set mit dabei ist, ist die Mimosa x Orange Punch fem. von Barney's Farm, die ihre Genetik und den Taste bereits im Namen trägt, eine 65% Indica, die laut Barney's "ein wirklich sensationelles, zitrusähnliches und mandarinenartig-süßes Aroma" haben soll. Auch sie könnte interessante Farben bekommen. Hier die URL: https://www.barneysfarm.de/mimosa-x-orange-punch-552 Last but not least, der dritte Strain ist die Chocolate Sherbet fem. von Grower's Choice, eine 70% Sativa, deren Eltern Chocolope x Sunset Sherbet sind. Auf den Geschmack bin ich schon jetzt gespannt, cremiges Haschisch. Mit bis zu 240cm könnte sie die größte im Greenhouse werden und würde dann bis zur Decke wachsen. Hier ist die URL: https://www.growerschoice.nl/de/chocolate-sherbet.html#description EDIT: Nachdem die oben aufgeführten Pflänzchen nicht so recht loslegen wollten, habe ich mich entschlossen, fertige Stecklinge von Hanfgarten aus Österreich dazuzubestellen. Die Stecklinge kommen in die Mörtelwannen, die selbst gezogenen kommen in die bereits bewährten 15 und 20 Liter ROOTiES. So kann ich die auch mal direkt in die Sonne stellen. Der erste Steckling ist die Blueberry von Hanfgarten, eine 80% Indica, einer Kreuzung aus Afghan Indica x (Thai Sativa x Mexican Oaxacan Sativa), die nach 8 Wochen Blüte Mitte Oktober fertig sein soll. Außerdem soll sie fruchtig, beerig und süß schmecken. Auch hier gibt es eine URL: https://www.hanfgartenshop.de/blueberry.html Der zweite Steckling ist die Runtz, ebenfalls von Hanfgarten, ein Hybrid aus Zkittlez × Gelato, die auch nur 8-9 Wochen Blüte hat, mal sehen. Wenn sie ein ähnliches Aroma hat wie die Wurlz bin ich happy. Die URL: https://www.hanfgartenshop.de/runtz.html Der dritte Steckling ist die Super Lemon Haze, eine 80% Sativa von Greenhouse Seeds, deren Genetik von Lemon Skunk x Super Silver Haze stammt. Mit 9-10 Wochen Blüte steht sie wohl mit am längsten im Greenhouse. I💖Haze und hier sind die URL's: https://www.hanfgartenshop.de/super-lemon-haze.html https://shop.greenhouseseeds.nl/feminised-cannabis-seeds/1-seed-pack/super-lemon-haze/?variation_id=604 Auch dieses Jahr gibt es wieder etwas Neues: Mir ist vor einigen Wochen im Baumarkt ein Foliengewächshäuschen begegnet. Die Aussicht, meine Schätzchen immer im Trockenen zu Wissen, lies mich sofort (also sofort nach einem Recall mit meiner Liebsten) zuschlagen. Danach war nur noch ein teilweiser Umbau unseres Gartens nötig, einen kleinen Weg anders verlegen, ein Fundament ausheben, Bordsteine zersägen, 2 Zentner Beton verbuddeln, Löcher bohren, verdübeln und verschrauben ohne das der Beton ausplatzt, einen haufen Astwerk vom Wein opfern und viel Rasen neu anlegen, das war's schon fast. Neu: Sind auch die zwei 90 Liter Maurerbottiche, in denen sich meine Pflanzen wohlfühlen dürfen, 4x soviel Platz wie im letzten Summer Outdoor Grow. Zur Drainage habe ich Rheinkiesel 9-18 verwendet. Da drauf kam mein altes Erdmischungsrezept mit frischem Kompost von Piluweris, Lehm, den die Wühlmäuse ständig in unserem Rasen aufwerfen und Sand aus'm Kieswerk mit gaaanz viel Staub drinne, praktisch Gesteinsmehl. Auch hier gab's was Neues: Hornmehl zusätzlich, hatich früher schon verwendet und ganz vergessen. Der erste Sack Sonnenerde Hanferde wurde mit der oberen Schicht meiner Mischung vermischt. Der zweite Sack kam dann blank obendrauf. Neu: Für mich ist auch die angewendete Keimmethode noch neu, die Samen zuerst in einem Marmeladenglas mit temperiertem Wasser mit Zusatz von Wasserstoffperoxyd keimen zu lassen. Das ist jetzt das dritte Mal, dass ich diese Methode anwende. Der Vorteil daran ist die superschnelle Keimung, der Keim schaut tatsächlich bereits am nächsten Tag aus der Schale und nach ein oder zwei weiteren Tagen haben sich die Keimlinge von der Samenschale befreit. Das weitere Vorgehen bereitet mir noch Probleme. Ich verwende immer noch die SmartStart Plugs von Zamnesia die ich praktisch halbiere, also von oben nach unten einmal Mittendurch. Dahinein lege ich jetzt den Keimling und klappe die zwei Hälften dann zusammen und pflanze den Plug in den Topf. Neu: In die Wannen kommen zusätzlich Gäste als da wären erprobte und neue sowie überwinterte Chilisorten, verschiedene Basiliken oder -kums, Weiße Melisse, Roter Klee, paar Blumen und so. Tag 43: Heute hat es 36°C und das bleibt die ganze Woche so bis Samstag, dann soll es abkühlen. Die Blumen im Greenhouse bekommen jetzt 2-3 mal 0,5-1 Liter Wasser täglich. Tag 47: Sonntag hat es geregnet und danach war unser Rasen mit kleinen 2-3cm Schnecken schon fast bedeckt, so viele waren es und alle in Richtung Haus unterwegs. Richtig Spooky. Letzte Woche habe ich die PC-Nematoden gegen Schnecken von Oere BioProtekt im ganzen Garten ausgebracht und die nächsten 4 Tage Abends mit gut 100 Litern Wasser den ganzen Garten feucht gehalten. Nach Regen sind wir gewohnt, von Schnecken aus der benachbarten Obstwiese überfallen zu werden, aber halt normal großen so ~10 cm, aber diesmal waren keine großen dabei. Tag 48: KEINE Schnecke mehr zu sehen, nirgends, keine kleine und schon gar keine große. Jetzt bin ich mal gespannt, wie lange das anhält. Ich kann's noch gar nicht glauben. Eins kann ich versprechen: It will take a very, very long time 😃 Schön das du es bist, der mich begleitet 👍😎
Likes
5
Share
@Ensign420
Follow
Greetings fellow growers 🖖 and welcome to my first grow ever. This adventure actually started several months ago when I decided to stop buying flower from dispensaries and just grow my own bud. How hard can it be!? This is actually my second seed of this strain. The first bean sadly died due to over watering (sorry girl, RIP). I was literally watering the cube to the point where water was dripping from the bottom, then heavily sprayed the humidity dome and tray with the vents completely closed. Everyday. Multiple times. I never let the dome or try dry out. So after about 8 days of not sprouting, there was a funky smell of rot. So that was that. Later I learned that rockwool retains a lot of water and can easily drown seeds. So a wet/dry cycle is best for rockwool germination. So even after hours of researching and digging through forums and tutorial videos, I was still under prepared for this journey. Did not consider how delicate the germination phase is. Oh well. Lesson learned. Reset and try again! I hope everyone is safe and stoned during this corona crisis. Just like everyone else in the world, I want this pandemic to be over with. But in the meantime, let's grow some weed! 🖖 [START OF WEEK 01] Day 01 - Monday - 08/03/20 - Total Days: 001 ----------------------------------- - [0830]: Light Schedule: 24Hrs/0 --- Soaked cube in 5.5 PH water for 10 min. Did not shake water out. --- NO NUTES! Only PH'd down to control the PH levels. --- Did not use the default hole (way too deep). --- Flipped cube upside down and made a shallow hole for the seed (less than 0.25" deep). --- Placed seed in and pinched hole close. No additional water added. --- Sprayed the tray and dome with straight water (5.5 PH). --- Vents are cracked opened a for ventilation (about 1/4 opened each). --- Distance between the light and tray was 53" --- AC was set to 80 °F --- Exhaust fan was set to 86 °F --- Room average temp was at 85 °F --- Dome humidity was at 85-99% when sprayed. --- Allowing to completely dry before respraying. - [2200]: Dome and tray were completely dry! Sprayed only tray and dome with more water. Day 02 - Tuesday - 08/04/20 - Total Days: 002 ----------------------------------- - [0845]: Sprayed dome and tray in the morning. Everything was dry. --- Hoping for the best! - [2130]: Everything was dry again, so sprayed dome and tray at night along with a light spray on the cube. Day 03 - Wednesday - 08/05/20 - Total Days: 003 ----------------------------------- - [0830]: Everything was dry again. Resprayed dome and tray. Slightly sprayed cube. - [2125]: Hooo damn!! She popped! Am little stub is visible! Resprayed dome and tray again. --- Still going 24/0 for lights. - [+0033]: Just checked up on her and I swear she grew a bit taller! Getting excited! Day 04 - Thursday - 08/06/20 - Total Days: 004 ----------------------------------- - [0845]: Wow! Went from a little stub to fully sprouted overnight! Everything was pretty dry again so resprayed dome and tray. - [2200]: Tap root is visible! Over 1" long too! Just resprayed dome and tray again. -- Going to prep for hydroton transplant tomorrow! Day 05 - Friday - 08/07/20 - Total Days: 005 ----------------------------------- - [0930]: She keeps growing! -- Added a bit of CalMag to the spray bottle (8 drops to 650ml of distilled water). Resprayed dome and tray. Water was at a 5.4 PH with 141 PPM. - [1045]: Prepped the bubble bucket with 4.5gal of water. Water is high enough to reach about 0.25" above the bottom of the net pot. --- Added 3 drops of Superthrive --- Added 3.5ml of CaliMagic --- Added 2ml Hydroguard --- Then PH'd down to 5.6 --- Solution Strengh: 120 PPM --- Water chiller is set to 20 °C - [1100]: Transplant time! --- Filled the net basket 1/3 with hydroton. When placed in the bucket, air bubbles are not visible, but are slightly below the surface (slight digging will reveal the water/bubbles below). --- Removed plastic on rockwool cube and placed in basket, then filled around and covered with hydroton. Making sure to block any light from passing through the net pot and into the nutrient solution. --- Covered with a half-bottle dome sprayed with the CalMag water from earlier. --- Hoping for the best! - [1300]: Raised Bucket 5" higher. Now light distance is 48" to top of bucket. - [1820]: Lowered tent exhaust temp to 76 °F --- Lowered AC to 75 °F --- Raised bucket even higher so light distance is 30" to top of bucket. - [2300]: Looking good! --- Sprayed dome and surrounding hydroton with more CalMag water. --- Attached timer to light! So new 18 Hrs On/6 Hrs Off light schedule. --- Lights On: [1600] (4pm) --- Lights Off: [+1000] (10am the next day) --- Decided to go with lights on during the evening/night and off during the later mornings/afternoon (the hottest part of the day) to see if temps can be controlled better. --- Please survive girl! Day 06 - Saturday - 08/08/20 - Total Days: 006 ----------------------------------- - [0800]: Everything was dry. Resprayed hydroton and dome. - [2000]: Here first night cycle seemed to go well! Get'n taller! --- Dry again. Removed the dome. --- PH went up to 6.5 so PH'd down to 5.7 --- Ran the top feed drip ring for a bout a minute to wet the hydroton and rockwool with the nutient solution. ---Too scared to leave the top feed on 24hrs (I don't want over water her and cause dampening-off). Will let dry before re-watering. - [2100]: After closer inspection, I think she's looking a bit yellow. --- Decided to add a bit of grow nutes to the bubbler solution. --- Added 2ml of Sensi Grow A --- Added 2ml of Sensi Grow B --- Solution strength after adding more nutes: 176 PPM --- PH went up to 6 --- I hope that the extra chelating properties of the 'PH Perfect' solution is enough of a buffer for proper nutrient uptake. Day 07 - Sunday - 08/09/20 - Total Days: 007 ----------------------------------- - [0800]: Water dropped a bit (mostly due to evaporation) so solution strength was at 190. --- Checked PH again. Was still at 6, so PH'd down to 5.4 --- Ran the top feed for a minute to wet the hydroton a bit. - [0915]: Since she's looking perky but still a bit yellow. So decided to up the nutrient concentration even more before lights out. --- Added 2ml more of Sensi Grow A --- Added 2ml more of Sensi Grow B --- Solution strength after adding more nutes: 199 PPM --- PH went up to 5.8 - [1700]: Checked nutrients. --- PH: 5.9 --- Solution strength: 202 PPM --- Added 4ml of Voodoo Juice --- Added 4ml of B-52 --- PH after adding more nutes: 5.9 --- Solution strength after adding more nutes: 238 PPM - [2130]: Decided to make a new foliar spray to address the continued yellowing. --- Started with 500ml of distilled water. --- Added 3 drops of CaliMagic --- Added 3 drops of Sensi Grow A --- Added 3 drops of Sensi Grow B --- Added 3 drops of B-52 --- Added 1 drop of Superthrive --- Solution strength: 164 PPM --- PH was at 5.9 and did not adjust. --- Gave her one spray. --- Also sprayed the surrounding hydroton. [END OF WEEK 01]
Likes
18
Share
@Dunk_Junk
Follow
She's almost done. Watching pistils to all turn colour and trichomes to go more cloudy.
Likes
10
Share
So it must be that she prefers to be defoliated the training seemed hard on her for me. She wilted really hard through the weekend. I even reduced her light hours way back and separated them. Now they're back together again. I find that shes also a heavy drinker. I'm super excited shes definetly flowering now! And rather large for the container size. Hope you enjoy & check back next week to see just how fast she grows! And remember its 4:20 somewhere!!!!!!
Likes
33
Share
Welcome back together again, brother farmers.We meet again together to test qquqques We get together again to discuss a new variety from the catalog of our friends at wse The photos speak for themselves ... it is one of the fastest varieties in this tent. He follows the feeding respecting the times and with a little training a nice bush has opened 🌱😉
Likes
65
Share
@3lementa1
Follow
I changed the reservoir and set the pH to around 5.3 and reduced the nutrients by 5ml/g. I just realized I've been adding far far fewer nutrients than I thought. I've been using 30ml in a 5 gal bucket (probably 4.5g volume) but I should be using 30ml/g so 4x as much. I'm going to leave it for now but I should probably start adding more nutrients. I took the wires I was using for LST off the bucket so it isn't stressed during flower and so it's easier to change the water. I'm taking off fan leaves that are blocking bud sites if I can't tuck them away. It grew a crazy amount today, so many little pistils came out. It's an exciting time. July 10 she thirsty. I added half a gallon of water and a full 30ml of each nutrient. That should bring us close to half the recommended nutes. I'll probably change the full res out and give 3/4 nutes sometime this week and go up to full strength next weekend if everything looks OK. https://www.remonutrients.com/calculator/ I just looked at my chart again and I think I was right the first time. I just added more nutrients for no reason. I added another half gallon of water and checked ppm and pH. Ppm is 1050, pH is 5.8. Gonna keep an eye on it through the day and see what happens. 305pm pH 5.8 ppm 1200 July 11 pH 5.8 ppm 1300. I'll add some plain water after the res goes down a bit more. Looks like the plant isn't using all the available nutes and is probably leaching some. She looks good though. Loads of vertical growth over the past week, now really going hard making bud sites. I'm going to see how this nute situation goes before doing any major defoliation or pruning. Leaf temp was 29 on the central cola so I turned up the fans and raised the light a bit. July 12 ppm down to 1200, pH still 5.8. Looks like it's going to be ok. July 13 ppm 1300 pH 6.2. I dropped an entire oscillating fan on my plant today. I broke 4 stems almost clean off. 3 appear to be surviving through duct tape and wire. The biggest one appears to be a casualty. I'm pissed. But the cabinet is coming together. Once it's perfect this kind of thing won't happen. I salvaged a piece of plywood yesterday and hand sawed the whole thing to fit as a door.
Processing
Likes
1
Share
week 5 when the thrips first showed themselves. I noticed them cuz some silver stains started appearing on some leaves. you can see them better under LED light. So, I sprayed Neem Oil all over the plant. I could notice that if you don't do it well, spraying and rubbing the leaves with a piece of cloth, the oil will also create some stains. 2nd topping. killed some thrips this week, they're cute and didn't seem to harm the plant seriously. Neem oil worked fine to control them. No other pests that I could notice + Defoliation + LST Flowermind (4ml + 0.5g)
Likes
12
Share
@Shinobi
Follow
Máme tu dosť silné búrky so silným vetrom.rastlina 1 dostala zabrať.jeden konár spadnutý na zemi,ale nebol zlomený.použil som pletivo ako podporu.stále vyzerajú ok.dnes posledné kŕmenie .držte im palce.mier
Likes
7
Share
@theBnc
Follow
• Day 72 Today I started with the RIPEN (3.5 ml / l). 💪🏻 I want to see if buds actually gain mass and weight. 🏋️‍♂️🏼,🏋️‍♂️🏼,🏋️‍♂️🏼,🏋️‍♂️🏼 • Day 75 The finish line begins to be seen on the horizon. 🏁 Looking at the girls tonight, I came up with a term that I read in another diary from which I took a lot of ideas: "buds on buds". 🌾🌾 Buds on buds is the difference that I notice thinking about how they were even just three days ago (see photos).📸 Being at my first experience, I don't know if it is a natural thing or if it is the Ripen that gives its effects. 🎆
Likes
69
Share
@nonick123
Follow
Día 59 (29/07) Este cultivo no es muy entretenido con solo agua, asi que... Le hago supercropping a todas! 😁 A ver como reaccionan! Día 60 (30/07) Las plantas se están recuperando muy bien del supercropping! 😁 Todos las puntas hacia arriba! 💥 Come onnnnnnn! A por esa floración en 2-3 semanas! Riego 500 ml H2O pH 6,75 Día 61 (31/07) Las plantas se han recuperado genial del supercropping y están lanzando TODAS las ramas hacia arriba 😍 Un espectaculo la fuerza de estas plantas! 💥 Redistribuyo las plantas, para ver si OnionOG está más protegida del sol, ya que consume muchisima agua y voy a estar en unos días fuera... También reubico ligeramente la malla de sombreado, debido a que en mi latitud el sol empieza a incidir lateralmente por las tardes... Riego 500 ml H2O pH 6,55 Día 62 (01/08) Vuelvo a redistribuir las plantas en el invernadero dejando a OnionOG todavía más protegida del sol directo, para tratar de disminuir su consumo de agua estos días que no voy a estar... Pongo una protección "visual" en el invernadero en el lado que da a los vecinos (cara norte), porque he "cazado" miradas indiscretas... Riego 500 ml H2O pH 6,55 Día 63 (02/08) Debido a que me voy de vacaciones unos días, adelanto el riego semanal con Té y la aplicación foliar de Kelp Riego con 1 Litro de Té Vegetativo de Lurpe Solutions. Preparación: 24 horas con bomba de aire (oxigenación) con ingredientes: Green Sunrise 8 ml/L + Insect Frass 16 ml/L + Hummus Lombriz 8 ml/L + Melaza 1 ml/L + Kelp Hidrolizado 0,25 g/L Aplicación foliar Kelp hidrolizado de Lurpe Solutions a 0,25 ml/l Día 64 (03/08) Cerrado por vacaciones Día 65 (04/08) Mi amigo viene a casa a hacer un riego con 1 Litro de H2O pH 6,5 💦Nutrients by Lurpe Solutions - www.lurpenaturalsolutions.com 🌱Substrate PRO-MIX HP BACILLUS + MYCORRHIZAE - www.pthorticulture.com/en/products/pro-mix-hp-biostimulant-plus-mycorrhizae
Likes
54
Share
Day 29 of flower 1 blue dream😋🔥 1 white kush(but it may be a Afghan hindu kush which is 100% indica with not alot of stretch) my white kush stretches like the blue dream but not this round. Lol Grow light: Mars Hyrdo TSW 2000 at 100% power 24inches above 🌞☀️ Medium: coco coir mix with compost at a 50/50 ratio with 30% perlite added⛰️ Nutrients: fox farm dirty dozen 🦊🚜 Grow space: 4x4x7 Water: tap water (my tap water is allows 110ppm) left out for at least 24hours
Likes
43
Share
~ FastBuds PAPAYA SHERBET Photoperiod~ Well here we go on another journey together through 'Canna-land' and this one's kinda special... forget that, it's VERY special because this is FastBuds newest surprise for the community, a FEMINIZED PHOTOPERIOD STRAIN!🤯 I was fortunate enough to score these seeds, of which only 1000 were available and can't wait to see what this strain can do! This Papaya Sherbet, according to FastBuds, is a hybrid with a 9-10 weeks flowering period. For a more detailed and accurate description of this strain the following from FastBuds says it best: "Combining the massive stature of Papaya (Oni Selection) with the strength and resilience of one of our best keeper cuts (Sunset Sherbet), this strain develops into a big, expansive bush adorned with numerous bud sites that later transform into a generous harvest of medium-sized buds. Papaya Sherbet flowers deliver a signature flavor of premium cannabis with subtle citrus undertones that emerge upon inhaling. During growth, her aroma makes for a sweet yet pleasantly bitter fragrance, giving you an idea of what the smoke will taste like. Notably stress-resistant, Papaya Sherbet is a great choice for growers working in challenging environments. She is very forgiving and rebounds quickly from any adversity, allowing growers the freedom to experiment with confidence that she will take everything like a champion she is. This strain embodies resilience, flavor, and abundant yields in every grow cycle." Sounds like an epic strain and I personally cannot wait for this lady to strut her stuff!😍 ________________________________________________________________________________________________________________________________________________________________________________________________________________________________________________________________________________________________________________________ The Setup: This is going to be an outdoor grow, but I have started the Papaya Sherbet photoperiod indoors as our weather is still a bit too chilly to put a newly sprouted seedling outside (nighttime temp's dipping regularly into the 40's℉). The plan is simple... let her grow inside under a 19/5 light schedule until the nighttime temperatures are in the mid 50's℉, which shouldn't be long. After which, she'll be moved outside and transplanted into the soil which I have already setup and inoculated with beneficial microbes from BioTabs and slow release dry amendments from Gaia Green. Once she's established herself outside she'll be given periodic top dressings of Gaia Green 4-4-4 and 2-8-4 along with worm castings and Compost Tea's. Her grow area is approx. 5'x5' and I have posts and a trellis net set up already for when she gets bigger to aid in training her. Let the fun begin!🤪💚 ________________________________________________________________________________________________________________________________________________________________________________________________________________________________________________________________________________________________________________________ Weekly Updates: 9/20- Here we gooo... Week 6 of flower and the FastBuds Papaya Sherbet photoperiods flowers are exploding now! 9/22- My daily routine of watering, removing dead foliage and checking over the Papaya Sherbet continues. She is unfortunately starting to show signs of Septoria which is a bummer, but at least it's showing up late in flower so it hopefully won't affect the outcome too much. 9/24- Our weather has now cooled off dramatically, with daytime highs in the mid 60's℉, and nighttime temperatures dipping into the low 50's℉. As a result I have cut back on the amount of water the Papaya Sherbet photo is receiving daily. 9/26- There's another exciting week of flowering on the books for the FastBuds Papaya Sherbet photo and from the looks of her, she only has a couple of weeks to go! I'm so excited!🤩 Thank you for checking out my diary, your positive comments and support make it all worthwhile! 💚Growers Love!💚😎🙏
Likes
Comments
Share
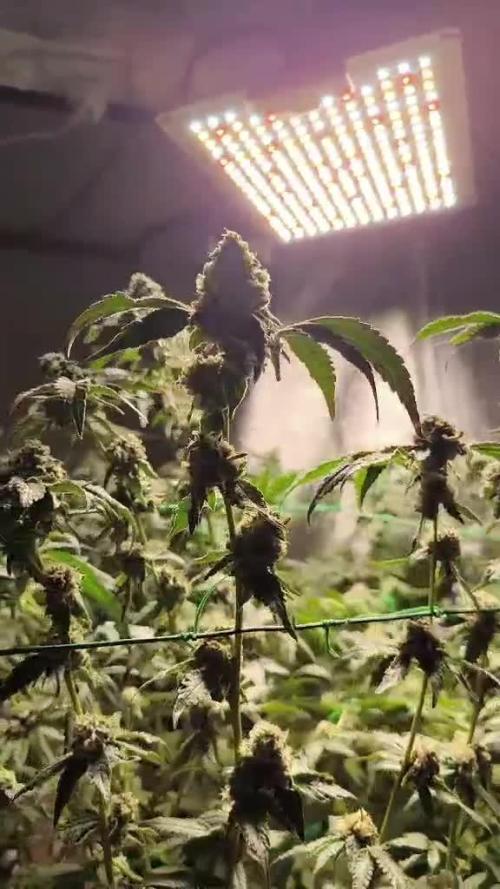
DWC Grow #3 - Week 5 (Day 28–34) | Canopy Takes Over + Trellis/Topping + Space Management (Dec 25–31) Week 5 was the week the plant stopped being “a plant in a bucket” and started being a canopy-management project. Growth turned noticeably more explosive, the footprint expanded fast, and I had to make real decisions about structure, airflow, and tent space. Day 28 (Dec 25) - Explosive growth Came home to a huge jump in growth. The plant looked healthy and vigorous, and it finally felt like the system was “locked in” after the earlier turbulence. Reservoir was stable, roots looked strong, and the canopy started to crowd the tent. I started seriously thinking about topping and how to manage height long-term. Day 29 (Dec 26) - Post-training recovery looks good The plant handled the recent canopy work well and kept pushing new growth. I logged a stable reservoir (temp staying in a good range) and the overall posture looked positive. Water usage was clearly increasing, which matches the jump in biomass. Day 30 (Dec 27) - Strong momentum + dialing light position The plant kept building mass fast. I continued to raise the light slightly as the canopy climbed and nudged intensity upward cautiously (still conservative relative to manufacturer “veg” suggestions). Reservoir readings stayed in the workable zone, and water level continued to drop steadily, confirming she’s drinking. Day 31 (Dec 28) - Steady readings, steady push No big interventions - more “observe, tuck, and keep it stable.” The canopy was getting denser, and I could tell the next phase would be about preventing the tent from turning into a packed, hard-to-service jungle. Day 32 (Dec 29) - Space management: moved extraction hardware outside To reclaim headroom and working space, I moved the inline fan and carbon filter outside the tent. This was purely about space and practicality as the plant expands. I kept an eye on airflow behavior and made sure the setup still pulled properly. Day 33 (Dec 30) - Canopy density reality check Canopy got dense enough that it started feeling like a “light and airflow engineering” problem. I did a light prune (nothing extreme - more like clearing obvious blockers). I also noticed some droop and ended up focusing on reservoir basics: keeping the root zone oxygenated and avoiding a too-high water line. I siphoned out some water to bring the level down. The water looked a bit murky but didn’t smell, which was reassuring. Day 34 (Dec 31) - Hands-off (New Year) I was away for New Year’s, so this was effectively a hands-off day. Sometimes that’s the best thing for me - less temptation to over-adjust. The plan was simply to return, assess water usage, and continue shaping the canopy with minimal stress. Week 5 takeaway: The plant is officially in “take over the tent” mode. Growth is strong, water consumption is increasing, and the limiting factor has shifted from “will she survive?” to “can I keep the environment and structure under control without over-correcting?”
Likes
3
Share