Likes
Comments
Share
@Chucky324
Follow
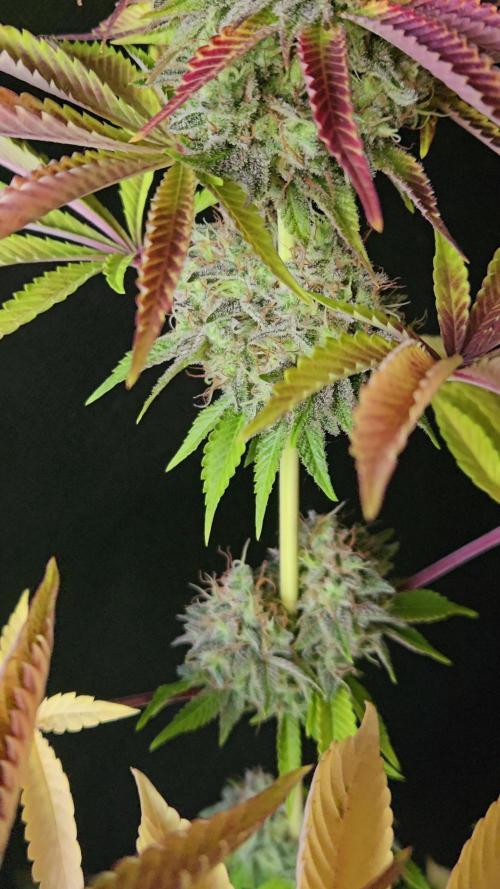
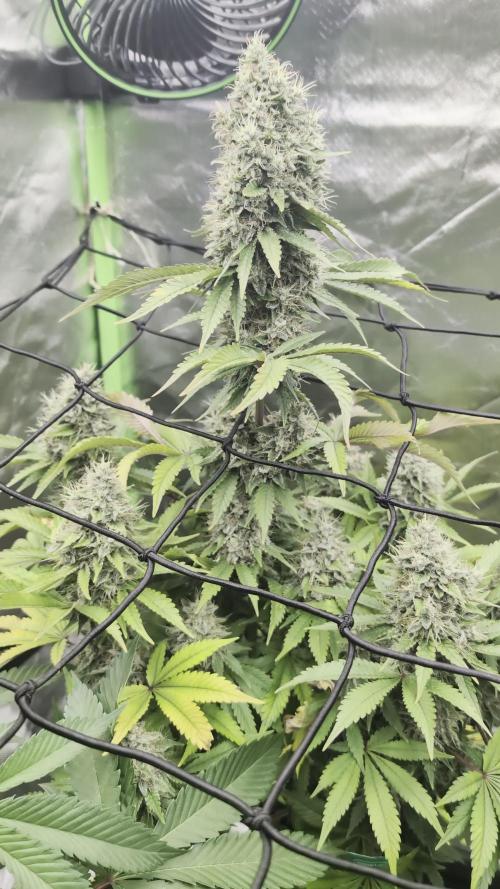
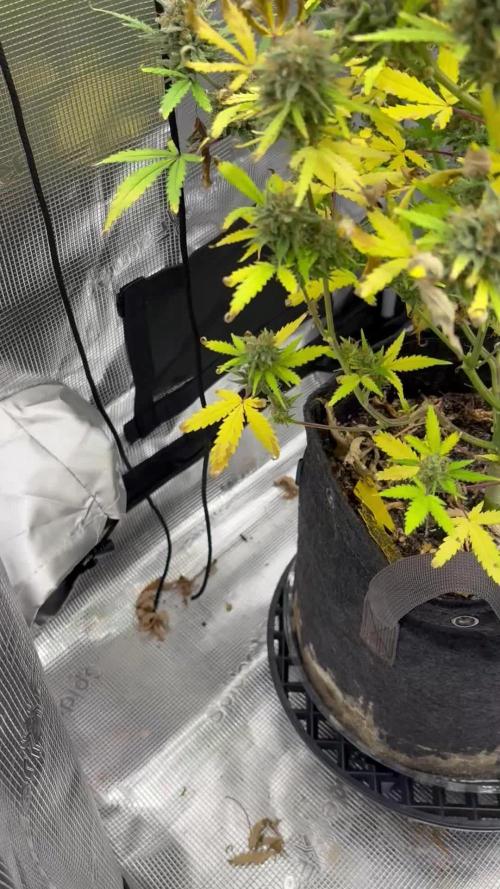
Hello. This is the end of week 8 and the beginning of week 9 of flowering. Oh Man... Just saw a leaf with some spider mite damage on it. But I'll be harvesting in about 4 days anyway, so not really a big problem. Just don't want to bring them inside, so I'll do a pat down when I leave the greenhouse. Rub my clothes like I'm brushing off sticky dust. And not wear the same shoes down in the inside grow areas. This plant has WPM too. I've been spraying some frequency altered water on it. Knocks it out.... Look it up. Works good. OK Have Fun. Chuck.
Likes
6
Share
This beauty is the Choco Kush auto, from Amsterdam genetics, she is 9 weeks old, started flowering at around 4 weeks. First part of her life she was just in the growing tent, the last 4 weeks she has been sunbathing in the garden, for about 10 hours almost everyday. In the night she is back in the growing tent. So 24 hours light program, LED combined with sunlight. She loves her nutrients from biobizz in every water, the ration is 3-4 ml per 1 litre water. She received about 2 times in the first 5 weeks of life the boomboom spray. She is a midget. But a midget beast with some beautiful flowers, that stink in the entire garden.
Likes
9
Share
@Headies
Follow
fantastic smells coming out of the tent! The purple punch smells delicious. The sour diesel smells dank. The girl scout cookies smells like GSC
Likes
8
Share
@Naujas
Follow
28 dienos!!! Megaitų nemačiau kelias dienas, tad prieš išeidamas šiek tiek palaistiau, bet manau, kad tai bus sutvarkyta, 28 dieną pašalinau lapus ir šakas, taip pat pradėjau ją dresuoti LST, bet mano palapinė tikra netvarka, nežinau, kur ji yra ir kaip :D Vos telpa dvi damos:) sėkmės visiems :).
Processing
Likes
15
Share
Likes
22
Share
@BB_UK
Follow
So I've chosen my final 6! 4 are 7 days old and the other 2 are 6 days old! A little slower in growth for some but I put that down to me having them in coco to start and I'm inexperienced with coco and as soon as I switched them to soil they perked right up so I'll stick to what I know and use soil starter plugs or soil or even root cubes have done me justice in the past, I run my diffuser twice a day to maintain my 60-70% avg RH I started at 25% power on the light at 10" and slowly increasing the power to 50% at 10" above canopy! As I'm using co2 im able to put the light closer and raise the temps! I was using a heat matt but honest opinion I think they're a Hazzard in some way and not necessarily necessary! Just my opinion as I came across problems with the substrate being too dry sometimes! But I will keep them in these pots for about another 3-5 days and then transfer them into a bigger but not final pot for an avg of 2-3 weeks! Can't wait to be at the end of may! Want my babies to be all grown up now lol but thanks for stopping by and wish me luck on my journey 😊
Likes
18
Share
@wolfvb
Follow
📅 Week 1: The Micro-Mission Begins! 🥦 Strain: Sticky Broccoli Auto 🥦 Stage: germination Light Schedule: 18/6 📝 The General Vibe Welcome to my micro-grow experiment! I'm using an extra Sticky Broccoli Automatic seed from my main grow to see what I can achieve in a small space. She's popped and is looking healthy! This is going to be a fun little side project. So original I popped one 6.01 but she did not Survive, I guess I have over water her the new one have survived so far. It will be nice experiment and challenge! 🌡️ Environmental Data: 💡 Light: @ 70% intensity 🌡️ Temp (Day/Night): 27°C / 24°C 💧 Humidity (RH): 65% 🚿 Watering: Mist the soil surface daily to keep it moist ⚗️ pH : 5.5 🍽️ The Menu (Nutrients) Powered by Plagron Biobizz root juice 3ml
Likes
65
Share
@3lementa1
Follow
I changed the reservoir and set the pH to around 5.3 and reduced the nutrients by 5ml/g. I just realized I've been adding far far fewer nutrients than I thought. I've been using 30ml in a 5 gal bucket (probably 4.5g volume) but I should be using 30ml/g so 4x as much. I'm going to leave it for now but I should probably start adding more nutrients. I took the wires I was using for LST off the bucket so it isn't stressed during flower and so it's easier to change the water. I'm taking off fan leaves that are blocking bud sites if I can't tuck them away. It grew a crazy amount today, so many little pistils came out. It's an exciting time. July 10 she thirsty. I added half a gallon of water and a full 30ml of each nutrient. That should bring us close to half the recommended nutes. I'll probably change the full res out and give 3/4 nutes sometime this week and go up to full strength next weekend if everything looks OK. https://www.remonutrients.com/calculator/ I just looked at my chart again and I think I was right the first time. I just added more nutrients for no reason. I added another half gallon of water and checked ppm and pH. Ppm is 1050, pH is 5.8. Gonna keep an eye on it through the day and see what happens. 305pm pH 5.8 ppm 1200 July 11 pH 5.8 ppm 1300. I'll add some plain water after the res goes down a bit more. Looks like the plant isn't using all the available nutes and is probably leaching some. She looks good though. Loads of vertical growth over the past week, now really going hard making bud sites. I'm going to see how this nute situation goes before doing any major defoliation or pruning. Leaf temp was 29 on the central cola so I turned up the fans and raised the light a bit. July 12 ppm down to 1200, pH still 5.8. Looks like it's going to be ok. July 13 ppm 1300 pH 6.2. I dropped an entire oscillating fan on my plant today. I broke 4 stems almost clean off. 3 appear to be surviving through duct tape and wire. The biggest one appears to be a casualty. I'm pissed. But the cabinet is coming together. Once it's perfect this kind of thing won't happen. I salvaged a piece of plywood yesterday and hand sawed the whole thing to fit as a door.
Likes
1
Share
Likes
17
Share
@Kirsten
Follow
I've cleaned and disinfected the tent again. It had gotten a little dirty. I removed the scrog and all the plants for cleaning. When I returned them to reset, I decided to remove the scrog and use some LST as I'm just so sick of not being able to get in there because of the net. I added some more LST clips instead. I rearranged the plants to be more spaced out, and instead of having my 3 Purple Punch plants at the back, where I can't see them at all, moved them to the front of the tent for access to see the trichomes development as they are now very close to harvest. Another week or 2 maybe. I watered very well, with Do-sì-dos having a whole 4 litres. Some plants did not need water again, so I left them be.
Likes
27
Share
3/4/2023 Week 3- Day 1 of Veg (Day 31 overall) Water Change out Day 36 Gallons in CalMag = .5Mil/Gal = 18Mil FloraMicro = 4.2Mil/Gal = 151Mil FloraGrow = 3.8Mil/Gal = 137Mil FloraBloom = 3.0Mil/Gal = 108Mil PH DOWN = 1.72Mil/Gal = 62Mil PPM = 546 PH = 5.88 This Grow has definitely been an interesting grow I have been playing with Over or Under since the beginning and it all started with me drowning the plants by adding too much water. I will have to make sure I watch that on all my future grows. I prayerful that this week will get me fully back on track, in my previous grows using my chart, I haven't had any issues during this week, so again prayerful that this is the week I am back on point. 3/5/2023 Week 3- Day 2 of Veg (Day 32 overall) ROOT ROT!!! I guess from when I drowned it I caused a lurking issue that really showed it's head today. The roots were looking not slightly bleached but looking black. I cut out what looked dead and I had to run to the local Hydro shop to pick up some items to see if I can fix it and strengthen the plants. I picked up Mammoth Silica, ORCA, and ROOT Drip. I completely drained the system and started it over today as well. 38 Gallons In Mammoth Silica = .5Mil/Gal = 19Mil CalMag= .5Mil/Gal = 19Mil Root Drip = 1Mil/Gal = 38Mil FloraMicro = 4.2Mil/Gal = 160Mil FloraGro = 3.8Mil/Gal = 144Mil FloraBloom = 3.0Mil/Gal = 114Mil Orca = .5Mil/Gal = 19Mil PH Down 60 Mil = PH 5.83 I also had to run by Staples I realized the paper I was using wasn't the right brightness and Lbs for the Photon App. What I needed to have 22Lbs 98 Bright. I recently saw a comparison of the different weight papers against a several hundred dollar Apage PPFD detector and with the right paper it was almost exact readings. With that my PPFD 355. 3/6/2023 Week 3- Day 3 of Veg (Day 33 overall) Still alive!! #2 and #3 are still alive and it looks like no further damage to any of the leaves. #2 needed 1 node topped. I will keep monitoring day to day. 3/7/2023 Week 3- Day 3 of Veg (Day 34 overall) Well Both appear to be doing all right. I cut off the offensive leaves from #3 nothing new on shown on the leaves. I actually needed to top 1 node on #2. PH is stable, Temps are stable.. I will be changing out the water and Nutes on Saturday not waiting the 2 weeks. 3/8/2023 Week 3- Day 4 of Veg (Day 35 overall) Well Both appear to be doing all right. I actually needed to top 1 node on #3 and 2 on #2. PH is stable, Temps are stable.. I will be changing out the water and Nutes on Saturday not waiting the 2 weeks. I think the additives are truly making a difference I think I will be adding them to all my grows from here on out. 3/9/2023 Week 3- Day 5 of Veg (Day 36 overall) Both still appear to be on the mend Still some dark brown on a small part of the roots and I don't know if those are just dead but it doesn't look like it is spreading and I see a bunch of new roots forming. Nothing new on the leaves at all. So I think the trio that I added is helping. The plants also seem to be in raised happy position going towards the light. I still plan to change the water on Saturday and go from there. 3/10/2023 Week 3- Day 6 of Veg (Day 37 overall) Moved the light up to 41 1/2" so 3' 4 1/2" away from the top of the Plants. PPFD= 363 Power on my Light =62.5 Water Temp is holding steady=70.3 PPM= 534 PH= 5.92 Tent Temp= 72.5 Humidity= 50-60% I have 2 humidifiers running on INK Bird controllers monitoring it 24/7. I will be changing out the water tomorrow even though I could let it go an extra week but I am still concerned that the Root Rot is clearing up and I don't want to risk it coming back. I want fresh Nutes/ water in the tanks. I topped 2 nodes on #3 I topped 3 Nodes on #2 I also cleaned out some of the bottom third portion that isn't getting much light and not much growth at all. #2: 8 1/2" tall, 18" Wide #3: 7 1/2" Tall, 15" Wide
Likes
48
Share
@DreamIT
Follow
🧙‍♂️🍁BUBBA HAZE BY REGULAR SEEDS 🍁🧙‍♂️ 🧙‍♂️ 26.3... 🧙‍♂️ 27.3 All great. the plant is very tall, 108 centimeters. The flowers begin to swell and form well, soon it will start to release its scent, I'm very curious 😀 🧙‍♂️ 28.3 🧙‍♂️ 29.3 🧙‍♂️ 30.3 🧙‍♂️ 31.3 🧙‍♂️ 1.4 ____________________________________________________________________________________ 😮 What ???? New to Regular Seeds? Take a look at their site, you won't regret it !! http://bit.ly/REGULARSEEDS ________________________________________________________________ 📜 A look at the details of what I'm growing 📜 🧙‍♂️🍁Bubba Haze 🍁🧙‍♂️ ⚧ Gender ▪️ Regular ➰ Genes ▪️ 75% Indica / 25% Sativa 🎄 Genetics ▪️ Bubba Kush x Jack Herer x Cannalope Haze 🚜Harvest ▪️ 550 g/m² 🌷Flowering ▪️ 8 weeks ✨THC ▪️ Very High ✅CBD ▪️ 1.0% 🏡Room Type ▪️ Indoor 🌄Room Type ▪️ Outdoor 🕋Room Type ▪️ Greenhouse __________________________________________________________________________ 📷🥇 Follow the best photos on Instagram 🥇📷 https://www.instagram.com/dreamit420/ 🔻🔻Leave a comment with your opinions if you pass by here🔻🔻 🤟🤗💚Thanks and Enjoy growth 💚🤗🤟
Processing
Likes
18
Share
11/30: I harvested the first 6 today, flushed 5 more for the second time, and fed everybody else for the last time. I washed all the branches using the 4-step method ascribed by Doc Bud at High Times/420magazine and many other notable cannabis connoisseurs, with slight modifications: 4 x big plastic totes/bins 8 x ounces of 12% hydrogen peroxide (or 32 ounces of 3%) 2 x cups of concentrated lemon juice 2 x cups of baking soda 10 x gallons of water in each bin Unless your tap water stinks, you're safe to use tap water for the procedure, but I used an inline carbon hose filter to fill my buckets. Bin #1 - 10 gallons of water mixed with the hydrogen peroxide Bin #2 - 10 gallons of water mixed with the lemon juice and baking soda Bin #3 - 10 gallons of water as hot tap water Bin #4 - 10 gallons of cold tap water I was mainly concerned about removing as much lint and cat/dog hair as possible, but also rinsing off any residue left from all the various foliar applications of humic/fulvic acid, kelp, axiom, big bloom, and tiger bloom I did. First, I put my leaf blower on low speed and blasted my plants thoroughly, one at a time, replicating 50-60mph winds for about 10 seconds and watched as a whirlwind of debris and hair flew out the back door. Bud-washing: Pluck any necrotic plant material and any old fan leaves off while they're still on the plant. Then, take a handful of branches and submerge them in Bin #1 for about 30 seconds, agitating it, removing from water, submerging again, agitating, etc...then remove it and let it drip out for a few seconds...then repeat the process with Bins #2-4. Let it drip dry overnight with a little bit of airflow, then dry as you normally would...baskets, boxes, etc.. I hadn't watered these plants in a few days, so they were almost in draught, but after doing this procedure, they were fully hydrated(turgid) and seemed to have brighter colors than before. Nice!😍 12/1: The bottom part of the closet seems empty with only 9 plants in there.. 😟 I cut the harvested plants up and put them into drying baskets in the top of my closet with a small oscillating fan on. I've got the temperature fluctuating between 68f and 75f and the RH is staying between 48% and 52%. To do that, I had to take down the small light in the top of the closet to fit the drying baskets up there. So, I moved the 3 shorter plants still up there down to the bottom and put them on top of buckets. Now the bottom of the closet looks full again!😃 I'm anxious to finish up this grow so I can get busy growing the Fastbuds Fast Flowering Photo Testers!!! When I harvest the next 5, I'll flush the remaining plants really well and that will be all the flushing they'll get..I'll let them dry back out for a few days and harvest them. I've got to make some minor improvements to the garden (adding UV, blue and red/far red booster panels and intake fans) That should put me on track to start germinating them by mid-December if all goes well. 12/3: ...early a.m... The harvested plants are already dry!?!?? And have excellent texture??? Wow..bud washing is for real..roughly 48 hours after I hung them to drip dry, and 40 hours after I put them in baskets in 50% RH/70f conditions with moderate airflow...usually takes 4 or 5 days to get a good slow-dry in the same conditions, so I'm convinced that this must be attributed to the bud-washing procedure. I'm sold! Here's the talley so far: plant #1 - 115g (plus 13g larf) - Candy Cane [F2] plant #2 - 108g (plus 18g larf) - Candy Cane [F2] plant #3 - 119g (plus 15g larf) - C4ndycaine [Candy Cane x C4] plant #4 -  92g (plus 6g larf) - Candy Cane [F2] - the smallest plant in the main area plant #5 - 112g (plus 22g larf) - Candesia [Candy Cane x Amnesia] plant #6 -  75g (no larf) - Candesia [Candy Cane x Amnesia] - grown in upper area under 200w ...afternoon: I flushed 6 of the last 7 plants for the first time today and harvested 4 more of them. I washed them and hung them to dry.....my dripping wet bathing beauties!😍
Likes
26
Share
Today marks the start of the final week before harvest, and I’ve officially begun flushing the plant. It's really exciting to see how far it has come. The buds have developed beautifully, and the scent is amazing – super fruity and sweet, almost like a mix of berries and tropical fruit. The aroma fills the space every time I check on it. I’m pretty satisfied with how the plant has grown overall. The structure is solid, and the buds are dense and sticky. Everything looks on track for a good yield, and I can’t wait to see the final product after curing. Fingers crossed for a smooth finish!
Likes
2
Share
Anfang Blütewoche 4. Sensationeller Geruch bei der Candy Lime! Ich mache das nun seit 35 Jahren und hat viele verschiedene Strains, aber einen derart intensiven Geruch nach frischen Orangen habe ich noch nicht erlebt. Zmoothiez macht seinem Namen alle Ehre!
Likes
2
Share
Cosecha finalizada, fue una de las mejores plantas que e tenido, su aroma fuerte a menta y pegamento invadió toda mi casa, ni hablar del tamaño mounstruoso
Likes
16
Share
Hello Diary, Epsilon F1 is the fifth hybrid F1 strain from the Royal Queen Seeds lab that grows on my small farm. This time, all three plants on the farm are Epsilon F1, but the soil mix in which they grow is different. But before I describe the preparation, a few words about the strain itself. EPSILON F1: Epsilon F1 is the fastest of all of our F1 cannabis seeds, and combines genetic traits from some of the most notable cannabis varieties of the last decades, including Blue Dream, Blueberry, Amnesia Lemon Haze, and Black Domina. She boasts delicious aromas, plenty of cannabinoids, and, like all RQS F1 seeds, unrivaled stability, resulting in a uniform crop that consistently produces buds of unwavering quality. Plus, her autoflowering trait and extra-fast flowering time make Epsilon F1 an ideal choice for growers focused on getting to harvest as quickly as possible. Epsilon F1 features a rich aroma that combines hints of fresh herbs and citrus with full-bodied earthy notes and touches of blueberries and lavender. Epsilon F1 is a mid-strength variety, consistently producing solid levels of THC and a terpene profile dominated by myrcene, farnesene, ocimene, and limonene. Not only do these terpenes impact Epsilon F1's delicious aroma, but also its effects, endowing it with a long-lasting, physically relaxing stone that soothes the entire body (predominantly courtesy of myrcene, linalool, and farnesene), mixed with an uplifting, motivational kick (from limonene). SET-UP ON MY LITTLE FARM: Box - Secret Jardin DS120W 120x60x178 Lights - MIGRO 200+ Ventilation - TT Silent-M 100 Filter - Primaklima filter PK 100/125 Fan - Oscillating Koala Fan X 2 Humidifier - Beurer LB 45 Soil - BioBizz Light - Mix Pot - 11L Air pots Seed - Royal Queen Seeds Nutrition - RQS Organic nutrition Let's officially start the diary: 02/08/2023 Planting. I prepared a total of three pots, as usual. And this time I used AirPots, which proved to be the best option. I've been using them since the beginning. I used the soil from BioBizz Light-Mix. Pot #1 - I first put Easy Boost Organic nutrition in the form of pellets into the ground, then I added SeaWeed and Mycorrhiz in the recommended doses and mixed everything well. Pot #2 - I also put in Easy Bosst Organic nutrition, Seaweed and Trichoderma. Also in doses according to instructions. Pot #3 - Along with Easy Boost Organic nutrition, I put Bat Guano and Trichoderma. After I prepared the soil, I soaked all the pots well with water and made small holes in which I placed the seeds. I then placed the pots in the Grow Box where the temperature was around 28 degrees and the humidity was around 55%. 05/08/2023 I sprinkled a little water on the surface of the soil. Not too much. 06/08/2023 All three plants sprouted. 07/08/2023 I watered the plants with a little water. Approximately 0.5 liters per each plant. 10/08/2023 Watering. Each 0.5 liters of water. That's all for this stage, see you soon and thanks for your support.
Likes
3
Share
@Proto420
Follow
Great dope. Tastes amazing and smells amazing. Highly recommend.
Likes
19
Share
@Brujha77
Follow
Start Woche 8 (Start Blüte) Von gestern auf heute wurde auf 12/12 umgestellt. Es kamen nochmal ein paar Lst Clips rein und die 2 Lage Netz wurde vorbereitet. Zudem wurde unten herum mal etwas Luft gemacht.. Ansonsten muss ich sagen Gefällt mir was ich bisher sehe. Schön kräftiger, buschiger Wuchs🥀💪 Zudem Bekam die gute heute wieder 4l Wasser mit Green Bull. Ich denke sie bekommt Ende der Woche dann das erste mal nen Composttee🍀🍀 Licht ist bei 900ppfd bei nem VPD von 1,3 Tag5 Blüte Heute gab es 3l Composttee (50g Biotabs PK Booster Compost Tea, Melasse und Wurmhumus; 36h angesetzt) und es wurde nochmal entlaubt. 2. Netz kam auch dazu.