




Likes
3
Share


@Krautbauern
Follow
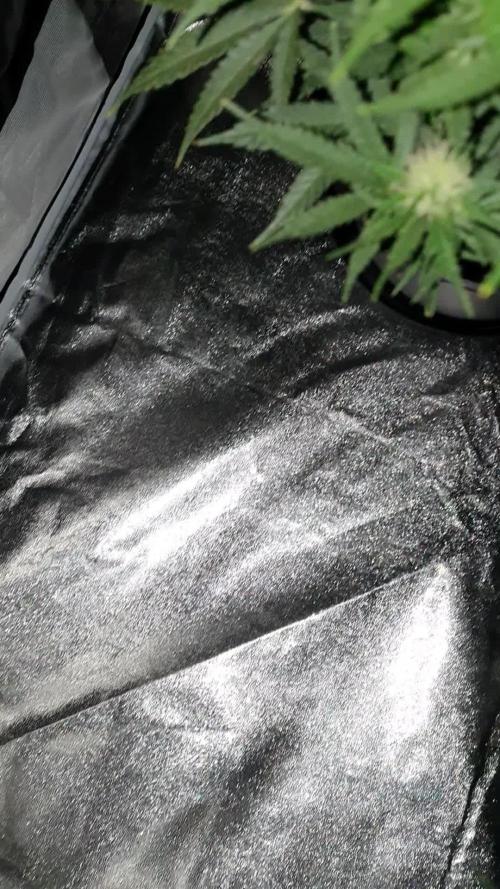
The calmag deficiency has improved significantly and the plants are now putting all their energy into the flowers.
In the meantime, no new eggs are forming, which makes us very happy :)


Likes
4
Share


@Ageddd
Follow
And after 2 rainy days and a sunny one after them, here comes Harvest day !! 😎
THe plant was sorrounded by a lot of bugs , as you can appreciate in the photos, it was neccesary to clean up the material... Never done this before but watched a video of Jorge Cervantes where he was cleaning the buds with H202
THe concentration was 200-250 ml with 22l, and i used 6l of water with 50 ml of H202 at 3%.... After the bath, like 90 % of the bugs are gone..
Im happy with te results, the buds/flowers are nicely lined up at the same height, and the aroma is really nice,but im curing the weed a couple of months at least... Today rolled up one and the taste is sweet on the exhale with spicy tones in the mouth too, but a proper cure is needed until full flavor develops in my opinion :)
Overall a nice experience, didnt expect that purple tones appearing in the end and didnt expect such intense smell too hahah really stinky plant.. She screams im here, dont care what you think about me hahaha
It has been drying for 5 days as the buds werent too compact and didn took too much time to dry..
Thank you for reading and i hope you liked the documentation of this strain here in GrowDiaries :D
Take care, and Good Vibes!!!
///// Bad news: The scale is broken, so next days im buying a new one an the uploading the weight :) ////////
Aprox weight : around 40-50 grams i would say

Likes
12
Share


@Alice_in_Wonderland
Follow
Day 8 - First official day of veg and both ladies are looking good and on schedule for a couple of changes.
Nutrients: 10ml of Hydro A & Hydro B were added to both buckets (10L of water in each bucket)
PH: the Milwaukee PH controller was set to work - starting at a PH of around 7.6 - 7.8, it slowly worked down to a perfect 6.0 over about 50minutes.
Lights: The lights were readjusted to be 60cm from the seedlings who are all between 8-10cm tall and the intensity of the lights were increased to about 70% brightness.
Day 9 - Both plants are taking nicely to the adjustments and I am happy with the progress. Temp and humidity are stable and PH is controlled.
Day 11 - The second nodes are clearly visible today for both Chong and Max which would hopefully put them at 3 nodes by the end of the week - right on schedule!
Day 13 - The ladies seem to be showing some signs of heat stress, so thinking about adjusting the lights after their period of dark today because they are due to be adjusted tomorrow anyway for the new week of veg

Processing
Likes
1
Share


@Guzgrown
Follow
Really hot week with some showers early in the week, but chucking along. Fed with bloom once and a compost tea. 1-1.5 gal of water daily. Smelling some wonderful tropical smells. Cant wait to smoke it and figure out what it is.
Likes
142
Share


@MadeInGermany
Follow
Hey everyone :-)
This week it smells more and more sweet and fruity in the whole room 😍.
There is actually not much to report, everyone is now under 12/12 :-).
This is the last grow that comes in the entire diary.
From now on, each plant will be added to the diary 👍.
I wish you all a lot of fun watching, stay healthy 🙏🏻 and let it grow 😎👌


Likes
27
Share


@Chubbs
Follow
420 Fastbuds Week 6
Blackberry Auto
What up grow fam. Hope everyone's grow is going as expected. These two Black beauty's are absolutely stunning. The colors they're producing in the flowers are just breath taking. The smell is already very pungent berry so one could only imagine once finished. The bigger of the two seems to be a little further along with its flowers. Decided to add General Hydroponics 3 part flora series to the fed for an added boost if they're needing it. I'll continue the routine I've done up to this point.
Likes
16
Share


@DeepRootsGrowTrees
Follow
GORILLA KING AUTO / KANNABIA
WEEK # OVERALL
WEEK #2 FLOWER
This week great progress she's starting to form some nice looking buds that are taking shape quickly she's vibrant and strong!! Stay Growing!!
Thank you for stopping by and taking a look it's much appreciated!!
Thank you KANNABIA!!
GORILLA KING AUTO / KANNABIA.COM

Likes
37
Share


@GODSGIFT_2005_JM
Follow
For LIQUIDS & NUTES ******GREEN BUZZ NUTRIENTS***** organic.
Also i’m using their LIVING SOIL CULTURE in powder form!
MARSHYDRO ⛺️ has large openings on the sides which is useful for mid section groom room work. 🤩
☀️ MARSHYDRO FC 3000 LED 300W
💨MARSHYDRO 6” in-line EXTRACTOR with speed-variation knob, comes complete with ducting and carbon filter.


Likes
5
Share


@Ensign420
Follow
Greetings fellow growers 🖖 and welcome to my first grow ever. This adventure actually started several months ago when I decided to stop buying flower from dispensaries and just grow my own bud. How hard can it be!?
This is actually my second seed of this strain. The first bean sadly died due to over watering (sorry girl, RIP). I was literally watering the cube to the point where water was dripping from the bottom, then heavily sprayed the humidity dome and tray with the vents completely closed. Everyday. Multiple times. I never let the dome or try dry out. So after about 8 days of not sprouting, there was a funky smell of rot. So that was that.
Later I learned that rockwool retains a lot of water and can easily drown seeds. So a wet/dry cycle is best for rockwool germination.
So even after hours of researching and digging through forums and tutorial videos, I was still under prepared for this journey. Did not consider how delicate the germination phase is. Oh well. Lesson learned. Reset and try again!
I hope everyone is safe and stoned during this corona crisis. Just like everyone else in the world, I want this pandemic to be over with. But in the meantime, let's grow some weed! 🖖
[START OF WEEK 01]
Day 01 - Monday - 08/03/20 - Total Days: 001
-----------------------------------
- [0830]: Light Schedule: 24Hrs/0
--- Soaked cube in 5.5 PH water for 10 min. Did not shake water out.
--- NO NUTES! Only PH'd down to control the PH levels.
--- Did not use the default hole (way too deep).
--- Flipped cube upside down and made a shallow hole for the seed (less than 0.25" deep).
--- Placed seed in and pinched hole close. No additional water added.
--- Sprayed the tray and dome with straight water (5.5 PH).
--- Vents are cracked opened a for ventilation (about 1/4 opened each).
--- Distance between the light and tray was 53"
--- AC was set to 80 °F
--- Exhaust fan was set to 86 °F
--- Room average temp was at 85 °F
--- Dome humidity was at 85-99% when sprayed.
--- Allowing to completely dry before respraying.
- [2200]: Dome and tray were completely dry! Sprayed only tray and dome with more water.
Day 02 - Tuesday - 08/04/20 - Total Days: 002
-----------------------------------
- [0845]: Sprayed dome and tray in the morning. Everything was dry.
--- Hoping for the best!
- [2130]: Everything was dry again, so sprayed dome and tray at night along with a light spray on the cube.
Day 03 - Wednesday - 08/05/20 - Total Days: 003
-----------------------------------
- [0830]: Everything was dry again. Resprayed dome and tray. Slightly sprayed cube.
- [2125]: Hooo damn!! She popped! Am little stub is visible! Resprayed dome and tray again.
--- Still going 24/0 for lights.
- [+0033]: Just checked up on her and I swear she grew a bit taller! Getting excited!
Day 04 - Thursday - 08/06/20 - Total Days: 004
-----------------------------------
- [0845]: Wow! Went from a little stub to fully sprouted overnight! Everything was pretty dry again so resprayed dome and tray.
- [2200]: Tap root is visible! Over 1" long too! Just resprayed dome and tray again.
-- Going to prep for hydroton transplant tomorrow!
Day 05 - Friday - 08/07/20 - Total Days: 005
-----------------------------------
- [0930]: She keeps growing!
-- Added a bit of CalMag to the spray bottle (8 drops to 650ml of distilled water). Resprayed dome and tray. Water was at a 5.4 PH with 141 PPM.
- [1045]: Prepped the bubble bucket with 4.5gal of water. Water is high enough to reach about 0.25" above the bottom of the net pot.
--- Added 3 drops of Superthrive
--- Added 3.5ml of CaliMagic
--- Added 2ml Hydroguard
--- Then PH'd down to 5.6
--- Solution Strengh: 120 PPM
--- Water chiller is set to 20 °C
- [1100]: Transplant time!
--- Filled the net basket 1/3 with hydroton. When placed in the bucket, air bubbles are not visible, but are slightly below the surface (slight digging will reveal the water/bubbles below).
--- Removed plastic on rockwool cube and placed in basket, then filled around and covered with hydroton. Making sure to block any light from passing through the net pot and into the nutrient solution.
--- Covered with a half-bottle dome sprayed with the CalMag water from earlier.
--- Hoping for the best!
- [1300]: Raised Bucket 5" higher. Now light distance is 48" to top of bucket.
- [1820]: Lowered tent exhaust temp to 76 °F
--- Lowered AC to 75 °F
--- Raised bucket even higher so light distance is 30" to top of bucket.
- [2300]: Looking good!
--- Sprayed dome and surrounding hydroton with more CalMag water.
--- Attached timer to light! So new 18 Hrs On/6 Hrs Off light schedule.
--- Lights On: [1600] (4pm)
--- Lights Off: [+1000] (10am the next day)
--- Decided to go with lights on during the evening/night and off during the later mornings/afternoon (the hottest part of the day) to see if temps can be controlled better.
--- Please survive girl!
Day 06 - Saturday - 08/08/20 - Total Days: 006
-----------------------------------
- [0800]: Everything was dry. Resprayed hydroton and dome.
- [2000]: Here first night cycle seemed to go well! Get'n taller!
--- Dry again. Removed the dome.
--- PH went up to 6.5 so PH'd down to 5.7
--- Ran the top feed drip ring for a bout a minute to wet the hydroton and rockwool with the nutient solution.
---Too scared to leave the top feed on 24hrs (I don't want over water her and cause dampening-off). Will let dry before re-watering.
- [2100]: After closer inspection, I think she's looking a bit yellow.
--- Decided to add a bit of grow nutes to the bubbler solution.
--- Added 2ml of Sensi Grow A
--- Added 2ml of Sensi Grow B
--- Solution strength after adding more nutes: 176 PPM
--- PH went up to 6
--- I hope that the extra chelating properties of the 'PH Perfect' solution is enough of a buffer for proper nutrient uptake.
Day 07 - Sunday - 08/09/20 - Total Days: 007
-----------------------------------
- [0800]: Water dropped a bit (mostly due to evaporation) so solution strength was at 190.
--- Checked PH again. Was still at 6, so PH'd down to 5.4
--- Ran the top feed for a minute to wet the hydroton a bit.
- [0915]: Since she's looking perky but still a bit yellow. So decided to up the nutrient concentration even more before lights out.
--- Added 2ml more of Sensi Grow A
--- Added 2ml more of Sensi Grow B
--- Solution strength after adding more nutes: 199 PPM
--- PH went up to 5.8
- [1700]: Checked nutrients.
--- PH: 5.9
--- Solution strength: 202 PPM
--- Added 4ml of Voodoo Juice
--- Added 4ml of B-52
--- PH after adding more nutes: 5.9
--- Solution strength after adding more nutes: 238 PPM
- [2130]: Decided to make a new foliar spray to address the continued yellowing.
--- Started with 500ml of distilled water.
--- Added 3 drops of CaliMagic
--- Added 3 drops of Sensi Grow A
--- Added 3 drops of Sensi Grow B
--- Added 3 drops of B-52
--- Added 1 drop of Superthrive
--- Solution strength: 164 PPM
--- PH was at 5.9 and did not adjust.
--- Gave her one spray.
--- Also sprayed the surrounding hydroton.
[END OF WEEK 01]


Likes
14
Share


@FourVentiFarms
Follow
pics from 20th and 22nd October
26th for lemon
It's the second year ever for me, and I talked to some people because I still get 8g per plant, and it's because of the mainlining and toppings I do at wrong times, and also because an outdoor plant doesn't always get the perfect sunlight and energy to repair itself enough. so the stress might be it.
next year I'll try bending the main stem and never doing topping
Likes
15
Share


@RamirezDusha
Follow
There was nothing special to mention on that stage. Growing proceeded as normal.
Likes
126
Share


@WhiteWidow
Follow
You can find tbe first week of all girls on my profile, second week is missing coz its just boring and now i start week 3 so its day 15 today from placing seeds to germination.
Uploaded a video of their habitat, i still wont name each one indifidually coz i still didnt choose winners / keepers.
Unfortunatelly i have a bit low RH for this stage of growth but they obviously dont mind, i spray them twice a day, no burns from spraying with lights on, no electroshocks caused by spraying so all good now.
I tried it all enough to be able to say i cant be assed anymore :D
Since @growdiaries are not keen on resolving a problem with uploading each pic individually on androids, i will keep one diary for all girls, dont even mind not being able to compete in dom.
Stay tuned these girls will rock.


Likes
62
Share


@Santica_Garden
Follow
So this is how things are looking for the Exodus Cheese & GH Cheese. I lost some of the other footage that I had throughout week 4,sorry guys, but didn't do much to these ladies anyway, they started out too short to do much training.

Likes
26
Share


@ButterfliesLittleFarm
Follow
Hello Diary.
Two new diaries. Hulkberry and Green Gelato, both Automatic. Many thanks to RQS for these strains, and I am very happy to be starting with the new storys.
WHY HULKBERRY AUTOMATIC?
HulkBerry Automatic is Royal Queen Seeds’ revved-up version of Bruce Banner #3 Auto. She’s one of the most potent autos you can get your hands on, easily outperforming many photoperiod strains in this area. Her compact and frosty flowers provide a THC content of up to 21%, enough to satisfy the most experienced of smokers. Expect a wave of euphoria to crash over you after a vape hit or bong bowl of HulkBerry Automatic. The strain is motivating, increases alertness, and gets the creative juices flowing. She makes a superb smoke when listening to music and watching films, or when indulging in your own creative endeavours. Overall, she’s an excellent strain for daytime use.
LET'S START FIRST WITH THE FARM SET-UP:
Box - Secret Jardin DS120W 120x60x178
Lights - MIGRO 200+
Ventilation - Blauberg Turbo - E 100
Fan - Oscillating Koala Fan
Humidifier - Beurer LB 45
Soil - BIOBIZZ Light - Mix
Pot - 11L Fabric Pot from RQS
Seed - Royal Queen Seed
Nutrition - BioBizz and RQS Organic nutrition
I apologize in advance for the detailed documentation, or the large number of photos, but I enjoy it, and I think it will help others around tracking their plants.
LET THE DIARY START OFFICIALLY:
10/06/2020. planting.
I have prepared everything I need for planting. The 11lit fabric pot I got from RQS, also Organic Boost Nutrition and Mycorrhizza from RQS, Soil is Light-Mix from BioBizz and of course the seeds of the new strain Hulkberry Automatic. After adding 50g of pellets from Organic Nutrition and 5g of Mycorrhizze, I mixed everything well in the pot. After that I watered well and soaked the soil, I dug a hole with a wooden stick about 2-3 cm, I first put 1g of mycorrhize and then put the seeds inside. I lightly covered the hole with earth and put the pots in their new home. I planted two Hulkberries and one Green Gelato Automatic. The temperature was about 25 degrees and the humidity about 65%.
14/06/2020. She sprouted.
After 4 days, Hulkberries came out. In the meantime, I sprayed the surface of the earth a little twice. The temperature is still around 26 degrees, thanks to the summer and the high temperature that enters the apartment anyway. I regulate the humidity with a humidifier, I maintain it around 60% -65%.
15/06/2020.
Their first photo shoot, I also watered their with about 2 liters of water, which I only regulated p.H. at 6.3 with Plagron, Lemon Kick.
19/06/2020. Day 1.
Hulkberries is officially one day old. On that occasion I took another photo shoot to celebrate this big day :).
24/06/2020. First Feeding
First feeding. Their got a whole meal from BioBizz, Root-Juice, Bio-Heaven and Acti-Vera, p.H of water I regulated with Lemon Kick from Plagron.
25/06/2020. Day 7.
End of the first week. For now, everything is great. It is developing nicely, its conditions are almost perfect.
Hulkberry #1 - Day 7. - 9 cm
Hulkberry #2 - Day 7. - 10 cm
I think that’s all for this week, I’m happy that it’s starting all over again, following its development and looking forward to what’s to come. See you next week.
Likes
1
Share

@Black_Widow
Follow
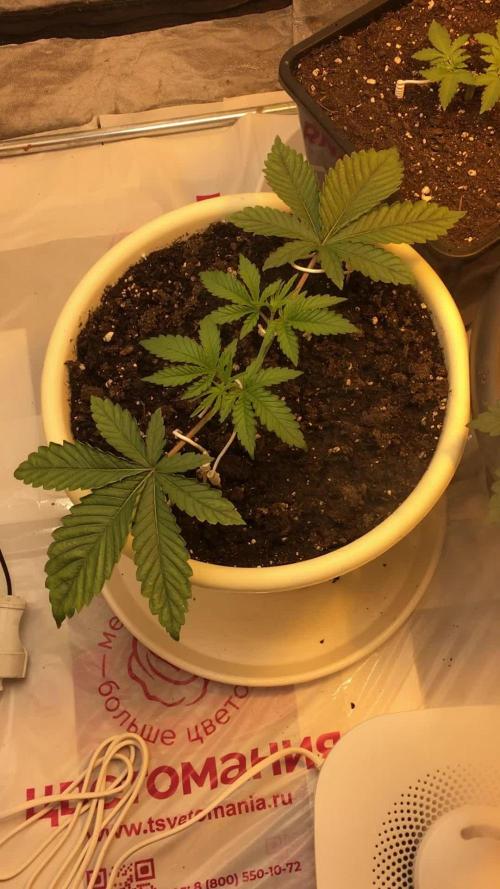
Привет садоводы !!!
Началась новая неделя
растения немного подросли и я пересадил их в горшки побольше
Сегодня я обрезал верх для дальнейшего формирования


Likes
6
Share


@Groweedo
Follow
Bonjour,
J’ai lancé le cycle de floraison mercredi, elle est en stretch très bonne santé général.
J’ai procédé à une défoliation avant le cycle mais comme vous pouvez le voir elle ça ne les a pas empêché de se refournir
Je commencerai l’engrais de floraison dans 1 semaine ou en voyant les premiers pistils
🤘🏽👌💥😍🎉
