


Likes
Comments
Share

@Fank0
Follow
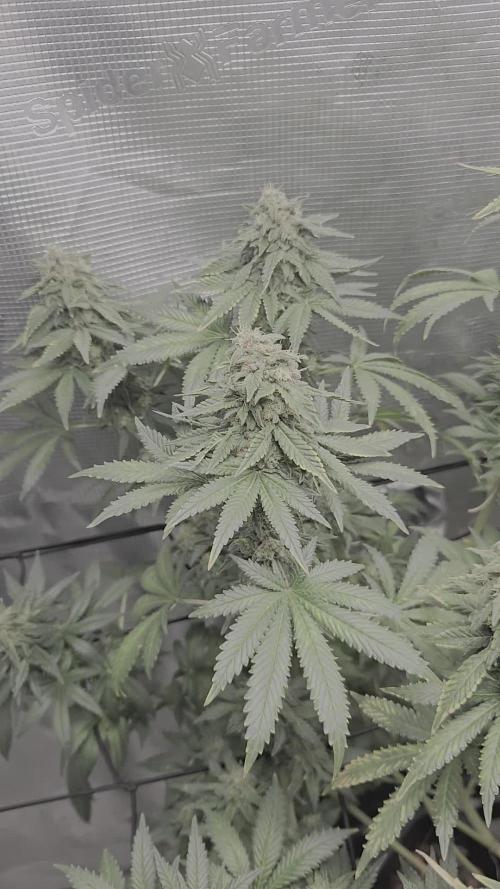
Začina kritická fáza kvetu, postupna defo slabnúcich listov, inak dobre, čus

Likes
7
Share


@MrRaid
Follow
She had a simple life little lst but thats about it she looked small as a plant but ended up being my highest yeild plant over 100 grams dry flower had couple problems with me feeding to much but sorted out just fine overall its a nice plant to grow very quickly and easy just don't get carried away with food my experience less additives the better grow simple with autos from fastbuds especially 2 or 3 additives is plenty or your gonna run the risk of buring them 😤 grow for this plant was 10/10 hardly any effort needed 70 quick days


Likes
35
Share


@nonick123
Follow
Día 30 (01/07) Riego con 250 ml H20 pH 6,5. Se muestran sedientas
6 días después del topping, las nuevas ramas se están formando rápidamente!
Día 31 (02/07) Se muestran saludables y potentes!
Día 32 (03/07) Riego con 500 ml H20 pH 6,5
Día 33 (04/07) Las plantas están creciendo muy rápido! Me planteo hacer supercropping o LST en algunas de ellas...
Día 34 (05/07) Se muestran sedientas. Las macetas se le empiezan a quedar pequeñas
Riego con 250 ml de H20 pH 6,5
Día 35 (06/07) Training session! Aplico LST a todas y supercropping a la OnionOG mutante con 4 colas por nodo
Riego con 500 ml H20 pH 6,5
Día 36 (07/07) Riego con 500 ml de Té Vegetativo de Lurpe Solutions
Aplico foliarmente Kelp hidrolizado a 0.25 ml/l
Ajustes de LST. Están respondiendo estupendamente al entrenamiento! 😍💥
💦Nutrients by Lurpe Solutions - www.lurpenaturalsolutions.com
🌱Substrate PRO-MIX HP BACILLUS + MYCORRHIZAE - www.pthorticulture.com/en/products/pro-mix-hp-biostimulant-plus-mycorrhizae

Likes
21
Share


@BrieflyGrowing
Follow
All four seeds sprouted at the same time just within hours. Very lucky for direct in soil germination!
In this first week I just tried to make them nice and cozy with warms temps and high humidity. Trying to keep watering
in check and small dosing so I don't risk overwatering them. Watered about once every two days when top soil was dry with 50/60ml pHed soft water.
Likes
16
Share


@WeGrow
Follow
Well what can I say... added a used LED light to the grow that I got for a good price as energy prices are quite high and getting more expensive. Going to upgrade the ventilation system as well, having the box in my bedroom is just unbearable with the current ventilation.
High humidity at night above 60% causes me a headache, I am trying to reduce it as much as possible - hope the new system is gonna work better.
Plants have a variety of issues, also I believe that they don't grow as fast as they should. Any help/comment appreciated!

Likes
62
Share


@Reyden
Follow
🔸Davvero una grande notizia! Una nuova collaborazione con @Spiderfarmer è iniziata e sono felice di poter creare dei contenuti per una azienda seria come la loro!!! Questa mattina è stata montata questa bellissima #SF2000 nella tenda da coltivazione più grande dove dovrà lavorare per far fiorire tutte le signorine che passeranno di qui prossimamente 😁😎🔥
Voglio fare i complimenti perché siete riusciti a creare veramente una luce bellissima con materiali super leggeri ed esteticamente geniali ❤️🔥oltre che consumare veramente poco (2.7 Umol/J)per il raggio di copertura ( 4x3 in crescita )(4x2 in fioritura ) e intensità uniforme in PPFD
Mi piace molto anche il fatto che monta anche diodi IR utili per accelerare la fase di fioritura e aumentare la resa 💡
Ci saranno diversi aggiornamenti rimanete connessi e grazie ancora per essere passati a trovarmi 😃
https://www.instagram.com/reel/Cl_EEAbu_vQ/?igshid=YmMyMTA2M2Y=
Funzionalità principali
2022 NUOVA VERSIONE COSTI DI ESERCIZIO INFERIORI E RENDIMENTI DI QUALITÀ SUPERIORE: Le luci progressive a LED SPIDER FARMER SF2000 utilizzano la più recente tecnologia LED ad alto rendimento oggi: diodi Samsung LM301B, alta efficienza energetica con 2,7 umol/J, creano la migliore penetrazione della luce del baldacchino. Copertura vegetale 3 x 4 piedi, fiore 2 x 4 piedi. Potenza estremamente elevata ma consuma solo 200 W di elettricità, rendendola più efficiente delle tradizionali lampade HID e di altre lampade per piante sul mercato.
NUOVO DISPOSIZIONE DEI DIODI E DESIGN DIMMERANTE: Luci crescenti SF2000 aggiornate. Più perline leggere ai bordi, meno al centro. Aiuta a ottenere una PPFD più uniforme. e la manopola di regolazione della luminosità regola liberamente l'intensità della luce. Connessione multi-luce con regolazione unificata particolarmente vantaggiosa per un'ampia area di coltivazione indoor e piantagione commerciale.
IDEALE PER TUTTE LE FASI DI CRESCITA: Eccellente spettro completo: bianco, blu, rosso e IR (3000K, 5000K, 660nm e IR 760nm). Diodi 3000K che forniscono più luce rossastra e 5000K che forniscono più luce bluastra. La luce rossa e IR da 660 nm è particolarmente utile durante la fioritura, dove accelera i tempi di fioritura e aumenta i raccolti. Trasforma i tuoi semi nella tua scorta. E la luce sembra abbastanza naturale, quindi è utile per monitorare accuratamente la salute delle piante.
COSTRUZIONE BEN FATTA E SOLIDA: nessuna ventola senza rumore. Il driver ad alta efficienza, affidabile e staccabile ha un'ottima dissipazione del calore. Il dissipatore di calore in alluminio è spesso e robusto, coperture protettive per i cavi; Imballaggio intuitivo. Componenti di qualità significano che la luce dura più a lungo, SF Light si prende cura di te con un design più attento, puoi facilmente risparmiare denaro senza acquistare frequentemente luci.
In qualità di produttore professionale di luci di coltivazione a LED da oltre 10 anni. Spider Farmer ha sempre insistito per creare attrezzature per la semina domestica più efficienti, adatte e di alta qualità per la crescita delle piante e si impegna a diventare un partner fidato per ogni coltivatore! Riceverai una lampada da coltivazione Spider Farmer SF2000, un manuale di istruzioni, un paio di ganci d'argento, un paio di ganci neri.


Likes
17
Share


@German_GrowLab
Follow
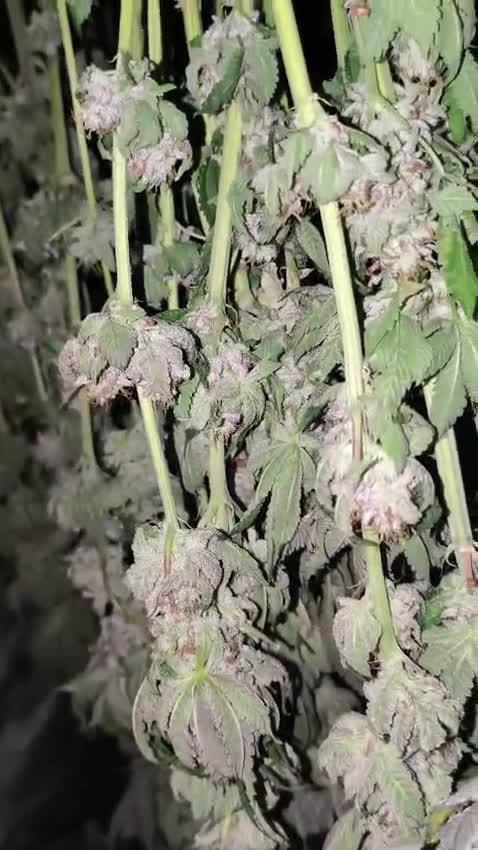
Einen wunderschönen guten Tag, liebe Grow-Community, und herzlich willkommen zur neunten Woche meines kleinen Outdoorprojekts!
Heute dann doch mal wieder an einem Montag :). Ich habe es nach dem Mary-Jane-Wachenden leider noch nicht nach Hause geschafft. Allerdings habe ich paar Bilder vorproduziert, um hier nicht mit leeren Händen aufzutauchen.
Ich bin die letzte Woche ein wenig durch die heimischen Wälder flaniert und habe den ein oder anderen Schatz bergen können. Aber alles der Reihe nach …
Da ich messbedingt nicht bei den Pflanzen sein konnte und das mit dem Gießdienst an Dritte abgeben mal so, mal so funktioniert. Dachte ich mir, man muss der Verdunstung und der damit einhergehenden Trockenheit etwas entgegensetzen.
Ich habe mich als kurz und knapp für eine Mulchschicht entschieden. Diese schützt nicht nur vor Austrocknung, sondern macht ebenso die obere Erdschicht für die Durchwurzelung brauchbar. Sie ist obendrein ein weiterer Schritt zu einem gesunden Bodennahrungsnetzwerk. Dieses wird durch die in dem auf dem Grünschnitt/Waldlaub enthaltenen Mikroorganismen (Protozonen, Wimperntierchen), welche durch das Belüften im Tank nochmals gefördert werden, noch einmal gestärkt. Last but not least führt der Mulch dazu, dass Schadorganismen das Einfallen in die obere Erdschicht erschwert wird.
Aber was ist drin?
Ähnlich wie schon beim Komposttee wird bakterienreiches organisches Material in einen Tank mit vorzugsweise Regenwasser gegeben und anschließend über einen gewissen Zeitraum belüftet (siehe Woche 5). Der wohl größte Unterschied zum Komposttee ist, dass wir eher auf das Material und nicht auf die Flüssigkeit aus sind. Dieses besteht zu ca. 90 % aus Grünschnitt (in meinem Fall eine Biokleintiermischung) und zu ca. 10 % aus Laub, welches ich in einem wenig bis gar nicht bewanderten Waldstück gesammelt habe.
Die richtige Platzwahl:
Bei der Platzwahl war mir wichtig, einen möglichst naturbelassenen Teil des Waldes auszusuchen, um eine Kontaminierung von bspw. Müll oder Hundeurin zu vermeiden. Ebenso habe ich nach Material Ausschau gehalten, welches schon Kontakt mit einem Pilzmyzel und dem ein oder anderen Regenwurm aufwies. Beides sind Indikatoren für ein gesundes Bodenleben.
Zum Schluss …
Nun einfach alles in einen großen Tank, Wasser drauf und Pumpe an. Belüftet wurde das Ganze für drei Tage. Danach das Material entfernen und luftig um die Pflanzen aus Ringen (leicht in den Boden einarbeiten). Um mit so wenig Waste wie möglich zu arbeiten, habe ich dann noch das Wasser gegossen. Dieses ist sehr reich an Mikroorganismen.
Aber nun (besser spät als nie) noch ein paar Credits:
Und zwar an Flo von Florganics, von dem ich das meiste Wissen um den Komposttee, die Erdmischung sowie auch das Mulchen bezogen habe. All die genannten Themen sind nochmal deutlich detaillierter auf seinem Yt-Kanal (Florganics) zu finden.
Noch ein kurzes Wort zu den Damen:
Soweit sehen alle sehr saftig und grün aus. Mit dem Toppen warte ich noch, bis ich wieder da bin. Alles in allem sollte am Ende doch ein wenig herauskommen (im Optimalfall 50 g/Person).
Das war’s für diese Woche. Euch nun einen schönen Restmontag und einen guten Wochenstart.
Peace




Likes
18
Share


@ApothecAries
Follow
1 Week since planting the seeds into soil! very healthy little seedlings! I think for this run. Will be running two 3 gallon pots next week or two. We do have the spider farmer SE3000 coming sometime which will give us all the power we need for flowering a full tent 8).Girls have a radio playing country of all eras all day long and when I’m around they get a dose of classic metal hope they are jamming out 🤘
Next week most likely homing into their 3 gal homes. Will be giving a shot of Microbes and Molasses. Coating root system with Dynomyco mycorrhiza!


Likes
15
Share


@Roope
Follow
Ewerything works and im so bananas right now and broud of those ladys that comment will be,
Start u'r own project and dont race becouse somebody may have 20+year of more info and they get moster no epic size planta but thats the goal be like pro at this lifetime.
Aint do any modification only extra bag of co2 and wery mild start nutriments so stay in tune!

Processing
Likes
29
Share


@Lennys_Laboratory
Follow
Feed Started With Tap Water Left Overnight For Chlorine/Chlorides To Evaporate.
Next Day.
Starting EC of our water is 0.10-0.15.
I added 1ML of Regenaroot Per Litre. Then Used Canna Terra Flores Until EC measured 0.7.
I then used the mighty bloom enhancer by the ml until my EC measured 1.3
Always Give A Little Sprinkle Of Great White Into The Mix
Finally i PH'd the mix to 6.2. Made sure the feed was of adequate temp (21c) and continued to feed.
😎

Likes
9
Share


@TheGreenGroomer
Follow
Guys, I did it! I managed to get to the end of my grow with no problems and a whopping dry weight of 189 grams (6.6 oz). I am over the moon with the outcome, especially considering this was my first time. The buds have been curing for 12 days now, breaking down extra chlorophyll for a smoother smoke.
The aromas are subtle when putting your nose in the jars—nothing crazy—but when you break into a bud, it smells absolutely amazing. It has an aroma almost like Stardog, with a diesel, piney, and gassy scent.
As for the taste, the buds are just as impressive! They taste exactly how they smell: diesel, piney, and gassy, much like a Stardog. The effect is incredible; it numbed my whole body and put me in a couch lock state. This strain is probably not the best for daytime smoking due to its potent, body-numbing effect.
I can't wait to continue this journey with my next grow!


Likes
3
Share

@MindFlowers68
Follow
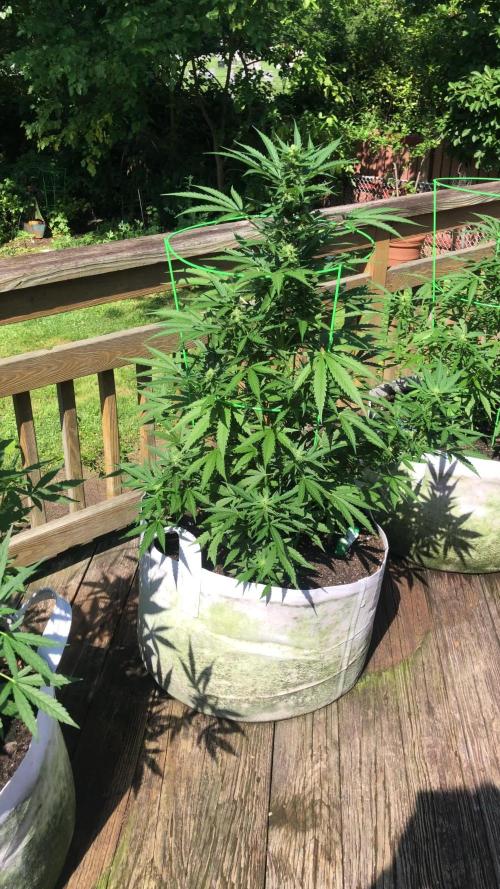
This week was similar to last week. Rain every other day with intense sun. There were no major changes I made. I did slide my pots over a few feet to try to catch more sunlight. Mainly just been on scouting duty making sure there are no questionable bugs hanging around. A few things seem to take a liking to them but leaving them lone for the most part. One thing I noticed with the autos is that they seemed to adapt a whorled phyllotaxy along with the lemon ak that started with 3 from seed. They got their weekly does of boogie brew, but think I will stop feeding after this week.
Likes
164
Share


@Hattiwatti
Follow
Hola 🐎
Basicly nothing happened in month.
Harvested lot of leaves yesterday and best leaves still ripening. Shirley leaves feel lot thicker than Virginia gold.
Princess died in lack off nutrients.
Flower is huge and going to produce lot of seeds.
Wood shed was too wet place for drying tobacco. Moved in 😂
With smokey hopes 🤞
Likes
100
Share


@GreenAutoConsumo
Follow
Ya solo quedan cinco plantas con vida y muy pronto también estarán listas, iremos viendo como quedan las flores tras ser cosechadas, espero que les guste!! Saludos


Likes
5
Share


@Chucky324
Follow
Hello This is the end of week 2 and the beginning of week 3 of flowering.
The plants are doing well and you can see the flowers forming already.
My wife sends me the cute or funny pics I use... The one with the hot knives brought back a memory, of a friend at 17 years old, slipped when giving himself a hash hit and burning himself on the cheek... and having to go the school like that.... all the students knew what it was and he got a lot of teasing and had the mark on his face for months... Be Careful...
I'll try to get inhere this week to do a final trim up... Taking off unwanted fanleaves and sucker branches.
Ok. Be Cool
Chuck.