




@UDUDUDUDU
Follow
it haz now turned into a religion. Wake up at 3:24 switch boobs ...bulbs... to something 40watt dat make heat, wait till 9:44 to see if good day for take a few outside to catch sun.
If not run 500watts for 4-5 hours, switch to florescent bulbs X3 for 5 hours. Switch to night lights for 7 hours. pawz between waKe up repeat cycle for 20 minutes.
Drag water out of da 20 foot fountain with a rooope & a bucket & waznt der a man from namtucket 🦁?
🐲 I'm loving it🐲


@DoctorCannas
Follow
Welcome back friends.
The two automatic ladies grow up healthy and beautiful.
The Bio fertilizers and bio nutrients I am using I must say are a bomb.
praise to bionova, biocanna and zamnesia.
Unfortunately I will not be able to taste my girls, for reasons of force majeure. But my crew is ready as always to come to help.
A misfortune that makes me sad, but more determined than ever

shorts_status_processing


@Nookandplant42o
Follow
Water rainwater + epsom salt and diluted nutrients with more total water of 180 ppm ph 6.2 temperature of the 20 ° solution, gradually using more water due to the 10% runoff temperature, slightly relieving the roots without much removal, sprayed with water without ppm complement due to perspiration and water loss when it's hot, more soil around the stem "I made some abrasions around the stem that is now covered with soil in order to create more quick roots, added more mycorrhizae around to heal and root and stretch with mycorrhizae. Always covered with coconut fiber so it doesn't dry quickly without absorbing enough, I really need one more exhaust fan to pull in fresh cold / fresh air from the outside in, and limit one little use of fans since air conditioning is not part of my plans at the moment.


@DogDoctorOfficial
Follow
🌱 Germination Journey with Terpyz Mutant Mentha de Croco 🌱
Hey Grow Fam! Today kicks off an exciting adventure with Terpyz Mutant Mentha de Croco genetics. I’ve got 10 regular seeds ready to sprout, and I’m looking forward to discovering some beautiful female phenotypes—and maybe even a standout male for potential future breeding. It’s been a while since I’ve worked with regular seeds, so I’m thrilled to dive in!
Germination Process Overview:
Here’s a step-by-step rundown of the germination setup and process, with a special focus on the equipment and nutrients that are helping these seeds thrive right from the start.
Step 1: TheCannaKan Germination Pod 🌱
For germination, I rely on TheCannaKan—a device I’ve come to love and trust. It’s designed to create the perfect microclimate for seed germination, and within just 24 hours, the seeds started showing signs of life. By the 32-hour mark, they were all ready to be transferred to the next stage! I can’t recommend this gadget enough for anyone serious about getting strong, early growth from their seeds.
• Why TheCannaKan?
• Humidity Control: Ensures seeds stay hydrated without oversaturation.
• Stable Temperature: Maintains an even temperature around the seeds, so there’s no shock or stalling.
• Enhanced Oxygenation: Keeps fresh air circulating, helping prevent mold and ensuring seeds don’t suffocate.
Step 2: Transfer to Root Riots & Aptus Holland Supplements 💧
Once the seeds were sprouted, I transferred them into Root Riots, known for their excellent water retention and structure that encourages strong root growth. Root Riots also have a pH-balanced, spongy texture that makes it easy for roots to penetrate, promoting sturdy, healthy root systems.
At this stage, I started using Aptus Holland’s Regulator and Startbooster at 1ml/L each. Here’s why I chose these products for early growth:
• Aptus Regulator (1ml/L): Helps strengthen the plants against environmental stresses by supporting cell wall structure. It’s a fantastic choice for giving young seedlings an early boost in resilience.
• Aptus Startbooster (1ml/L): This product provides essential microbes and nutrients that stimulate root growth and early plant vigor. Especially for regular seeds, the early root development makes a noticeable difference in later growth stages.
Step 3: Lighting with Future of Grow (FOG) LED at 200 PPFD 💡
For lighting, I’m using a Future of Grow (FOG) 600W LED. For the germination stage, I’ve dimmed it to around 200 PPFD (photosynthetic photon flux density), which provides just enough light for healthy, strong seedling growth without overwhelming them.
• Why Low Intensity?
• 200 PPFD ensures that young plants aren’t exposed to too much light, which could cause stress or stunting. This level of intensity is perfect for encouraging healthy development without risking “stretching.”
• The FOG LED provides a balanced spectrum tailored to plant growth, setting up these young sprouts for success as they grow.
Step 4: Environmental Control with TrolMaster Tent X Controller 📲
For monitoring and control, I’m using the TrolMaster Tent X Controller, which lets me dial in every aspect of the environment to make sure these little ones have the perfect conditions for germination and early growth.
• TrolMaster Benefits:
• Precision Control: Adjust temperature, humidity, and lighting all in one place.
• Notifications: Sends updates in real-time to my device, so I can make adjustments as needed without being physically present.
• Consistency: Maintains stable conditions around the clock, reducing stress on seedlings and ensuring they’re thriving.
Grow Tips & Reflections:
Germination is one of the most crucial stages in a plant’s lifecycle. Starting with strong genetics like Terpyz Mutant Mentha de Croco, combined with a solid germination setup and the right nutrients, creates the foundation for a successful grow.
💡 Quick Tips for Fellow Growers:
• Hydration Balance: Don’t oversaturate! Moisture levels should be high enough for the seeds to sprout but not so wet that they drown.
• Light Management: A low PPFD for young seedlings prevents stretch and keeps nodes tight, preparing them for a healthy vegetative phase.
• Environment Consistency: Use a reliable controller like the TrolMaster Tent X to manage your settings, and consider monitoring tools for real-time adjustments.
Shout Outs to the Community:
Big thanks to Terpyz Genetics for these incredible seeds, Aptus Holland for their top-notch nutrients, Future of Grow for the stellar LED lights, and TrolMaster for the amazing controller. Also, shout out to all of you in the growing community—you make this journey exciting and filled with endless learning. Let’s keep growing and sharing together!
That’s it for the germination update! Next up, I’ll be monitoring growth closely to identify strong females (and maybe a standout male for breeding). Stay tuned for updates on our Mutant Mentha de Croco adventure—this is just the beginning!
Genetics - Mentha De Croco
https://terpyz.eu/products/menta-de-croco-fern-type?_pos=1&_sid=e9237cbcb&_ss=r
DogDoctorOfficial Discount Codes @ terpyz.eu - DOCTOR 15% off
Nutrition - @aptusholland
https://aptus-holland.com/
Led Power @ F.O.G. Future Of Grow
https://www.thefuturofgrow.com/en/online-store/BLACK-SERIES-600-p489093171
Controls @ TrolMaster
https://www.trolmaster.eu/tent-x
As always thank you all for stopping by, for the love and for it all , this journey of mine wold just not be the same without you guys, the love and support is very much appreciloved and i fell honored with you all in my life
With true love comes happiness Always believe in your self and always do things expecting nothing and with an open heart , be a giver and the universe will give back to you in ways you could not even imagine so
Growers Love To you All 💚


@Skipi007
Follow
There's another week, last major cut, Gorilla No. 1 was male or hermaphrodite so it was removed, Gorilla No. 2 looks like a female for now, maybe it will stay like this 🙏
Day 40: Because one wheels grew 20 cm above the others I had to do HST, I can do topping, but I didn't want to lose buds, so I chose HST
Day 41: the next day, the HST branch turns behind the light
day 42: The last day of the sixth week, the girl is in great condition


@ChitownCannaChica
Follow
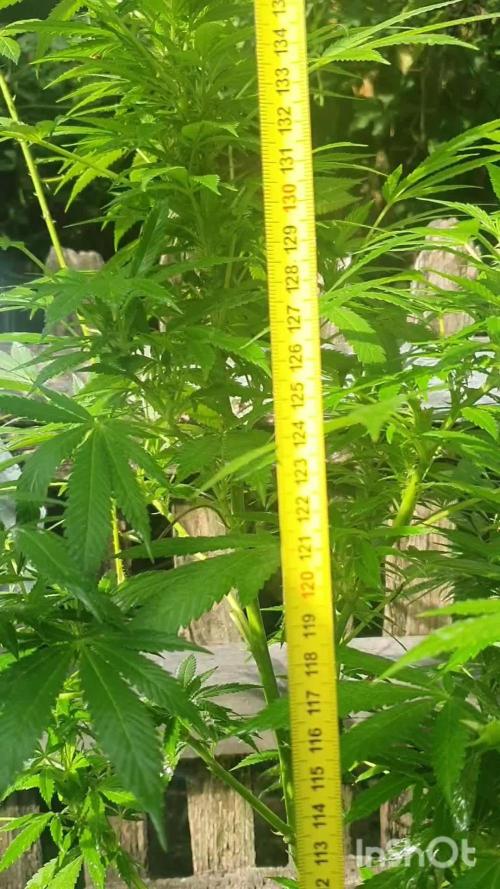
Whoa!!! She took off like a rocket from the end of the first week to the end of the second week of veg! She likes the rain and crazy weather!!! ✌️🏻💚🌿💨


@4F1M6
Follow
Made the flip to flower to start this week. Did a bunch of lst to get the side branches booming for the Scrog. Put a second net right above her to start things off spacing and structre wise. Second she starts to stretch its scrog game on!
Got her on a well balanced diet to support her transition period. Can't wait to see her explode and take off! Start rowing me out some colas! Treated her with lost coast as a preventative. Next up us dr zhymes in 5 days. Until next update. Happy growing and stay lit fam.


@sunshinegroww
Follow
Love the looks of her so uniform just wow if i had the space not to top i would leave her anyway ,it was cleaned last night as strech stops now so decided to give her a cleane so removed bottom branches and those who would not make it high enough,drinks around 1l a water for now and just looks gorgeous well done RQS with this strain



@HowtoBubatz
Follow
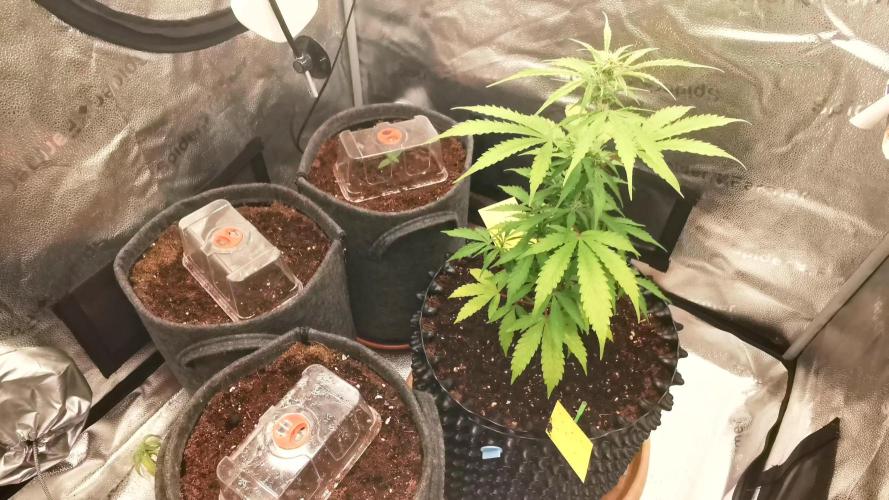
The plant is doing well overall this week! 💪
To handle a few fungus gnats that started showing up, I introduced nematodes into the soil and placed some yellow sticky traps, seems to be keeping things under control so far.
She's growing quite tall now, definitely stretching up nicely, but not really filling out much in width. A true lemony skyscraper in the tent!😂💚





@CheeRz
Follow
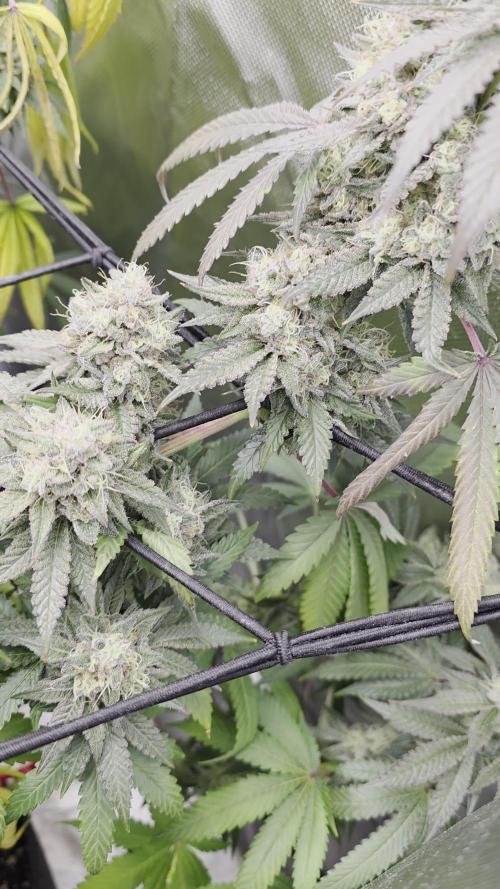
Lemon Cherry Gelato will need a little more time before she is ready. However, the buds are already covered with trichomes and also very sticky. Buds smell very sweet and lemony, with the classic Gelato aroma. 🍋🍋🍋🍒🍒🍒


@Nistnov
Follow
Edit: I decided to harvest her tomorrow, i dont want any bud rot.
Shes doing well, the buds are not fattening as much as i hoped for so i think she needs 2 more weeks here is the crux, next week itll rain nonstop, no sun and high humidity in this stage its safe to assume shell get bud rot.
So i took a look through the microscope today cause im thinking about an early harvest. Its better than expected, 75% white 20% clear and 5% amber, almost all pistils are brown.
If you have suggestions, leaving her to grow in real bad weather or an emergency harvest, what do you think would be better?


@tsf_homegrow
Follow
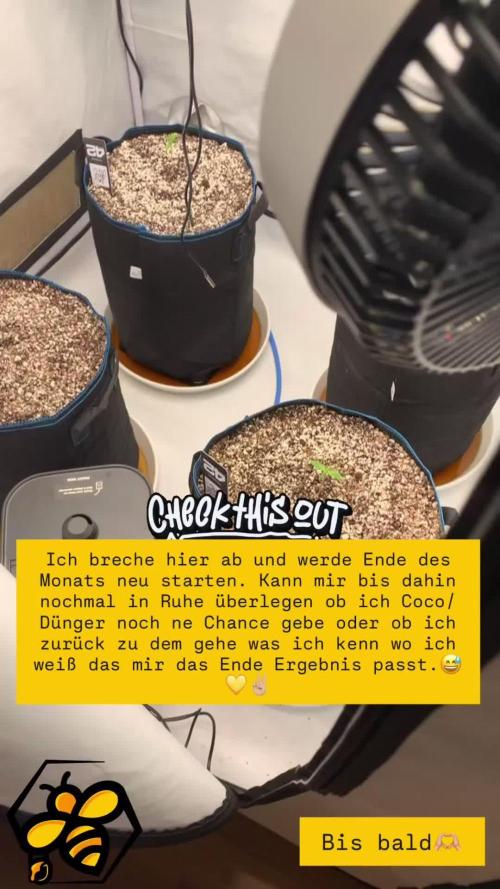
🇩🇪2.9.25 - sie sind alle oberhalb des Substrats.🎉 die Papaya Cookies hat es eilig und war als erstes da die Frost Banger kam als nächstes und die beiden Z-Ups waren gestern Abend und heute Morgen auch am Start.
Passend dazu war es zum dritten Tag an dem sie in der Erde stecken nach dem angießen heute auch wieder Zeit zum Gießen es gab etwas mehr diesmal gute 200ml pro Topf, möglicherweise etwas viel aber das verteilt sich im Topf ja gut und ich möchte auch vermeiden das die Wurzelen auf trockenes Substrat treffen.
8.9.25 - ❌Abbruch nachdem ich bemerkt habe das ich mich nicht ordentlich genung vorher über coco als Substrat informiert habe, dementsprechend hab ich zu wenig gegossen und nach 5-6 Tagen schon bemerkt das etwas nicht stimmt und sie auch nicht mehr großartig retten kann. Werde Ende September wieder auf Erde mir einem light mix neu starten.💛🏼
🇬🇧 9/2/25 - they're all above the substrate.🎉 The Papaya Cookies are in a hurry and arrived first. The Frost Banger came next, and the two Z-Ups were also in action yesterday evening and this morning.
On their third day in the ground, it was time to water them again today. I added a little more this time, a good 200ml per pot, perhaps a bit much, but it distributes well in the pot, and I also want to avoid the roots coming into contact with dry substrate. 😅💛
9/8/25 - Cancelled after realizing I hadn't done enough research beforehand about coco as a substrate. As a result, I watered too little. After 5-6 days, I noticed something was wrong and couldn't really save it. I'll start again at the end of September on soil (light mix). 💛🏼


@Garreweedlover
Follow
Plantas muy iguales , entre nodos casi no existen jejeje son uno tras otro , tengo mucha esperanza


@Weird_Jimmy
Follow
👉The time finally arrived for the harvest, mostly cloudy trichomes with scant few amber, very few white pistols, and the leaves had either faded or were fading. The run-off pH would quickly plummet and the run-off EC would spike. This may be an indicator that the plant is ready but that only would be conjecture on my part. The overall look of the plant to me said it was ready. The aroma was super strong citrusy and intoxicating. THe leaves were fading and there were virtually no white pistols.
👉I harvested bottom to top. I hung each cola on alphabetized clothes pins with gardening wire attached for hanging on the rack. The buds are dense and shaped like pine cones. I trimmed it semi-tight, but left some of the smaller frosty sugar leaves. The buds and sugar leaves are very frosty but it wasn’t as scissor freezing as the Gorrila Glue I grew last year. I measured the post trim wet weight on a self-calibrating digital scale. I checked the accuracy of the scale with a set of scale calibration weights and it was accurate at all weight ranges. I logged each colas trimmed wet weight and hung on the rack. I have a 42” tower fan. For first 12 hours I ran it at its medium setting, then reduced to lowest speed. I rotated the side facing the fan after 24hrs. Then after another 24 hrs I placed them in paper sacks with to top open. I left the buds on the clothes pin hanger and clipped the bag to that. After another 24 hours I closed the tops. Another 24 hrs and I test weighed a couple of colas. I monitored for another couple of days until the weights averaged 20-25% reduced from the initial wet weight. I then cataloged the weight of each cola and placed each into its own jar, most got one of those small cheap hygrometers. These hygrometers have been calibration tested and I know the drift of each. My target humidity is 62%. I would open the jars for brief periods of time during the next couple of days until the humidity stabilized at 62%. Once stable I placed 62% humidity packs in the jars. I took out most of the hygrometers for the next plants cure, but leave some of them with the best buds. The Queen cola was 20g when placed in the jar. That is about 24% remaining weight from trim. 24% is a little on the high side of the humidity target range. The jar the Queen cola is in, is a wide mouth counter jar and I will be toking that bud primarily and it will dry out the fastest. I have compensated the weight I entered on the dry weight spec to reflect about 20g more of humidity loss and another 30 for the stems that are left on the bigger buds. The final weight of the buds going into the jars was 254g (not including the larf at 23gdry). 200g of plump sticky pine cones for the final weight is pretty nice for a 1 gallon pot.
👉I wrote this review at 3 weeks before the 6 week cure mark. In my short experience of being weed rich, its been interesting to take note of how the flower continues to ‘cure’ as time goes on. I have found that 6 weeks isn’t a given for when its ‘cured’. I have observed that as weed ages it changes. I have not noticed much difference with 2-3 week old buds at 62% humidity when compared to 6 weeks from jarring. But I do notice significant difference around 6 months of age. The flavor is enhanced and the buzz is stronger. It maintains this level then 8-12 months it has leveled off and all strains are becoming more ‘couch lock’ inducing. My observations are not scientific by any means. This is just my 8th plant in the 2 years that cannabis became legal for home grow in my area. But I still have each of the plants and rotate which one I consume.
👉I loved growing this plant, and hopefully gained more knowledge. It fox-tailed a bit at the end. I think my frequent fertigation techniques contributed to most of the issues I had. I think I was a little too conservative with nutrient mix and irrigation volume and frequency. I used only 10% expanded clay pebbles in the coco mix as opposed to the standard 30%. This was slightly problematic at first before the roots filled the pot. Fertigation events would cause erosion and caution had to be taken around the seedling. I placed a layer of hyrdoton pebbles across the surface and the issue was solved. Once the pot was filled with roots it took 10+ minutes to give the plant 2L of solution. The pot was packed hard with roots. This may have been a contributing factor to some of the possible nutrient issues I had. I dont think the nutrient issues I saw had much impact on the final outcome. To get 200g from a 1 gallon pot is wonderful.


@Buddyhighs
Follow
Another week donnnnnnne 💪🏽!
Soo yeah the stretch has finished and the buds are stacking I fucked up a little at the start of the week, i set the lights to full power. She’s at 300watts. I turn the timer down to 11hours. But I didn’t realise it turned the timer off by mistake 😬 she ran 24 hours a day for two days 😫. I hope she don’t get pissy with me but so far so good. A part from that there noting to report on. No nutes this week just water.
Until next week let’s get it 💪🏽!
