


Likes
Comments
Share


@The_Bearded_Grower
Follow
So this is day three of pre vegetation that means the seeds have not yet broken the soil completely and grown their first true leaves. Not much to really say at this point they all are growing roots and doing very well so far. I'm just using tap water at this point. An important note to make these are seeds from a company called 7 East genetics here in Ontario Canada they shipped me my seeds in good time although Canada Post was slacking LOL. Can't wait to see how these babies grow and I very much hope they live up to their name.

Likes
Comments
Share


@Lushgaia
Follow
Plain water as usual, did top some of them with bat guano only the ones I think need it the rest looks ok

Processing
Likes
17
Share


@Doobiefumes
Follow
week 2 day 3. maybe 200 ppm is a bit too much im actualy seeing tip burn on 2 of them i might remove 50 % water and add reverse osmosis water tomorow to lower nute concentration to around 100 will see how night goes.did the 50% water change and readjusted ph now everything looks fine. also iv lowered water level to 1 inch above bottom of net pot to promote more root growth i need to buy a par meter asap im scared to lower my veg led lower.some little issue with minor tip burn maybe from stress from power outtage or potassium deficiency from nutrient lock out ph went to 6.7 for a day cant get it stable so far.seems like ph as finaly settle down go check my video from grow room.2 of them are doing really well but 2 are in bad shape newbie mistake my ph pen was way out of range went to 4.8 for 2 days i calibrated it 2 days ago flushed system and ran revive only for 2 days ph has been spot on at 5.8 since flushed again yesterday and started adding nutrient back in very low dose 1/4 strenght plants now seems to thrive as roots entered the system today they already are like 6 inch long light just shut off i might do another foliar spary with revive and sensi cal mag extra and wet betty to help with damaged leafs from bad ph pen mistake next week if they have not fully recovered already in case 1 of them does not make it i have a spare 1 growing in coco whos ready to drop in system im still learning feel free to leave comments

Likes
17
Share


@FirstTimer007
Follow
Tops rock rock hard .had to put strings cos they was falling cos of the weight. I think is comimg to the end and stressing me out cos first time doing it .dont wona start to flush to early ....any help would be much pri...started looking at the trichomes every day now

Likes
10
Share


@Dunk_Junk
Follow
Wow she doubled her height this week. Grew 9cm!
Got loads bushier too.
She was repotted too into her 10 litre fabric pot forever home.

Likes
13
Share


@Hashy
Follow
********************************************
Growdiaries Grow 22
********************************************
Welcome to my 22nd grow on growdiaries. I'm going to be stricter on this grow as i have been a bit lax on the last few and let them get out of control.
My plan is no more then 12 colas between the 2 plants. I'm going to have a shorter veg period to keep them at a reasonable height. I'm also going to try to keep them away from the sides of the tent more then I normally do.
Because I may be going away shortly I'm going to start in the final pot because sods law I'll be away when they need potting up.
I'm running 2 photoperiods again, they are both from the MSNL catalogue. Plant #1 Lemon cherry gelato will be on the left looking in the tent and #2 Zoap will be on the right.
This diary is focusing on
#2 Zoap
Nutrients.
Ecothrive Neutralise
Shogun Katana roots
Plagron Terra grow (3-1-2)
Plagron Terra Bloom (2-2-4)
Plagron green sensation (0-9-10)
Plagron power buds (0-0-0)
Equipment on Smart plugs.
1. Light= Viparspectra Xs2000
2. Feed= water pump.
3. Extractor= Ac infinity
4. Oscillating fans= 2 on ext.
5. Cameras= 2 on ext.
6. Humidifier= ram 5L
7. Dehumidifier= 2L
8. Radiator= 1KW
Tent settings.
Light cycle=24/0
Light Power=100W (42%)
Photone app has been Calibrated, and I have done a ppfd map over a 40cm×40cm area.
Extractor controller settings
High temp= 26c
Low temp= c
Temp step=0c
High Rh= 69%
Low Rh= %
Rh step=0%
Speed max=10
Speed min=1
Smart controller settings (during lights on).
Radiator on= -20c
Radiator off= +21c
********************************************
Germination/Prepwork.
********************************************
📅1/10/24 Tuesday
📋 Prepared 12L fabric pots, filled with biobizz lightmix, then gave 2L water Ec=0.25 PH=7.0/6.7. Then 1L water with katana roots @5ml/L Ec=0.3 PH=6.3/6.3
No runoff.
Placed pot into tent with no light on.
📅2/10/24 Wednesday
📋 Dropped the seed into 40ml of water with 5ml/L katana roots and 0.1ml/L neutralise solution at 5.05pm
5.00pm turned light on @ 100w 80cm above the soil, Ppfd=200, 24hr DLI=17.3
10.00pm placed seed into moist paper towel.
📅3/10/24 Thursday
📋 7.30pm tap root breaking through so put the seed into 12L fabric pot, and placed in the tent under constant light.
📅4/10/24 Friday
📋 9.00pm no movement yet.
📅5/10/24 Saturday
📋 🌱9.00pm above ground and cotyledons are open. Day 0
********************************************
Germination summery.
📋 Nice quick germination. The zoap looks fine.
Back soon.
Take it easy.
********************************************

Processing
Likes
16
Share


@Gelato93weed
Follow
Per ora solo haze berry auto in fioritura in questi giorni monto un secondo box per le troppe piante. E i diversi tempi di semina e crescita per fare il diario in modo piu coretto per ora mi fermo per 1 settimana pepreparare il tutto


Likes
3
Share


@RunicKevin58675
Follow
These two plants have given me the experience and the desire to do even better!
Next genetics I thought I would bring another pure Indica...
Likes
45
Share


@masterofsmeagol
Follow
6/19 Knowing it was going to be over 100° for the majority of the day I WATERED the garden with 3 1/2 gallons. I went to check around 4 and everything looked amazing. We got some hard rain from a thunderstorm at 4pm but it seems like these girls like it rough and did fine. The take a beating and come back stronger. Knock on wood but I haven't seen any problems on the plant I snapped amd dict taped.. Everything seems to have toughened up and the leaves are an awesome healthy color. They grow observable every day now. Tomorrow is supposed to reach 100 again for most of the day before weather goes back to semi normal. I took a video but it will take way to long to upload. Tons of other pics didn't upload either.
6/20 Another day that's going to be over 100°. Plants seem to love it lol. I can't believe what I'm seeing. Bags still had some heft so I didn't water this morning. I figure I'll check them around noon and then plan on watering tonight if they need it. Hopfully they'll get some rain from thunderstorms. This crop has been through a lot. I think that has helped them significant deal with this unpredictable weather.
6/21 We had a MAJOR thunderstorm with sheet rain yesterday. I missed it but it was intense. I saw some videos. First time dad seemed concerned. Fortunately there was no damage. I was going to water today but I decided to hold off due to the look of the plants and the "praying leaves" at 4pm and feeling some moisture in the soil. Bags seemed to still have some heft. I'll probably water tomorrow. Need to transplant the 1 gals and need to figure out what I want to do for nutes this year. So far I've put in much less effort and I'm still doing great. I just don't have as many plants as usual.
6/22 Rained last night. Not much but the bags were heavy still so I held off watering. Plants looked happy and I can fix under watering much easier. It will rain tomorrow. I'll check throughout the day and update but things are going good. I should transplant those 3 seedlings in 1 gals.
6/23 It Rained last night and is suppised to rain today. It was raining when i went over. Just the kind if rain the plants love. I'll check again before church but I'm eventually going to have to water them. Those thunder storms helped a lot.
6/24 Rained about an inch yesterday. Plants loved it. Bigger everytime I see them. One seedling showed a pistol and I'll transplant it with the rest. It was the only one I was worried about. I've seen a FEW leaf hopper punctures and some other bites that could be anything. Time to get the ipm
6/25 Looks like its gonna be a nice sunny day. 75° at 10am. Plants are doing amazing and growing at a rapid pace. Haven't done anything ipm as of yet but any damage I've seen is localized to "A" leaf on "A" plant. I'll be paying attention and watching for signs of deficiencies. As of now though they LOOK great. I'll try to transplant the 3 seedlings today.

Likes
19
Share


@420DeepGrow
Follow
Gracias al equipo de Royal Queen Seeds, Marshydro, XpertNutrients y Trolmaster, sin ellos esto no seria posible.
💐🍁 Gelato #44:
Los criadores de Tyson 2.0 criaron Gelato 44 a partir de cepas finas. Al cruzar la Sunset Sherbet y la Thin Mint Girl Scout Cookies, crearon un híbrido de dominancia índica que asesta fuertes golpes en el cuerpo y la cabeza.
Su contenido de THC del 22% crea sinergia con terpenos colocantes para ablandar los músculos
Mantenla hidratada y con una dieta constante y pasará por la fase de floración en unas ocho semanas. Las plantas de interior alcanzan una altura máxima de 120 cm y producen 400-450 g/m², mientras que sus homólogas de exterior alcanzan los 180 cm y producen hasta 600 g por planta.
🚀 Consigue aqui tus semillas:
https://www.royalqueenseeds.es/rqs-semillas-cannabis-tyson/664-dynamite-diesel.html
💡TS-3000 + TS-1000: se usaran dos de las lámparas de la serie TS de Marshydro, para cubrir todas las necesidades de las plantas durante el ciclo de cultivo, uso las dos lámparas en floracion para llegar a toda la carpa de 1.50 x 1.50 x 1.80.
https://marshydro.eu/products/mars-hydro-ts-3000-led-grow-light/
🏠 : Marshydro 1.50 x 1.50 x 1.80, carpa 100% estanca con ventanas laterales para llegar a todos los lugares durante el grow
https://marshydro.eu/products/diy-150x150x200cm-grow-tent-kit
🌬️💨 Marshydro 6inch + filtro carbon para evitar olores indeseables.
https://marshydro.eu/products/ifresh-smart-6inch-filter-kits/
💻 Trolmaster Tent-X TCS-1 como controlador de luz, optimiza tu cultivo con la última tecnología del mercado, desde donde puedes controlar todos los parametros.
https://www.trolmaster.com/Products/Details/TCS-1
🍣🍦🌴 Xpert Nutrients es una empresa especializada en la producción y comercialización de fertilizantes líquidos y tierras, que garantizan excelentes cosechas y un crecimiento activo para sus plantas durante todas las fases de cultivo.
Consigue aqui tus Nutrientes:
https://xpertnutrients.com/es/shop/
📆 Semana 12:
Ella se ha quedado pequeña y está floreciendo mucho antes de lo previsto, se está cargando de resina.
Cambio los nutrientes de crecimiento por los de floración.
Likes
55
Share


@valiotoro
Follow
FBA2507 Super soil finito✔️
Trichomes 15% amber🔬
Buds rockdense⛰️
Families fruity & sweet🤤
Head notes peach & mango🍑
Heart notes citrus,sweet & floral🍋🍭🌸
Base notes vanilla & tart crust🥧
Light soil it’s the last week🤩
Coco same feeding,watering 2/day🔥
Have a good wk😎
Likes
10
Share

@gentlegiantgrows
Follow
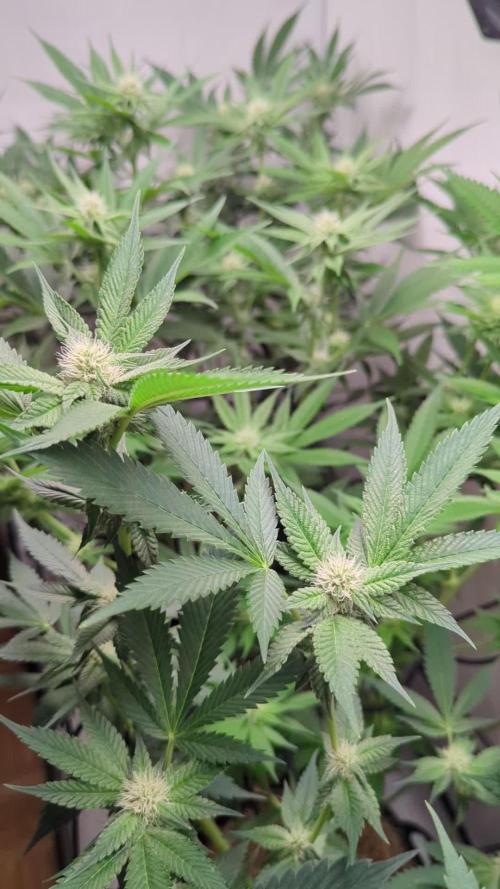
Entering bulk phase now, gave them another round of microorganisms and molasses, they wouldn't have needed it. Looking great with just water (not even pH correction). Feels a bit wrong, coming from salts, but the plants are happy..
Weird top on the AGO, looks stunted, like it topped itself.
Minor Thrips damage, but nothing to worry about at this stage.
I will be gone for 10 days and someone else is looking after the plants 😬 so next update will have to wait until I come back.


Likes
45
Share


@Theia
Follow
Another not much to say week I'm afraid. She still eats she grows. Flower sites are out and the flowering begins.
Coco is magic and I'm converted. I have them on an auto feed that gives water every 3 hrs 200ml. Then I manually feed them with nutes every other day.
3 clones of the cough are looking good. May do another diary for those or I might gift them to some friends.
Thanks for stopping by.
I hope all your grows are successful 👍
Stay safe from the Vid 19.😷😷
Be happy❤️🌿🌱

Likes
3
Share


Likes
25
Share


@Hawkbo
Follow
Lookin good, no more herms so far as I’ve tightened things up hopefully that’s the last of them for good. I installed a 4Inch AC infinity fan and filter as an intake so I have been able to close all of the vents. At this point the leaf strip has proven to be a solid method, I have nothing to compare bud size at this point but just the extra space it opened up is a plus. I’m sure the lowers will be a little more firm and the plants obviously haven’t had to be fed as often as usual so its saving time, water and nutrients. The added microbes have also allowed me to keep my ppm around 1000 instead of 1080ish without any sign of deficiencies. The Mandarin cookies x Dionysus has a little cal-mag issue but that was a trait from the mother which out of 10+ grows all had a cal-mag deficency. I gave everything a little flush last watering and took measurements then a good feed today
REMEMBER , IF YOUR SHOPPING FOR GEAR YOU CAN USE THE CODE “BANGDANG” FOR 10% OFF YOUR ENTIRE PURCHASE FROM ANY OF THE FOLLOWING COMPANIES.
@greenbuzzliquids
@rainscience_growbags
@gorilla_grow_tent
@growlightscience.led
*****Gorilla grow tent discounts extend to all companies affiliated with grow strong industries which include..*****
@super.closet
Lotus Nutrients
Kind LED grow lights
Likes
12
Share


@ciansta
Follow
Onto the second node now and the plant is looking really good :)) I have great hope for this Northern Lights auto I'm so happy too be growing this strain again!!
Likes
7
Share


@GrowingFlavour
Follow
Flowering – Day 21 | End of Week 3
Day 21 since the flip to 12/12, and today was finally cleanup day!
The stretch is already over. There was barely any vertical growth during the last week, and the girls have clearly started focusing on flower development. Honestly, I think they’re looking pretty far along for just day 21. The buds are already forming nicely!
Today I gave both plants a proper cleanup underneath, removing weak branches, lower shoots and anything that wasn’t getting enough light.
I actually left quite a bit more on the plants than I normally would. Since this run is going to be washed, I’m not really worried about perfect-looking buds or bag appeal. This time it’s all about biomass, so even the smaller flowers are welcome.
Right after the defoliation, I also switched off the AutoPot system for a little controlled dryback. I’ll leave it off for up to 48 hours, depending on how quickly the pots use up the remaining water.
This is something I’ve had good experiences with back when I was hand watering. I used to time my defoliation so the next watering would be about two days later, instead of watering right after cutting everything back. The plants always seemed to handle it better that way.
The idea isn’t to stress the plants or let the soil dry out. With BioTabs, I want to keep the microbial life happy and active. It’s more about giving the root zone a little breathing room after removing so much leaf mass, especially now that the plants temporarily need less water.
With 20L AutoPot FlexiPots and a 50/50 mix of Lightmix and perlite, the substrate is already pretty well aerated. This short break is just my way of managing moisture and keeping the roots healthy. I’m not trying to push yield through crop steering here.
Apart from that, everything is going really well. The plants are looking super healthy, the leaf color is great, and the flowers are developing faster than I expected. The BioTabs setup is doing its job, and I’m really happy with how things are going.
Three weeks into 12/12 and we’re already looking good. Now it’s time to let the girls do their thing and stack some flowers! 🌱

Likes
72
Share


@MiyaguiOkPolilla
Follow
Hola amigo!
💐 Cuarta semana para estas Dos Green Crack F1 Automatic. 💐
_ LLENO DE BOTONES _
Ellas son realmente rápidas, de momento estoy muy contento con cómo funciona esto para mí. Siempre he tenido un poco de rechazo a las automáticas, no les voy a mentir 🤞. Ahora ese pensamiento desaparece y he aprendido la técnica ideal para darles tamaño en su momento vegetativo 🤜🤛
La línea de @xpertnutrients me convence mucho, el agua inicial tiene un pH de 7.7 aprox y con la mezcla en el orden adecuado el pH se regula sólo! Trabajan en sincronía con el suelo vivo del fondo, que contiene la poca humedad de la maceta textil.
Ph: 6.1-6.5
EC: 700 PPM 020+/020-
HR: 65% 5+5-.
C⁰: 19-26%
Manta térmica 24 x 7 con plato.
. !! .19 horas de luz: 2 x TS600 LATERALES. !! .15 horas de luz: + 100Watts CENTRAL. !! .
La idea es tener un pico de luz asimilando la naturaleza pero sin dejar de lado los soportes laterales, el led central trabaja dos horas después y se apaga dos horas antes del ciclo lumínico diario 🤜🤛
PREPARÁNDOSE PARA LA EXPLOSIÓN DE LUZ QUE VIENE!

Likes
75
Share


@Sider79
Follow
Pure distilled h20 for her last week ..It got pretty chunky over the last two weeks.


