


Likes
Comments
Share

@Stonie_Mahoni
Follow
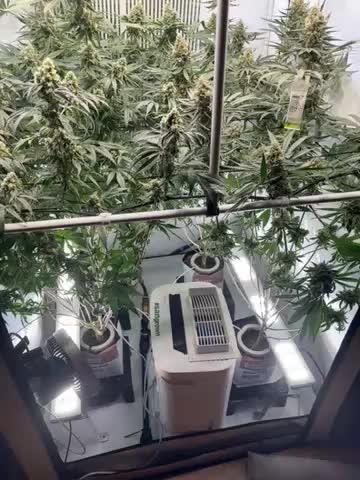
Läuft weiterhin gut .. RootSenseKit ist ziemlich stabil und genau .. ich bin so weit echt zufrieden..


Likes
4
Share

@The_Doctor_Green
Follow
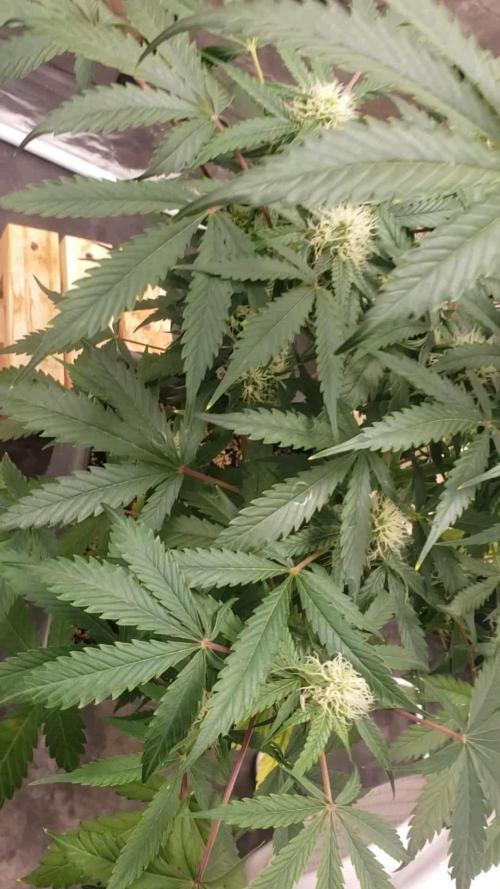
Hola a todos!!
Esta semana prácticamente no he fertilizado, ya que luego de un breve lavado note que los valores de ppm aun seguían siendo alto..(1700...1800), entonces segui regando solo con agua, con bajas ppm 500 ppm aprox.
Recien ayer logre bajar las ppm , no asi el ph, del drenaje, me viene dando 7.2, pero a pesar de todos estos inconvenientes, a la planta se la ve engordando los cogollos.En esta semana se estiro 1.5 cms solamente, pero los cogollos están creciendo de buena manera.
El lavado lo hice el día 44 con 7 litros de agua con ph 6 y ppm 500, luego de un buen rato de drenaje medi y en ese entonces parecían haberse corregidos, pero al siguiente riego dia 46( lo hice con 2lts de agua) me volvió a dar valores altos. Para no generar un mal ambiente para la planta, la deja descansar 2 días, y ayer (dia48) volvi a regar y al fin las ppm han bajado a 900, el ph aun sigue dando alto, pero como mencione antes la planta demuestra que cualquier inexperto la puede cultivar, porque se aguanta todo ese stress😅😅 .
Aun no sé distingue sus sabores, pero sus hojas ya se están cargando de resina..

Likes
12
Share


@chrisss
Follow
Day 57) nothing
Day 58 ) Fed ph”d recharged water, half a gallon
Day 59) nothing
Day 60) Fed calmag and bloom , lotta calmag cuz I see cal def
Day 61) nothing
Day 62) flush with 2 gallons of phd water
Day 63)

Likes
6
Share


@Nune2021
Follow
Hey Leute die strains machen sich sehr gut man kann gut unterschied Sativa indika /indika sativa sehen das unterschiedliche strain hybride sie wachsen sehr gut die machen keine Probleme bis jetz unkompliziert


Likes
11
Share


@4skin
Follow
few of the bottom leafs are going yellow and on one lady round the bud some of the larger leaf are yellowish.

Likes
29
Share


@CanadianFillmore
Follow
Harvest time for LSD! What an awesome strain, incredible fruity and citrus smell, amazing bud development and loaded with frost! Growing this strain was pure joy. I'll update in 7-10 days with dry weight and smoke report.
Thanks for stopping by and checking out the grow. 👽🌳🔥💚
Update - 105 grams dry, minus 2-3 grams for the smoke test. What an amazing smell and taste, fruity, berries, sweet, it's like a bouquet of fruity pebbles! Very impressed by this strain and she'll be a keeper in my garden.

Likes
93
Share


@Ferenc
Follow
13th week. If I am not wrong I started 12/12 light schedule with 36 hours darkness before at beggining of the week 7, so it is the 7th week of flowering.... or 6th ?😅 Well buds are getting thicker, and just checked the trichomes now they are more matured but still need I think at least 3 weeks to be done properly. When I see the milky trichomes, I will start flushing. Wednesday: End of the week Purple Punch is 43 cm like before. Buds are thicker smelly and a lot of resin. It is totally coated with THC, and sticks my finger together. This is the last day I fertilized the plant, from tomorrow I will start flushing. I will give maximum 2 more weeks to be done. I also removed some more fan leaves (those are getting yellow) so I will make some tea. I really love the citrus taste and the smell of this plant.

Likes
10
Share


@wheedtobeus420
Follow
Beautiful beautiful girl. I love their genetics through and through. Never have I grown a plant from sweet seeds that wasn’t fire. The smells the density the entire process. This bitch is beautiful and really throws frosty dense fire nugs. I haven’t been able to test smoke her because I’m taking a tolerance break for a vacation out of country but you bet your ass the second I’m home I am rolling a blunt if this beautiful lady. I just am so happy with how she turned out. Super happy to have watched this bad bitch grow. It’s been an honor.

Likes
14
Share


@LokalGrenz
Follow
Got a dehumidifier it’s reading different from what mine controller 69 is saying but I have it set at 40% it’s the lowest so it’s going pull humidity regardless right now it’s about 53% which is okay would like it to get down to the 40’s I also changed the light schedule today to 20/4 the humidity raises at in my tent when lights are out so I figured change it to 20/4 instead of the 18/6 I’ve been running so if humidity does go over it won’t be for as long as before hopefully this works just trying to avoid any mold situation
So far the Amneisa Haze 2 is at stretching she’s going be big I can but the haze 2 is done seems to just be flowering the sour diesel is looking good as well so far I’m happy with its looking like left town for two days and the auto watering pots worked!

Likes
15
Share


@Roberts
Follow
Melon Gum is doing good. She has reached the solution. Ot looks like it is s bit string for her. She should grow into it very fast. Everything is looking good. Thank you Pure Instinto, Spider Farmer, and Athena. 🤜🏻🤛🏻🌱🌱🌱
Thank you grow diaries community for the 👇likes👇, follows, comments, and subscriptions on my YouTube channel👇.
❄️🌱🍻 Happy Growing 🌱🌱🌱
https://youtube.com/channel/UCAhN7yRzWLpcaRHhMIQ7X4g.


Likes
2
Share


@Mondolibero
Follow
Buongiorno le piante sembrano stare bene sono alla seconda settimana di veg. Per il momento sto fertilizzando solo una volta a settimana con il woodoojuice b52 Bud Candy ,e il tripac Advance pH perfect. Nn sto riscontrando problemi gravi per il momento sperando di avere pianto e forti ci aggiorniamo la prossima settimana. ☮️💚💜🏴☠️🆓🇵🇸🇵🇸🆓
Likes
16
Share

@CanadianFillmore
Follow
Blue dream begins her flushing! She's got about 5 % trichomes and a very nice fruity citrus smell. Buds are decent size and the plant looks happy. Very excited to smoke this round 2 run of Blue Dream. It's the final countdown to harvest!
Thanks for taking a look at my grow! 👽🌳


Likes
74
Share


Likes
32
Share

@MrGrowDiarie
Follow
Day 107
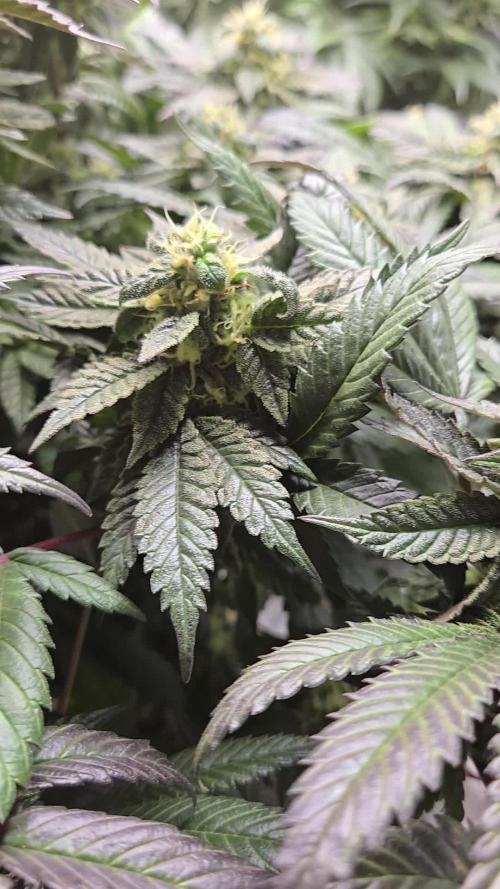
Today marks day 107 of the grow, and the plants are looking mature and well into the flowering stage. The front plant shows a stunning display of dark green to purple hues across the fan leaves, a clear sign of late flower coloration - possibly influenced by genetics and cooler night temperatures. The buds are dense and frosty, with trichomes covering nearly every surface, giving a rich, sticky appearance. The pistils are starting to darken and curl inward, indicating that the plant is approaching its final weeks before harvest.
The canopy is nicely even, suggesting that training earlier in the grow paid off well. Some lower fan leaves are showing slight discoloration and minor nutrient wear - normal at this stage as the plant redirects energy toward finishing its buds. The leaves' darker tone and slightly glossy texture suggest nutrient levels are still balanced, though it might be time to begin thinking about tapering off feeding soon and preparing for a flush.
Processing
Likes
51
Share


@Silverback_Guerilla
Follow
11/1:
I started a pair of each of the Wicked Stix beans, but had a couple of failures and ended up planting a Berry Bomb and a GG4 as replacements.
Sucrose Overdose (aka "Sugah") seeds are derived from a legendary InHouse Sugar Cane plant. They are F2's, selfed from possibly the frostiest cannabis plant on earth..so I'm pretty anxious to see how they, and her hybrids, do in my garden.
Muscadine Wine seeds are derived from a strategic cross between a delicious InHouse Black Cherry Punch and the aforementioned, legendary Sugar Cane plant.
Platonium seeds are derived from a strategic cross between a really gnarly InHouse Platinum Jelly and the aforementioned, legendary Sugar Cane plant.
Sucrose Breath / aka "Sugah Bref" seeds are derived from a strategic cross between a spectacular InHouse Velvet Breath and the aforementioned, legendary Sugar Cane plant.
SPECIAL THANKS go to Wicked_Stix for this incredible opportunity to grow real 🔥FIYAH🔥 🙌!!!
11/3:
Seeing sudden signs of an N deficiency on a Sucrose Overdose and a few other seedlings in the garden. Fed them for the first time and started foliar feeding with Microlife Super seaweed.
Likes
Comments
Share

@Growfather1
Follow
Hello everyone,
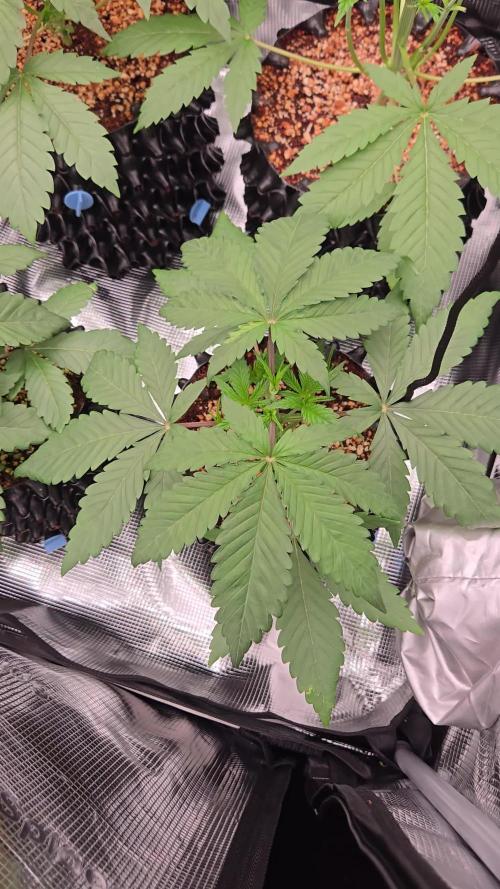
The mac1 F1 hybrid entered their third week of veg and they look okay they growing not so fast as the gorilla x white widow they were planted the same day, but the mac1 is a much more stable strain.
They are still under 24/7 of light at 55% intensity.
I need to setup a bigger tent so that i can transplant the girls to 10 gallon pots, i hope to have done that by the next update.
Thanks for stopping by and have a nice day.
Best regards,
Growfather

Likes
17
Share


@JonnyKush
Follow
hey guys sorry for the absence but in this period I have had a lot to do with my work and I have not been able to bring a good detailed diary, but finally now the holidays will start and I will be able to dedicate myself 110% to a new crop and new ones diaries. having said that, I think I will leave him a week at the most and finally reap the benefits 💚🌳💚🌳maybe my fault the RQS slow release nutrients did not perform as much as the ADVs in my tent, you can see it from the video of 27/07/22 where you can see that 2 out of 6 plants are visually leaner and less compact to the touch , I wanted to try on the same varieties in order to have feedback. I think it could also be caused by the crowding of the tent but with the ADV I have not encountered any problems. I will definitely try them again, giving them much more attention.


Likes
40
Share


@Kitties_and_Colas
Follow
While we're not huge on autoflower plants, this one turned out really nice, not a huge yield, maybe just over an Oz dry but her bag appeal can't be beat.. we may actually grow this strain again but probably outdoors, our autos always seem to preform better in the garden. Thanks for reading and happy growing everyone
