


Likes
7
Share


@Double_AAs_Garden1
Follow
Looks like one more week for the Blueberry Auto . Really need the space for the Northern lights auto.

Likes
38
Share


@Zurban_Poison
Follow
Hello everyone, people!
This is the largest Autoflowering plant that I have ever grown!)) The photo still does not convey the entire volume and its size .. it is just gigantic! fills a 1 square meter grow tent .. flowering started well! and develops without any problems .. received the first doses today Nirvana and Big Bud from advanced nutrients!!

Likes
9
Share


@newenglandgrowers
Follow
Scratch what I said at the end of last week pests are still around just had some bug fly at me and bite/sting me on the neck now a got a welt on my neck smh, not sure what the heck it was it was some sort of black bug maybe a thrip but I honestly have no idea, did another neem oil drench on the medium only and tomorrow I'm going to use a hydrogen peroxide mixture again that way I can also use it on the tops and undersides of the leaves as well. Some of the roots started to become exposed on the top soil so I added more an inch or two coco to cover the exposed roots. Another successful week I guess the plants aren't dead so onto week 9, Week 4 of flower

Likes
36
Share


@nonick123
Follow
Día 94 (02/09) Aplico Insect Frass como Top Dress para ver si revierto un poco el amarilleamiento que muestran algunas hojas, ya que empieza a ascender por la planta
Riego con 500 ml H2O pH 6,5
Día 95 (03/09) Dia nublado y de temperaturas entorno a 24 ºC. NO es necesario regar!
Día 96 (04/09) Llueve que te llueve! 🌧️. Temperatura 21 ºC. Dias de humedad alta por aquí!
Riego con 500 / 1000 ml H2O pH 6,5
Día 97 (05/09) Floración en progreso. No veo ni una sola oruga con el bacillus thuringiensis y espero que siga así! 🤞
Dia muy nublado. No hace falta riego
Día 98 (06/09) Riego con 500 / 1000 ml H2O pH 6,5 + 4 ml/L de BioGrow de Biobizz para tratar de parar el amarilleamiento que asciende por la planta
Día 99 (07/09) Riego con 500 / 1000 ml H2O pH 6,5 + 4 ml/L de BioGrow de Biobizz para tratar de parar el amarilleamiento que asciende por la planta
Día 100 (08/09) Riego con 1 Litro de Té Floración de Lurpe Solutions. Preparación: 24 horas con bomba de aire (oxigenación) con ingredientes:
Healthy Harvest 8 ml/L + Insect Frass 16 ml/L + Hummus Lombriz 8 ml/L + Melaza 1 ml/L + Kelp Hidrolizado 0,25 g/L
Aplico de nuevo Insect Frass como Top Dress
💦Nutrients by Lurpe Solutions - www.lurpenaturalsolutions.com
🌱Substrate PRO-MIX HP BACILLUS + MYCORRHIZAE - www.pthorticulture.com/en/products/pro-mix-hp-biostimulant-plus-mycorrhizae


Likes
13
Share


@Lazuli
Follow
Using Ripen for a week now, 3 more days or so and then flush for 3 days
Then harvest will be at day 56


Likes
16
Share


@NMGDOC
Follow
Semana del 26 de abril al 2 de mayo
Semana de mucha lluvia así que está costando mantener baja la humedad del indoor, ya que en el ambiente ya está alta.
Pensé que algunas plantitas se pondrían más moradas o rojizas pero que va, están con un toquecito de color y nada más.
Última semana usando el AK47 (1 ml por litro)
Volvieron los bichos, así que hoy 1 de mayo volví a aplicar el Tec Fort.
Además tuve un accidente. Se me cayó el TGL60 cuando lo estaba subiendo para fumigar. Lo bueno es que el foco no dio contra el suelo, pero cayó sobre la malla y adiós a una ramita de cogollos. No era mucho pero igual dolio. La corté y la puse a secar, no tendrá mucho thc ahora pero entre que se pierda y fumarla igual, pues me la fumo.
Likes
5
Share

@LeosLivingSoil
Follow
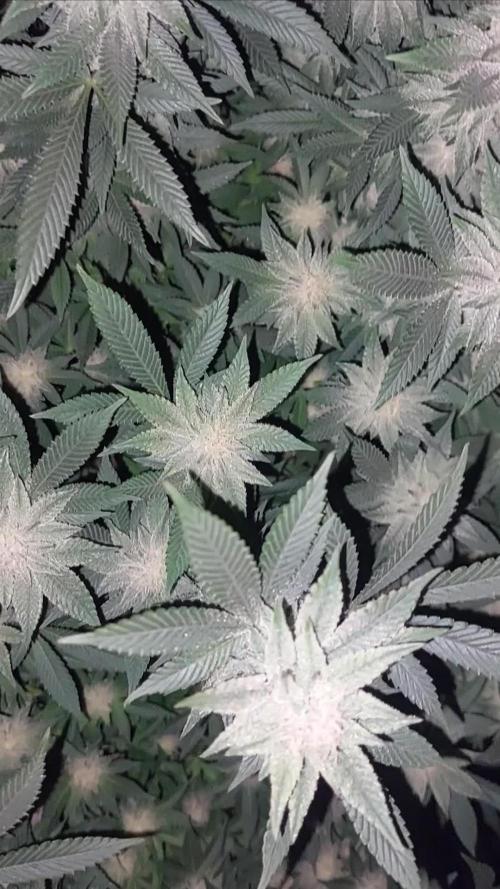
Ich hätte vielleicht ein paar der kleinen Knospen wegschneiden sollen, fand es nur super hübsch und dachte ich behalte die, aber jetzt muss ich fast jede Woche Blätter entfernen die sonst Licht für die anderen verdecken würden und das wenigstens etwas Luft reinkommt :D
Wenn die schimmelt wäre schon Arsch freue mich schon stark auf das verkosten :D
Achso und hebe den ab und an mal an und kippe eigentlich alle 2 Tage 4,5L Wasser drauf :o

Likes
8
Share


@dreamLife
Follow
Se ve super sana y con un buen tamaño para cambiar el ciclo lumínico a 12/12. Las raíces blancas y creciendo rápido.


Likes
58
Share


@MadeInGermany
Follow
Unfortunately, I had to find out that my account is used for fake pages in social media.
I am only active here on growdiaries.
I am not on facebook instagram twitter etc All accounts except this one are fake.
Hi everyone :-) .
The lady continues to grow well and is ready to be trained for the first time this week :-).
From this week on there will be a little bit of Grow Liquids before it gets full power from next week :-).
It was poured once this week with 1.2 l.
Otherwise everything was cleaned and checked.
Have fun with the update and stay healthy 🙏🏻
You can buy this Nutrients at :
https://greenbuzzliquids.com/en/shop/
With the discount code: Made_in_Germany you get a discount of 15% on all products from an order value of 100 euros.
You can buy this Strain at :
www.Zamnesia.com
Type:
Banana
☝️🏼
Genetics:
OG Kush x unkown
👍
Vega lamp:
2 x Todogrow Led
Quantum Board 100 W
💡
Bloom Lamp :
2 x Todogrow Led
Cxb 3590 COB 3500 K 205W
💡💡☝️🏼
Soil :
Canna Coco Professional +
☝️🏼
Nutrients :
Green Buzz Liquids :
Organic Grow Liquid
Organic Bloom Liquid
Organic more PK
More Roots
Fast Buds
Humic Acid Plus
Growzyme Big Fruits
Clean Fruits
Cal / Mag
Organic Ph - Pulver
☝️🏼🌱
Water:
Osmosis water mixed with normal water (24 hours stale that the chlorine evaporates) to 0.2 EC. Add Cal / Mag to 0.4 Ec Ph with Organic Ph - to 5.5 - 5.8 .

Likes
124
Share


@Legendaryseedthumb
Follow
Day 1 drying: Really nice strain! Easy to grow, medium dosage of nutrients.
Smells amazing, I’m really curious how they will end up after the drying. Let’s see in some days.
Drying day 7: finished and damn the terps are amazing! Smells and taste amazing. It reminds me of amnesia but in a mix with mimosa. Super special. I do really recommend trying this one out. But I would recommend using living soil over coco!
Likes
4
Share


@Bud_vista
Follow
We are hitting week 4 now! Plant looks strong, has a nice green look overall and she seems to like her new home! I give her every 4 days ph regulated water. 1liter from the bottom, about 1,5l from above.
I will give the plant another week unter the trellis to make sure the side branches catch up.
Week 4 was pretty straightforward, holding the branches under the trellis and cutting some fan leafs that giving shadow to the lower branches. At end of week 4 there are first signs of flowering and she gets thirstier over the week. Giving her about 1L from bottom and 1,5L from above every two days at the moment. At first sign of flowering I have turned the led to 100% (100W)
I’m really happy with my first try in coco, the plant looks healthy with a nice green color overall. I’m using ph regulated water between 6-6,3 with biobizz nutrients.
Likes
2
Share


@Keep_it_Cleannabis
Follow
This is my favorite smoke, had this cut for about 2 years. Came from the best bag of runtz I ever bought, got a few ozs and 3 big nugs each had 1 seed. And I got this, im excited to actually document it. Only one of these got trained. I cut the top off for a clone and spread her legs lol. Rest are straight up clones.
Likes
6
Share


@Spazmagi
Follow
11/3 - Today was the first day of week 5 and also the first day I could see a visibly measurable decrease in her water level between check-ins (~12 hours apart). As a result of her drinking so much water in such a short time, the ppms shot up to almost 800. I used straight tap (7.5 pH, 170ppm) to adjust since her pH was also measuring 5.3. I adjusted her with this method until she registered 5.6pH and 670ppm (1.0ec + tap, 500ppm of nutrients). I would prefer for her pH to be a bit higher (5.8, ideally), but I will settle with this for now since the water is back to just touching the basket. Over the last couple days I've been adjusting her LST to help her bush up as much as possible. I can already see the heavy Sativa influence in her compared to her sister in the tent. I can't wait to see what she will throw at me.
11/4 - I wasn't even planning on doing an update today, but I want to note a few changes. Her root bundle is over a foot long and getting more wound up every day. I removed her LST ties in order to take advantage of the ScrOG screen apparatus (see notes below). After lights came back on, she measured 650ppm and had another notable drop in water level. Currently, I am preparing another nutrient solution that closely matches what she is feeding on now. I will be upgrading her to a 5 gallon bucket. I will be aiming for 1ec of nutrients/additives (500ppm + Tap on my meter, Hanna Primo .5 conversion). Tap measured 180ppm, so target ppm would be 680.
Later that same day... So I finished upgrading her to a 5 gallon bucket before I actually got done writing the update. Added one photo showing new 5 gallon setup.
Solo ScrOG test mk1 - In an attempt to do a ScrOG, but maintain control over each bucket, while still having relatively easy access to each reservoir, I decided to throw together this little contraption. I removed the lowest complete segment of a tomato cage, leaving a short "tail" beyond the lower ring to act as a peg to insert into corresponding holes in the lid. The lower ring is 10" in diameter and the upper is approximately 12" in diameter. Each ring is 11" apart. I would prefer to have a shorter segment, but I haven't worked out exactly how to do this yet. I would prefer to set the screen height at around 6" above the bucket instead of 11". This will have to suffice for the time being while I let my latent conscious work out a solution or one is provided by the community. Above each cage will sit a coated wire fence with grids measuring ~2"x3", as shown in the above picture.
11/5 - Uploaded short video showing Solo ScrOG Apparatus in place. Screen height currently set to 6".
Thanks for stopping by my garden, and, as always, Happy Growing!

Likes
30
Share


@Em_grows
Follow
They stretched like crazy, I think I raised my light too quickly, hoping it doesn’t hurt yield too much
Likes
50
Share


@MyCloset
Follow
They barely take any nudes, but they keep fighting and are finally fattening up a bit, most of the trichomes are still clear.
Couple days ago i gave them R/o water with calmag recommended dose and with a ec of 0,6, I think they are drinking more since but ph still dropping everyday. I just have to adjust it everyday.
The end is near!!
I'm thinking to cut the top off in the weekend and the bottom canopy a week later, to get some extra yield because i have uncountable little tops and for all the time and effort put in this grow, it prob will be worth it.
Ciao Amigos💪
Likes
6
Share


@Krautbauern
Follow
On day 38, we topped the top shoots of the chimera again because she is getting way to gig already. Then, after 40 days in the vegetation phase, we sent them into flowering.
From now on 12/12h Day-nightcycle
We cut some Clones at day 47 because we had to wait until our clonex arrives.
Likes
65
Share

@MadeInGermany
Follow
Flowering day 25
since time change
to 12/12 h.
Hey guys :-) .
The ladies are developing more and more beautiful and fat week after week 😊.
The tent fills up perfectly 👌.
I removed the bottom shoots to allow the energy to flow to the top buds.
This week it was watered 3 times with 1.3 l each (nutrients see table above)
Otherwise everything was cleaned and checked.
Have fun and stay healthy 💚🙏🏻
👇🏼👇🏼👇🏼👇🏼👇🏼👇🏼👇🏼👇🏼👇🏼👇🏼👇🏼👇🏼
You can buy this Nutrients at :
https://greenbuzzliquids.com/en/shop/
With the discount code: Made_in_Germany you get a discount of 15% on all products from an order value of 100 euros.
👇🏼👇🏼👇🏼👇🏼👇🏼👇🏼👇🏼👇🏼👇🏼👇🏼👇🏼👇🏼
You can buy this strain at :
https://www.barneysfarm.com/dr-grinspoon-5
Water 💧 💧💧
Osmosis water mixed with normal water (24 hours stale that the chlorine evaporates) to 0.2 EC. Add Cal / Mag to 0.4 Ec Ph with Organic Ph - to 5.8 - 6.5
MadeInGermany