


Likes
Comments
Share


@DerTim
Follow
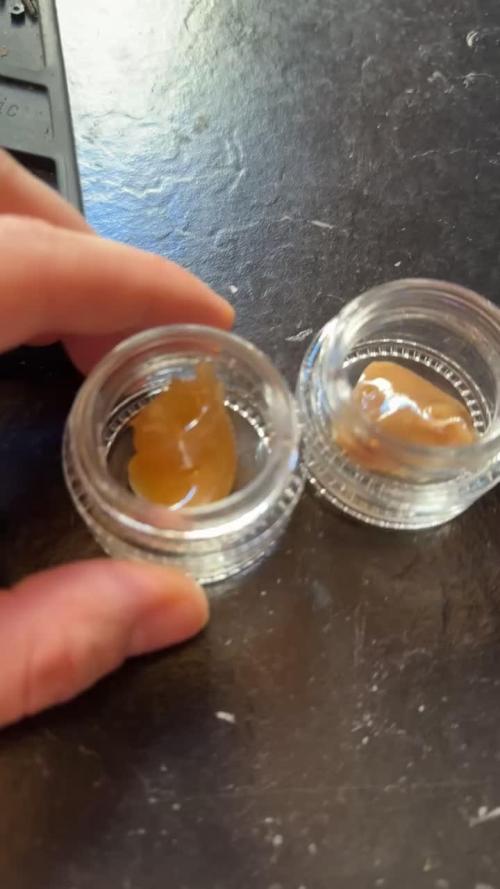
So geht das Späßchen zu Ende mit dieser Genetik. Ich hab nicht allzu viel dazu zu sagen. Ich war nie der große Sativa Fan. Wir haben die Pflanze zu Hasch verarbeitet. Ich werde die Bilder davon editieren, sobald es fertig ist
Ich hab die Pflanze ohne große Erwartungen angebaut. Ich hab sie auch in keinster Weise je trainiert oder ihr besondere Aufmerksamkeit geschenkt.
Es handelte sich mehr um ein Randprojekt dass wir aus Spaß haben laufen lassen. Nicht, weil wir sie wirklich als Konsumgut verwenden wollten.
Daher war ich auch nicht allzu gekümmert, als zum Ende des Sich die ersten Blüten mit Schimmel gezeigt haben oder als die Pflanze vom Sturm komplett dahin gerissen wurde.
Nichts, desto trotz muss ich sagen, wie mir bereits aufgefallen ist. Passt auch hier die Beschreibung von FastBuds wie die Faust aufs Auge. 👊🏻👀
Die haben da also nicht nur talentierte Züchter, sondern auch Connaisseure da sitzen, die es schaffen die Kreation sehr passend als Produktbeschreibung aufs Papier zu bringen.
Wer auf Sativadominante Pflanzen steht, hat hier sicher ein schönes Erlebnis mit starker Genetik.
Ich habe sie wie oben beschrieben, zwar nicht trainiert oder Ähnliches, jedoch hat sie den ein oder anderen Sturm mitgemacht und ist letztlich auch als gesamte Pflanze mit über zweieinhalb Metern umgefallen und hat sich davon überhaupt nicht aus der Ruhe bringen lassen.
Daher würde ich davon ausgehen, dass es auch grau, die auf Dinge wie LST oder noch kompliziertere Trainingsmethoden abfahren mit dieser Genetik einen gnädigen Partner in Zelt zu haben, der viel mit sich machen lässt.
Sie stammt aus einem Mix Pack und ist daher bei mir im Garten gelandet. Ich würde sie mir nicht explizit selber noch einmal kaufen allein aufgrund meiner Rausch und Rauchpräferenz.
Der Erntewert ist eine Schätzung und wird, nachdem ich das Nassgewicht der Blüten ermittelt habe mit dem Faktor 0,2 errechnet und dann eingetragen.
Ich wünsche euch viel Erfolg bei euren Projekten und wir sehen uns nächste Woche
❤️🌴☘️?🏻

Likes
35
Share


@gottagrowsometime
Follow
Welcome to my Alien Moonrocks Diary.
Have to say, out of all 3 plants from original sensible seeds. They have been the biggest, easiest plants I've ever grown. They don't demand much in the way of nutrients are really great growers. The stems that come off from the nodes are huge. And have nice flower points that will no doubt make for some great harvests. (Touch bud).
This lady has been ran off Terra Power and has loved the enzymes. The roots are practically coming out of all drainage holes at the end of the pot. The silca has really taken affect too make for really strong leafs and nodes that responsed really well to late LST. In her 1st week of pre flower she grew 13cm. I've been using my far red IR 730nm to increase the lighting time the plant is under and the change has been so rapid. Usually what takes the other females I grew, takes a week before I'd see pistils. Within 2 days I've seen pistils and well has came together really well.
All her flower sites on top & below they are all showing signs of sex and throwing it pistils.. can't wait to see her in a few weeks to see her true pedigree.
Shout out to my sponsors from mars hydro & Original Sensible Seeds, (reps) Much appreciated for your support and products guys.

Likes
4
Share


@Cannabot
Follow
Definetly the tallest of my current plants,but that's what u expect from a 100% sativa.Long ass flowering times but well worth the wait.She likes the nutes ,one of my favourite strains of all time

Likes
10
Share


@Barzenegger
Follow
In this week, the Acapulco Gold, GMO, and Glookies successfully germinated and grew into little seedlings, while the first "anonymous" germination attempt failed.

Likes
39
Share


@Ginger_gnome
Follow
Everything is looking done. Been checking when lights turn on and just before you go out and the trenchomes are looking full and starting to turn amber. So first thing tomorrow there all going to get chopped down.
Well that's all for this week
Happy growing everyone.

Likes
Comments
Share


@Wiffz_CBD
Follow
Skipped uploading last week, due to I kept getting errors. Other than that WWXXL is staring to show its beauty. Buds are looking fab. switching to PH'd tap water now. RO water is kinda a pain stripping all the metals.
Recharge .5tsp/2.5gal
Likes
58
Share


@Legendaryseedthumb
Follow
Day 9: they are all looking super healthy and ready to explode! I’ll just veg these fast. Let them grow a node or two more then top them all and wait some days then switch to 12/12.
I’m having 9 plants in the same tent.




Likes
55
Share


@Organic_LarF
Follow
High GD community
Week 16,
Zuchinis all around, tomatoes getting ready on a daily. Cucumbers are getting almost mature proportions. Everything going well.
Terra preta
Location: center perma garden
Surface: 125cm x 105cm
Depth: 115cm
The hole was dug out over 3 days, it were very sunny days. 😅
Theres mostly loamsand with a small sandloam bottom that was very hard. The sand was also very compressed and hard. The top layer is this grey dusty soil of about 40cm deep.
At the bottom theres pure sand thats soft, easy drainable.
First step is to fill up the entire bottom with fine chopped wood, progressively using bigger pieces of wood. I try to use some hardwood like oak to for its extra K (potassium = pot ash). A bit of charcoal to.
This will take the entire first day, bcs it needs to have a minimal ticknes of pure ashes of around 5cm. Otherwise, after compressing it with the upcoming layers, the ash-line would almost disappear. Not all the wood needs to be burned entirely. Its a first layer with lots of N and K. Bones can be used to in the fire making the NPK complete. But it can be added also as a separated layer. I dont have that much bone material because my 2 dogs, or eating, or burry them somewere.
Little warning at the end, be aware of your local laws applied to open fires. 😅😉
After a good burn ive got between 8 and 12cm of ashes in total over the entire surface.
A small layer of soil (5cm) is put on top of that. Theres no need to harden out that layer, pressure will to the work and the layers will compress over time into ideal circumstances.
On to the next layer!!
Next is a layer of the compost, but the part that isnt allready decomposed. Its green/brown/yellow of color. And a bit of everything, grass, weeds, leafs and some thin branches.
Another layer soil to cover that up.
Now i formed a thin layer of chopped(10mm) wood(beech), just enough to make a thin,almost 1 piece high, layer. On to this i added a complete wheelbarrel of compost(black) with small pieces of still not completly decomposed materials. Lots of worms here.
On that, you guessed it, an other layer of soil. I try to have both types of soil in that mix, the almost pure sand and the more grey type.
Next, back to the beech. This time the rest of the bag follows. Theres a good layer of around 3cm deep. On this ive layed down some new small woodsticks to make a small fire again. Starting at the center and adding some last branches i found. It turned out really smoky!!
Half way the burn ive opend the core of the fire, trying to spread the small pieces of char over the complete surface. After that, i added for the first time some water here.
And an other layer of soil again, this is just covering up each time. Max 5cm!!
Now we are at the upper half of the pit. Still 50cm to go.
Now ive added some compost again, the green/brown/yellow one, with on top of that, a 15 liter bucket with compressed bokashi fermentated kitchen leftovers. Making a layer out of that and some fresh bokashi juice with 10 liters of water to drain those benificial bacteria into to compost layer just underneath it. This layer is almost 20cm tick.
Again, yeah, soil, 5cm.
Ive bought some blond peat to at to to toplayers. Last 25 to 30cm of soil, is a mix of the peat(20%) and the two other types of soil. First ill do tiny layers of each, last 10cm i try to mix it.
And to finish the job, ive took some 100% reused and composed soil with some perlite in it from past use.
I havent watered a lot, but the meteo predicts a good amount of water in the upcoming days.
The soil that stayed and didnt get back to its original place, ive used to make a new top layer on the rest of the mini field.
I havent used clay because it was hard to find or just to expensive. Beside the peat(250l), i didnt buy anything. So its labor intensive, but real cheap. If you dont get a sanction by the community ofcours! 😅😅😅
Feel free to comment and give your toughts.
🙏🌿🌿🌿🙏
Thats it for this week boys and girls,
Thanks for reading and passing by and 💚💚💚👏👏👏👍👍👍 for Marshydro leds. Quality/price top!
Grow safe buds and feel free to check out my other ladies doing fine thanks!
🙏🌿🌿🌿🙏
Weedseedsexpress!!!! 👏👏👏
LarfxWSE for discount at weedseedsexpress!!! 15% off!!!
Zamnesia!!! 👽👽👽
Add OrganicLarF as a code when buying your own MarsHydro LED light and get a nice reduction!!!👽🚀🛸


Likes
6
Share


@Livetimegrower93
Follow
Started the first topping and She hated it Shocked her near to death..... This is where she started to show what she is made of and still to this day I don't have a clue what she is but soon will know
Likes
1
Share


@Mplants
Follow
Lo mismo que sus compañeras de indoor cherry. Alguna puntina quemada de la diferencia de tamaño entre plantas pero sin problema.
No creo que las quede mucho para su final.

Likes
13
Share


@Rob691
Follow
Today, day 23 was the last repotting. Girls went from 11.6L to a 20L pot. Now there in the right place. In fact, just 3/4 have beene repotting because I didn't have enough Lightmix :/ My order is late, and I'm not really happy with that 😡
I planned to top the girls on wednesday or thursday. It will depends on how they will recover.
Actually, it's my first time with smartpots. If smartpots have a lot of advantages, repotting is not one of them ! I made a mistake : the plants were 60% dry, and abviously, it was not a good idea ! It should be clearly moist. Nextime I think I will water the girls 1 hour before repotting.
I hope it will be ok and they will recover from this tough moment.... Will see in a few days 😰😨
Anyway, I have generously watered them right after repotting with no nutrient. Juste clear water with the right Ph. As they are in some brand new light-mix medium, I thought they have enough nutrient for a at least 2 or 3 days.
D-25 : Everything is ok. Girls seems to have recover very well :) Anyway, I'll wait at least one more day before topping. The last Chocolate Haze (the one that was 5 days late), doesn't have 6 nodes yet and I would prefer to top each girls at the same time.
D-26 : Repotting the last one and topping everybody. Fingers crossed for the next couple of days... I also feed the girls right after the top. During the topping process, the plants were reduced from 19cm to 12cm.

Likes
4
Share


@Samsationalseeds
Follow
Last week's vidoe. For some reason, it's taking like minutes to upload thirty second videos.
I will try my best to show the updated videos on a lot of these plants.Now i'm impressed with a lot of my autos growing in this naturally derived nutrient.Solution


Likes
4
Share


@eldruida_lamota
Follow
Venga familia que ya viene la cosecha de estas Forbidden Mochi de Seedstockers, que ganas que tenia ya de darles tijeretazo.
Que variedad , me encantó cultivarla , sacaron unas flores bien resinosas y alucinantes.
Las flores aparte son muy pegajosas.
a sido una genética con la que disfruté bastante, fue muy fácil cultivarla. Y a la vez es medio resistente, teniendo trips desde la 4/5 semana incontrolable salieron bastante bien.
La flor tiene una tonalidad morada rosácea bastante llamativa.
Agrobeta:
https://www.agrobeta.com/agrobetatiendaonline/36-abonos-canamo
Mars hydro:
Code discount: Eldruida
https://www.mars-hydro.com/
Hasta aquí es todo , espero que lo disfrutéis, buenos humos 💨💨.

Likes
65
Share


@Roberts
Follow
Baked Bomb autoflower grew really well. I had a issue getting a seed going, then some ph issues in vegging. Beside that she just thrived. Big dense colas with a cherry vanilla fruity smell. Loaded with trichromes as well. Can't wait to give her a try. Thank you Bomb seeds, and Spider Farmer. 🤜🏻🤛🏻🌱❄️🌱
Thank you grow diaries community for the 👇likes👇, follows, comments, and subscriptions on my YouTube channel👇. ❄️🌱🍻
Happy Growing 🌱🌱🌱
https://youtube.com/channel/UCAhN7yRzWLpcaRHhMIQ7X4g


Likes
7
Share

@Ninjabuds
Follow
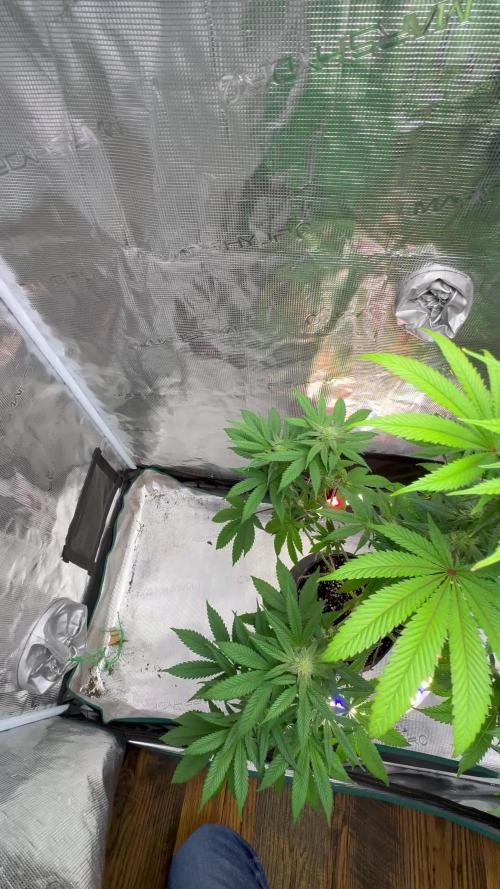
My ELUFAH UAP 1500 test grow is showing excellent results, with the plant thriving under my care. The addition of the ELUFAH Saturn Ring under canopy light has been a game-changer, significantly boosting growth. It's clear that the supplemental lighting is providing the plants with the extra energy they need for robust development and impressive yields.