


Likes
Comments
Share


@danielsegovia
Follow
Cambié la iluminación por un sodio de 400w por un par de semanas

Likes
18
Share


@Nugget_head88
Follow
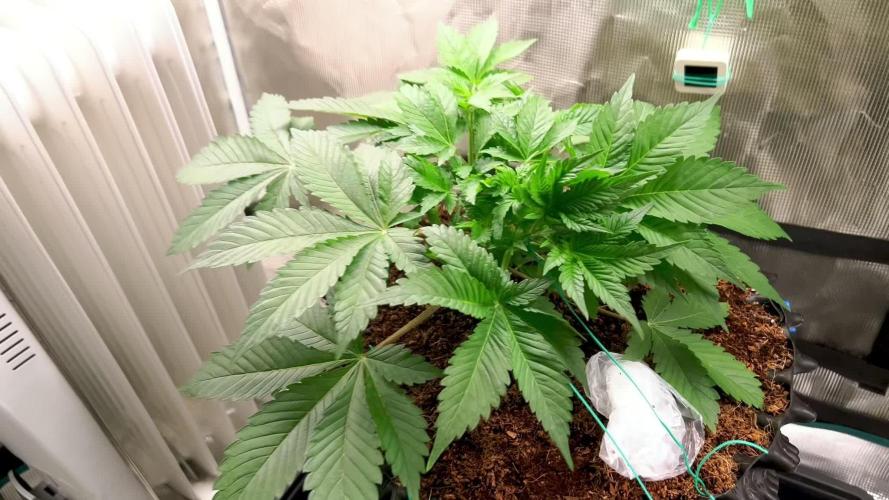
07/07/2025, beginning of week 8, a few issues have reared their head, done as many checks as I can on conditions and soil conditions and have come to the conclusion that I need to carry on sensibly feeding as these issues were probably present weeks ago but just not showing until now.
Bud development seems ok and they are lengthening/stacking ok, she's becoming more and more frosty and starting to smell a bit, I think she will carry on lengthening this week before starting to flatten up from next week and will feed accordingly.
Fingers crossed it doesn't fall apart haha.



Likes
12
Share


@TMGrow
Follow
8.30
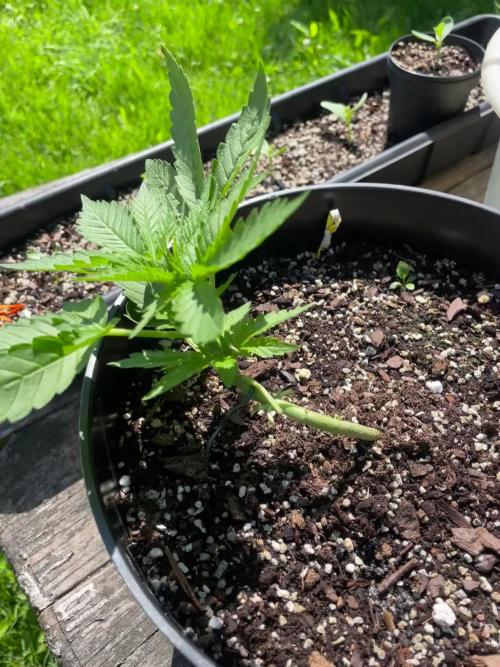
LST preformed - stabilized main stalk and bent plant to 90*
Watered 300ml PHed to 6.4 w/ 4-5 drops of CalMag
Broke Lower branch during LST, taped in hopes it repairs its self
Noticed strange growth of new leaves, amused to be oddity from genetics or from topping
4.5" tall after LST with 3 mains
8.31
LST
9.01
LST
Watered ~14 oz. w/ .2 g Recharge and 4-5 drops of CalMag
9.02
LST
9.03
LST
Likes
17
Share


@Tazard
Follow
She has reached above the light (light is 72” above her nutrient tank) I supercropped a few of the tallest branches but she’s still in the light. She is developing flowers very well and she has nice tight internodal distances. I suspect she will fill in most of the runs in her tops.

Likes
1
Share


@Kraken85
Follow
Bouture + commentaires...
Co2 Maison Gélifié : ,agar-agar, levure de boulanger en cubes, sirop grenadine, BICA = bicarbonate de soude + eau.
Silence : ça pousse !
Début du 2ème Cycles 01/05/2022.



Likes
12
Share


@LucasHendrik
Follow
With 33 grams on such a small plant I can't complain. I was amazed on the many hours (3) to clean the buds before curring. Several buds had rotten places because of the yellow leaves, they died and caused this problem Luckily I stopped in time and dived a little bit earlier in harvesting here highness.
Likes
21
Share


@MadeInGermany
Follow
Hey everyone 😃.
No training was applied this week.
I'll do that in the coming week. It was poured twice with 1 liter this week.
The tent was cleaned and the humidifier was refilled every day.
The ambient values are in the optimal range and the setup has been checked 👍.
I wish you a lot of fun with the update. Stay healthy and let it grow 👍🍀🙏🏻
You can buy this Strain at
https://www.amsterdamgenetics.com/product/kosher-tangie-kush/
Type:
Kosher Tangie Kush
☝️🏼
Genetics:
Kosher Kush
X
Tangie
👍
Vega lamp:
2 x Todogrow Led
Quantum Board 100 W
💡
Bloom Lamp :
2 x Todogrow Led
Cxb 3590 COB 3500 K 205W
💡💡☝️🏼
Soil :
Canna Coco Professional +
☝️🏼
Fertilizer:
Green House Powder Feeding
☝️🏼🌱
Water:
Osmosis water mixed with normal water (24 hours stale that the chlorine evaporates) to 0.2 EC. Add Cal / Mag to 0.4 Ec Ph with Organic Ph - to 5.5 - 5.8 .

Likes
14
Share


@ao_grows1978
Follow
Week 7 of flower in the books and the Kush is in the home stretch. Pistils are all turning orange and buds are getting thick and resinous. She's got a nice citrusy smell and the colas are all swaying in the breeze. Shout out to Seedsman for these stable genetics. No deficiencies or issues that I had to fix along the way. Really happy I still have a couple more seeds left over.

Likes
7
Share


@Eddjack
Follow
La signorina comincia a mostrare molti boccioli . La cola principale emette un buon odore di fragola con un retrogusto di agrumi non vedo l'ora di fumarla 😍. Ora speriamo con il nuovo led come si comporterà a 3 giorni dal cambio ha come accelerato lo sviluppo . Aspettiamo e vediamo che succede
Dajeforte growers 💪💪
Likes
87
Share


@Mrs_Larimar
Follow
2021-12-19
This is the final Week of Vegetation,
a few days ago the " Puddin" Plant got ahard training. Today she looks like nothing happened
she took the Training like aDarling
My dog loved the training too. because she loves to eat the Leaves.
Iam not sure if iam able to end this grow in the Urban chili Growbox,
because i was not hard enough on er ( I barely cant cut more)
we will see,
But hey thats life, in " worst Case" she will move into my Floweringroom
under the Viparspectras to finish
xxxxxxxxxxxxxxxxxxxxxxxxxxxxxxxxxxxxxxxxxxxxxxxxxxxxxxxxxxxxxx
Big Shout- Out to @urban_chili
For sending this wonderful complete Growbox named „urban Chili 3.0“ for our CHARITY GROWOFF
@silky_smooth and me, are using the same Equipment for this entire Grow.
We are having space 45x60 cm and 130 cm in Hight.
The lights are supereffective 85 Watt Quantum LED, made in Austria.
We are using the same Strain, the same Growbox.
So it will really just come down to Skill and Mastery of the Grower....
With this Event, we want to be there for Woman in Need of Help.
And Support those ,who are less Fortunate than us.
We feel like, we are so Blessed for what we have, that we feel Obliged to give a bit back to the Community that we so dearly Love...
During the „GROW OFF FOR CHARITY“, @Weedseedsexpress will Donate 100 Euro per Month to our Charity Goal and an additional
500 euro's by the End of he Contest, if we reach at least 2000 Likes on our weekly Posts
on Instagram.
The other Companies who are Sponsoring our „ GROWOFF FOR CHARITY“
are giving us Products and Merchandise from their Companies. And they help Promote our „ Growoff“
There are coming some AUCTIONS and GIVEAWAYS fort Horticultists
The „GROW OFF FOR CHARITY“ is Sponsored by:
( Named in Order of Appearance)
@weedseedsexpress
@urban_chili
@greenbuzzliquids
@Herbiesheadshop_com
@genoneeleven_nutrients
@zamnesiaxseeds
@spilffseeds
@Inseediousseeds
@sgreenlab
@viparspectraled
@cannabonsai_¬manny
·
PLS FOLLOW OUR SPONSORS!
·
LIKE AND SHARE This Posting!
·
To Reach the 2000 Likes per Week!
…
#growjournal
#instaweed #instaweed420 #trackyourgrow #growsharelearn #cannabissociety #cannabisgrow #growerslife #cannabiscommunity #growersunite #mj #weedstagram #weedart #growyourown #weednation #weedgrower #weeddaily #cannabisinfluencer #cannabisartist #cannabisart
Likes
18
Share


@RickJames_Mcdank
Follow
As you can see that I have taken allot of leaves of because they were getting too yellow and drying up. So far she is fdoing great.
I have been giving her les frequently water now. Like every other 3 or 4 day. Thats because she has less leaves now to hold water.
The smell is just fruity and mazing. I think she still needs 2 weeks but lets see.
Likes
2
Share


@Grandillustrator
Follow
Having to constantly move the ties as each branch keeps pulling in closer together , keeping on top of defoliation starting to get a weak smell when opening the tent overall plants healthy

Likes
30
Share


@GYOweed
Follow
Here it is.
Vpd doin ok.
Should transplant hopefully in 2 weeks and flower two weeks after.
Using Unit farm uf2000 led.
Likes
14
Share


@LokalGrenz
Follow
So nothing much just ready I got like two more weeks left before chopping haze 1 is getting thick the haze 2 really just waiting on trichomes to get cloudy/amber same with the Sour I been opening up the window in the tent room to get the temps down happy that been working and happy I finally got control of the humidity the way I want

Likes
12
Share


@Hawkbo
Follow
On cruise control now, done some defoliation here and there but that's it, feeding every 2-3 days and they are swelling up very nicely. I took a nice slow video instead of photos of each plant individually below is the order they appear in the video.
1st is 31?
2nd is #29
3rd is #35
4th is Orange Sherbert
5th is #33
6th is Wedding Cheesecake
7th is Wedding Cheesecake #2
8th is #37
REMEMBER , IF YOUR SHOPPING FOR GEAR YOU CAN USE THE CODE “BANGDANG” FOR 10% OFF YOUR ENTIRE PURCHASE FROM ANY OF THE FOLLOWING COMPANIES.
@greenbuzzliquids
@rainscience_growbags
@gorilla_grow_tent
@growlightscience.led
NEW* @Rocbudinc Seeds on his website *
*****Gorilla grow tent discounts extend to all companies affiliated with grow strong industries which include..*****
@super.closet
Lotus Nutrients
Kind LED grow lights
Likes
3
Share


@Kinglui77
Follow
Because of the extrem Defolitation/Schwazzing, which was more or less necessary regarding Humidtiy levels of of over 95% around evening night and morning. Even though I also did it for trying out how the Plants react. They mainly stopped growing Bud for 3-4 Days and the leaves of the Bud Sides got a bit Bigger. Also I had problems with NutBurn and Heat Burn, Nutburn because of my not constantly watered Pots which, I guess, ended up beeing a really salty and nutrient soaked(from the soil) substrate because they are reused Filters for Water out of clay. As well in midday it gets really hot and we are more than 3500ft over the sea level.
And why I grow in Clay Filters ? Just to try, in my opinion already not recommendable even though it keeps the Soil a bit cooler..
Likes
15
Share


@Venabr96
Follow
Armario posto em fase de floraçao.
Rega de 4 a 4 dias com 2l de agua desmineralizasa.
Deixei a lampada cair sobre elas , piqueno incidente 😣😣
Mas esta tudo bem só perdi uma folha da piquena uma da grande e algumas queimaduras 😣😣


