Likes
Comments
Share


@babajana
Follow
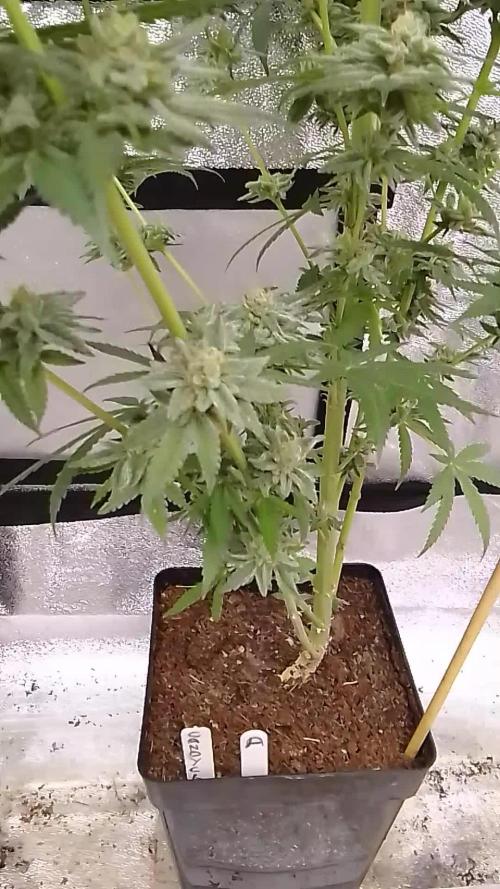
easy to grow. givs good and heavy buds. i was smoking it before harvest. if i didn't smoked it i think i could have 200+ grams of wet bud.

Likes
17
Share

@DogDoctorOfficial
Follow
Animal Mints — Legends of the Frozen North
Part 3 — Smoke Review & Final Thoughts
And here we are.
The final chapter of this frozen journey.
Before we begin, we once again want to thank everyone that followed this run from seed to harvest. We know these reports became long, divided into multiple parts across several weeks, but honestly, this is the only way we know how to properly document a cultivation journey while keeping things educational, transparent, emotional, and real.
Because growing does not end at harvest.
Drying matters.
Trimming matters.
Curing matters.
Storage matters.
And finally… the smoke itself matters.
So before talking about the final medicine, let’s make a quick resume of how we got here.
⸻
This entire run was grown 12/12 directly from seed.
Minimal intervention.
Minimal stress.
Almost no training at all besides occasional leaf bending and small adjustments to help light penetration naturally.
The plants grew directly into the PPFD we provided, shaping themselves beautifully under the environment instead of being forced aggressively into unnatural structures.
And honestly… this style of cultivation continues to impress us more and more every single run.
Compact plants.
Dense flowers.
Massive trichome production.
Efficient morphology.
Beautiful natural structure.
We combined both organic and mineral approaches using Plagron nutrients throughout the cycle, allowing the plants to feed aggressively while still maintaining beautiful terpene development and overall flower quality.
The girls finished strong.
We harvested during lights-off.
We dried them whole-plant style for 10 full days at around 18–20°C and roughly 60% humidity.
Then came trimming.
Then curing.
Then preservation.
And now…
Around two months later…
We finally sit down in the frozen north to truly experience what these girls became.
⸻
And honestly?
This medicine is beautiful.
Animal Mints might carry “Mint” in the name, but in this particular run, none of the phenotypes expressed any noticeable mint profile at all.
And that is completely okay.
Because what these girls delivered instead was absolutely outstanding.
The dominant profile is unmistakably:
Pine.
Diesel.
Strong earthy-herbal tones.
But there is also something else happening underneath it all.
A strange sweetness.
Not candy sweet.
Not fruity sweet.
Not sugary sweet.
It is almost impossible to explain properly.
It sits underneath the pine and diesel like a soft background note that lingers quietly behind the heavier aromas. The more time passes during curing, the more this strange sweetness starts appearing between the earthy layers.
And honestly, this is exactly why we love curing so much.
The plant evolves.
⸻
On inhale, the smoke immediately hits with a strong pine-diesel combination.
Dense.
Heavy.
Rich.
The earthy-herbal profile follows immediately afterward, coating the entire mouth and throat with thick lingering flavor that stays there for a very long time after exhaling.
And then comes that strange sweetness again.
Not fully identifiable.
But present.
Like the memory of sweetness rather than sweetness itself.
The smoke itself is incredibly smooth despite being extremely dense.
Heavy clouds.
Rich texture.
Oily feeling smoke.
You can feel the resin content immediately.
⸻
Now let’s talk effects.
Because this is where these girls truly define themselves.
This is not daytime productivity medicine.
Not at all.
Could you enjoy it during the afternoon by a lake, pool, beach, or somewhere peaceful?
Absolutely.
But if you have responsibilities, work, errands, or tasks that require active focus and productivity…
This is probably not the medicine you reach for.
Because Animal Mints pulls you deeply into relaxation.
Body and mind equally.
This is not purely physical sedation.
And it is not purely cerebral either.
It hits both directions simultaneously.
Heavy relaxation.
Mental slowdown.
Comfort.
Warmth.
Stillness.
The type of medicine that makes you melt slowly into your chair while conversations become softer and time starts moving differently.
Perfect for:
* late afternoons
* evenings
* nighttime sessions
* movies
* deep conversations
* music
* relaxing environments
* disconnecting from stress
This is beautiful end-of-the-day medicine.
And honestly… it performs that role exceptionally well.
⸻
Of course, the classic dry mouth is absolutely present.
But honestly, that comes naturally with many powerful resin-heavy cultivars.
Hydration becomes part of the ritual itself.
And for people uncomfortable with those stronger medicinal effects, this simply may not be the right type of medicine for them.
But for anxiety, stress, depression, mental exhaustion, and emotional decompression…
These girls genuinely shine.
⸻
Now let’s talk final numbers.
Plant A gave us:
127g
Plant B gave us:
247.8g
Plant C gave us:
287.9g
For a final total of:
662.7 grams
127 + 247.8 + 287.9 = 662.7
And honestly… this is an outstanding result for dense, heavily resinous 12/12-from-seed plants grown with this style.
Especially because the quality remained consistent across all three plants.
Some flowers became slightly denser than others after drying. Some phenotypes stacked a little differently structurally.
But terpene-wise?
Practically identical.
We stored them separately.
We cured them separately.
We tested them separately.
And honestly, in a blind test, we genuinely do not think we could confidently tell Plant A from Plant B or Plant C.
That level of terpene consistency between phenotypes is incredibly impressive.
⸻
We also want to mention how beautiful this entire project felt visually and emotionally.
From the frozen harvest aesthetics… to the hanging plants… to the trimming sessions with Mr. Baggy beside us… to the cinematic frozen north imagery… everything about this run felt like a complete universe of its own.
Even sitting later in the frozen north enjoying this medicine while looking over the endless ice and mountains…
That image perfectly captured the feeling of this journey.
Cold world.
Warm medicine.
Legends of the Frozen North.
⸻
Massive thanks to Zamnesia for the genetics.
Massive thanks to Plagron for the nutrients and support throughout the run. Because genetics create potential, but nutrition, environment, and cultivation practices shape how that potential finally expresses itself.
Huge thanks to GrowDiaries.
Huge thanks to the community.
The followers.
The longtime supporters.
The silent readers.
The lovers.
The skeptics.
The haters.
The growers sharing knowledge every day.
All of you are part of these journeys too.
And even though this chapter now closes…
The story continues.
New genetics.
New runs.
New experiments.
New legends.
The frozen north never truly sleeps.
📡 DELETED @ 1K Please stay tuned.we never quit https://www.youtube.com/@TheDogDoctorOfficial NEW 🙏 Thank you for your patience and continued support.
FOR DISCOUNT CODES AND MORE JUST FOLLOW THE LINK https://website.beacons.ai/dogdoctorofficial
📲 Don’t forget to Subscribe and follow me on Instagram and YouTube @DogDoctorOfficial for exclusive content, real-time updates, and behind-the-scenes magic.
GrowDiaries Journal: https://growdiaries.com/grower/dogdoctorofficial
Instagram: https://www.instagram.com/dogdoctorofficial/
YouTube: https://www.youtube.com/@dogdoctorofficial Deleted by Youtube - https://www.youtube.com/@TheDogDoctorOfficial NEW
Vimeo : https://vimeo.com/dogdoctorofficial Under construction stay tuned ⸻
Explore the Gear that Powers My Grow
If you’re curious about the tech I’m using, check out these links:
🔆 Lighting & Environmental Control
• Future of Grow — Advanced LED lighting technology
https://www.futureofgrow.com/
DISCOUNT CODE: DOG20
• Lumiflora — Under-canopy LED lighting
https://lumiflorade.com/
• TrollMaster — Environmental controllers and automation gear (past collaboration)
⸻
Genetics
• Zamnesia Seeds — Genetics used in this project
https://www.zamnesia.com/
⸻
🌱 Soil, Substrates, Boosters & Root Support
• Plagron — Substrates, bio mixes, and supportive products
https://plagron.com/en/
⸻
🎒 Storage, Curing & Preservation
• Grove Bags — Curing and storage solutions
https://grovebags.com/
⸻
📸 Photography Equipment & Tools
(Not sponsors, but part of my creative toolkit)
• Sony A6700
• Sony full-frame macro lens + few more
• Stacking photography workflow - learning
• iPhone (for behind-the-scenes shots)
As always, this is shared for educational purposes, aiming to spread understanding and appreciation for this plant. Let’s celebrate it responsibly and continue to learn and grow together.
With true love comes happiness. Always believe in yourself, and always do things expecting nothing and with an open heart. Be a giver, and the universe will give back in ways you could never imagine.
💚 Growers love to all 💚
📸 P.S. – The Eye Behind the Lens
All photos in this diary (for now — except for the ones showing the camera, which I took with an iPhone) are taken with a Sony A6700 paired with a Sony full-frame macro lens and a few more.
Photography is part of the story — it’s how we share the fine textures, the glow, and the quiet details that words can’t always capture.
I’ve also started experimenting with photo stacking — a technique where multiple images, each taken at a slightly different focus point, are layered together to create one perfectly sharp image from front to back.
It’s not digital enhancement or AI; it’s pure photography — a way to reveal the plant’s beauty in microscopic depth, from trichome to petal.
You’ll even see a few shots of "ghost me" capturing the shots — camera, lens, setup — because every grow deserves not just to be cultivated, but documented like art.
FOR DISCOUNT CODES AND MORE JUST FOLLOW THE LINK https://website.beacons.ai/dogdoctorofficial
NEW DISCORD - Official Server Invite Link : https://discord.gg/ksjAkA5T74


Likes
6
Share


@RandomStreetMerchant
Follow
Premium cultivars has got a banger here, week 3 started the frost over.
The plant seems to be darkening up in a beautiful way, I love how this plant is looking!!!
She is starting to form nice dense buds these next few weeks will start to be even better.
Till next time growmies ☮️ 08/28/23
Edit: 09/2/23 holy shit guys this girl is putting out some serious frost wish I would have got a clone of her. But at least I got one more seed of this to make into a mother!!! 10/10 so far!!!!

Likes
25
Share


@Master_weeda
Follow
Stretch 10 centimètres
Jour52 légère defolliation et arrosage avec deux litres d'eau ph6.3
Petit rappel sur le meilleur cycle de lumière pour les autofloraisons
QUEL EST LE PLANNING LUMINEUX OPTIMAL ?
Le cannabis à autofloraison peut survivre avec à peine 5 heures de lumière du soleil par jour. Mais si vous voulez que vos plants s’épanouissent, atteignent le pic de leur puissance et produisent une lourde récolte, ils ont besoin d’au moins 18 heures de lumière par jour. Le planning optimal de lumière pour la culture en intérieur du cannabis à autofloraison est un 20-4 constant pendant tout le cycle de vie. Bien entendu, des plannings de 18-6, 20-2 et 24 heures non-stop ont tous leurs avantages, mais nous avons obtenu les meilleurs résultats avec le planning 20-4.
Les cultivateurs en extérieur peuvent potentiellement lancer la culture dès le printemps. Cependant, nous recommandons toujours de faire germer les graines et de cultiver les jeunes pousses en intérieur sous des lampes artificielles pendant une semaine ou deux pour obtenir les meilleurs résultats. Nous parlerons des options en extérieur plus en détail un peu plus bas.
LE CYCLE DE VIE DU CANNABIS À AUTOFLORAISON
La plus grande différence entre le cannabis à photopériode et à autofloraison est que l’horloge tourne pour une auto dès le moment où la coque de la graine s’ouvre. Le cycle de vie post-germination de la grande majorité des variétés à autofloraison modernes est de 8-12 semaines au total. Au contraire des variétés à photopériode, les autos n’ont pas besoin du planning lumineux courant 12-12 pour faire la transition vers la floraison. Une variété à autofloraison progressera dans son cycle de vie indifféremment du cycle jour-nuit.
CROISSANCE VÉGÉTATIVE ACCÉLÉRÉE
Il est presque impossible de délimiter la phase de la jeune pousse de la croissance végétale avec les variétés à autofloraison de nos jours. De plus, en 30 jours, la plupart exploseront soudainement en phase de floraison. Donner aux autos un bon départ, solide et sain est un facteur critique pour une culture réussie. Beaucoup de choses peuvent se passer pendant une semaine avec un hybride à autofloraison vigoureux en culture. Il n’y a pas non plus beaucoup de temps pour la transplantation. Nous recommandons d’utiliser notre kit de germination ou de planter directement dans les premiers et derniers récipients dès le début. Des pots/récipients en plastique de 10-20 L avec de nombreux trous de drainage au fond sont parfaits. Les Air-Pots sont encore mieux. Beaucoup de cultivateur découvrent à leurs dépens que les petits pots ne sont pas durables pour les hybrides autos modernes plus grands.
Préparez-vous à devoir ajuster quotidiennement votre lampe de culture pour éviter de brûler le feuillage. De plus, tout comme les variétés à photopériode, les conditions environnementales optimales pour les jeunes plants à autofloraison sont des températures entre 20 et 25 °C et une HR dans une fourchette de 50-70 %. En outre, les besoins en nutriments seront considérablement plus faibles que les variétés à photopériode. Il n’y a donc aucune bonne raison de ne pas cultiver bio. Généralement, les autos préfèrent avoir un milieu de culture légèrement fertilisé et bien aéré. Les terreaux légers et/ou le coco sont des substrats fortement recommandés.
La plupart des cultivateurs préfèrent des lampes CFL blanc chaud, LED et MH pour la courte période végétative. Cependant, les lampes HPS à double spectre sont tout aussi efficaces et probablement plus pratiques à utiliser.
FLORAISON RAPIDE ET FÉROCE
Dès que vous pouvez voir les pistils pousser à partir des premières fleurs, vous pouvez vous dire qu’en 45-60 jours, les plants finiront le cycle de floraison et seront prêts à la récolte. Que vous soyez prêt ou non. Mais vous serez prêt, car vous aurez fait les ajustements nécessaires en temps et en heure.
Les apports en engrais de croissance végétative à un dosage faible à moyen seront remplacés par des nutriments pour la floraison et des doses appropriés de compléments et boosters de floraison. Une fois de plus, un régime alimentaire spartiate est recommandé. Pas besoin de changer le planning des lampes, car vous allez suivre votre planning originel jusqu’à la récolte. Mais il faudra vous assurer que les températures ne dépassent pas les 28 °C et vous devez réduire votre HR vers une fourchette plus basse de 40-60 %. Les plants vont s’étirer à des degrés divers. Quoi qu’il en soit, vous devez faire attention et toujours maintenir une distance optimale entre la lampe et la canopée. Un ensemble de cordages ou de crochets réglables rendront la tâche bien plus aisée.
Ne vous imaginez pas que toutes les autos développeront une structure courte de buisson, à moins que le sélectionneur ne donne des données qui le suggèrent.
Naturellement, les deux dernières semaines de floraison devraient être réservées à un rinçage en profondeur du milieu. De l’eau pure, ou une solution de rinçage légère fonctionneront très bien. Quand la majorité des poils ou pistils sur les fleurs auront changé du blanc à l’orange/rouge, vous devriez passer au rinçage. Ne sautez pas cette étape finale critique. Vous méritez les fleurs les plus savoureuses, sans contamination.
COMMENT LES AUTOS RÉPONDRONT AUX TECHNIQUES DE TAILLE ET DE PALISSAGE ?
La réponse courte : très bien ! La plupart des variétés à autofloraison de nouvelle génération répondront très positivement au LST. Et tant que vous taillez tôt, l’étêtage et le fimming peuvent multiplier les tiges de têtes et en plus booster les rendements. De plus, la méthode ScrOG peut être combinée avec toutes ces techniques pour un rendement maximum. Cependant, la culture à grand volume utilisant la méthode SOG est probablement le style de culture le plus populaire à présent. Un nombre croissant de cultivateurs d’autos expérimentent avec les mêmes pratiques courantes de taille et de palissage à haut rendement que les cultivateurs de cannabis à photopériode utilisent.
Les cultivateurs débutants ne devraient probablement pas se lancer dans une taille ou un palissage intensif ou excessif avant d’avoir de l’expérience.
Cependant, plier un peu les pointes de croissance pour créer une canopée plus plate ne peut pas nuire aux rendements. De même, une défoliation minimale pour augmenter la pénétration lumineuse ne stressera probablement pas des plants en bonne santé, tant que vous vous limitez à l’élimination des grosses feuilles nourricières qui font de l’ombre aux sites de floraison.
May the force be with you 💪
Likes
33
Share


@Rollex420
Follow
Day 28
Last day of the third week she has finally been moved outside for like 7-8 days now.
Plus it looks like it's starting to bloom too! Just yesterday I noticed these little white pistils that can be seen in the video I uploaded..
Unfortunately at the beginning of the month she didn’t have an easy life.., there were many days of rain and wind.. so I had to shelter my little plant under a roof in these days.
Now it would seem that for the rest of the following weeks there is a good climate with sunny days!☀️
So I hope the plant is able to start its flowering phase safely.
I'll upload more posts on the next days😊💚

Likes
8
Share


@SuperSoul420
Follow
This week I worked on hardening the clones. I got them used to 40% RH pretty quickly. My grow set up is subject to some pretty crazy swings from the weather. Outside, it went from 16% to 45% and back to 24% in one week. Going easy with the light for another week at about 180-200 µmol/m2/s. I'm not going to push any parameters until I get them through the transplant. So far so good.
When I saw the first roots I jumped up and down and did a bunch of spastic air fist pumps. 😂
Likes
5
Share


@CanadianFillmore
Follow
Another new grow and like the OG kush, trying something new with this grow, by flipping to 12/12 for a week (without bloom nutrients). Also with this grow and the OG kush, I'm switching to the coco series nutes, as they have higher P & K values than the non-coco line up.

Likes
5
Share

@leithsffs
Follow
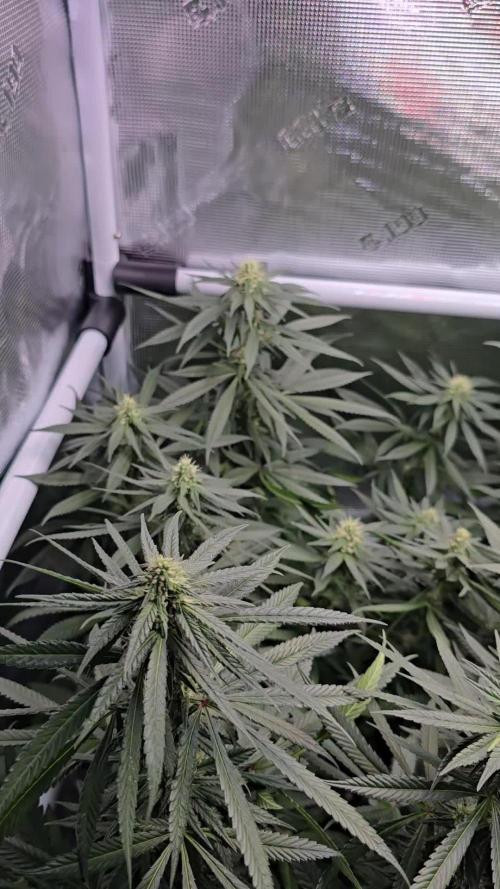
I defoliated a lot of the under canopy today so I could move the scrog net upwards. These girls just had to stretch and stretch their legs. And, yes, the smell on my fingers after handling them was intensely citrus.
I only gave them a little water this week as the air has been very moist and the soil has been damp enough.
Likes
14
Share


@Reyden
Follow
Penso che questo seme non abbia ereditato il tratto autofiorente perché adesso ho appena spostato a 12/12 e dopo 25 e passa giorni la ragazza non è entrata nella fase di fioritura e non si è nemmeno allungata, invece LSD-25 è già con pistilli visibili e ha la forma sta salendo per allungarsi e formare i siti di fiori, vediamo se starà al passo delle Fast Flowering ma a questo punto non penso 😄💚🌱👋
Processing
Likes
7
Share


@Dralph87
Follow
Rc#1 has started its flushing today for about a week and half before the snip. Rc#2 has picked up the pace now and will go on longer than rc#1 has. Rest of the tent is coming along nicely. All the plants are on full nutes other than rc#1. Both of the girls have had heavy defoliation. Looking forward to see how it tastes.
16.03.20
RC#1 had its final flush last night of around 12 litres of water. 80% of the trichomes are cloudy. Once the pot is pretty much dried (4days) I'll be throwing her into dark for 36hours before harvest. I'll be sure to get some good pics in the natural light before and after the chop. All branches look like they can barely hold the weight of the buds now, few branches have been supported with cable ties off of the main stem. Sugar leaves are turning a nice purple. I guessing roughly 4-5oz dried.
Week 10 coming this week....
Likes
15
Share


@DSKO88
Follow
She's looking great! Takes feedings well. Watered about every 3 days at this point. She drinks a lot. I call her Penelope 🌱💜

Likes
42
Share


@DogDoctorOfficial
Follow
Ladys and gentleman it's your friendly neighborhood plant lover checking in once again. I'm here to give you all an update on my lovely Lavender auto from seedsmafia, and let me tell you, she's been growing like a weed!
We're now in week 4 of her vegetative stage, and she's just entered into her pre-flower stage at the end of the week. To be honest, I wasn't expecting her to start pre-flowering so soon, but hey, I guess she's just eager to show off her beautiful blooms.
Now, I know some of you may be worried about pre-flowering, but let me assure you that it's a perfectly normal stage in the growth of our beloved plants. In fact, it's a sign that our plants are healthy and growing strong!
As for my Lavender auto, she's not the biggest plant out there, but she's certainly one of the most beautiful. I've been taking great care of her and making sure to stop the all-in-one liquid feedings as the pellets pre-mixed with the soil should be available by now.
I've got plenty of faith in my little Lavender auto, and I'm excited to see how she'll continue to grow and develop over the coming weeks. Who knows, maybe she'll surprise me again with another early stage of growth!
In the meantime, I've been keeping my sense of humor intact, and let me tell you, growing with a sense of humor is key! That's why I've been joking around about how my Lavender auto couldn't wait to show off her pre-flowering stage. I guess she just wanted to steal the spotlight a little early.
But hey, that's just part of the fun of growing, right? Keep on laughing and growing strong, my fellow plant enthusiasts!
As always thank you all for stopping by and for supporting me on this journey, i am super passion about growing and fell blessed to have you all with me on this new journey <3 <3 <3
Genetics -Seeds Mafia Lavender Automatic
Light - LUMATEK ZEUS 465 COMPACT PRO
Food - APTUS HOLLAND
All info and full product details can be find in can find @
https://seedsmafia.com
https://aptus-holland.com/
https://autopot.co.uk/
https://lumatek-lighting.com/
<3 <3 <3 Growers love to you all <3 <3 <3
Auto Lavender Feminized is a very popular type of cannabis, whose strong therapeutic effects are highly appreciated. It has a flowering period of approximately 9-10 weeks and can be grown both indoors and outdoors. It is a resistant variety which can be cared for easily.
This variety is mostly appreciated because it produces strong, durable and resistant plants. Its branches and stem usually grow vertically rather than horizontally. It reaches heights of 120 cm and the harvests amount to 90 grams/plant. In addition, it contains high levels of THC- up to 20%.
As their name suggests, the plants that grow from Auto Lavender Feminized seeds have a smell and taste similar to those of lavender, also comprising mint and rosemary tones. This is a variety of cannabis that is usually appreciated for its pleasant fragrance and high productivity, seeing as its buds and stem produce an impressive quantity of resin. If you’re looking for another kind of feminized, autoflowering variety, Auto Lavender Feminized will not disappoint you for sure!
auto Lavender Feminized is a feminized, autoflowering variety, obtained by crossing the Lavender and Lowryder 2 species. The plants that grow from this variety have a very specific structure: they are tall, vigorous, and have large branches. At the end of the flowering period, the plants acquire an orange-gold shade

Likes
78
Share

@squalino
Follow
🌿 Journal de Culture : Mac 1 – "Spirit" (Plante #2) – Floraison Avancée / Explosion de Résine
#Dryrocket
Date du jour : 23/06/2026
Âge de la plante : J+73 (Semaine 11 - Fin / Début Semaine 12)
Taille actuelle : 136 cm
Évolution :
Hauteur stabilisée, mais volume floral démultiplié
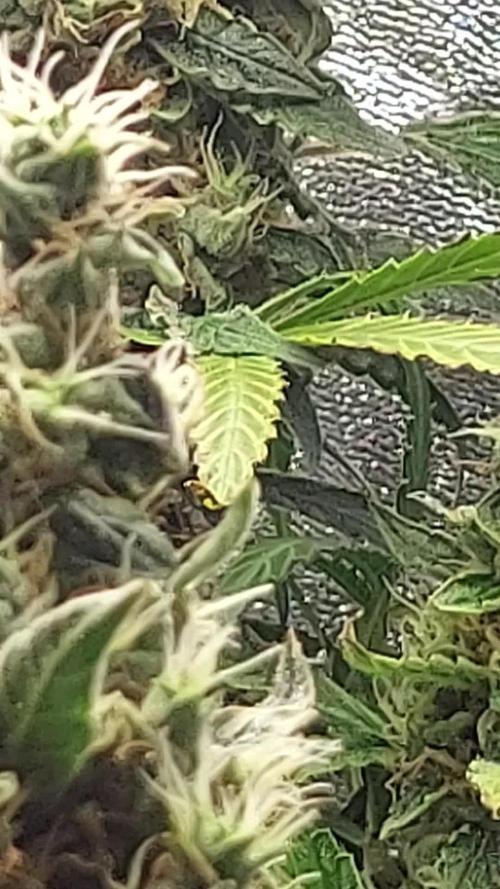
On bascule dans une autre dimension cette semaine. Spirit ne grandit plus en hauteur, mais ce qu'elle développe sur ses branches est tout simplement irréel. Elle me fait complètement rêver.
👽 Descriptif des Fleurs :
L'Alien de la Tente
Des structures hors normes : Je n’ai pas de mots pour la décrire... Cette plante est une véritable alien. Les têtes sont devenues énormes, s’étirant sur de longues structures aussi massives et épaisses que des bouteilles d’eau.
Une compacité extraterrestre :
L'allure Sativa de ses longs bras contraste avec la dureté des buds, qui continuent de se densifier de manière spectaculaire. Les calices s'empilent pour former des tours massives recouvertes d'un givre de trichomes brillant et collant. Elle semble venue d'une autre planète.
Vigueur du feuillage :
La structure reste d'une beauté magnifique. Bien qu'elle continue de dominer l'espace et de faire de l'ombre à sa sœur Bee Apee, sa santé reste de fer. Elle a l'air de vouloir encore et encore se développer, sans montrer le moindre signe de fatigue ou de fin de cycle précoce.
Profil aromatique :
L'arôme sucré et divin se complexifie, enveloppant l'espace d'un parfum riche et enivrant dès qu'on s'en approche.
⚙️ Paramètres Environnementaux
Climat & Tente :
Toujours parfaitement stables (24°C jour / 21°C nuit, humidité gérée de près avec le déshumidificateur pour protéger ces têtes gigantesques de toute moisissure).
Lumière : Intensité à 75%. La cime principale flirte toujours à 15 cm du panneau, tandis que le reste profite des 35 cm de pénétration.
Arrosage :
Le système Autopot tourne en continu à l'eau claire, maintenant le substrat parfaitement hydraté en arrière-plan.
Nutrition & Entretien (Aujourd'hui)
Le repas :
Face à cette poussée de fin de vie qui n'en finit pas, j'ai légèrement ajusté le tir aujourd'hui en lui donnant 4 ml de Bio PK 5-8 de Biotabs dans mon arrosage manuel.
Réaction :
Cette gourmande insatiable convertit instantanément chaque apport en résine pure et en gonflement floral.
📝 Résumé de la situation
Spirit offre un spectacle hallucinant. Ses buds en forme de bouteilles d'eau défient les lois de l'espace restreint de mon local. Elle est massive, résineuse à souhait, dure comme la pierre et continue de pousser ses calices vers l'extérieur. La fin de session s'annonce dantesque et la planification de la récolte commence doucement à se dessiner à l'horizon.
🙏 Remerciements
Un immense merci à @mia_biotabs et à @Mrs_Larimar _Larimar pour m'avoir guidé jusqu'à l'obtention de ce monstre sacré.
Un grand merci également à @Dryrocket pour me donner l'opportunité d'essayer leur appareil Dryrocket pour le futur séchage ; j'espère de tout cœur que j'aurai assez de silice pour le faire tourner à plein régime le moment venu !
Enfin, merci à vous tous qui suivez l'évolution de cette alien depuis le premier jour.
Le show de Spirit continue, restez branchés pour la suite !❤️❤️

Processing
Likes
29
Share


@Crazydaver
Follow
Bit of a difficult start to these girls seeing as this is my first grow and all, but they’re still growing and overall looking pretty healthy, good colour, springy, but I’m suspecting nute deficiency maybe but I’ve upped the food so we’ll see how we do!
Now, when to start topping 🤔...
Puff, puff, pass ✌️

Likes
7
Share


@Hightable420
Follow
One more week till chop. Huge dense nugs with high resin levels and LOUD terps.
Processing
Likes
7
Share


@SpecialgrowerZ
Follow
I'm so fuckin' crazy, i change my hps lamp 250w for a led lamp 600w 👽⛈️
Likes
12
Share

@Bud_vista
Follow
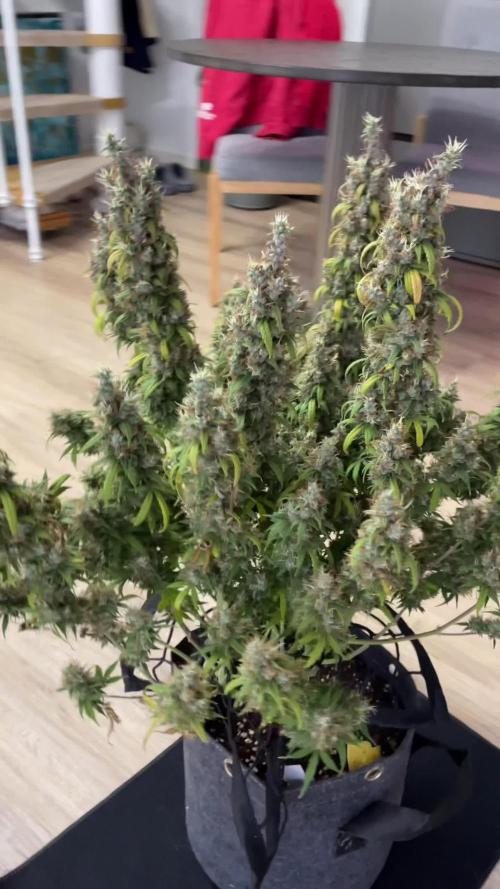
Today, at the second of January I decided to chop our 24k auto. About 10-20% amber trichomes , also on the smaller buds! The performance of the plant was great and also my first grow on coco gone well! Feeling good to grow in coco and I think I will try a second time.
Likes
8
Share


@dauntless
Follow
10/15 Same stuff, just keeping it stable is all I'm trying to do.
Update 10/18 - Heat was ridiculous this week, had to turn one or more light features off, for example, turned off the HPS -AND- the LED circuit on the Phlizon on the hottest day because inside the tent it was like 91 degrees F. Yeah it may not be the perfect environment, but look at the growth from the 15th til today. Major flowering happening, unless I am tripping. I see a lot more healthy growth now, which in my opinion means the transplant idea was SO WORTH IT. I see a lot of crystals forming now and the tops the leaves are turning more white that I could hav imagined -- with two more weeks at least to go, I think I may have some bomb flowers if I dont fuck anything up.
Northern light to the left in video has more to go and is not as far along as the Vanilla Frosting.
10/20 Added some new nutes for the last two weeks of flower, bubbling like a madman wanting this grow to finish. White Widow (three plants outdoors) will probably finish in the tent, its just really in stasis but it is getting some frosting of its own.
BTW when I smelled the flowers yesterday I was blown away by how awesome they smell, like seriously boutique top shelf aromas going on, this is my first grow indoors and really the first time I have been able to give the attention and care these babies need. I have learned SO much. Especially about stuff I was clueless about before. Like which lights are good. What tent size to get. Ph, nutes, watering, relative humidity, cloning... all new stuff. I have become a better gardener as a result and my 200 sq ft community garden plot is doing way better and I expect next year to be bonkers because I really get the whole ecosystem thing now and how mycorrhizae helps everything. This video helped me a ton: https://www.youtube.com/watch?v=ID9rE5JewVg&ab_channel=ApogeeInstrumentsInc. and this one too: https://www.youtube.com/watch?v=jq_wl8XRUK4&ab_channel=GrowersNetwork Also, really check out Phlizon lights (CREE COB) if your tent can handle the heat. I am already planning my next grow, and I am going high CDB autos... solomatic and fast eddy.


Likes
24
Share


@Dr_Sampson
Follow
This experiment has taught me a great deal about all of these strains. I switched half way to NPK Raw and watched all the Harley Smith videos I could find. These strains all displayed differing deficiencies at different times. My 10L res PH, supporting 4 x 5g Buckets, plummets Daily failing from 6.5 to 5.3. Exclusivly H20 topups. Co-planting deficiency overall is that you can’t cater to anyone on a shared resivoir.