
Processing
Likes
Comments
Share


@Yiyis_Grow
Follow
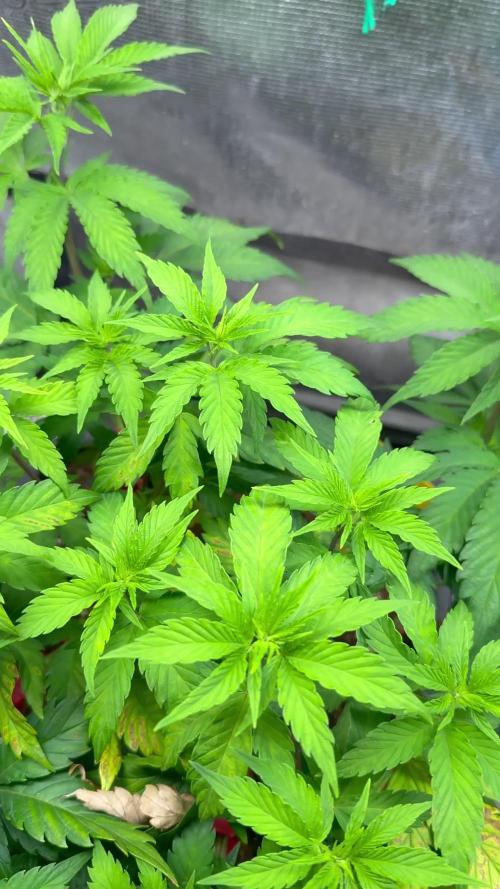
Buenas noticias para esta semana.
1. La semana pasada comenté que tenía una planta desordenada, pues no me había percatado que la karpa tenía un orificio abierto en el techo y estaba entrando contaminación lumínica cuando dormía y por eso estaba débil.
2. Un loco que sabe más que yo, me dijo que las puntas amarillas es algo bueno en mis plantas y no algo malo, por lo que están saludables.
3. Las flores tuvieron un gran avance y ya se notan de mejor tamaño y un excelente aroma.
4. El calor y la humedad hacen que cada planta consuma 2 lts de líquido al día.
5. Voy a iniciar Pk1314 esta semana que sigue.
Malas noticias
1. Ya no tengo mota seca jajaj
Buenos humos


Likes
6
Share

@Sobreruedas
Follow
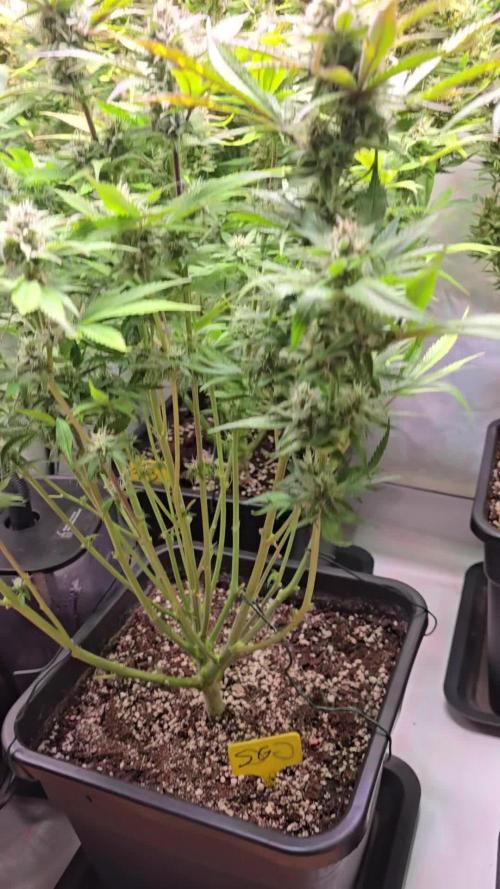
Continued working on the mainlining structure.
This week I performed a selective defoliation to remove leaves blocking the inner structure and improve airflow.
I also applied some light LST, only to guide the branches and keep them level while the manifold continues to develop.
No heavy stress this week, just fine tuning and letting the plant recover and grow evenly 🌱

Likes
142
Share


@MadeInGermany
Follow
Hey everyone :-)
This week a lot has happened 🤗🍀.
The 5 that are already in the 12/12 cycle explode day after day 😍😅.
All others have been repotted, and will remain in the vegi phase for 1-2 weeks.
Otherwise there is not much to say 😃.
I wish you all a good start into the week, let it grow and stay healthy 🙏🏻🍀🌱


Likes
13
Share


@Chuckwaggon420
Follow
Starting to get strong smelling when you move them around. HANDS OFF lol. Will do tea next week coming along nice. Both the pie is was crystaly and #3 runtz is way crystaly! All runtz have big weight, all pie is about the same. Should have a decent harvest!!! Let me know what you guys think!!!

Likes
8
Share

@ThatsmyGrow
Follow
They're a bit of a worry for me; I hope they still produce a good number of buds despite their small size.
Likes
8
Share


@Hightable420
Follow
Beautiful Pheno. Stacked with trichs! Definitely huge appeal! With a slight sour worm/super c terp profile.


Likes
77
Share


@SuggaShane
Follow
Started flushing last week. So just a few more days hopefully. She’s super sticky, and smells amazing. 👃 She’s been fun to grow. Pretty easy, just took a little longer than expected. Thanks for following and checking my diary out. 🌱💪🏽💪🏽
Likes
4
Share


@Ninjabuds
Follow
The purple kush has been behind all the plants the whole time. When you look at the plant you will notice a lot of the leaves are burnt. 10 days ago or so I think I accidentally gave them to much nutrients or I didn’t shake the bottle I used. The purple kush is starting to bulk up some I’m thinking it will be a decent little plant when all is done.

Likes
3
Share


@UrbanBoer
Follow
The craziest strain, this one ever since she started flowering all she has been doing is going in and out of reveggin and flowering, she has even out grown everyone, and the craziest part, is that she uses less grow medium than all the other ladies, I should expect late January harvest, my fear is her not been able to support her buds, as tall as she is, I think I should waiting and see.


Likes
5
Share

@Ninjabuds
Follow
My OG Kush is a contender for the biggest plant in the tent, tied for second place! It's got an amazing structure with perfectly spaced nodes and it's stacking up beautifully. This plant is a beast, and I'm expecting a huge yield of those classic OG Kush buds. It's got that unmistakable OG aroma – earthy and pungent with hints of citrus and spice. This one's gonna be a knockout
This past week has been a whirlwind of work, leaving little time for anything else. My phone's camera roll is sadly neglected, with only a few snapshots to show for it. But finally, I'm finding a moment to catch up on my grow diaries. It's been exciting to see the progress, even if it's just through photos. I'm looking forward to documenting the next stage!

Likes
16
Share


@AestheticGenetics
Follow
4/15/25 This plant is blowing my freaking mind. Long stacked colas. Even the lower buds are plumping up like golf balls. This is an exceptional plant so far.
Shes starting to show the classic "sherbert" purple that ive noticed shows up with anything that has sunset sherbert in the lineage. Some of the leaves are starting to fade slightly and the purple is coming in.
The rs11 that this seed came from, produced the most from a single plant out of all plants ive grown and trained and kept that small. She yielded 3.5 ounces or a 1/4lb of top nugs from a plant that was only about 18 inches tall and vegged for 6 weeks before flip.
Once i start to clear out all of the fan leaves later on in flower, its just going to be buds running the length of the stems
4/18/25
I really believe this may be a keeper. She is absolutely stunning. Just everything is perfect. She has super long stacking of buds up and down the stems.
Im actually super stoked to see how she finishes up.
One of the craziest parts is that shes in a plastic 2 or 3 gallon pot and this plant is going to yield insane.

Likes
2
Share


@Saintvicious
Follow
Leaves starting to brown. First thought was over fertilizing but guessing calcium. Did add powdered oyster shells to dirt mix but needing alot more.
Likes
3
Share


@Chubbs
Follow
Week 6 update:
What up Grow family. These testers are growing fast and strong. Where in week 6 now and the swelling and ripening of flowers are going amazing. Still feeding 500ml/16oz daily as I've found that's the sweet spot for 3gal fabric pots for these. I'd say these probably have about 2 weeks left until they'll be finished.
All in all Happy Growing.
Processing
Likes
20
Share


@Stash074
Follow
No complaints this week..leaves was starting to twist and show brown spots on Bruce banner and both cbd harlequin...did some research and came to conclusion its from Ph influctuation..especially being that I've been trying hard to get ph in ideal range the past week and half..I believe I finally got a grasp on it..also I'm starting to realize..if the plants look healthy...no need to panic from a higher ph in runoff in coco coir..so I'll definitely keep that in mind in the future..also I was will be sending these ladies into flowering tonight..I couldn't hold off any more lol..im ready to get this grow out of the way, so I can start my next 1..which will most likely be the same strains..being that I still have a few feminized seeds left..only next time they will actually be germinated all on the same day..I'll keep you updated in my next upload..here comes the best part..Flowering stage😎
Likes
5
Share


@Fefa128
Follow
More plant porn hehe... Not sure if that pollination was from the last week or the one before cutting. Either way this was the las week before chopping it down!

Processing
Likes
18
Share


@Visions
Follow
I believe this will be the last week this girl will stretch. Shes got arm buds at the ready and will be full on flower from here on out. In going to keep her nitrogen at a high for these next two weeks and dip out after mid week 6 and keep it just bloom shiz. She is gorgeous with 7 main colas. Would be easily 12 but one main got snapped due to her topping her own self(stakes). Yes these girls can do that. They will drive thsy stake out the ground and the California gold in my other diary did the same as well. The effort/force topped them so I lost some branches and instead took a loss. I love her and it's so crazy how she started out small. 1 gallon is blooming out. Stripped all lower sites to a degrees none of that garbage yah here. 3 gallon just got some orange hairs. We are now beginning to fall out of the stretch.
Likes
17
Share


@EGPharouh
Follow
The harvest wasn't the biggest. But high quality. I will increase the light density by adding CFL to the grow room. And test the nest grow how much I can push the yeild.
