
Likes
Comments
Share


@Dairon
Follow
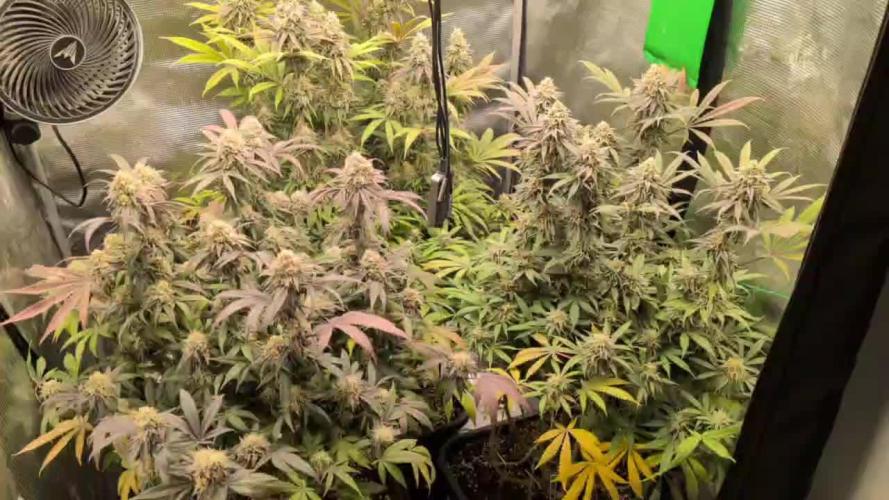
Buenas, como podéis ver han pegado un buen tirón, después de hacer las fotos tuve que volver a realizar poda de bajos, sacando unas ramas bastante grandes, las cuales voy a clonar y etiquetar por si sale algo que merezca conservarse. ya están mostrando preflores, aunque lleven 4 semanas a 12 /12 es como si fuese la 1ª en ejemplares de marihuana indica, sigo con una EC de 1.2 hasta que empieze a ver flores, donde iré subiendo poco a poco con cuidado pues es la primera vez que planto sativas y no quiero sobre abonarlas, hago un riego con abono y otro con agua de ósmosis corrigiendo hasta alcanzar una EC de 0.4, mido el agua que drena de las macetas tanto el PH como la EC para controlar que no alla carencias o excesos de nutrientes. Realizaré una limpieza del armario y pulverizare las plantas con Leaf Coat para prevenir, van como un tiro a ver que tal siguen, Buenos Humos!!!😃


Likes
62
Share


@OwlGang_Uk
Follow
Week 6 - The Purple Power Is No Longer The Tallest In The Forest But It’s Still The Prettiest. The Purple Power Has Been Dethroned By 4 Of The Other Plants. Everyone Except For The Gorilla Glue Is On Bloom Nutrients.
Height:
Gorilla Glue: 19 Inches
Purple Power: 28 1/2 inches
Girls Scout Cookies(3gal): 30 inches
Lemon OG: 34 1/2 inches
Girls Scout Cookies(5gal): 34 1/2 inches
Stardawg: 33 1/2 inches
These Plants Are All Correct Measurements Size May Look Different In Picture Because Of Pot Size.


Likes
59
Share


@Jsammy09
Follow
7/15 (Day 28)- Everything seems to be going well and everything is staying in check. I’ve been adding around 1 gallon of nutes ppm to 550 and ph 5.8 to res around every 12 hours. Having to defoliate some every couple days to unblock light. These are very short bushy girls. I’ve been doing some light LST as well, mainly just lightly bending some as I defoliate. Roots look nice, big and healthy. My humidity during the night is starting to be a concern. It’s getting high and my little dehumidifier is not doing much. Will monitor and continue update daily.
7/16 (Day 29)- Started off the day with a gallon of nutes to top off res, then did some light LST, just trying to figure out the best way to do that. Trying to keep them all even. They continue to grow like crazy and each day I have to pluck a few leaves here and there to open up some light for the newer smaller growths. Everything is in check, water and bite change in the morning.
7/17 (Day 30)- They continue their short, rapid, bushy growth. Flushed and added fresh water and nutes. PM to 500 and PH 5.8. Everything stays in check.
7/18 (Day 31)- Progress continues, did some more light defoliation and added another gallon of nutes to res.
7/19 (Day 32)- Things continue along. Didn’t do much today, just monitored and added a gallon in the morning and a little before lights off.
7/20 (Day 33)- Pretty much same as yesterday. Probably going to take another stab at some LST and light defoliation on Saturday.
7/21 (Day 34)- Same as previous two days. Just monitored and made sure everything was good, they are drinking about 2 gallons a day now. I also added a dehumidifier to the room, humidity at night was getting really high so we will see how this helps. Tomorrow starts a new week and I'm excited to see the timelapse tomorrow.
As always, any tips or recommendations always welcome. Thanks for looking everyone! Happy growing!
Likes
12
Share


@ESVAGROWER
Follow
Plants rebounded completely, no deficiencies to be seen. Leaves were twisting from excess blowing air. Positioned fan higher, instantly solved the problem.
Likes
5
Share


@LittleBigTrees
Follow
I've defoliated a little as I go.
One of the watermelon candy has a flat stem (Fasciation) I've been trimming the leaves as they are growing in abundance on the affected branches.
The black orchid smells so good it's very pungent and captivating, I'm really looking forward to trying it now.

Likes
3
Share


@coolesrat
Follow
Starting to flower quite vigorously,
The pro-silicate is definitely helping push and hold up much of the huge canopy, aswell as the Medi one ☝️ an amazing product!! All around can’t complain with this one.


Likes
15
Share


@tokesly
Follow
Everyone says the plants smell amazing but I can't smell them! fml. They're supposed to smell like guava candy. Just gotta rest up more till my smell is back, honestly the worst thing about covid. Started flush this week, going to flush for 10 days including a 48 hour darkness period. The darkness period is when the buds can reproduce the trichome coating. It's normally used as sunscreen for light protection but much is burned off during intense day times. This is why it's best to harvest after a period of darkness.

Likes
4
Share


@littlefoot
Follow
Recovered after my topping issue, going let her get 2 or 3 nodes and top agian...more carefully.
Gained good size since last week. Opened up decently.
Likes
1
Share


@Wenz004
Follow
In der vergangenen Woche der Abwesenheit ist die Pflanze fast eingegabgen. EC drain war nicht mehr Messbar. Mein EC Gerät gibt bei über 6 auf. Wohl totale Übersalzung. Fast alle Blattränder sind kaputt und viele Blätter komplett. Weiß nicht ob es nicht an den aqua flores liegt - evtl. für sowas nicht geeignet oder weil zuwenig drain vorhanden war.
Hab jetzt mehrmals gespüllt mit ta flash clean und den ec drain auf 1 runtergebracht.
Ab jetzt wieder Handbewässerung mit Aptus - da gabs solche Probleme nie. Vermerk - bei nochmaligen Düngerwechsel - ordentlich vorher spülen. Auf zur zur Rettung.


Likes
Comments
Share

@SpliffDoc
Follow
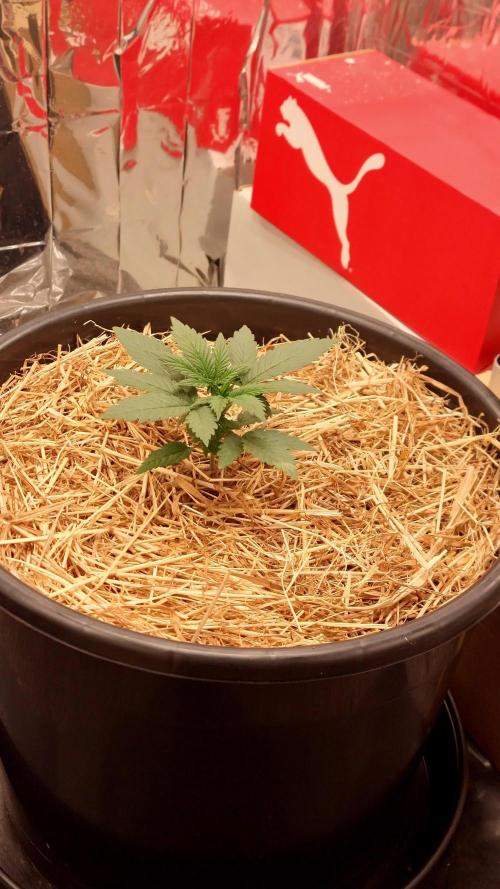
Shes growing well. No problems here. The substrate does all the work. NOTHING BUT TAPWATER. Happy with colour and vitality so let's keep it going. Topped at day 18. Hope all is good🍁🔥🏻


Processing
Likes
21
Share


@Stick
Follow
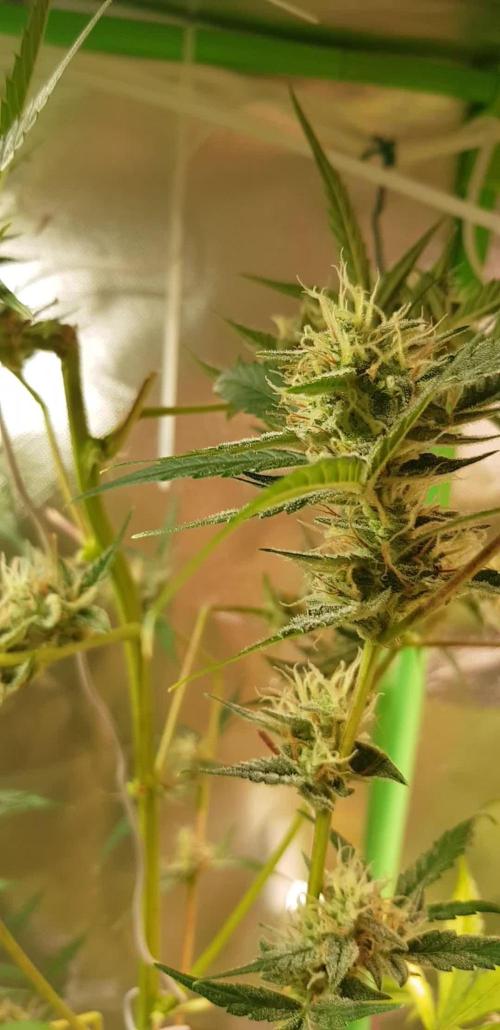
She's late compared to the other strains in the room, buds are slowly expanding. This might be related to the lack of stretch, she was not supposed to be so compact/short in my plans. Anyway, she has a lot of bud sites, let's see how this goes, hopefully these will fatten up nicely. Thanks for stopping-by! 👊
Likes
23
Share


@Firepharmer
Follow
She’s getting frosty and dank
👃🍪🍊🍓🍰🍌🍒🍇🍭👃
Day 29 almost half way , happy with all the phenos so far all frosty so many terps
.. started feed the canna nutrients plants canna pk1314 ..
2 flush’s Got the remo plants all most on the proper Ec again

Likes
8
Share


@NordicClosetGrower
Follow
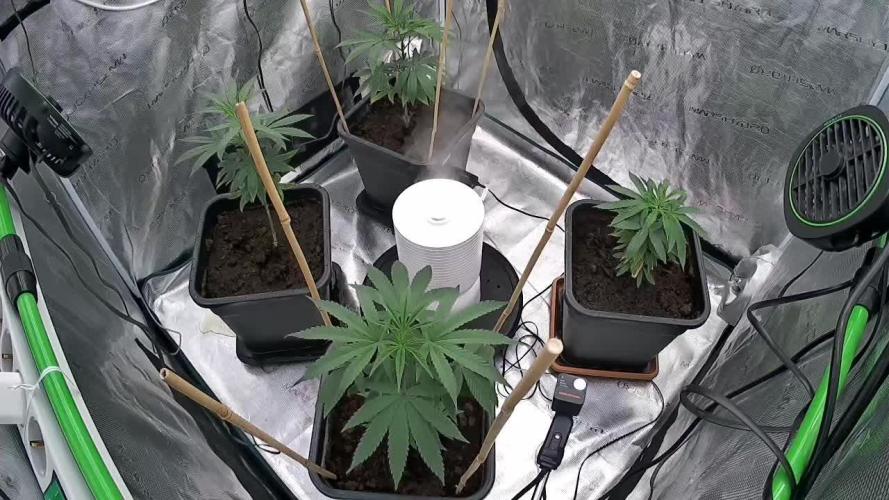
Didn't really give these 2 the attention they needed this week and they dried up a tiny little bit. Also they stretched quite a bit compared to the non auto ones.
Time to start with some LST, right at the limit as the core is quite thick already, but still bendy enough.
First pistils have started to come out.


Likes
Comments
Share


@Card1Cultivations
Follow
April 28 - May 5
This week the nutrients have been completely phased out and they are now just sipping plain TO water ph balanced to 5.8 still. As they start entering into the flushing zone with harvest day quickly approaching.
Daily tricome inspections become the focal point In these final days and or weeks.
I


Likes
2
Share

@GERGrowDesigns
Follow
Welcome to Flower Week 6 of Divine Seeds Auto 77 Days
I'm excited to share my grow journey with you all as part of the Divine Seeds Autoflowering Competition 2025. It's going to be an incredible ride, full of learning, growing, and connecting with fellow growers from all around the world!
For this competition, I’ve chosen the Feminized Automatic strain: Auto 77 Days
Here’s what I’m working with:
• 🌱 Tent: 120x60x80
• 🧑🌾 Breeder Company: Divine Seeds
• 💧 Humidity Range: 60
• ⏳ Flowering Time: 56 Days
• Strain Info: 21%THC
• 🌡️ Temperature: 26
• 🍵 Pot Size: 3
• Nutrient Brand: Narcos
• ⚡ Lights : 200W x 2
A huge thank you to Divine Seeds for allowing me to be a part of this amazing competition and Sponsoring the Strains. Big thanks for supporting the grower community worldwide! Your genetics and passion speak for themselves!
I would truly appreciate every bit of feedback, help, questions, or discussions – and of course, your likes and interactions mean the world to me as I try to stand out in this exciting competition!
Let’s grow together – and don’t forget to stop by again to see the latest updates!
Happy growing!
Stay lifted and stay curious!
Peace & Buds!
